Maybe you’re visiting family in Türkiye, paying a freelancer you work with, or taking care of an expense while you’re abroad. Maybe you’re heading to Saudi Arabia for Hajj or Umrah and need to sort out accommodation and transport.
Whatever the reason, you can now send money to Türkiye and Saudi Arabia directly from Grey, in Turkish lira (TRY) and Saudi riyal (SAR).
Whether you’re managing work across borders or you simply need to get money to someone in either country, you can now do it from Grey without moving money between multiple services.
Sending money to Türkiye just got easier
If you have someone to pay in Türkiye, you can now send Turkish lira directly to their local bank account from Grey.
You could be visiting for a holiday, supporting family, paying a freelancer or vendor, or handling an expense from abroad. With Grey, you can now send TRY directly to bank accounts across Türkiye. Transfers are supported across operating banks in Türkiye for both personal and business accounts.
The fee is $1.50 + 0.10% per transfer, and you can send between TRY 10 and TRY 200,000 at a time.
Transfers are processed within 24 hours from Monday to Friday, with a 13:00 GMT cut-off time. So, once you have the recipient’s bank details, you can send the money without needing them to sign up for Grey or use a separate wallet.
You can also send Saudi riyals directly to a bank account
We’ve added Saudi Arabia too.
You can now send Saudi riyals directly to personal and business bank accounts across operating banks in the country.
This can come in handy in plenty of situations. You might need to send money to someone living in Saudi Arabia, cover part of a family member’s expenses or pay someone you work with there.
Each transfer costs a flat $3.50, with a minimum of SAR 1 and a maximum of SAR 20,000 per transaction.
Transfers are processed within 24 hours from Monday to Friday, with a 10:00 GMT cut-off time.
Start with the money you already have in Grey
You don’t need to hold Turkish lira or Saudi riyals in your Grey account before you send money.
If you already have money in a supported Grey balance, you can use it to send TRY or SAR to the recipient.
Simply choose the destination, add the recipient’s bank details and enter how much you want to send. You’ll be able to see the transfer details before confirming.
The person receiving the money doesn’t need a Grey account. The money goes to their local bank account in Türkiye or Saudi Arabia.
So when your money needs to reach someone in Türkiye or Saudi Arabia, you can send it directly from Grey.
Open Grey and send TRY or SAR directly to a bank account today.
Frequently asked questions about sending money to Türkiye and Saudi Arabia
Can I send Turkish lira with Grey?
Yes. You can send Turkish lira (TRY) directly to personal and business bank accounts in Türkiye.
How much does it cost to send money to Türkiye?
Grey charges $1.50 + 0.10% per transaction. The 0.10% fee has a minimum of $0.80. You’ll see the fee and exchange rate before you confirm your transfer.
How much TRY can I send?
You can send between TRY 10 and TRY 200,000 in a single transaction.
Can I send Saudi riyals with Grey?
Yes. You can send Saudi riyals (SAR) directly to personal and business bank accounts in Saudi Arabia.
How much does it cost to send money to Saudi Arabia?
Each transfer to Saudi Arabia costs a flat $3.50.
How much SAR can I send?
You can send from SAR 1 up to SAR 20,000 in a single transaction.
How long do transfers to Türkiye and Saudi Arabia take?
Transfers to both countries are processed within 24 hours from Monday to Friday. Cut-off times apply: 13:00 GMT for Türkiye and 10:00 GMT for Saudi Arabia.
Does the person receiving the money need a Grey account?
No. You send the money directly to their local bank account, so they don’t need to have a Grey account to receive it.
Costa Rica can catch you off guard when it comes to cost. You might picture an affordable Central American trip, then start checking hotels, rental cars and tours and realise your budget needs a rethink. Prices have changed a lot over the years, and in 2026, you’ll need considerably more than the $30-a-day budgets you might still find in older travel guides.
A good starting point is around $100 to $200 per person per day for a mid-range trip, covering a comfortable hotel, restaurant meals, transport and activities. If you’re happy with hostels, buses and local food, $50 to $80 a day is possible. At the other end, boutique stays, private tours and fine dining can push your daily spend to $300 to $600 or more.
Does that make Costa Rica too expensive? I don’t think that’s really the question. You come here for experiences that are difficult to squeeze into one trip elsewhere: waking up near a volcano, hiking through a cloud forest, spotting sloths in the trees and ending the day by the Pacific. If that’s the kind of trip you’re after, it’s easier to understand where the money goes.
This guide breaks down every major cost category with real prices.
Flights to Costa Rica: prices and booking tips
From the US: $250 to $600 return per person, depending on origin city and booking timing. Miami, Houston, and LA have the cheapest fares. JFK, Chicago, and Seattle run higher. Direct flights are available from most major US cities to San Jose (SJO) or Liberia (LIR). Liberia is closer to the Pacific coast beaches (Guanacaste, Tamarindo, Nosara). San Jose is better for the central valley, Arenal, and the Caribbean coast.
From Canada: $350 to $700 return per person. Toronto and Montreal have direct options. Vancouver routes often connect through the US.
From Europe: $500 to $900 return per person. Madrid and Amsterdam have direct routes. London connects through the US or Panama City. European fares fluctuate more than US fares, so booking 3 to 4 months ahead is important.
Booking tip: flights to Costa Rica are cheapest in May to June (early rainy season, lowest demand) and September to November (deep rainy season). December to April (dry season) is peak pricing, especially around Christmas and Easter. The difference between peak and off-peak can be $150 to $300 per ticket.
Accommodation costs in Costa Rica
Budget ($20 to $50/night): hostels, basic cabinas (Costa Rican guesthouses), and budget eco-lodges. Dorm beds in popular backpacker towns (Santa Teresa, Puerto Viejo, La Fortuna) run $12 to $25. Private rooms at basic hotels or Airbnbs run $30 to $50. Quality varies dramatically. Read recent reviews. A "basic but clean" cabina in Costa Rica can mean anything from a charming family-run guesthouse to a bare concrete room with a cold shower.
Mid-range ($80 to $200/night): boutique hotels, mid-range eco-lodges, and well-reviewed Airbnbs. This is the sweet spot for Costa Rica. At $100 to $150/night, you get air conditioning (essential in coastal areas), a pool, decent breakfast, and often stunning natural settings. Nayara in Arenal, Pacuare Lodge on the Pacuare River, and Lapa Rios in the Osa Peninsula are standout mid-range lodges where the setting is the experience.
Luxury ($250 to $800+/night): high-end eco-resorts, private villas, and all-inclusive lodges. Four Seasons Peninsula Papagayo, Andaz Costa Rica, and Kura Design Villas are at this tier. The premium buys you privacy, exclusive wildlife encounters, personal guides, and settings that feel like a private national park.
Food and drink prices in Costa Rica
Budget eating ($15 to $25/day per person): sodas (local eateries serving casados, the traditional rice-beans-meat-plantain-salad plate) cost $5 to $8 for a filling lunch. Street food, bakeries, and supermarket groceries keep costs down. Cooking in your Airbnb is the cheapest option. Rice, beans, eggs, and tropical fruit from a local market cost $3 to $5 per meal.
Mid-range eating ($30 to $60/day per person): restaurant breakfast ($8 to $15), a soda lunch ($5 to $8), and a restaurant dinner ($15 to $30). A beer at a restaurant costs $3 to $5. A cocktail costs $6 to $10. Costa Rican coffee is excellent and cheap: $2 to $3 at most cafes.
Luxury eating ($60 to $150+/day per person): resort restaurants, tasting menus, and premium dining. Fine dining exists in San Jose, Tamarindo, and resort areas. A tasting menu at a top restaurant runs $60 to $100 per person before drinks. Wine is expensive because it's all imported. Expect $30 to $60 for a decent bottle.
Costa Rica activities and tour costs
Activities are where Costa Rica costs add up fastest. Most adventure and wildlife experiences require a guide, transport to the site, and an entry or tour fee. The flip side: the experiences are extraordinary and often unavailable elsewhere.
Budget-friendly and free: hiking in national parks (entry $12 to $18 per person at most parks), swimming at waterfalls (many are free or $3 to $5 entry), beach days (free), bird watching from your lodge terrace (free and surprisingly rewarding).
Mid-range ($40 to $120 per person): zip-lining in Monteverde ($50 to $80), white-water rafting on the Pacuare River ($80 to $110 for a full day), Arenal hot springs ($20 to $60 depending on the facility), snorkelling tours ($40 to $60), guided night walks in cloud forests ($25 to $40), coffee plantation tours ($30 to $50).
Premium ($120 to $400 per person): multi-day treks in Corcovado National Park ($200 to $400 including guide, transport, and food), private catamaran sunset cruises ($100 to $200), helicopter tours over volcanoes ($250 to $400), exclusive wildlife photography tours ($150 to $300).
The honest advice: budget 2 to 3 paid activities per week and fill the rest with free or low-cost options. Four paid activities in one week at $80 each is $320 per person, which can blow a mid-range budget quickly.
Getting around Costa Rica: transport costs
Rental car ($40 to $80/day): the best way to explore Costa Rica if you're comfortable with challenging roads. Many destinations require gravel or dirt roads, especially during the rainy season (May to November). Rent a 4x4 (not optional for Monteverde, Osa Peninsula, or mountain roads). Insurance adds $15 to $30/day and is highly recommended. Gas is about $1.10 to $1.30 per litre.
Public buses ($2 to $15 per route): Costa Rica's bus network connects major towns. San Jose to La Fortuna: $5, about 4 hours. San Jose to Manuel Antonio: $8, about 3.5 hours. Buses are cheap but slow, and schedules are limited. Great for budget travellers with flexible timelines. Not great for tight itineraries or remote destinations.
Shared shuttles ($30 to $60 per person): tourist shuttle services (Interbus, Caribe Shuttle) run between popular destinations. More comfortable than buses, with hotel pickup. Good middle ground between renting a car and taking the bus.
Domestic flights ($80 to $200 one way): Sansa and local charter operators connect San Jose to Liberia, Quepos (Manuel Antonio), Tortuguero, Drake Bay, and Tambor. Saves 4 to 8 hours of driving on some routes. Worth it for Tortuguero (the alternative is a 4-hour boat ride) and Drake Bay (the alternative is a bumpy 5-hour drive).
How much does a 10-day trip to Costa Rica cost?
Budget ($2,000 to $3,000 total): flights $600, hostels/cabinas $400, food $500, buses $150, 4 activities $350. Tight but doable. Cook some meals, take buses, prioritise free activities (national parks, beaches, waterfalls), and splurge on one or two paid experiences.
Mid-range ($3,500 to $5,500 total): flights $800, mid-range hotels $1,200, food $800, rental car $600, 6 activities $600, miscellaneous $300. The most rewarding balance of comfort and experience. You see everything, eat well, and sleep comfortably without feeling extravagant.
Luxury ($6,000 to $12,000+ total): flights $1,200, boutique lodges $3,000, food $1,200, private transfers $800, premium activities $1,500, spa/extras $500. The full Costa Rica experience with no compromises on comfort or access.
Paying in Costa Rica: cash, cards and currency
Costa Rica uses the Costa Rican colon (CRC), but USD is widely accepted in tourist areas. Most hotels, tours, and upscale restaurants price in USD. Local sodas, buses, and markets use colones. ATMs are available in all towns (Banco Nacional and BAC have the widest ATM networks). Withdraw colones in larger amounts to minimise per-withdrawal fees of $3 to $5.
A Grey virtual card works at Visa terminals across Costa Rica. Hold USD in your Grey account before you travel. For mobile data, grab a travel eSIM for Costa Rica instead of buying a local SIM on arrival.
Planning a Costa Rica trip? Save in a Grey Pouch and spend on a virtual card with no conversion fees.
Frequently asked questions about trips to Costa Rica
How much does a trip to Costa Rica cost?
$2,500 to $5,500 for a 10-day trip for two at a mid-range budget, including flights, accommodation, food, transport, and activities. Budget travellers can do it for $2,000 to $3,000. Luxury: $6,000 to $12,000+. The biggest variable is how many paid activities you do (zip-lining, rafting, tours add up fast).
Is Costa Rica expensive?
More expensive than other Central American countries (Nicaragua, Guatemala, Honduras) but cheaper than the US or Europe. Expect mid-range daily costs of $100 to $200 per person. Budget travellers can manage $50 to $80/day. Costa Rica's costs are justified by the quality of wildlife, adventure activities, and natural settings.
When is the best time to visit Costa Rica?
December to April (dry season) for guaranteed sunshine, especially on the Pacific coast. May to November (rainy season) for lower prices and fewer tourists. Rain typically falls in the afternoon, leaving mornings clear. September and October are the wettest months. The Caribbean coast has its own weather pattern: driest in September and October.
Do I need a rental car in Costa Rica?
Recommended for flexibility, especially for Monteverde, Osa Peninsula, and remote beaches. Rent a 4x4 (essential for gravel roads). If you're sticking to popular routes (San Jose, La Fortuna, Manuel Antonio), shared shuttles and buses work fine. Driving in Costa Rica requires comfort with narrow mountain roads and river crossings in the rainy season.
Is Costa Rica safe?
Generally safe for tourists. Petty theft (car break-ins, bag snatching) is the main risk, especially in San Jose and crowded beach areas. Use hotel safes, don't leave valuables in parked cars, and avoid walking alone at night in San Jose. Rural and tourist areas are very safe. Costa Rica has no army and one of the highest literacy rates in the Americas.
Disclaimer: This article is for informational purposes only. All costs and details are estimates based on mid-2026 data. Verify current information before making decisions. Grey isn't a bank. We're a licensed financial services provider offering multi-currency accounts.
If you’ve ever sent an international wire transfer, you probably know the amount you pay at the start isn’t always the full cost. Your bank might charge around $45 to send the money, the receiving bank may charge another $13, and if the payment passes through an intermediary bank, another $10 to $25 can disappear along the way. All that for a transfer that can still take 1 to 5 business days to arrive.
And those are only the fees you can easily see. Exchange-rate markups and intermediary charges can make the final cost considerably higher than the wire fee your bank advertises. In this guide, we’ll break down where those costs come from, how an international wire transfer actually works, and when paying for one makes sense compared with other ways to send money abroad.
An international wire transfer is an electronic payment sent from one bank to another across national borders, typically via the SWIFT messaging network. The sending bank debits your account, routes a payment instruction through one or more intermediary banks, and the receiving bank credits the recipient’s account. The process can involve currency conversion, compliance screening, and interbank settlement, which can affect both the cost and how long the transfer takes.
How an international wire transfer works, step by step
SWIFT isn't a payment system. It's a messaging network. This distinction matters because it explains why international wires are slow and expensive: SWIFT tells banks what to do, but the actual money moves through a separate settlement process between the banks themselves.
Here's what happens when you wire $1,000 from a US bank account to a recipient in Nigeria:
Step 1: You Initiate the Transfer
You tell your bank to send money internationally. You provide: the recipient's full name (exactly as it appears on their bank account), their bank name, their account number or IBAN, the receiving bank's SWIFT/BIC code, and the amount you want to send. Your bank charges an outgoing wire fee, typically $25 to $50.
Step 2: Your Bank Screens the Transaction
Before sending anything, your bank runs the transfer through compliance checks. In the US, the Office of Foreign Assets Control (OFAC) screens every international wire for connections to sanctioned countries, individuals, or entities. Your bank also checks for compliance with anti-money laundering (AML) rules and may flag transfers over $10,000 for IRS reporting. This screening takes minutes for routine transfers but can hold up unusual or high-value transactions for hours or days.
Step 3: Your Bank Sends a SWIFT Message
Your bank creates a SWIFT message (typically an MT103 for single customer transfers) containing the payment instructions. This message travels through the SWIFT network to the receiving bank. SWIFT assigns every bank a unique 8 or 11-character code called a BIC (Bank Identifier Code). For example, Wells Fargo's SWIFT code is WFBIUS6S. JPMorgan Chase's is CHASUS33. Your bank uses the recipient bank's BIC to route the message correctly.
Step 4: Intermediary Banks Process the Transfer
This is the step most guides skip, and it's where the hidden costs live.
If your bank has a direct relationship (called a correspondent banking relationship) with the recipient's bank, the transfer moves directly. But most banks don't have direct relationships with banks in every country. In that case, the transfer routes through one or two intermediary banks that do have those relationships.
Each intermediary bank can deduct a processing fee from the transfer amount, typically $10 to $25 per intermediary. If your $1,000 transfer passes through two intermediaries, $20 to $50 may be deducted before the money reaches the recipient. You won't see this on your bank statement. Your recipient just received less than you sent, and neither of you knows exactly where the money went.
This is the single biggest frustration with international wire transfers: the sender pays a $45 fee and expects the recipient to get $1,000, but the recipient gets $955 because an intermediary bank took $45 along the way. For a detailed comparison with ACH, see ACH vs wire transfer explained.
Step 5: Currency Conversion
If the sender's currency differs from the recipient's, someone has to convert it. This can happen at the sending bank, at an intermediary bank, or at the receiving bank, depending on the arrangement. Whoever converts the currency adds a markup to the mid-market exchange rate, typically 1-3% for retail customers. On a $1,000 transfer, a 2% markup costs $20 in hidden fees that never appear as a line item. You see it only if you compare the rate you got to the mid-market rate at the time of transfer.
Step 6: The Receiving Bank Credits the Recipient
The recipient's bank receives the SWIFT message, verifies the details, runs its own compliance checks, and credits the recipient's account. The receiving bank may charge an incoming wire fee (median $13 in the US, varies by country). The recipient sees the funds in local currency, minus any intermediary deductions and the receiving bank's fee.
What an international wire transfer actually costs
The stated fee is never the total cost. Here's every layer:
Fee Layer
Typical Range
Who Pays
Outgoing wire fee (your bank)
$25 to $50
Sender
Exchange rate markup
1 to 3% of transfer amount
Sender (hidden in rate)
Intermediary bank fee(s)
$10 to $25 per intermediary
Deducted from transfer
Incoming wire fee (recipient bank)
$0 to $20
Recipient
SWIFT messaging fee
Included in wire fee
Sender (bundled)
Example: $1,000 wire from the US to Nigeria via a major US bank. Outgoing fee: $45. Exchange rate markup at 2.5%: $25. One intermediary deduction: $15. Incoming fee at the Nigerian bank: $10. Total cost: $95. The recipient receives the equivalent of $905 in naira, not $1,000. That's a 9.5% total cost on a $1,000 transfer.
On large transfers ($10,000+), the percentage cost drops because the flat fees become proportionally smaller. Wire transfers become more cost-effective as the amount increases. For small transfers (under $500), the fixed costs make wire transfers extremely expensive as a percentage of the total.
Domestic vs international wire transfer
Feature
Domestic Wire
International Wire
Network
Fedwire (US), CHAPS (UK)
SWIFT
Speed
Same day (before cutoff)
1 to 5 business days
Typical fee
$25 to $30
$35 to $50 + intermediary
Currency conversion
None
Required (adds cost)
Intermediary banks
None
0 to 2 intermediaries
Compliance screening
Standard AML
OFAC + AML + destination rules
Reversibility
Generally irrevocable
Generally irrevocable
Tracking
Real-time via Fedwire
SWIFT GPI (if supported)
Domestic wires are faster, cheaper, and simpler because the money stays within one country's banking system. No currency conversion. No intermediary banks. No cross-border compliance checks. The Fedwire system in the US processes domestic wires in real time during business hours, with final settlement the same day.
International wires are slower because the money crosses multiple banking systems, each with its own compliance requirements, business hours, and settlement schedules. A wire from New York to Lagos may pass through a correspondent bank in London, adding a full business day. Time zone differences mean that a wire initiated at 3 pm in New York arrives after business hours in Lagos, pushing settlement to the next local business day.
When to use a wire transfer and when to skip it
Wire transfers aren't always the right choice. They're designed for specific situations where their unique properties (irrevocability, same-day domestic settlement, no amount cap) justify the cost.
Use a Wire Transfer For
Large, one-off transactions where the fixed fees are a small percentage of the total. Buying property, closing a business acquisition, or paying a large invoice. On a $100,000 transfer, a $45 wire fee is 0.045% of the total. On a $500 transfer, it's 9%.
Time-critical payments where same-day or next-day settlement matters. Contract deadlines, supply chain emergencies, legal settlements. No other standard banking method offers this speed for large amounts.
Payments to countries or banks with no fintech coverage. If the recipient's bank isn't supported by any digital transfer service, a SWIFT wire may be the only option. This is common for transfers to some banks in Central Asia, parts of the Middle East, and smaller institutions in Africa.
Skip the Wire Transfer For
Regular transfers under $5,000. The fixed fees and exchange-rate markups can make wire transfers expensive for smaller amounts. A fintech service like Grey (1% capped at $6 for currencies including NGN, USD and EUR; see the full list of Grey conversion fees), Wise (0.41% to 1.5%), or Remitly ($0 to $4.99) may offer a lower overall cost for transfers under $5,000.
Recurring payments (monthly remittances, contractor payments, subscription invoices). The cost compounds. Twelve wire transfers at $45 each amount to $540/year in bank fees alone, before exchange-rate markups and intermediary deductions. A multi-currency account that receives via ACH or local payment rails eliminates most of this cost. For comparison, see SWIFT code vs routing number.
Payments where you need the recipient to receive the exact amount you quoted. Intermediary deductions are unpredictable. You might send $1,000, and the recipient might get $955 or $980 or $1,000, depending on which intermediaries handle the transfer. If the amount matters (paying an exact invoice, meeting a minimum deposit), a fintech service with transparent, upfront pricing is more reliable.
How to send an international wire transfer
If you've decided a wire is the right choice, here's what you need:
Information required: recipient's full legal name (as it appears on their bank account), recipient's bank name and branch address, recipient's account number or IBAN, receiving bank's SWIFT/BIC code, the amount and currency, and the purpose of the transfer (some banks and countries require this).
Where to initiate: most US banks let you send international wires through online banking, mobile app, by phone, or in-branch. Online is the fastest. Some banks restrict first-time international wires to in-branch or phone for security. Check your bank's policy before you need to send urgently.
Timing: initiate domestic wires at least 1 to 2 hours before your bank's cutoff time (usually 4 to 5 pm ET). For international wires, initiate 3 to 4 hours before the cutoff. Wires initiated after the cutoff are processed the next business day.
Tracking: ask your bank for the SWIFT reference number (also called a UETR under SWIFT GPI). The recipient's bank can use this to trace the transfer if it doesn't arrive within the expected window.
Receiving an international wire transfer
If someone abroad is wiring money to you, they need your bank's SWIFT code, your account number (or IBAN for European accounts), your bank's name and address, and your full name as it appears on the account. Some sending banks also ask for the receiving bank's routing number as a secondary reference.
Your bank may charge an incoming wire fee (ranging from $0 to $20, depending on the bank). The money arrives in the currency the sender specified, or your bank converts it to your local currency, usually at a marked-up rate.
For people outside the US who need to receive USD wires regularly: you don't need a US bank account. Grey provides USD account details (ACH routing number and account number) that can receive incoming transfers from US banks. You can also receive GBP via FPS, CHAPS, or BACS, and EUR via SEPA. The money arrives in your chosen currency, and you decide when to convert. No intermediary bank deductions, no surprise fees. Open a Grey account and share your account details with anyone who needs to pay you. You can also send money from the US through Grey's own transfer rails, bypassing SWIFT entirely.
Frequently asked questions about international wire transfers
How long does an international wire transfer take?
Most international wire transfers take 1 to 3 business days. Some take up to 5 business days if they route through multiple intermediary banks or if the destination country has additional compliance requirements. Domestic wires settle the same business day. Time zone differences, local bank holidays, and enhanced screening on large or unusual transfers can all add delays. Ask your bank for the SWIFT GPI tracking number to monitor the transfer in real time.
How much does an international wire transfer cost?
The median outgoing fee at US banks is $45. The median incoming fee is $13. But the stated fee isn't the total cost. Exchange-rate markups (1-3%) and intermediary bank deductions ($10-$25 per intermediary) can double the effective cost. For a $1,000 transfer, the all-in cost can range from $80 to $100. On large transfers ($10,000+), the percentage cost drops because flat fees are proportionally smaller.
What is a SWIFT code and how do I find one?
A SWIFT code (also called a BIC) is an 8 or 11-character code that identifies a specific bank on the SWIFT network. The format is: 4 letters (bank code) + 2 letters (country) + 2 characters (location) + 3 optional characters (branch). For example, WFBIUS6S is Wells Fargo (WFBI), United States (US), San Francisco (6S). You can find any bank's SWIFT code on its website, by calling the bank, or by searching the SWIFT directory at swift.com.
Can an international wire transfer be reversed?
Generally no. Wire transfers are designed to be irrevocable once processed. If you sent money to the wrong account, contact your bank immediately. They can request a recall through SWIFT, but the receiving bank is not obligated to return the funds, and the process can take weeks. This irrevocability is a feature for recipients (guaranteed funds) but a risk for senders. Always verify the recipient's details twice before confirming a wire.
What is the difference between a wire transfer and an ACH transfer?
Wire transfers are processed individually and settle the same day (domestically). They're irrevocable, have no amount cap, and cost $25 to $50. ACH transfers are batched, settle in 1 to 3 business days, are reversible in some cases, have lower fees (often free or under $3), and may have daily limits. Use wire for large, urgent, one-off payments. Use ACH for recurring transfers, payroll, and smaller amounts. For a detailed comparison, see ACH vs wire transfer explained.
Do I need a bank account to receive an international wire transfer?
You need an account that can receive SWIFT or domestic bank transfers. This can be a traditional bank account or a fintech account with its own banking details. Grey provides USD, GBP, and EUR account details that can receive wire transfers and ACH deposits without requiring a local bank account in the US, UK, or Europe. Open a Grey account to get your own receiving details.
Skip the $45 wire fee. Open a Grey accountand receive USD, GBP, and EUR with your own account details. Convert when the rate works for you, and send to 50+ countries.
Disclaimer: This article is for informational purposes only. Wire transfer fees, exchange rates, and processing times vary by bank and may change. Grey isn't a bank. We're a licensed financial services provider offering multi-currency accounts.
When you start looking for day trips from Tokyo, the same names come up again and again: Hakone, Kamakura, Nikko, Yokohama, and maybe Mount Fuji if you’re feeling ambitious. They’re popular for a reason, but I wouldn’t stop there. Tokyo’s incredible train network puts more than 15 destinations within easy reach, including plenty that most visitors never think to add to their itinerary. Some of my favourite options are less than an hour away and can cost less to reach than a restaurant lunch in Tokyo.
The best day trips from Tokyo include Kamakura (1 hour), Hakone (1.5 hours), Nikko (2 hours), Yokohama (30 minutes), and Kawagoe (30 minutes). Kamakura has the Great Buddha and a surf beach. Hakone has hot springs and Fuji views. Nikko has ornate shrines in a mountain forest. Most are reachable on a Japan Rail Pass or regular Suica/Pasmo card.
Skip Mount Fuji as a day trip unless you're only going to the 5th station viewpoint. Actually, climbing Fuji requires an overnight stay during the July to September climbing season. The 5th station bus-and-view trip is doable in a day, but less rewarding than spending that time in Hakone or Kamakura, where you'll see more and stress less.
This guide covers 15 destinations with train times, costs, and what makes each one worth your time. If you're also planning European travel, see best day trips from Paris.
Under 1 hour from Tokyo
1. Kamakura. 1 hour from Tokyo Station via JR Yokosuka Line. A coastal town with the Great Buddha (Kotoku-in, JPY 300 entry), dozens of smaller temples, excellent hiking trails between shrines, and a surf beach. Start at Kita-Kamakura station, walk the temple trail to Hase station (about 2 hours with stops), see the Great Buddha, then walk to the beach for the afternoon.
The Daibutsu hiking trail connects Kita-Kamakura to the Great Buddha through bamboo forests and ridge paths. It's the most scenic walk within day-trip distance of Tokyo.
Budget: JPY 3,000 to 5,000 ($20 to $35) for transport, entry fees, and lunch.
2. Yokohama. 30 minutes from Tokyo Station via JR Tokaido Line or Tokyu Toyoko Line. Japan's second-largest city, but it feels completely different from Tokyo. Chinatown (the largest in Asia with 500+ restaurants), the Cup Noodle Museum (JPY 500, worth it for the custom cup noodle experience), Sankeien Garden, and the Red Brick Warehouse waterfront district.
Yokohama is the easiest day trip from Tokyo: short travel time, lots to do, easy navigation. Good for days when you want a change of scenery without committing to a long train ride. Budget: JPY 2,000 to 4,000 ($14 to $28).
3. Kawagoe. 30 minutes from Ikebukuro via the Tobu Tojo Line. Known as "Little Edo" for its preserved Edo-period merchant houses and kurazukuri (clay-walled warehouse) streetscape. The bell tower (Toki no Kane) is the icon. Penny Candy Alley (Kashiya Yokocho) sells traditional Japanese sweets from 20+ tiny shops.
Less crowded than Kamakura, more photogenic than Yokohama, and close enough for a half-day trip. Go on a weekday to avoid the weekend crowds that can overwhelm the narrow streets.
Budget: JPY 2,000 to 3,500 ($14 to $24).
4. Enoshima. 1 hour from Shinjuku via Odakyu Line to Katase-Enoshima. A small island connected to the mainland by a bridge, with a shrine, sea caves, a lighthouse observation tower, and views of Mount Fuji on clear days. Combine with Kamakura for a full day: temples in the morning, Enoshima in the afternoon.
The island is small enough to walk in 2 to 3 hours. The shirasu (whitebait) rice bowls at the island's restaurants are a local speciality worth trying.
Budget: JPY 2,500 to 4,000 ($17 to $28).
5. Mount Takao. 50 minutes from Shinjuku via the Keio Line to Takaosanguchi. The most accessible mountain hike from Tokyo. The main trail (Trail 1) takes about 90 minutes to the summit and is paved the entire way. For more challenge, Trail 6 follows a stream through the forest. The cable car (JPY 490 one way) covers the first half of the ascent if you want to save energy.
Summit views include Mount Fuji on clear days. Best in autumn (late November) for red maple leaves and spring (April) for cherry blossoms.
Budget: JPY 1,500 to 2,500 ($10 to $17).
1 to 1.5 hours from Tokyo
6. Hakone. 1.5 hours from Shinjuku via Odakyu Romance Car (JPY 2,330 reserved seat). The classic day trip for hot springs and Mount Fuji views. The Hakone Free Pass (JPY 6,100 for 2 days from Shinjuku) covers the Romance Car, cable car, ropeway, pirate ship on Lake Ashi, and buses. It's excellent value if you use even half of the included transport.
The loop route (train to Hakone-Yumoto, bus to Togendai, pirate ship across Lake Ashi, cable car and ropeway back) takes a full day. The open-air museum is worth an hour. Owakudani's volcanic valley smells like sulfur and sells black eggs boiled in the volcanic springs that supposedly add 7 years to your life.
Budget: JPY 6,000 to 10,000 ($40 to $70) with the Free Pass.
7. Nikko. 2 hours from Asakusa via Tobu Railway (JPY 2,800 round trip with the Nikko Pass). Toshogu Shrine is one of Japan's most ornate: gold leaf, intricate carvings (including the famous "see no evil" monkeys and the sleeping cat), and set in a towering cedar forest that filters the light in a way that makes the whole complex feel otherworldly.
The Kegon Falls (100m drop, JPY 570 elevator to the viewing platform) are 30 minutes by bus from Nikko station. Nikko is more expensive and time-consuming than Kamakura, but the visual payoff is bigger. The shrine complex alone justifies the trip.
Budget: JPY 5,000 to 8,000 ($35 to $55).
8. Fuji Five Lakes (Kawaguchiko). 2 hours from Shinjuku via JR Chuo Line + Fuji Kyuko Line, or direct highway bus (JPY 2,200). The best Mount Fuji viewing point that doesn't require climbing. Kawaguchiko (Lake Kawaguchi) has multiple photo spots along the northern shore, a ropeway with panoramic views (JPY 900), and the Chureito Pagoda (free but 400 steps), which produces the iconic five-tiered pagoda framing Mount Fuji that appears on every Japanese tourism poster.
Cloud cover is the risk: Fuji hides behind clouds roughly 60% of days.
Check the webcam at fujigoko.tv before you go. Early morning (before 10 am) offers the best visibility. Budget: JPY 4,000 to 7,000 ($28 to $48).
9. Chichibu. 1.5 hours from Ikebukuro via Seibu Railway. A mountain town that feels rural despite being 90 minutes from central Tokyo. Famous for the 34-temple Chichibu Pilgrimage, sake breweries, and the Nagatoro river gorge, where you can take a traditional boat ride through rapids (JPY 1,800). Much less touristy than Kamakura or Hakone.
The Chichibu Night Festival (December) is one of Japan's most spectacular festivals with illuminated floats, but the town is rewarding year-round. Budget: JPY 3,000 to 5,000 ($20 to $35).
1.5 to 2.5 hours from Tokyo
10. Kusatsu Onsen. 2.5 hours from Tokyo via Shinkansen to Naganohara-Kusatsuguchi, then bus. One of Japan's top three hot spring towns. The yubatake (hot water field) in the town centre is a steaming, sulfurous wooden channel that cools the spring water before it flows to the bathhouses. Free public foot baths line the streets. The Sainokawara open-air bath (JPY 600) is enormous and surrounded by forest.
Kusatsu is the best day trip for onsen (hot spring) culture, better than Hakone's commercialised baths. Budget: JPY 5,000 to 8,000 ($35 to $55).
11. Izu Peninsula. 2 hours from Tokyo via Shinkansen to Atami or Ito. A coastal resort area with hot springs, dramatic cliffs, and seafood. Atami has a castle and fireworks shows (weekends in summer). Jogasaki Coast (near Ito) has a 9km cliff walk with suspension bridges over volcanic rock formations.
Izu is where Tokyo residents go for weekend getaways, so it has excellent infrastructure (ryokans, onsen hotels, seafood restaurants) without the international tourist crowds of Hakone. Budget: JPY 4,000 to 7,000 ($28 to $48).
12. Takayama. 2.5 hours from Tokyo via Shinkansen to Nagoya, then Hida Wide View Express (or direct bus, 5.5 hours). A preserved Edo-period mountain town known for its morning markets, sake breweries, and Hida beef (the rival to Kobe beef that locals insist is better). The old town (Sanmachi Suji) is three streets of wooden merchant houses converted to sake shops, craft stores, and restaurants. Takayama is at the limit of a comfortable day trip.
It's better as an overnight, but if you catch the earliest Shinkansen, you can get 5 to 6 hours in town. Budget: JPY 8,000 to 15,000 ($55 to $100) including Shinkansen.
13. Matsumoto. 2.5 hours from Shinjuku via Azusa Limited Express. Home to Matsumoto Castle, one of Japan's five original castles (most Japanese castles are concrete reconstructions). The black exterior earned it the nickname "Crow Castle." The castle interior climb is steep, narrow wooden stairs through six floors.
The city itself is a pleasant university town with craft beer bars and soba noodle shops. Like Takayama, this stretches the day trip definition, but is doable with an early departure. Budget: JPY 6,000 to 10,000 ($40 to $70).
14. Hitachi Seaside Park. 2 hours from Tokyo via JR Joban Line to Katsuta, then bus. Famous for two spectacular flower seasons: nemophila (baby blue eyes) covering rolling hills in late April to early May, and kochia bushes turning bright red in October. Outside these seasons, the park is pleasant but unremarkable.
Time your visit to the bloom calendar published on the park's website. Entry: JPY 450. Budget: JPY 3,000 to 5,000 ($20 to $35).
15. Odawara. 1 hour from Tokyo via Shinkansen (or 1.5 hours via JR Tokaido Line for the budget option). Odawara Castle is a well-restored hilltop castle with a free garden and JPY 510 keep entry. The castle town has a fish market, a kamaboko (fish cake) museum, and lantern-lit streets.
Often overlooked because it's the gateway to Hakone, and most visitors pass through without stopping. That's a mistake. Odawara deserves 2 to 3 hours before or after Hakone. Budget: JPY 2,000 to 4,000 ($14 to $28).
Paying for day trips from Tokyo
Japan is still a cash-heavy country, though IC cards (Suica, Pasmo) work for all trains and many convenience stores and vending machines. Smaller temples, street food vendors, and rural businesses are often cash-only. ATMs at 7-Eleven and Japan Post accept international cards. Withdraw JPY in larger amounts to avoid per-withdrawal fees.
If you're visiting Japan, it’s worth checking how your card handles payments in yen before you travel. With a Grey virtual card, you can spend directly from your available Grey balance, with no separate card top-up required. For non-USD card transactions, a cross-border fee of 2% + $0.50 may apply. You can also get a travel eSIM through Grey Lifestyle, depending on availability, so you can stay connected for maps, train schedules, and translations without relying on your usual mobile roaming plan.
The Japan Rail Pass is worth it if you're taking the Shinkansen to 3+ destinations. A 7-day pass costs approximately JPY 50,000 ($340) and covers unlimited JR trains, including Shinkansen. If you're only doing 1 to 2-day trips from Tokyo on local JR lines, a regular Suica card is cheaper.
Exploring beyond Tokyo? Spend on a Grey virtual card with no markup and grab a travel eSIM for Japan.
Frequently asked questions about day trips from Tokio
What is the best day trip from Tokyo?
Kamakura for temples and beach. Hakone for hot springs and Fuji views. Nikko for ornate shrines in forest. Yokohama for food and city atmosphere. The best choice depends on what kind of day you want: spiritual and historical (Kamakura, Nikko), scenic and relaxing (Hakone, Kawaguchiko), or urban and culinary (Yokohama, Kawagoe).
Do I need a Japan Rail Pass for day trips?
Only if you're doing 3+ Shinkansen trips. A 7-day JR Pass (~JPY 50,000) covers unlimited JR travel. For 1 to 2-day trips on local JR lines, a Suica or Pasmo IC card is cheaper and more flexible. Non-JR railways (Odakyu, Tobu, Keio, Seibu) aren't covered by the JR Pass anyway.
Can I use credit cards on day trips from Tokyo?
Major stations, chain restaurants, and department stores accept cards. Smaller temples, street food, rural shops, and many local restaurants are cash-only. Withdraw JPY at 7-Eleven ATMs (they accept international cards). Bring JPY 5,000 to 10,000 in cash per day trip as backup.
What is the cheapest day trip from Tokyo?
Mount Takao: JPY 1,500 to 2,500 total ($10 to $17). Train from Shinjuku is JPY 390 each way. No entry fee for the mountain. Cable car is optional (JPY 490). Pack lunch to keep costs down. Kawagoe and Yokohama are also budget-friendly at JPY 2,000 to 3,500.
Is Mount Fuji worth a day trip?
Only for the 5th station viewpoint (bus from Kawaguchiko, 50 minutes). Climbing Fuji requires an overnight trip from July to September. For Fuji views, Kawaguchiko (2 hours from Shinjuku) offers better photo opportunities from the lakeside without the summit commitment. Check the webcam before going. Fuji hides behind clouds roughly 60% of the time.
Disclaimer: This article is for informational purposes only. All costs and details are estimates based on mid-2026 data. Verify current information before making decisions. Grey isn't a bank. We're a licensed financial services provider offering multi-currency accounts.
Finding accommodation as a digital nomad is a skill in itself. Unlike a holiday, where you book something nice for a week and call it done, nomadic living involves a constant cycle of research, short-term stays, longer-term negotiations, and the occasional bad Wi-Fi situation you didn't see coming.
The good news is that the infrastructure for nomadic accommodation has improved significantly in recent years. More landlords understand what nomads need. More co-living spaces have opened in major nomad cities. And the playbook for finding good, affordable housing on the road is well established, even if it's not always well documented.
This guide covers the full range of accommodation options available to digital nomads, from short-term platforms to local rental markets, along with practical tips for finding housing quickly in a new city and managing cross-border payments when you do. For a broader introduction to the lifestyle itself, see our digital nomad lifestyle guide.
Short-term accommodation options for digital nomads
Short-term stays, typically under one month, are where most nomads start when arriving in a new location. They're more expensive per night than long-term rentals but are usually more flexible, have no lease requirements, and are often furnished and include utilities.
Airbnb and Vrbo
Airbnb and Vrbo are the most familiar options. Both offer furnished apartments, private rooms, and entire properties for nightly, weekly, or monthly bookings. Airbnb has a monthly discount feature built into the pricing: hosts can set a percentage off for bookings of 28 days or more, and many do. Make sure to contact the host directly to negotiate a monthly rate, even if the discount isn’t advertised.
Pros: wide selection, clear guest reviews, flexible booking terms, and host communication before arrival.
Cons: higher cost than local rentals, Wi-Fi quality varies significantly, and some hosts are optimised for tourists rather than working professionals.
Booking.com monthly stays
Booking.com has expanded significantly into the long-stay market and often surfaces options that don’t appear on Airbnb, particularly serviced apartments and aparthotels. Filter for “apartments” and select monthly stays for better pricing.
Pros: broad inventory, often includes properties not listed elsewhere, good cancellation policy options.
Cons: varies by property; some listings have minimum requirements for monthly pricing.
Hostels with private rooms
In budget destinations across Southeast Asia, Latin America, and Eastern Europe, hostels with private rooms offer a surprisingly good option for short stays. Private rooms in hostels are often significantly cheaper than equivalent Airbnb listings, include shared common areas and sometimes coworking spaces, and come with a built-in social environment.
Pros: cost-effective, social, often include breakfast and utilities.
Cons: thin walls, shared bathrooms in some cases, variable Wi-Fi, and not suitable for long client calls in shared spaces.
Hotel long-stay deals
Many hotels, particularly business hotels and aparthotels, offer significantly reduced monthly rates for extended stays that are never listed on their standard booking pages. These are negotiated directly by calling the hotel and asking for long-stay or corporate rates.
Pros: Hotel amenities, cleaning service, reliable infrastructure.
Cons: Typically more expensive than private rentals, even with long-stay discounts, and less "home-like.”
Cost comparison by accommodation type and region
Accommodation type
Southeast Asia (monthly est.)
Southern Europe (monthly est.)
Latin America (monthly est.)
Airbnb (entire apartment)
$400–$900
$900–$2,000
$500–$1,200
Co-living space (private room)
$500–$1,200
$1,000–$2,200
$600–$1,500
Hostel private room
$200–$500
$500–$1,000
$300–$700
Local rental (unfurnished)
$250–$600
$600–$1,400
$350–$900
Serviced apartment / aparthotel
$600–$1,400
$1,200–$2,500
$700–$1,600
Figures are estimates based on Nomad List city data and market research. Costs vary significantly by city, neighbourhood, and season.
Long-term accommodation options for digital nomads
Once you’ve settled on staying somewhere for two months or more, the economics shift. The short-stay premium no longer makes sense, and the right approach is to find accommodation the way a local would.
Local rental market
In most cities, the cheapest furnished apartments are found through local channels rather than international platforms. This typically means Facebook groups (search for "[city name] expats", "[city name] apartments for rent", or "[city name] digital nomads"), local property listing sites, and WhatsApp groups that circulate among the expat and nomad community in that city.
The trade-off: finding a place this way takes more time and requires being either in the city already or trusting photos and video tours remotely. The upside is that a furnished apartment found through local channels can cost 30 to 50% less than the equivalent on Airbnb for the same city and quality level.
Furnished apartment agencies
Many cities have local agencies that specifically handle furnished apartments for short- to medium-term rentals. These agencies often cater to business travellers and relocating professionals, which means their inventory is typically furnished to a reasonable standard and includes utilities. A quick search for “furnished apartments [city name]” plus the local language equivalent often surfaces these.
House-sitting through TrustedHousesitters
TrustedHousesitters matches homeowners who need their home and pets looked after with nomads and travellers willing to house-sit for free accommodation. If you're comfortable with pets and flexible on location, this is a legitimate way to live rent-free in exchange for daily pet care and property oversight.
It requires advance planning: good house-sitting opportunities in desirable locations fill quickly, and building a strong TrustedHousesitters profile with reviews takes time. But for nomads who want to significantly reduce accommodation costs in high-cost countries, it’s a genuine option.
Sublets
Locals who are travelling temporarily often sublet their furnished apartments at rates closer to local market prices than tourist prices. These can be found through the same Facebook groups and WhatsApp networks as local rentals. Sublets are typically informal arrangements, so due diligence on the space and the landlord’s willingness to let is important.
How do digital nomads find housing abroad?
The most common mistake first-time nomads make is trying to solve the accommodation problem entirely from home, before arriving. Booking three months of Airbnb before you’ve spent a single week in a place is expensive and inflexible. The approach experienced nomads use is different.
Book one to two weeks of short-term accommodation first Arrive at your destination with a comfortable, central place already sorted for the first week or two. This gives you time to explore neighbourhoods, join local nomad and expat groups, and get a feel for where you actually want to be before committing to something longer.
Join the Facebook and WhatsApp groups for that city Search for “[city] expats”, “[city] digital nomads", and “[city] apartments for rent” on Facebook. Request access. Post asking what you’re looking for. Many of the best long-term finds come through these groups within 48 hours of posting.
Ask on Nomad List Nomad List’s community forum and chat are organised by city and are among the most useful real-time sources for what's available, which areas are best for working, and what pitfalls to avoid in any given place.
Talk to other nomads already there The nomad community is generally generous with practical information. If you’re staying in a hostel or co-living space during your first week, ask other residents where they found their accommodation. Recommendations from people currently living in the city are more reliable than anything you’ll find through a search engine.
Be ready to move quickly on local listings Good furnished apartments at local prices go fast, particularly in popular nomad cities like Chiang Mai, Medellín, Lisbon, and Tbilisi. If you find something good, don’t spend days deliberating.
Co-living spaces for digital nomads: are they worth it?
Co-living spaces are purpose-built or adapted residential properties that offer private or semi-private rooms with shared common areas, Wi-Fi, and often a built-in community of other remote workers and nomads. They sit somewhere between a high-end hostel and a furnished apartment in terms of experience and price.
What co-living typically includes:
Private furnished room with reliable, fast internet
Shared kitchen, living areas, and sometimes coworking desks
Utilities and cleaning are included in the price
Community events, networking opportunities, and social programming
Often: rooftop access, gym, pool, or other amenities, depending on the property
Is it worth it? Co-living is worth it in two situations. First, when you’re new to a city, you want a built-in social environment to meet people quickly without putting in weeks of social effort. Second, when the all-inclusive price is genuinely competitive with furnished apartments, once you factor in utilities, internet, and cleaning. In some cities, it is, in others, it’s significantly more expensive per month than an equivalent local rental.
The experience varies considerably between properties. Read reviews specifically about the internet speed, noise levels, and the current community atmosphere (which changes as residents cycle in and out). A co-living space with a dead atmosphere or patchy Wi-Fi solves neither the social nor the work problem.
Tips for finding and securing nomad housing
Test the Wi-Fi before committing: Ask the host or property for the broadband speed, or run a speed test during a video call or in-person visit before signing anything. Minimum functional speed for most remote work is 25 Mbps download and 10 Mbps upload; 50 Mbps or more is comfortable for video calls.
Use a VPN to search local listing sites: Some regional property platforms show different results or prices based on your detected location. Searching with a local VPN node can surface listings that don’t appear when searching from abroad.
Always have a backup option: Before checking out of your current place, have your next accommodation confirmed and paid. Moving cities without a fallback creates unnecessary stress.
Read reviews for noise level, not just overall score: A 4.8-rated apartment can still be on a main road above a bar. Look specifically for reviews mentioning noise, street sounds, and sleep quality.
Ask for a monthly discount, even if one isn’t listed: Hosts and landlords generally prefer a reliable occupant for a month to the uncertainty of nightly bookings. A direct message asking for a monthly rate almost always gets a response, even if the answer is no.
Confirm check-in flexibility before booking: Many nomads arrive on late flights or unconventional schedules. Clarify check-in times before booking, particularly for entire-apartment listings where a lockbox or key exchange must be arranged.
Arrive with one month’s rent in local cash if possible: Many local landlords in emerging market countries prefer or require cash deposits. Having local currency ready, rather than relying on finding an ATM on arrival, simplifies the move-in process.
How to manage payments and deposits as a digital nomad
The financial side of finding accommodation abroad creates its own set of complications. Deposits are often due in advance, in local currency. Monthly rent may need to be transferred internationally. And paying through your home bank can mean losing 3 to 5% on every conversion.
For deposits sent ahead of arrival, the cleaner approach is a multi-currency account that lets you convert at a fair rate and send internationally at low cost. Grey lets you send money abroad with Grey at a conversion fee of 1%, capped at $6, with the rate shown before you confirm. For nomads regularly moving money between countries, this is significantly cheaper than bank wire transfers that typically carry a $25 to $50 sending fee plus a 2 to 4% conversion spread.
For ongoing rent payments in foreign currencies, opening a multi-currency account for nomads lets you hold USD, EUR, and GBP balances, pay from whichever currency is most cost-effective for the transaction, and avoid converting back and forth on every monthly payment.
The practical workflow: hold income in the currency you earn it in, convert only what you need for the current month’s expenses, and use a Grey virtual card for USD-denominated online subscriptions and tools you’re paying for, regardless of where you’re living.
Frequently asked questions about finding accommodation as a digital nomad
How much should a digital nomad budget for accommodation?
It depends significantly on the destination. In Southeast Asia (Chiang Mai, Bali, Ho Chi Minh City), comfortable furnished apartments run $400 to $800 per month. In Southern Europe (Lisbon, Barcelona, Athens), expect $900 to $1,800 for a similar standard. In Latin America (Medellín, Mexico City, Buenos Aires), the range is $500 to $1,200. Co-living and Airbnb add a premium of 20 to 50% above the local rental market rate for equivalent quality. A general planning range for most nomad-friendly destinations is $600 to $1,500 per month for accommodation, with high-cost-of-living cities (Western Europe, Japan, US) falling above that range.
Is it safe to rent from local landlords as a digital nomad?
Generally, yes, with reasonable precautions. Request a video call to see the apartment in real time before paying any deposit. Pay the deposit using a method that leaves a record (bank transfer or a traceable payment method), rather than in cash, if possible. Confirm the landlord’s identity and verify the address on maps before arrival. In cities with established nomad communities, Facebook groups and WhatsApp recommendations for specific landlords are useful vetting tools: others have rented from the same person and can confirm their experience.
Can I get a lease as a digital nomad without a fixed address?
Formal leases typically require proof of income and sometimes a local guarantor, which many nomads can’t provide. In practice, most nomad accommodation is arranged informally: a written agreement, a WhatsApp exchange, or a platform booking confirmation rather than a legally binding lease. This is the norm in the nomad market, and most landlords catering to nomads expect it. For any significant deposit, having a written agreement (even via email or WhatsApp) that specifies the amount, the return conditions, and the rental period is worth the effort.
What is the best app for finding digital nomad accommodation?
No single app covers everything. For short stays, Airbnb and Booking.com are the most practical starting points. For co-living, Selina and Outsite have their own booking platforms. For local rentals, the most effective tool is Facebook Groups combined with Nomad List’s city-specific community chats. Many experienced nomads use Airbnb for the first week in a new city and then transition to a local rental found through Facebook or community recommendations.
How do digital nomads handle deposits in a foreign country?
Most deposits for nomad accommodation are paid by bank transfer, local cash, or through a platform (for Airbnb bookings, Airbnb holds the payment). For local rentals requiring a direct bank transfer in foreign currency, a multi-currency account with a competitive conversion rate is the most cost-effective method: converting at a bank’s standard rate typically costs 3 to 5% of the deposit amount, whereas a platform like Grey charges 1%, capped at $6, on conversion. Keep a record of every deposit paid, the agreed return conditions, and the landlord’s contact details.
Do I need travel insurance if I am renting accommodation long-term?
Travel insurance needs change when you’re a long-term renter rather than a short-stay tourist. Standard travel insurance often excludes stays beyond 30 to 90 days or has reduced coverage for long-term accommodation. Nomad-specific insurance products (such as SafetyWing or World Nomads) are designed for extended travel and cover medical emergencies, trip interruption, and sometimes personal belongings. For long-term rentals, contents insurance for your possessions in the rental property is worth investigating separately, as landlord insurance typically doesn’t cover tenants’ belongings.
If you’ve read our FX trading beginner's guide, you already know that the forex market is primarily an over-the-counter market, with no central exchange and trades happening directly between participants. FX futures are different. They are exchange-traded, standardised contracts regulated by a recognised authority, with fixed contract sizes, set expiration dates, and publicly visible prices.
That distinction matters. It shapes everything from how you access the market to who regulates it to how much it costs to trade. This guide explains how FX futures work mechanically, how they compare to spot FX, and when they’re the right tool for a specific financial problem, and when they’re not.
What is FX futures trading?
FX futures trading is the buying and selling of standardised contracts that commit the holder to exchange a specified amount of one currency for another at a predetermined price on a specific future date.
Unlike spot FX, where currencies are bought and sold for immediate delivery (typically two business days), FX futures contracts have a defined expiration date in the future, typically quarterly: March, June, September, and December. You don’t have to hold the contract until expiration: most futures positions are closed before the contract expires by taking the opposite position.
The major FX futures markets are operated by CME Group, which runs the Chicago Mercantile Exchange (CME). The CME is one of the world’s largest derivatives exchanges and lists futures contracts on major currency pairs, including EUR/USD, GBP/USD, USD/JPY, AUD/USD, CAD/USD, CHF/USD, and MXN/USD, among others.
Because FX futures trade on a regulated exchange rather than over-the-counter, all participants see the same prices, all transactions are cleared through a central counterparty (the CME Clearing House), and the Commodity Futures Trading Commission (CFTC) in the US regulates the market. This centralised structure is one of the primary differences from spot FX.
Currency futures explained
Understanding the mechanics of a currency futures contract requires knowing its key specifications. Here is how the major CME EUR/USD futures contract works, using CME Group’s published contract specifications.
Contract size: Each EUR/USD futures contract represents 125,000 euros. This is the standardised unit. You cannot trade a partial contract: if you want exposure to EUR/USD, the minimum is one full contract worth 125,000 euros.
Tick size: The minimum price movement (tick) for EUR/USD futures is 0.00005 dollars per euro, which equals $6.25 per contract (125,000 × 0.00005). This is the smallest profit or loss increment per contract per tick.
Expiration months: EUR/USD futures expire quarterly: March, June, September, and December. The contract expiration date is the third Wednesday of the delivery month. The front-month contract (the one with the nearest expiration date) is typically the most liquid.
Settlement: CME currency futures are physically settled, meaning the actual exchange of currency can occur at expiration if a position is held open. In practice, most traders close their positions before expiration by taking the opposite trade, avoiding physical delivery.
Margin requirements: To trade FX futures, you don’t pay the full value of the contract upfront. You deposit an initial margin, a percentage of the contract’s notional value, as a performance bond. CME publishes initial and maintenance margin requirements. For EUR/USD futures, initial margin requirements vary but are typically between $2,000 and $3,000 per contract, depending on market volatility. This means you’re controlling a contract worth approximately $137,500 (at EUR/USD 1.10) with a margin of a few thousand dollars.
Mark-to-market: Unlike some financial instruments, futures positions are marked to market daily. At the end of each trading session, gains and losses are calculated based on the day’s settlement price and credited or debited from your margin account. If your account falls below the maintenance margin level, you receive a margin call and must deposit additional funds or have your position liquidated.
How to trade FX futures
Trading FX futures requires access to a futures broker and a funded margin account. The process differs from opening a standard retail forex account.
Choose a CFTC-regulated futures broker FX futures must be traded through a registered Futures Commission Merchant (FCM). Check CFTC registration at cftc.gov before depositing funds with any broker. Major regulated FCMs include Interactive Brokers, TD Ameritrade Futures, and others. Verify that the broker specifically offers access to CME currency futures.
Open a futures account and complete compliance requirements Futures accounts require more documentation than standard brokerage accounts. You’ll complete risk disclosures, provide financial information, and confirm you understand the risks of leveraged derivatives trading.
Deposit initial margin Transfer funds to meet the initial margin requirement for the number of contracts you intend to trade. Remember that margin requirements can change based on market volatility: CME can raise them at any time.
Place an order. Select the contract (e.g., EURO FX Futures, symbol 6E), the expiration month, the direction (buy or sell), and the order type (market, limit, or stop). Your broker’s platform will show the current bid and ask price for the contract.
Monitor your position and margin Because futures are marked to market daily, your account balance will change each day based on price movement. Monitor your account to ensure it remains above the maintenance margin.
Close or roll before expiration To exit a long position, sell the same number of contracts in the same expiration month. To exit a short position, buy. To maintain exposure beyond the current contract’s expiration, “roll” the position by closing the front-month contract and opening the next expiration month.
FX futures vs spot trading
The two primary ways to trade currency markets are FX futures (exchange-traded, standardised, regulated) and spot FX (over-the-counter, flexible, broker-dependent). Here’s how they compare:
Feature
FX futures
Spot FX (retail forex)
Trading venue
Regulated exchange (CME, ICE)
Over-the-counter, through brokers
Regulation
CFTC (US), FCA (UK), other regulators
Varies; some markets lightly regulated
Price transparency
Full order book visible; same price for all participants
Broker-set spread; prices can vary between brokers
Contract size
Standardised (EUR/USD = 125,000 EUR)
Flexible; can trade micro lots (1,000 units)
Minimum trade size
One contract (typically large notional value)
Much smaller; micro lots available
Settlement
Physical delivery at expiration (usually closed before)
Cleared by exchange (low; exchange guarantees trades)
Counterparty is the broker (higher risk with unregulated brokers)
Transaction costs
Commission per contract plus bid-ask spread
Spread only (plus sometimes swap/overnight fees)
Who uses it
Institutional hedgers, professional traders
Retail traders, smaller hedgers
Access
Requires futures broker account
Retail forex broker account
The key practical differences: FX futures offer greater regulatory protection and price transparency, but the standardised contract sizes make them less accessible for small-volume traders. Spot FX offers more flexibility on position size, but with variable broker quality and less regulatory oversight in some jurisdictions.
Hedging with FX futures
One of the primary legitimate uses of FX futures, beyond speculation, is hedging: locking in an exchange rate for a future transaction to protect against adverse currency movement.
Worked example: a UK exporter hedging a USD receivable
A UK manufacturer has agreed to sell £500,000 worth of equipment to a US buyer. The invoice is denominated in USD at today’s GBP/USD rate of 1.27, making the USD invoice amount approximately $635,000. Payment is due in three months.
The risk: if the pound strengthens against the dollar (GBP/USD rises) over those three months, the $635,000 will convert to fewer pounds when received. At GBP/USD 1.35, for example, the same $635,000 would only convert to approximately £470,000, a loss of £30,000 versus today’s rate.
The hedge: the exporter sells GBP/USD futures contracts with an approximate notional value of $635,000. If GBP/USD rises to 1.35, the exporter’s futures position profits, offsetting the loss on the physical receivable. If GBP/USD falls (good news for the exporter), the futures position loses money, but that loss is offset by the better conversion rate on the physical USD received.
The hedge doesn’t make the exporter money. It removes the currency risk, allowing the business to plan based on a known effective exchange rate rather than an unknown future rate. This is what hedging is for.
Who uses FX futures to hedge:
Exporters and importers who invoice in foreign currencies, multinational companies consolidating overseas earnings, and fund managers with foreign currency exposure in their portfolios. For most of these users, the objective is risk reduction, not profit generation.
Risks of FX futures trading
The risks in FX futures are specific and worth naming precisely.
Leverage risk: A $3,000 margin controls a contract worth approximately $137,500. A 1% adverse move in EUR/USD costs approximately $1,375 per contract, nearly 50% of the initial margin. The same move in the favourable direction yields the same gain, but most traders focus on the asymmetry: losses can quickly exceed the initial deposit.
Margin calls: If the market moves against your position and your account balance falls below the maintenance margin level, your broker will issue a margin call: deposit more funds immediately or have your position closed at the current market price, potentially at a significant loss.
Expiration management: Futures contracts expire. If you’re not actively monitoring your position, a contract you intended to hold can expire without you realising it, resulting in automatic closing at the expiration settlement price or, for physically settled contracts, an obligation to deliver or receive currency.
Basis risk for hedgers: FX futures hedge currency risk but introduce basis risk: the risk that the futures price and the spot price don’t move perfectly in tandem. For most major currency pairs, basis risk is small, but it exists and means a futures hedge is rarely a perfect offset.
Liquidity risk in less active contracts: Front-month contracts for major pairs (EUR/USD, GBP/USD, USD/JPY) are highly liquid. Further-out expiration months and minor pair contracts can be less liquid, meaning wider bid-ask spreads and potentially difficulty closing positions at the desired price.
A simpler way to manage real-world currency exposure
FX futures are a sophisticated tool designed primarily for institutional hedgers and experienced traders who need to manage specific, quantifiable currency exposures. For most freelancers, remote workers, expats, and small business owners, the practical currency problem is different: receiving income in one currency, holding it efficiently, and converting at a fair rate when needed.
That doesn’t require a futures account. It requires a multi-currency account with a competitive conversion rate.
Grey lets you hold balances in USD, EUR, and GBP, receive payments from international clients through local payment rails (ACH for USD, SEPA for EUR, Faster Payments for GBP), and convert currencies at mid-market rates with Grey at a conversion fee of 1%, capped at $6. The conversion rate is shown before you confirm; there’s no expiration date to manage, no margin calls, and no leverage amplifying your exposure.
For someone who needs to hold USD earned from US clients and convert it to GBP or local currency at an appropriate time, opening a multi-currency account with Grey is a more practical approach than establishing a futures hedging programme. FX futures are the right tool for managing large, quantifiable, time-specific currency exposures. For everyday multi-currency financial management, a Grey account is more practical. Download the Grey app today to begin.
Frequently asked questions
What is the minimum to trade FX futures?
The minimum to trade FX futures is the initial margin requirement for one contract, plus enough buffer to avoid an immediate margin call if the market moves against you. For EUR/USD futures on the CME, initial margin requirements are typically $2,000 to $3,000 per contract, but this varies with market volatility and can be raised by the exchange at any time. In practice, most experienced futures traders maintain significantly more than the minimum margin in their account to absorb adverse moves without being forced out of a position.
How are FX futures different from forex spot trading?
FX futures are standardised contracts traded on regulated exchanges like the CME, with fixed contract sizes, quarterly expiration dates, and prices visible to all participants equally. Spot forex is traded over-the-counter through brokers, with flexible position sizes, no expiration dates, and prices set by the broker. Futures offer greater regulatory oversight and price transparency but require larger minimum positions. Spot forex is more accessible to retail traders, but broker quality and regulatory protection vary by jurisdiction.
Are FX futures suitable for beginners?
No. FX futures involve leverage, daily mark-to-market settlement, contract expiration management, and margin call risk. The standardised contract sizes mean a single EUR/USD futures contract controls 125,000 euros, which represents significant notional exposure for a beginning trader. Beginners who want to understand currency markets should start with educational reading rather than live trading, practice on simulated accounts before risking capital, and understand leverage mechanics fully before entering any leveraged position. The FX trading beginner's guide covers foundational concepts for those starting from scratch.
What is the contract size for EUR/USD futures?
One EUR/USD futures contract on the CME represents 125,000 euros. At an exchange rate of EUR/USD 1.10, one contract has a notional value of approximately $137,500. The minimum price move (tick) is 0.00005, worth $6.25 per contract. CME also offers E-micro EUR/USD futures contracts at one-tenth the size (12,500 euros per contract), which lowers the capital required per contract and may be more accessible for smaller traders.
When do FX futures expire?
CME currency futures expire quarterly: in March, June, September, and December. The specific expiration date is the third Wednesday of the delivery month, though the last trading day is typically the Monday before that Wednesday. Most traders close their positions before expiration to avoid the settlement process. Those who want to maintain exposure beyond the front-month contract “roll” their position by closing the expiring contract and opening the next quarterly contract.
Is Grey an alternative to FX futures for hedging small businesses?
For small businesses with straightforward multi-currency needs, Grey addresses the practical problem more simply than futures contracts do. A Grey multi-currency account lets you hold USD, EUR, and GBP balances, receive payments from international clients at low cost, and convert at a transparent rate. This is effective for managing the timing of currency conversion and avoiding forced conversion at poor bank rates, which covers the currency exposure most small businesses actually face. FX futures are appropriate when a business has a specific, large, time-defined currency exposure it needs to hedge precisely, such as a confirmed export contract in a foreign currency with a known settlement date. For most small businesses, that level of complexity and capital commitment isn’t justified.
If you have time for just one day trip from London, I’d choose Bath. If you can fit in a second, add Oxford. And for a third, Brighton is perfect when you want a break from the city and some sea air. But those are only the beginning. There are at least 11 destinations within easy reach of London that are worth giving a full day to, and getting to most of them costs less than a nice dinner in central London.
The best day trips from London include Oxford, Bath, Windsor, Cambridge, Brighton, Stonehenge, and the Cotswolds. Most are 1 to 2 hours by train or coach, with return fares from around £15 to £50. Book train tickets early for the lowest fares and plan one main sight per trip.
This guide covers all 11, ranked by how much you'll enjoy them relative to how much effort they take. We've included train times, return fares, what to see, and the one thing most visitors miss at each destination. If you're planning a longer European trip, see also the best day trips from Paris.
Best day trips from London: Quick overview
Here's a quick comparison of all 11 destinations so you can pick the right one for your day:
Destination
Train time
Return fare
Coach alt.
Walk score
Best for
Bath
1h 25m
£20 to £50
£10 to £18
High
Architecture, hot springs
Oxford
1h 05m
£15 to £30
£8 to £15
High
Historic colleges, bookshops
Brighton
1h 00m
£15 to £25
£8 to £12
High
Seaside, The Lanes, food
Cambridge
0h 50m
£15 to £25
£8 to £14
High
Punting, colleges, museums
Windsor
0h 55m
£12 to £20
£7 to £12
Medium
Castle, royal history
Stonehenge
1h 30m + bus
£30 to £50
£20 to £35
Low
Ancient monument, Salisbury
Cotswolds
1h 30m + bus
£25 to £45
£15 to £25
Low
Villages, countryside walks
Canterbury
0h 55m
£15 to £30
£10 to £18
High
Cathedral, medieval streets
Warner Bros Studio
0h 20m + bus
£10 to £15 + ticket
N/A
N/A
Harry Potter fans
Seven Sisters
1h 20m
£15 to £25
£10 to £15
High (hike)
Coastal cliffs, hiking
Leeds Castle
1h 00m + bus
£20 to £35
£15 to £25
Medium
Castle, gardens, families
All train fares are estimates for off-peak return tickets booked 1 to 2 weeks in advance. Walk-up fares on the day can be 2 to 3 times higher. Booking through Trainline or National Rail typically gets the best price.
1. Bath
Bath is the most complete day trip from London. Georgian architecture that looks like it was designed for Instagram, the Roman Baths (genuinely fascinating, not a tourist trap), the Royal Crescent, and independent shops along Milsom Street. It's a proper city with 2,000 years of history, not a village with one attraction.
Getting there: Great Western Railway from London Paddington, 1 hour 25 minutes. Return fare: £20 to £50 (advance), £70+ walk-up.
Don't miss: the Thermae Bath Spa rooftop pool. It's the only place in the UK where you can bathe in naturally warm, mineral-rich waters, and the views over the city from the rooftop are worth the £44 weekday or £49 weekend entry.
Budget for the day: £80 to £150 per person (train + Roman Baths entry £21 to £33 depending on date + food + optional spa).
2. Oxford
Oxford feels like stepping into a film set, largely because it literally is one. The Bodleian Library, Christ Church College (the Great Hall inspired Hogwarts), the Radcliffe Camera, and the covered market are all within a 15-minute walk of each other. The city is small enough to see the highlights in a day.
Getting there: GWR from Paddington or Chiltern Railways from Marylebone, about 1 hour. Return fare: from around £20 to £40 when booked in advance.
Don't miss: Blackwell's Bookshop on Broad Street. The Norrington Room in the basement is one of the largest book-selling rooms in the world.
Budget for the day: £50 to £90 per person (train + Christ Church entry from around £20 + food).
3. Brighton
Brighton is London's beach. One hour south and you're on the seafront with fish and chips, Brighton Pier, and The Lanes (a maze of independent shops, vintage stores, and cafes). The vibe is more relaxed and creative than anywhere in central London.
Getting there: Southern or Thameslink from London Victoria or London Bridge, about 1 hour. Return fare: £15 to £25 (advance).
Don't miss: the Royal Pavilion. It looks like an Indian palace dropped into a seaside town, and the interior is even more extravagant than the outside suggests. Entry is £21.50 for adults, with a 5% discount when booked online.
Budget for the day: £50 to £90 per person (train + Pavilion + seafood lunch).
4. Cambridge
Cambridge is Oxford's quieter, greener rival. The colleges are equally beautiful, the Fitzwilliam Museum is free, and punting on the River Cam is one of those experiences that's exactly as charming as it sounds. Hire a punt yourself (£25 to £30 per hour) or pay a chauffeur (£20 per person) and let someone else do the work.
Getting there: Greater Anglia from Liverpool Street or services from King's Cross, around 50 minutes to 1 hour 25 minutes depending on the train. Return fare: from £13 for a Weekend Day Return or £19 for a weekday Off-Peak Day Return with Greater Anglia; Advance fares can also be available.
Don't miss: King's College Chapel. The fan-vaulted ceiling is one of the finest examples of Gothic architecture in Europe. Entry: £15.75 online in advance or £17 on a standard weekday; weekend prices are slightly higher.
Budget for the day: £50 to £100 per person (train + punting + college entry + food).
5. Windsor
Windsor is dominated by its castle, the oldest and largest occupied castle in the world and still a working royal residence. The state apartments, St George's Chapel (where Harry and Meghan married), and the Changing of the Guard are all included in the castle ticket (£30 for adults).
Getting there: GWR from Paddington (change at Slough) or SWR from Waterloo, about 55 minutes. Return fare: fares vary depending on the service and ticket type (£12 to £20 - advance).
Don't miss: the Long Walk. A 2.65-mile tree-lined avenue stretching from the castle to the Copper Horse statue, free and spectacular in any season.
Budget for the day: £60 to £100 per person (train + castle entry + lunch).
6. Stonehenge
Stonehenge is the one destination on this list that divides opinion. Some visitors find it profoundly moving. Others see a circle of rocks behind a rope barrier and feel underwhelmed. The key to enjoying it: pair it with Salisbury. Take the train to Salisbury (1 hour 25 minutes from Waterloo), visit the cathedral (home to one of four surviving Magna Carta copies), then catch the Stonehenge Tour bus from the station (£16 return, runs every 30 minutes).
Getting there: SWR to Salisbury, then Stonehenge Tour bus, total around 2 hours. Return fare: varies depending on the train and bus ticket (£30 to £50 - train + bus). Stonehenge entry: £25 to £30 for an adult advance ticket without donation, depending on the date. Booking ahead can save up to 15%.
Don't miss: Old Sarum (the original Salisbury), a ruined hilltop fort 2 miles north of the city centre.
Budget for the day: £75 to £110 per person.
7. The Cotswolds
The Cotswolds aren't one place. They're a collection of honey-coloured stone villages spread across 800 square miles. Without a car, the easiest day trip is to Moreton-in-Marsh (direct train from Paddington, 1 hour 30 minutes), then walk or bus to nearby villages like Bourton-on-the-Water, Stow-on-the-Wold, or Broadway.
Getting there: GWR from Paddington to Moreton-in-Marsh, about 1 hour 30 minutes. Return fare: £25 to £45.
Don't miss: the walk from Moreton-in-Marsh to Bourton-on-the-Water (about 8 miles, 3 hours, flat and signposted). It's the best way to experience the Cotswolds without a car.
Budget for the day: £50 to £90 per person (train + pub lunch + cream tea).
8. Canterbury
Canterbury is a pilgrimage city, and the cathedral is the draw. It's the mother church of the Anglican Communion, a UNESCO World Heritage Site, and one of the oldest Christian structures in England. The medieval streets around it are charming and walkable, with plenty of independent shops and tea rooms.
Getting there: Southeastern from London St Pancras, about 55 minutes (high-speed). Return fare: £15 to £30. Cathedral entry: £18 from October to March, £19.50 from April to September, or £21 on weekends in July and August.
Don't miss: the medieval Eastbridge Hospital, a 12th-century almshouse that's still in use. Entry £10.
Budget for the day: £60 to £100 per person.
9. Warner Bros Studio Tour
Warner Bros Studio Tour (The Making of Harry Potter) is the only destination on this list that requires a timed ticket booked weeks or months in advance. It's not a theme park. It's the actual film sets, props, and costumes from all eight Harry Potter films, displayed in the studios where they were shot. Allow 3 to 4 hours inside.
Getting there: Train from Euston to Watford Junction (20 minutes), then shuttle bus to the studio. Return fare: £10 to £15 (train) + studio ticket £60 (adult).
Don't miss: the butterbeer. It's a theme park cliché at any other attraction, but here it's part of the experience.
Budget for the day: £80 to £110 per person.
10. Seven Sisters Cliffs
Seven Sisters is the outdoor option. A series of chalk cliffs along the Sussex coast that look like the White Cliffs of Dover but without the crowds. The cliff walk from Seaford to Eastbourne (about 13 miles, 5 to 6 hours) is one of the best coastal hikes in southern England.
Getting there: Southern from London Victoria or London Bridge to Seaford, about 1 hour 20 minutes. Return fare: varies depending on the ticket type and travel time (£15 to £25).
Don't miss: the view from Birling Gap. It's the most photographed angle of the Seven Sisters, and there's a National Trust cafe at the bottom.
Budget for the day: £30 to £55 per person (train + packed lunch + cafe).
11. Leeds Castle
Leeds Castle calls itself "the loveliest castle in the world," and while that's a bold claim, it's hard to argue when you see it reflected in the surrounding moat on a still morning. The castle, gardens, maze, and grounds easily fill a full day, especially with children.
Getting there: Southeastern from London Victoria to Bearsted (about 1 hour), then shuttle bus to the castle. Return fare: £20 to £35 (train + bus). Castle entry: around £40 (adult), £30 (children).
Don't miss: the yew tree maze. It's one of the most beautiful hedge mazes in England, and finding the centre takes about 15 minutes.
Budget for the day: £75 to £110 per person.
Getting around and paying on your day trips
If you're visiting London from abroad, your main concern is paying for trains, attractions, and food without losing money to foreign transaction fees. A 1.5 to 3% markup on every card payment adds up across a full day of spending. On a £100 day trip, that's £1.50 to £3 in fees you didn't need to pay.
Grey's virtual Mastercard lets you spend on a virtual card with no conversion markup. Load GBP before your trip and pay at train stations, restaurants, and attractions from your pound balance. You can also hold pounds and more in your Grey account, so you're not converting every time you tap.
For mobile data (booking tickets, checking train times, navigating to attractions), a travel eSIM is cheaper than roaming. Buy a travel eSIM for the UK. And if you need to send money abroad from the UK while you're here, Grey handles that too.
Oyster or contactless tip: most day trips start at a London mainline station. Use contactless (or Oyster) for the Tube or bus to get to the station, then buy a National Rail ticket for the journey itself. Contactless doesn't work on National Rail beyond Zone 9.
Exploring beyond London? Spend on a Grey virtual card with no markup and grab a travel eSIM for the day.
Frequently asked questions about the best day trips from London
What is the best day trip from London?
Bath. It has the most to see and do in a single day: Roman Baths, Georgian architecture, the Thermae Bath Spa rooftop pool, and excellent food. It's 1 hour 25 minutes by train from Paddington, and the entire city centre is walkable. Oxford is a close second, especially if you're interested in history and architecture.
How much do day trips from London cost?
Budget £40 to £100 per person, depending on the destination, including return train fare, attraction entry, and food. The cheapest day trip is Seven Sisters (£25 to £45 all in). The most expensive is Warner Bros Studio (£75 to £95). Train fares drop significantly when booked 1 to 2 weeks in advance.
Are trains or coaches cheaper for day trips from London?
Coaches are almost always cheaper. A coach to Bath is £10 to £18 return versus £20 to £50 by train. The trade-off is time: coaches take roughly 50 to 100% longer. For a day trip where time matters (you want to maximise your hours at the destination), the train is usually worth the premium. For budget trips where you don't mind the journey, coaches are a solid option.
Can I do a day trip from London to Paris?
Technically, yes, via Eurostar (2 hours 15 minutes to Gare du Nord). But by the time you factor in check-in, travel to and from St Pancras, and the same at the Paris end, you'll have about 6 to 7 hours in Paris. It's doable but rushed. If you have the budget, it's a brilliant day out. Return fares start from about £78 booked well in advance.
When is the best time of year for day trips from London?
Late spring (May to June) and early autumn (September to October). Summer (July to August) is warmer, but crowded and more expensive. Autumn is ideal for the Cotswolds and Blue Ridge-style countryside colour. Winter works for indoor-heavy trips like Oxford, Canterbury, or Warner Bros Studio, and off-peak train fares are lower.
Do I need to book train tickets in advance?
For the best price, yes. Advance tickets are typically 40 to 60% cheaper than walk-up fares. Book through Trainline or National Rail 1 to 2 weeks ahead. Anytime tickets (walk-up, flexible) are available on the day, but cost significantly more. If your plans might change, an off-peak return offers a middle ground: cheaper than anytime, no fixed train.
Exploring beyond London? Spend on a Grey virtual card with no markup, and grab a travel eSIM for maps and tickets on the go.
Disclaimer: This article is for informational purposes only. Train fares, attraction prices, and opening times change seasonally. All costs are estimates based on mid-2026 data. Verify current prices with National Rail and individual attractions before you travel. Grey isn't a bank. We're a licensed financial services provider offering multi-currency accounts.
When you start looking at day trips from Paris, Versailles seems to be everywhere. And it makes sense: it’s famous, easy to reach, and absolutely worth seeing. But it’s also one of the busiest and most tiring options you can choose. If you’d rather start somewhere a little quieter, I’d go with Giverny instead. Monet’s garden is smaller and much more relaxed, and you can be back in Paris by mid-afternoon with plenty of energy left to enjoy the evening.
The best day trips from Paris include Versailles, Giverny, Champagne (Reims or Epernay), Mont Saint-Michel, Loire Valley castles, Bruges, Normandy's D-Day beaches, Fontainebleau, and Chartres. Most are 1 to 2.5 hours by train, with return fares from EUR 15 to EUR 80.
In this guide, we'll walk you through all nine destinations with train times, return fares, what to see, and a realistic daily budget. Skip Mont Saint-Michel if you only have a short trip and hate early mornings. Skip Bruges if you want to stay in France. Skip Versailles if crowds make you miserable and you haven't booked timed entry. If you're also visiting London, see the best day trips from London.
Best day trips from Paris: Quick comparison
Here's every destination at a glance.
Versailles: Around 40 minutes by RER C, with a 2026 Metro-Train-RER fare of EUR 2.55 each way. A full-estate Passport costs EUR 25 in low season or EUR 35 in high season. Best for the palace, Hall of Mirrors and gardens.
Giverny: Around 45 to 60 minutes by train from Paris Saint-Lazare to Vernon-Giverny, followed by a shuttle, bus, taxi or bike ride to Giverny. SNCF currently shows Paris-Vernon fares from around EUR 10 each way, although prices vary. Best for Monet's house and gardens and art lovers.
Champagne (Reims): As little as 45 minutes by direct TGV from Paris. SNCF currently lists one-way fares from EUR 15, with prices varying by departure and booking date. Best for Champagne-house tours and Reims Cathedral.
Mont Saint-Michel: Roughly 3 to 4 hours from Paris depending on the train and connection, followed by the local transfer to Mont Saint-Michel. The abbey costs EUR 16 during the 2026 high season (1 April to 30 September) and EUR 13 from 1 October 2026 to 31 March 2027. Best for the medieval island and abbey, but it makes for a very long day trip.
Loire Valley: Travel time depends heavily on which castle you visit. Paris to Blois, a useful base for Chambord, takes as little as 1 hour 23 minutes, with SNCF currently showing fares from EUR 10 one way on selected departures. Reaching Chambord itself takes longer, so allow roughly 2 to 3 hours from Paris when connections are included. Best for castles, gardens and cycling.
Bruges: Allow roughly 2.5 to 3 hours each way from Paris, normally with a connection in Brussels. Also, I would remove “Thalys” from the original: Thalys was absorbed into the Eurostar brand in 2023. Best for canals, medieval architecture and chocolate.
D-Day Beaches: Paris to Bayeux takes around 2 hours 15 to 30 minutes by train, and you'll then need a tour, rental car or other transport to reach the landing beaches. Best for Second World War history.
Fontainebleau: Around 40 minutes by train from Paris Gare de Lyon to Fontainebleau-Avon, followed by a local bus to the château. Best for a quieter alternative to Versailles, with both the palace and Fontainebleau forest to explore.
Chartres: Around 1 hour to 1 hour 20 minutes by direct train from Paris Montparnasse, with fares currently available from EUR 10 one way on selected services. Entry to Chartres Cathedral is free. Best for its Gothic cathedral and stained glass.
All fares are estimates for return tickets booked a few days in advance. SNCF and Trainline typically offer the best prices. Walk-up fares can be 2 to 3 times higher on TGV and Thalys routes.
1. Versailles
Versailles is the most famous day trip from Paris for good reason. The Hall of Mirrors, the gardens (which are genuinely vast, not a courtyard with a fountain), and Marie Antoinette's estate are all extraordinary. But it draws 10 million visitors a year, so timing matters more here than at any other destination on this list.
Getting there: RER C from central Paris to Versailles Château Rive Gauche, about 40 minutes. Trains run every 15 to 20 minutes. Return fare: EUR 5.10 (EUR 2.55 each way).
Palace entry: EUR 25 in low season or EUR 35 in high season for the Passport ticket (book timed entry online to skip the worst of the queue, which can stretch to 90 minutes on summer mornings).
Don't miss: the Grand Trianon. Most visitors never leave the main palace, but the Trianon estate is where the royal family actually lived day-to-day, and it's far less crowded. The gardens are free to enter on most days, but on musical fountain show days (weekends, April to October), there's an additional EUR 10 charge. The fountain shows are worth it.
Budget: EUR 45 to 75 per person, including transport, entry, and lunch at one of the on-site cafes.
2. Giverny
Giverny is Claude Monet's house and garden, and it looks exactly like his paintings. The water lily pond, the Japanese bridge, the flower gardens bursting with colour. It's small enough to see in 2 to 3 hours and peaceful enough to make you forget you're 45 minutes from a city of 12 million.
Getting there: Train from Paris Saint-Lazare to Vernon (45 minutes), then shuttle bus to Giverny (15 minutes, EUR 10 return). Entry: EUR 13.
Don't miss: go in the morning. The garden opens at 9:30 am and the first hour is magical before the tour groups arrive. The house interior is worth seeing too: Monet's kitchen is painted bright yellow, and the dining room is bright blue. Both rooms feel like paintings themselves.
Season matters: the garden is open from April to November only. Peak bloom for water lilies is late June through August. May and September are less crowded, and the garden is still beautiful.
Budget: EUR 45-60 per person.
3. Champagne (Reims)
Reims is the capital of the Champagne region and home to most of the famous houses: Veuve Clicquot, Taittinger, Pommery, and Ruinart. A cellar tour with tasting costs EUR 30 to 60 per person. The Reims Cathedral, where French kings were crowned for 800 years, is free to enter and its Gothic facade is one of the finest in France.
Getting there: TGV from Paris Gare de l'Est to Reims, 45 minutes. Return fare: EUR 20 to 50 (book early for the best prices).
Don't miss: Taittinger's cellars are carved into 4th-century Roman chalk pits. The history is as impressive as the champagne. Ruinart (the oldest champagne house, founded in 1729) offers a more exclusive tour at a higher price (EUR 90+), but the cellars are UNESCO-listed, and the experience is exceptional.
Budget: EUR 70 to 130 per person (train, tour, and lunch). Book cellar tours in advance, especially for Veuve Clicquot and Taittinger, which sell out weeks ahead in summer.
4. Mont Saint-Michel
Mont Saint-Michel is the longest day trip on this list, but also the most unforgettable. A medieval abbey perched on a tidal island off the Normandy coast. It looks like a fantasy illustration, and the approach across the causeway is genuinely breathtaking. The abbey has been a pilgrimage site for over 1,000 years.
Getting there: TGV from Paris Montparnasse to Rennes (1h 30m) or Dol-de-Bretagne (2h 40m), then shuttle bus (1 hour). Return fare: From around EUR 50 return, depending on the train and connection. Abbey entry: EUR 16 in high season (April to September) or EUR 13 in low season.
Don't miss: arrive early or stay late. The island empties by 5 pm, and the evening light on the abbey is the view you'll remember. Walking the ramparts after the crowds leave is an entirely different experience from the midday crush.
Budget: EUR 80 to 120 per person. This is a full-day commitment: leave Paris by 7 am, return by 9 pm. Skip this if you only have 4 to 5 days in Paris. If you do go, it's worth every hour.
5. Loire Valley
The Loire Valley has over 300 castles. You can't see them all in a day, so pick two: Chambord (the largest and most dramatic, designed as a hunting lodge for Francis I) and Chenonceau (the most elegant, built across a river, run by women for most of its history). Both are accessible by train and local bus from Tours.
Getting there: TGV from Paris Montparnasse to Tours, 1 hour 15 minutes. Then, take the local bus or hire a bike. Return fare: EUR 25 to 50. Castle entry: Chenonceau EUR 19; Chambord EUR 31.
Don't miss: cycling between castles. The Loire à Velo route is flat, well-signposted, and passes through vineyards. Bike hire from about EUR 15 per day from shops near Tours station.
Budget: EUR 75 to 120 per person. If you're choosing just one castle, make it Chenonceau: it's more intimate, less crowded, and the river setting is unlike any other castle in France.
6. Bruges
Bruges is in Belgium, not France, but it's only 2.5 hours from Paris by Thalys train, and it's the most photogenic small city in northern Europe. Canals, cobblestones, chocolate shops, and medieval architecture. The entire old town is a UNESCO World Heritage Site.
Getting there: Thalys from Paris Gare du Nord to Bruges, about 2 hours and 30 minutes. Return fare: From around EUR 58 return for the Eurostar portion to Brussels, plus the connecting SNCB fare to Bruges. Book early for the lowest fares.
Don't miss: the Belfry tower (366 steps, EUR 14) for a panoramic view of the city. Then a canal boat tour (EUR 12) to see the buildings from the water. The chocolate shops along Katelijnestraat are better than the ones near the Markt.
Budget: EUR 90 to 140 per person. Belgium uses the euro, so no currency change needed from France. Belgian waffles (the real ones, not the tourist traps) cost EUR 2 to 4 from street vendors.
7. D-Day Beaches (Normandy)
The D-Day beaches are spread across 50 miles of the Normandy coastline. Without a car, the most practical approach is a guided tour from Bayeux (2 hours from Paris by train). Tours typically cover Omaha Beach, Pointe du Hoc, and the American Cemetery at Colleville-sur-Mer.
Getting there: Train from Paris Saint-Lazare to Bayeux, about 2 hours 15 minutes. Then join a guided tour (EUR 60 to 90 per person, half-day). Don't miss: the American Cemetery. 9,387 white crosses overlooking Omaha Beach. It's the most emotionally powerful war memorial in Western Europe, and the audio guide is excellent.
Budget: EUR 130 to 180 per person (train, tour, and meals). Book the tour in advance through Bayeux Shuttle or Overlord Tour. This is another full-day trip: 7 am departure, 9 pm return.
8. Fontainebleau
Fontainebleau is Versailles without the crowds. A royal palace surrounded by 60,000 acres of forest, 40 minutes from Paris. Napoleon called it "the true home of kings." The palace apartments are spectacular, and the forest is one of the best outdoor spaces near Paris for hiking, trail running, and renowned bouldering.
Getting there: Train from Gare de Lyon to Fontainebleau-Avon, 40 minutes. Then bus to the palace (10 minutes).
Return fare: EUR 5.10 by train (EUR 2.55 each way), plus local bus fares. Palace entry: EUR 14.
Don't miss: the forest. Bring walking shoes and spend the afternoon on the trails. The bouldering circuit at Gorge aux Chats is world-famous among climbers.
Budget: EUR 35 to 55 per person. Best combined with a picnic lunch in the forest: pick up bread, cheese, and wine from a Fontainebleau boulangerie before heading into the woods.
9. Chartres
Chartres is worth the trip for one thing: the cathedral. Chartres Cathedral is a UNESCO World Heritage Site with the finest medieval stained glass windows in the world. The blue glass ("Chartres blue") is a colour that hasn't been replicated since the 12th century. The old town around the cathedral is charming and quiet, with half-timbered houses along the Eure River.
Getting there: Train from Paris Montparnasse to Chartres, 1 hour 10 minutes.
Return fare: From EUR 20 return on selected trains. Cathedral entry: free (tower climb EUR 10).
Don't miss: the crypt tour (EUR 5.50). It's the largest crypt in France and includes sections from the 9th century. The labyrinth on the cathedral floor is usually uncovered on Fridays from Lent to October.
Budget: EUR 35 to 55 per person. This is the quickest and cheapest day trip on the list, ideal for a half-day if you want to spend the afternoon back in Paris.
Paying for your day trips from Paris
If you're visiting Paris from outside the eurozone, every card payment at a cafe, train station, or museum entrance carries a foreign transaction fee of 1.5 to 3%. On a EUR 100 day trip, that's EUR 1.50 to 3 in fees you didn't budget for. Across a week of day trips, it adds up to EUR 20 or more.
A Grey virtual Mastercard lets you spend on a Grey virtual card from your euro balance with no conversion markup. You can also hold euros in your Grey account before you travel, so you're not converting on every tap. For mobile data on the go, buy a travel eSIM for France and skip the roaming charges. Google Maps offline is essential for navigating small towns like Giverny and Bayeux, where cell coverage can be patchy.
Frequently asked questions about the best day trips from Paris
What is the best day trip from Paris?
Giverny, if you want beauty and tranquillity. Versailles if you want grandeur and history. Champagne (Reims) if you want wine and architecture. The best choice comes down to what kind of day you want: peaceful and artistic, grand and busy, or indulgent and cultural. For first-timers, Giverny is the most universally delightful.
How much do day trips from Paris cost?
Budget EUR 35 to 110 per person, depending on the destination. The cheapest day trip is Chartres (EUR 30 to 50). The most expensive is the D-Day beaches (EUR 110 to 160, including a guided tour). Train fares drop significantly when booked a few days in advance through SNCF or Trainline.
Can I do a day trip from Paris to London?
Yes, via Eurostar (2 hours 15 minutes to St Pancras). Return fares start from about EUR 78 booked well in advance. You'll get 5 to 6 hours in London if you catch an early morning train. It's a long day but a brilliant one. Book at least 2 weeks ahead for the best fares.
Is it worth visiting Versailles?
Yes, but book a timed entry ticket online and go early (the palace opens at 9 am). By 11 am, the Hall of Mirrors is shoulder-to-shoulder. The gardens are free except on musical fountain show days (EUR 10 extra, worth it). Allow a full day.
Do I need to speak French for day trips?
Not really. Train staff, museum employees, and restaurant servers in tourist areas generally speak enough English. Having a few French phrases goes a long way. Google Translate with a downloaded French language pack works offline for signs and menus.
Exploring France? Spend on a Grey virtual card with no markup, and grab a travel eSIM for maps and tickets on the go.
Disclaimer: This article is for informational purposes only. All costs and details are estimates based on mid-2026 data. Verify current information before making decisions. Grey isn't a bank. We're a licensed financial services provider offering multi-currency accounts.
When you're planning a trip to Italy, it's very easy to look at Rome and Florence and think, “What else can I fit in?” I get it. With places like Pompeii, Siena and Cinque Terre only a train ride away, adding a day trip is tempting. The mistake most visitors make, though, is trying to cram a day trip from Rome or Florence into an already packed itinerary. Give it a full day instead. Leave early, come back late, and actually have time to enjoy where you're going.
The best day trips from Rome include Pompeii (2.5 hours, ancient ruins), Orvieto (1 hour, hilltop cathedral), and Tivoli (45 minutes, Villa d'Este gardens). From Florence: Siena (1.5 hours, medieval piazza), Cinque Terre (2.5 hours, coastal villages), and Pisa (1 hour, and yes, the tower). Most are reachable by Trenitalia regional or high-speed trains.
Skip Pompeii from Rome if you only have 4 to 5 hours. The site needs at least 3 hours on the ground, and the 2.5-hour each-way travel time makes it a marathon, not a day trip. Go if you have 10+ hours. Otherwise, Tivoli or Orvieto gives you a richer experience with less travel stress.
This guide covers 7 destinations: 4 in Rome and 3 in Florence, with realistic budgets and timelines.
Day trips from Rome
1. Pompeii and Herculaneum. 2.5 hours from Roma Termini via Frecciarossa to Napoli Centrale, then Circumvesuviana local train to Pompeii Scavi. Return fare: EUR 60-90 (high-speed) or EUR 30-50 (regional; takes 3.5 hours). Entry: EUR 20 for Pompeii, EUR 16 for Herculaneum, EUR 36 combined.
Pompeii is enormous. The excavated area covers 170 acres and you'll walk 3 to 5 miles without trying. Hire an audio guide (from EUR 10) or book a guided tour (from EUR 30 to 50) to make sense of the layout. Without guidance, most visitors see the forum, wander aimlessly, and miss the best parts: the Villa of the Mysteries, the Garden of the Fugitives, and the amphitheatre.
Herculaneum (Ercolano) is smaller, better preserved, and less crowded. Where Pompeii was buried in ash, Herculaneum was encased in volcanic mud that preserved wooden furniture, food, and even fabric. If you can only visit one, Herculaneum offers more per hour. If you have a full day, do both: Herculaneum in the morning (2 hours), then train one stop to Pompeii for the afternoon (3 hours). Budget: EUR 100 to 160 per person for the day.
2. Orvieto. 1 hour from Roma Termini via regional train. Return fare: EUR 20 to 35. A medieval hilltop town perched on a volcanic rock plateau. The Duomo (cathedral) is one of Italy's finest Gothic buildings: the gold mosaic facade stops you in the street. Entry to the cathedral is free. The underground caves (Orvieto Underground, EUR 10) are former Etruscan tunnels and medieval wells carved into the volcanic rock beneath the town.
Orvieto is also one of Umbria's best wine towns. Orvieto Classico (a dry white wine) is the local speciality, and several enotecas in the old town offer tastings with local cheese and salumi for EUR 20 to 35 per person. The funicular from the train station to the old town (included in the train ticket) adds drama to the arrival. This is the most underrated day trip from Rome: beautiful, uncrowded, and easy to reach. Budget: EUR 50 to 75 per person.
3. Tivoli. 45 minutes from Roma Tiburtina via regional train. Return fare: EUR 10 to 20. Two UNESCO sites in one small town. Villa d'Este has the most spectacular Renaissance gardens in Italy: hundreds of fountains, waterfalls, and pools cascading down a hillside. Entry: EUR 17. Villa Adriana (Hadrian's Villa) is a vast 2nd-century Roman emperor's retreat with pools, temples, and underground passages. Entry: EUR 10-14.
Do both if you have a full day. Start with Villa Adriana (morning, 2 hours), then bus or taxi to Villa d'Este (afternoon, 1.5 hours). Villa d'Este is best in the afternoon light when the fountains catch the sun. Tivoli is the cheapest and most accessible day trip from Rome: under an hour, under EUR 70 total, and two World Heritage Sites. Budget: EUR 40 to 70 per person.
4. Ostia Antica. 45 minutes from the Roma Piramide via the Roma-Lido train. Return fare: EUR 5 (it's on the metro system). Entry: EUR 18. Rome's ancient port city, excavated like a smaller, quieter version of Pompeii, is only 30 km from central Rome. Preserved streets, mosaics, an amphitheatre, taverns, and apartment blocks give a vivid picture of everyday Roman life. Unlike Pompeii, it's rarely crowded. On a weekday morning, you might have entire streets to yourself.
Ostia Antica is the day trip for visitors who want to see Roman ruins without the Pompeii commitment. The site is compact enough to cover in 2 to 3 hours, and the train ride is essentially free by Italian standards. Combine it with a lunch at the beach town of Ostia Lido (15 minutes further on the same train line) for a ruins-and-beach day. Budget: EUR 30 to 45 per person.
Day trips from Florence
5. Siena. 1.5 hours from Firenze SMN via Trenitalia regional train or SITA bus (bus is slightly faster, EUR 8 each way). Return fare: EUR 16 to 30. Siena's Piazza del Campo is the most beautiful public square in Italy, a shell-shaped slope of red brick surrounded by medieval palaces. The Palio horse race runs here twice a year (July and August), but the square is magnetic even without the horses.
The Duomo (EUR 14-21 combined ticket for cathedral, library, crypt, and museum) rivals Florence's for artistry. The Piccolomini Library inside has frescoes so vivid they look freshly painted despite being 500+ years old. Siena's hilly streets, 17 medieval contrade (neighbourhood districts, each with its own flag, fountain, and fierce Palio rivalry), and gelato shops make it a full day without trying. Budget: EUR 50 to 75 per person.
6. Cinque Terre. 2.5 hours from Firenze SMN via train to La Spezia, then Cinque Terre Express to the five villages. Return fare: EUR 30 to 50 (depending on booking time and train type). Cinque Terre Card (EUR 15 for 1 day) covers unlimited village-to-village trains and trail access.
Five fishing villages (Monterosso, Vernazza, Corniglia, Manarola, Riomaggiore) cling to cliffs above the Mediterranean. Vernazza is the most photogenic. Monterosso has the best beach. Manarola has the most famous viewpoint. Take the train between villages (5 to 10 minutes each) and walk the coastal trail between at least two (Vernazza to Monterosso is the classic 2-hour hike, moderate difficulty, spectacular views).
This is a long day trip from Florence, but worth it for the scenery. Leave on the earliest train (6:30 am to 7:00 am) and return on the last (8:00 pm to 9:00 pm). Cinque Terre gets extremely crowded in summer, especially in July and August. Visit in May, June, September, or October for better weather and fewer crowds. Budget: EUR 60 to 90 per person.
7. Pisa. 1 hour from Firenze SMN via Trenitalia. Return fare: EUR 20 to 35. Yes, the Leaning Tower. No, it's not a scam: the tower genuinely leans at 3.97 degrees and genuinely impresses in person in a way that photos don't capture. Climbing it (EUR 20, timed entry, book online) is worthwhile for the views and the disorienting sensation of walking on tilted marble floors.
The Piazza dei Miracoli complex (tower, cathedral, baptistery, and Camposanto cemetery) is the main draw. The cathedral is free and often overlooked because everyone photographs the tower and then leaves. The baptistery's acoustics are famous: every 30 minutes, a guard demonstrates the echo by singing a few notes. The Camposanto (EUR 7) has Roman sarcophagi and medieval frescoes.
Pisa doesn't need a full day. 3 to 4 hours covers the piazza comfortably. Combine with a morning in Lucca (30 minutes from Pisa, a walled town with Renaissance ramparts you can walk or cycle on) for a full day. Budget: EUR 45 to 65 per person for Pisa alone; EUR 65 to 85 with Lucca.
Paying for day trips in Italy
Italy is more cash-dependent than northern Europe. Small restaurants, cafes, and gelaterias often prefer cash. Train ticket machines accept cards, but some regional buses are cash-only. ATMs (bancomat) are everywhere in towns but have withdrawal fees of EUR 2 to 5 for foreign cards.
If you're visiting Italy from outside the eurozone, every card payment carries a foreign transaction fee from your bank (1.5 to 3%). Grey's virtual card lets you spend from your euro balance with no conversion markup. Hold euros in your Grey account before you travel so every tap comes from your pre-loaded balance. For data on the go, a travel eSIM for Italy keeps you connected for maps, Trenitalia schedules, and restaurant reviews without roaming charges.
Trenitalia tip: regional trains (Regionale, Regionale Veloce) don't require seat reservations and are significantly cheaper than high-speed Frecciarossa/Frecciargento trains. For day trips under 2 hours, regional trains are fine. From Rome to Naples (Pompeii), the Frecciarossa is worth the extra cost because it cuts travel time in half.
Exploring Italy? Spend on a Grey virtual card with no conversion markup and grab a travel eSIM for maps and tickets.
Frequently asked questions about day trips from Rome and Florence
What is the best day trip from Rome?
Orvieto for an easy, beautiful day (1 hour, hilltop town, cathedral, wine). Tivoli for two UNESCO sites in 45 minutes. Pompeii for ancient history, but only if you have 10+ hours for the full trip, including 5 hours of travel. Ostia Antica if you want Roman ruins without leaving the metro system.
What is the best day trip from Florence?
Siena for medieval charm and the most beautiful piazza in Italy (1.5 hours). Pisa for the tower and cathedral complex (1 hour, half-day). Cinque Terre for coastal scenery and hiking (2.5 hours, full day). Siena is the most rewarding for a full day. Pisa is the easiest for a half-day side trip.
Can I do Cinque Terre as a day trip from Florence?
Yes, but it's a long day: 2.5 hours each way, plus 5 to 6 hours in the villages. Leave Florence on the earliest train (around 6:30 am) and return on one of the last (around 8 to 9 pm). It's doable and worth it, but tiring. An overnight in one of the villages is more relaxed if your schedule allows.
Is the Leaning Tower of Pisa worth visiting?
Yes. Photos don't capture the scale or the lean as well as seeing it in person. Climbing the tower (EUR 20, timed entry) is worthwhile for the views and the disorienting walk up tilted marble stairs. The adjacent cathedral (free) is often overlooked and equally impressive. Allow 3 to 4 hours for the full piazza.
Do trains in Italy accept credit cards?
Ticket machines at major stations accept cards (Visa, Mastercard). Trenitalia and Italo websites accept cards for online booking. Regional buses and some smaller stations may be cash-only. ATMs are widely available. Carry EUR 50 to 100 in cash as backup for each day trip.
Disclaimer: This article is for informational purposes only. All costs and details are estimates based on mid-2026 data. Verify current information before making decisions. Grey isn't a bank. We're a licensed financial services provider offering multi-currency accounts.
The Philippines receives more remittances from the United States than from any other country. Over four million Filipino Americans send money home regularly to cover everything from monthly household expenses and school fees to hospital bills and property payments. The Bangko Sentral ng Pilipinas (BSP) reported record remittance inflows in recent years, with the US remaining the largest source.
The good news is that sending money from the US to the Philippines has become significantly cheaper and faster than it was even five years ago. The bad news is that the cheapest option depends on how your recipient wants to receive: bank transfer, mobile wallet (GCash, Maya), or cash pickup. This guide covers the fees, speed, and delivery methods available in 2026, so you can find the right option for your specific situation. If you also send to other countries, see our broader.
What it costs to send money from the US to the Philippines with Grey
Here’s what the total fees look like at different transfer amounts:
Transfer amount
Conversion fee (1%)
Payout fee
Total fees
$500
$5.00
$0.85
$5.85
$1,000
$10.00
$0.85
$10.85
$2,000
$20.00
$0.85
$20.85
For example, sending $500 costs $5 to convert USD to PHP, plus the $0.85 payout fee, bringing the total fees to $5.85.
You can send PHP by bank transfer or mobile money. Grey supports wallets including GCash and Maya, and both bank and mobile money transfers are typically completed instantly or up to 1 business day. Processing can occasionally take longer depending on the recipient's bank or network conditions.
Bank transfer or mobile wallet: how your recipient gets the money
Bank transfer
Grey delivers PHP to all major Philippine banks. Your recipient needs a peso bank account, and you need their full name (as it appears on the account), the bank name, and the account number. The funds arrive as a standard deposit.
Bank transfer is the right choice for larger payments: hospital bills, tuition fees, property transactions, or any amount where the recipient needs the funds in their bank account. There are no receiving limits on the bank side beyond whatever the bank itself imposes.
Mobile wallets: GCash and Maya
If your recipient uses GCash or Maya, you can send directly to their mobile wallet using their registered name and mobile number. Mobile wallet delivery is often faster than bank transfer for smaller amounts and more convenient for recipients who do not use a bank account regularly.
Mobile wallets typically have per-transaction and monthly receiving limits set by the wallet provider. For larger medical bills or tuition payments, a bank transfer is usually the better option. For regular household support, groceries, or smaller medical expenses, a mobile wallet is practical and fast.
What Filipino Americans are sending money home for
Understanding the common use cases helps you choose the right delivery method and timing.
Monthly family support. Regular transfers to parents, siblings, or extended family can help cover household expenses, groceries, utilities, and daily needs. Grey charges a 1% conversion fee when converting USD to PHP, plus a $0.85 payout fee. Before sending, you can review the fees and the final PHP amount your recipient will receive.
Medical bills. Philippine hospital bills are typically paid to the hospital's bank account. Ask the hospital for their full business name, bank name, and account number. Send the exact PHP amount of the bill so the hospital receives the full payment without any shortfall from fees. Grey shows the exact amount your recipient will receive before you confirm, so you can match it to the billing statement.
Education and tuition. Philippine universities and schools accept bank transfers. Tuition payments tend to be large and time-sensitive (with fixed due dates). Send via bank transfer and keep the transaction receipt as proof of payment.
Property and investments. Buying property, paying mortgage instalments, or investing in the Philippines from the US can involve larger transfers. For these payments, it helps to check the exchange rate, fees, and recipient details carefully before confirming the transfer.
Emergency expenses. Typhoons, medical emergencies, or unexpected costs. Speed matters. Check whether mobile wallet delivery is instant and whether it fits within the amount limits. For larger emergency amounts, a bank transfer with confirmed delivery timing is more reliable.
How to send money from the US to the Philippines with Grey
1. Open your Grey account. Download the Grey app, sign up, and verify your identity. US residents need a government-issued ID. Grey is licensed by FinCEN as a Money Services Business.
2. Fund your account. Transfer USD from your US bank account into your Grey wallet. You can fund via ACH (free, arrives same day) or wire transfer.
3. Choose your destination. Tap Send, select PHP (Philippine Peso), and choose bank transfer or mobile wallet.
4. Enter your recipient's details. For bank transfer: their full name, bank name, and account number. For mobile wallet: their registered name and mobile number. Grey shows the exchange rate, conversion fee, payout fee, and the exact PHP amount your recipient will receive before you confirm.
5. Confirm and send. Review the summary and confirm with your PIN. Your recipient does not need a Grey account. The funds arrive as a standard deposit in their bank account or mobile wallet.
Three ways to save on US-to-Philippines transfers
Check the total cost before you send. Grey charges a 1% conversion fee when converting USD to PHP, plus a $0.85 payout fee. Before confirming your transfer, you can review the exchange rate, fees, and exact PHP amount your recipient will receive, so there are no surprises after you send.
Use ACH to fund your Grey account. ACH transfers from your US bank to your Grey wallet are free and arrive the same day. Wire transfers cost $25 (SWIFT) and are unnecessary for most users. Fund via ACH unless you need to move a very large sum urgently.
Send the exact PHP amount for bills. When paying a hospital bill, tuition fee, or any fixed-amount obligation, enter the amount in PHP rather than USD. Grey will calculate exactly how much USD is needed to deliver that PHP amount after all fees. This ensures the recipient receives the full bill amount with no shortfall.
Frequently asked questions about sending money from the US to the Philippines
What is the cheapest way to send money from the US to the Philippines?
The cheapest option depends on the amount, exchange rate, fees, and delivery method. With Grey, USD-to-PHP conversions have a 1% conversion fee, plus a $0.85 payout fee. Before confirming, you can see the applicable fees and final PHP amount your recipient will receive, making it easier to compare the total cost with other transfer options.
How long does it take to send money from the US to the Philippines?
Bank transfers to the Philippines typically arrive within 1 to 2 business days. Mobile wallet transfers, including GCash and Maya, may arrive faster. Actual delivery times can vary depending on the recipient’s bank or mobile wallet provider and network conditions.
Can I send money from the US to GCash in the Philippines?
Yes. Grey supports delivery to GCash using the recipient's registered name and mobile number. Per-transaction and monthly limits may apply based on GCash's own policies." If no, replace with: "Grey currently delivers PHP via bank transfer to all major Philippine banks.
How do I pay a hospital bill in the Philippines from the US?
Ask the hospital for their full business name, bank name, and bank account number. Send the exact PHP amount of the bill through Grey, using the hospital's bank details as the recipient. Grey shows the exact PHP amount your recipient will receive before you confirm, so you can match it to the billing statement. Keep the transaction receipt as proof of payment.
Do I need to pay tax on money sent to the Philippines from the US?
Personal remittances sent from the US to the Philippines are generally not taxable for the sender. The US does not tax outgoing personal transfers. However, if you send more than $16,000 to a single individual in a calendar year, you may need to file a gift tax return (IRS Form 709), though no tax is typically owed until you exceed the lifetime exemption. Consult a tax professional for your specific situation.
What exchange rate does Grey use for USD to PHP?
The exchange rate available for USD to PHP is shown in the Grey app before you confirm the conversion. Grey charges a 1% conversion fee, and you can review the rate, applicable fees, and final PHP amount before completing the transaction.
Exchange rates on Grey are variable and include a margin over the mid-market rate. Always review the rate before confirming a conversion. Grey is a financial technology company, not a bank. Banking services are provided by licensed banking partners. This article is general information, not financial or tax advice. Consult a qualified professional for tax questions.
Someone asks for your "routing number." Someone else asks for your "SWIFT code." They sound like they might be the same thing, and the confusion costs people real money. Use the wrong code and your transfer fails, you get charged a fee for the failed attempt, and the money sits in limbo for days while the banks sort it out.
A routing number is a 9-digit code that identifies a US bank for domestic transfers such as ACH and direct deposit. A SWIFT code (also called a BIC) identifies a bank internationally for cross-border transfers. Use a routing number for US payments and a SWIFT code for international payments. Some transactions, like receiving a wire from abroad into a US bank, require both.
The distinction is simple once you see it. This guide covers both codes, shows you exactly when to use each, and explains what to do when someone abroad needs to pay you.
What is a routing number?
A routing number is a 9-digit code assigned by the American Bankers Association (ABA) to every US bank and credit union. It identifies which financial institution holds your account. The system has been in use since 1910, originally designed to process paper cheques. Today it's used for every domestic electronic transfer.
Format: always exactly 9 digits, always numeric. No letters. Example: Wells Fargo California is 121042882. JPMorgan Chase New York is 021000021. Large banks have different routing numbers for different states because they acquired regional banks over the decades and kept the existing infrastructure.
When you need it: setting up direct deposit with your employer, paying bills online, transferring money between US bank accounts (ACH), receiving tax refunds, linking your bank to payment apps (Venmo, Cash App, PayPal). Essentially, any time money moves domestically within the US banking system, a routing number is involved.
Where to find it: bottom left of a paper cheque (first 9 digits in MICR font), in your bank's mobile app under Account Details, on your bank's website, or by calling customer service. For a complete state-by-state list for one of the largest US banks, see "Find a Bank Routing Number".
Key point: routing numbers only work within the United States. They have no function in international transfers. If someone outside the US asks for your routing number, they probably need your SWIFT code instead (or both, if they're sending a wire to your US bank account).
What is a SWIFT/BIC code?
A SWIFT code (also called a BIC, Bank Identifier Code) is an 8 or 11-character alphanumeric code that identifies a specific bank on the global SWIFT network. SWIFT stands for Society for Worldwide Interbank Financial Telecommunication. The network connects over 11,000 financial institutions across 200+ countries and handles the messaging layer for most international wire transfers.
Format: 8 or 11 characters, mixing letters and numbers. The structure tells you exactly what bank, in what country, at what location:
Characters 1 to 4: bank code (letters). Characters 5 to 6: country code (letters). Characters 7 to 8: location code (letters or numbers). Characters 9 to 11 (optional): branch code.
Example: WFBIUS6S is Wells Fargo. WF = Wells Fargo bank code, BI = part of the bank identifier, US = United States, 6S = San Francisco location. CHASUS33 is JPMorgan Chase: CHAS = Chase, US = United States, 33 = New York.
When you need it: sending money from the US to another country, receiving money from someone abroad, making international wire transfers, receiving freelance payments from overseas clients. Any time money crosses a national border via the banking system, a SWIFT code is involved.
Where to find it: your bank's website (usually in the wire transfer or international payments section), on your bank statement, by calling customer service, or by searching the official SWIFT directory at swift.com. Not every bank has a SWIFT code. Smaller credit unions and online-only banks may not participate in the SWIFT network, which can complicate the receipt of international payments.
SWIFT code vs routing number: Side by side
Here's the difference between SWIFT codes and routing numbers at a glance:
Feature
Routing Number
SWIFT/BIC Code
Purpose
Identifies US banks for domestic transfers
Identifies banks globally for international transfers
Format
9 digits (numeric only)
8 or 11 characters (letters + numbers)
Scope
United States only
200+ countries worldwide
Issued by
American Bankers Association (since 1910)
SWIFT network (since 1973)
Used for
ACH, direct deposit, bill pay, domestic wires
International wire transfers, cross-border payments
Example
121042882 (Wells Fargo CA)
WFBIUS6S (Wells Fargo)
Where to find
Cheque, bank app, bank website
Bank website, statements, swift.com
International use
None
Primary code for cross-border banking
The simplest way to remember: routing number = US domestic, SWIFT code = international. If money stays inside the US, you need a routing number. If money crosses a border, you need a SWIFT code. If money is sent from abroad to a US bank account, the sender usually needs both your SWIFT code (to identify your bank internationally) and your account number (to identify your specific account).
Which do you need for your transfer?
The answer depends entirely on where the money is going and where it's coming from.
Sending money within the US
You need the recipient's routing number and account number. This covers ACH transfers, domestic wire transfers, direct deposit setup, online bill payments, and linking bank accounts to apps. No SWIFT code needed. For domestic-only tasks like filling out payment forms, see how to fill out a money order.
Sending money from the US to another country
You need the recipient's SWIFT code (or BIC) and their account number (or IBAN for European recipients). Your bank initiates the transfer through the SWIFT network. You'll pay an outgoing wire fee ($25 to $50 at most US banks). If something goes wrong, see how to cancel a wire transfer. You can also send money internationally with Grey, which bypasses SWIFT entirely and uses its own transfer rails at lower cost.
Receiving money from abroad into a US bank account
The sender needs your bank's SWIFT code plus your account number. Some sending banks also ask for your bank's routing number as a secondary reference. Provide both to avoid delays. Your bank may charge an incoming wire fee ($10 to $20).
Receiving money from abroad without a US bank
If you're outside the US and need to receive USD, GBP, or EUR from international clients, you don't need a US bank's SWIFT code or routing number. Grey provides account details for each currency: a US routing number + account number for USD, a UK sort code + account number for GBP, and an IBAN for EUR. Your clients send the funds to those details through their normal banking channels, and the money arrives in your Grey account. No SWIFT fees, no intermediary deductions.
Receiving international payments with Grey
The SWIFT code vs routing number question usually comes up when someone abroad is trying to pay you. The traditional answer is: give them your SWIFT code and account number, wait 1 to 5 days, and accept whatever intermediary fees get deducted along the way.
Grey simplifies this. When you open a Grey account, you receive real account details for each currency you hold:
USD: ACH routing number + account number. Clients in the US pay you via ACH (free or near-free for them, no SWIFT involved).
GBP: UK sort code + account number. Clients in the UK pay you via Faster Payments (arrives in minutes).
EUR: IBAN. Clients in Europe pay you via SEPA (funds arrive within 1 business day).
Each payment arrives through local payment rails, not SWIFT. That means no intermediary bank deductions, no $15 incoming wire fees, and no 3- to 5-day wait. Your clients don't need to know your SWIFT code because they're sending payments through their country's domestic payment system. The money lands in your Grey account in the currency you chose, and you decide when to convert. You can also hold what you receive in multiple currencies.
No. A SWIFT code identifies a bank internationally for cross-border transfers. A routing number identifies a US bank for domestic transfers. They serve similar purposes (identifying the right bank) but operate in different systems. SWIFT codes are 8 or 11 alphanumeric characters long and are used across 200+ countries. Routing numbers are 9 digits long and are used only within the US.
Do I need both a SWIFT code and a routing number?
It depends on the transfer. For US domestic transfers, you only need a routing number. For international transfers from the US, you only need the recipient's SWIFT code. To receive international wires into a US bank account, the sender usually needs your SWIFT code and account number. Some sending banks also request the routing number as a secondary reference. Provide both to avoid delays.
Where do I find my SWIFT code?
Check your bank's website (usually in the international transfers or wire transfer section), your bank statement, your mobile banking app, or search the official SWIFT directory at swift.com. You can also call your bank's customer service. Note that smaller credit unions and some online-only banks may not have a SWIFT code.
Can I use a SWIFT code for domestic US transfers?
No. SWIFT codes are not used for domestic US transactions. For any transfer within the US, including ACH, direct deposit, bill payments, and domestic wires, you need the bank's routing number and the recipient's account number.
What happens if I use the wrong code?
The transfer will typically fail and the money will be returned to the sender, but this can take days. Some banks charge a fee for failed transfers ($10 to $25). In rare cases, the money could be routed to the wrong account. Always double-check the code before confirming any transfer. Verify the SWIFT code or routing number directly with the recipient rather than relying on third-party lookup sites.
Can I receive international payments without a SWIFT code?
Yes. Services like Grey provide local account details (US routing number, UK sort code, EUR IBAN) that your international clients can use to pay via their own domestic payment systems. The payment never touches the SWIFT network, so there are no SWIFT fees or intermediary deductions. This is the simplest way to receive international payments without dealing with SWIFT codes.
Receiving money from abroad? Open a Grey account and share your details to get paid, without the guesswork.
Disclaimer: This article is for informational purposes only. SWIFT codes and routing numbers should be verified directly with your bank before use. Grey isn't a bank. We're a licensed financial services provider offering multi-currency accounts.
Most AI prompt generators are just forms. Pick a tone, pick a length, click generate, and out comes a prompt that's marginally better than what a beginner would write on their own. A few, though, do something genuinely useful: they restructure how the AI receives instructions, add constraints that prevent generic output, and let teams reuse tested prompts across dozens of projects. The gap between the best prompt generators and the worst is enormous, and most listicles rank them without ever testing the difference in output quality.
AI prompt generators help you write and refine prompts to get better results from AI tools. The best offer templates, tone controls, and prompt libraries, with free and paid tiers. Popular options include prompt-builder tools built into major AI apps and dedicated prompt marketplaces. Choose one that fits your tasks.
This guide covers 7 tools, what each actually does (not marketing claims), and which ones are worth paying for.
What is an AI prompt generator?
An AI prompt generator takes a simple idea ("write an email to my landlord about a broken pipe") and expands it into a detailed prompt that tells the AI exactly what to produce: the tone, the structure, the length, what to include, what to leave out. Think of it as an automated prompt engineer.
Some tools do this by applying prompt templates. Others optimise your existing prompt by adding structure and specificity. A few are full-featured platforms with prompt libraries, version history, and team collaboration. The simplest are just form-based interfaces that plug your inputs into a pre-written prompt skeleton.
Who needs one? Anyone who uses AI regularly and wants consistent, high-quality results without spending 10 minutes crafting each prompt manually. Freelancers producing client content, marketers running campaigns through AI tools, developers generating code, and teams building AI-powered workflows all benefit. If you write the same types of prompts repeatedly, a generator can save time and improve consistency.
Who doesn't? If you use ChatGPT once a week for casual questions, a prompt generator is overkill. You'll get more value from learning a few prompting principles than from adding another tool to your stack.
The 7 best AI prompt generators compared
Tool
Best for
Free tier
Price (paid)
PromptPerfect
Optimising prompts across multiple AI models
Yes (limited)
From $16.67/mo
ChatGPT (built-in)
General-purpose prompt refinement
Yes (GPT-4o free tier)
$20/mo (Plus)
Claude Projects
Reusable prompt systems with context
Yes (free tier)
$20/mo (Pro)
Taskade
Team workflows with prompt automation
Yes (limited)
From $8/mo
Jotform AI
Form-based prompt building for non-technical users
Yes
From $34/mo
AIPRM
Chrome extension with prompt library for ChatGPT
Yes (limited)
From $9/mo
PromptBase
Marketplace for buying and selling tested prompts
Browse free
Per-prompt ($1.99 to $9.99)
1. PromptPerfect
PromptPerfect takes a prompt you've written and optimises it for a specific AI model. You paste in "write a product description for a water bottle," select your target model (GPT-4, Claude, Midjourney, Stable Diffusion), and PromptPerfect rewrites the prompt with added specificity, formatting instructions, and model-specific syntax. It's not a prompt generator from scratch. It's a prompt improver. Best for people who already write their own prompts but want them tuned for maximum output quality. Free tier is limited to a few optimisations per day.
2. ChatGPT (Built-In Prompt Refinement)
You don't always need a separate tool. ChatGPT itself can generate and refine prompts. Type "help me write a better prompt for [task]" and it'll restructure your request with role assignments, step-by-step instructions, and output formatting. The custom instructions feature lets you set default behaviour (tone, audience, format) so every conversation starts from a better baseline. GPT-4o is available on the free tier. If you're already paying for ChatGPT Plus ($20/mo), this is the zero-friction option.
3. Claude Projects
Anthropic's Claude lets you create Projects: reusable workspaces with uploaded reference documents and custom instructions that persist across conversations. This isn't a prompt generator in the traditional sense. It's a system for building reusable prompt environments. Upload your brand guidelines, your writing samples, and your formatting rules into a Project, and every conversation inside it uses those as context. Best for freelancers and teams who need consistent output across dozens of similar tasks.
4. Taskade
Taskade combines AI prompts with project management. You create AI-powered workflows where each step runs a prompt automatically. For example: step 1 generates a blog outline, step 2 writes the draft, and step 3 creates social media posts from the draft. Each step uses a pre-built or custom prompt. It's more of a workflow automation tool than a standalone prompt generator, but the prompt-building interface is solid. Best for teams that want to chain multiple AI steps into repeatable processes. Free tier covers basic usage. Paid starts at $8/mo.
5. Jotform AI
Jotform built an AI agent system that generates prompts through a form-like interface. You fill in fields (topic, audience, tone, length, format) and it constructs a prompt from your inputs. The output is visible and editable before you run it. It's the most accessible option for people who find writing prompts intimidating. No prompt-engineering knowledge required. The free tier is generous. Paid plans start at $34/mo but include Jotform's full form-building suite, not just the AI features.
6. AIPRM
AIPRM is a Chrome extension that adds a prompt library directly to the ChatGPT interface. It gives you thousands of community-contributed prompt templates organised by category: marketing, coding, writing, SEO, HR. Click a template, fill in the variables, and it inserts the prompt into ChatGPT. The value is the library, not the technology. You're browsing other people's tested prompts rather than writing your own. Quality varies. The best templates are excellent. The worst are no better than what you'd write yourself. The free tier gives limited access. Premium starts at $9/mo.
7. PromptBase
PromptBase is a marketplace, not a generator. People sell tested prompts for $1.99 to $9.99 each. Categories cover GPT, DALL-E, Midjourney, Stable Diffusion, and Claude. The idea is that someone else has already spent hours refining a prompt for a specific use case (say, generating real estate listing photos in Midjourney), and you buy the result instead of building it from scratch. Best for image generation prompts where the right phrasing makes a dramatic difference in output quality. Browsing is free. You pay per prompt.
Free vs paid: What you get
Free tiers are enough for most individual users. ChatGPT's built-in prompt refinement costs nothing. AIPRM's free library covers the most popular categories. PromptPerfect gives you a few optimisations per day for free. If you write fewer than 10 prompts a week, you probably don't need to pay.
Paid plans add three things: volume (more optimisations, more templates, more storage), team features (shared prompt libraries, role-based access, workflow automation), and model support (PromptPerfect's paid plans cover Midjourney, Stable Diffusion, and other image models that the free tier limits).
When to pay: if you're a freelancer or agency producing AI-assisted content daily, the time savings from a paid plan justify the cost. If AI prompting is part of your job, $9 to $20 per month for a prompt tool is a reasonable productivity investment. If you're using AI casually, stick with free.
How to choose the right one
Start with what you're actually doing:
Writing content (blogs, emails, copy)? ChatGPT's built-in features or Claude Projects. Both are free or included in your existing subscription. Build custom instructions once and reuse them across conversations.
Generating images (Midjourney, DALL-E, Stable Diffusion)? PromptPerfect or PromptBase. Image prompts are highly model-specific. The right phrasing can be the difference between a professional result and a blurry mess. Either optimise your own prompts (PromptPerfect) or buy proven ones (PromptBase).
Running team workflows? Taskade. Chain multiple prompts into automated sequences that your whole team can run. The project management layer means prompts live alongside tasks, not in a separate tool.
Just starting out? Jotform AI or AIPRM. Jotform's form interface removes the blank-page problem. AIPRM's template library lets you learn by example. Both are good training wheels that you'll probably outgrow within a few months.
Don't stack multiple prompt tools. Pick one that fits your primary use case and learn it well. A prompt generator is only useful if you use it consistently enough to build muscle memory around how it structures prompts.
Paying for AI tools and getting paid for AI work
Most AI tools are billed in USD. ChatGPT Plus is $20/mo. Midjourney is $10 to $60/mo. Claude Pro is $20/mo. If you're outside the US, your bank's foreign transaction fee (1.5 to 3%) adds a hidden cost to every subscription payment. Over a year, that's $15 to $40 in fees on a single $20/mo subscription.
Pay for AI tools billed in USD with a Grey virtual card. Your subscriptions pull from your USD balance with no per-transaction conversion.
On the earning side: prompt engineering, AI content creation, and AI consulting are growing freelance categories. If you're doing AI work for international clients, you need a way to receive payments in their currency. Get paid for AI work from anywhere with Grey's multi-currency accounts: a US routing number for USD clients, a UK sort code for GBP clients, an IBAN for European clients.
Working with AI tools? Pay for USD-billed subscriptions on a Grey virtual card and get paid by clients anywhere.
Frequently asked questions about AI prompt generators
What is the best AI prompt generator?
It depends on what you're doing. For optimising text prompts across multiple AI models, PromptPerfect is the most focused tool. For general prompt refinement without a separate app, ChatGPT's built-in features are free and effective. For reusable prompt systems with uploaded context, Claude Projects is the strongest option. For team workflows, Taskade chains multiple prompts into automated sequences.
Are there free AI prompt generators?
Yes. ChatGPT (free tier with GPT-4o) can refine prompts in conversation. AIPRM offers a free Chrome extension with limited access to community prompt templates. Jotform AI has a generous free tier with form-based prompt building. PromptPerfect offers a few free optimisations per day. For most individual users, free tiers are sufficient.
Do I need an AI prompt generator?
If you use AI tools daily for work and want consistent results, a prompt generator saves time and improves output quality. If you use AI casually for occasional questions, you don't need one. Learning a few prompting principles (be specific, assign a role, define the output format) will get you most of the way without adding another tool.
Can ChatGPT generate prompts for other AI tools?
Yes. You can ask ChatGPT to write prompts for Midjourney, Stable Diffusion, Claude, or any other AI tool. Describe what you want the output to look like and which tool you're using, and ChatGPT will format the prompt with the right syntax and keywords. This is free and works on the basic tier.
What is the difference between a prompt generator and a prompt marketplace?
A prompt generator creates or optimises prompts from your inputs (PromptPerfect, Taskade, Jotform). A prompt marketplace sells pre-made prompts that other people have tested and refined (PromptBase). Generators are for people who want custom prompts. Marketplaces are for people who want proven prompts without the trial-and-error.
How much do AI prompt generators cost?
Free tiers cover basic individual use. Paid plans range from $8/mo (Taskade) to $34/mo (Jotform, which includes the full form suite). PromptPerfect Pro is $16.67/mo. AIPRM Premium is $9/mo. PromptBase charges per prompt ($1.99 to $9.99) with no subscription. Most freelancers can stay under $20/mo for prompt tooling.
Disclaimer: Pricing and features are accurate as of the date of writing and may change. Grey isn't a bank. We're a licensed financial services provider offering multi-currency accounts and virtual cards.
A payment is ready to go, but the form asks for one more detail: your Wells Fargo routing number. You know your account number and which Wells Fargo branch you use, but finding the right nine-digit number can be less obvious than expected. And getting it wrong can delay the payment or send you back to the form to start again.
Wells Fargo uses different routing numbers depending on the state where the account was opened. The most commonly used numbers are 121042882 for California ACH, 082900736 for the South, and 121000248 for domestic wire transfers across all states. Always confirm your specific routing number in the Wells Fargo app or by calling the number on the back of your card.
Knowing which Wells Fargo routing number to use matters when setting up direct deposits, receiving ACH payments, or sending a domestic wire. The right number depends on the transaction, so checking before submitting your payment details can help you avoid unnecessary delays.
The Wells Fargo routing number you need depends on the state where your account was opened. While some states share the same number, others have their own ACH routing number. The table below lists the routing numbers provided for each state, including the specific number shown for El Paso, Texas. Before using any of these numbers for a payment or direct deposit, check your Wells Fargo account details to confirm that you have the correct routing number for your transaction.
State
ACH Routing Number
State
ACH Routing Number
Alabama
062000080
Montana
092905278
Alaska
125200057
Nebraska
104000058
Arizona
122105278
Nevada
321270742
Arkansas
111900659
New Hampshire
121042882
California
121042882
New Jersey
021200025
Colorado
102000076
New Mexico
107002192
Connecticut
021101108
New York
026012881
Delaware
031100869
North Carolina
053000219
Florida
063107513
North Dakota
091300010
Georgia
061000227
Ohio
041215537
Hawaii
121042882
Oklahoma
121042882
Idaho
124103799
Oregon
123006800
Illinois
071101307
Pennsylvania
031000503
Indiana
074900275
Rhode Island
121042882
Iowa
073000228
South Carolina
053207766
Kansas
101089292
South Dakota
091400046
Kentucky
121042882
Tennessee
064003768
Louisiana
121042882
Texas
111900659 (El Paso: 112000066)
Maine
121042882
Utah
124002971
Maryland
055003201
Vermont
121042882
Massachusetts
121042882
Virginia
051400549
Michigan
091101455
Washington
125008547
Minnesota
091000019
West Virginia
121042882
Mississippi
062203751
Wisconsin
075911988
Missouri
113105449
Wyoming
102301092
Wells Fargo wire transfer Routing number
When you send a domestic wire transfer from your Wells Fargo account, you use a single nationwide routing number rather than a state-specific number. The routing number for domestic wires is 121000248, so you do not need to search for a different number based on where your account was opened.
For an international inbound wire, you will need the Wells Fargo SWIFT code instead. The primary SWIFT code is WFBNDDNYXXXX, which helps identify Wells Fargo when money is being sent internationally. Understanding the difference between a SWIFT code and a routing number becomes important here because each one identifies your bank for a different type of payment.
The same distinction helps when looking at ACH vs wire transfers. ACH payments move through delayed electronic batches using state-specific regional clearinghouses, while wire transfers are processed individually in real time. When you send a wire, the transaction is settled directly through the Federal Reserve system rather than waiting for an ACH batch. That difference in processing is why the correct routing or SWIFT details matter when sending money to your Wells Fargo account.
Where to find your Wells Fargo routing number
Finding your Wells Fargo routing number is usually straightforward, and the quickest method depends on whether you have access to the mobile app, a cheque or online banking.
Check the Wells Fargo mobile app
Open the Wells Fargo app and sign in to your account. Select the account you need, then look for Account Details. Your routing number should appear alongside your account number and other account information.
Look at a Wells Fargo cheque
A Wells Fargo cheque also shows the routing number. Turn the cheque over to the bottom-left section of the front. The first nine-digit number in the sequence is the routing number, followed by your account number and cheque number.
Find it through Wells Fargo online banking
Sign in through the Wells Fargo website and select the relevant account. Open the account details or information section to view the routing number associated with that account. Make sure you are checking the correct account before sharing the details.
Need a USD account without Wells Fargo?
Getting paid by a US client can become frustrating when the payment requires US banking details that you do not have. Opening a traditional US bank account may not be practical either, especially when you live abroad and do not have a US residential address or the documents a local bank expects.
Grey gives eligible users access to USD account details that can be used to receive supported ACH and wire transfers, without requiring a US residential address. So when a client or employer asks for US banking details, you can provide the relevant information without opening a traditional Wells Fargo account.
Once your account is approved, the USD account details are available digitally, giving you a simpler way to receive eligible payments and manage the money online. Sign up for Grey or download the app to get started.
Frequently asked questions about Wells Fargo routing numbers
What is Wells Fargo's routing number for direct deposit?
The routing number for Wells Fargo direct deposit depends on the type of account and payment. Unlike domestic wire transfers, direct deposits use the ACH routing number associated with your account. Check your Wells Fargo account details or cheque rather than assuming the wire routing number applies.
Is the Wells Fargo ACH number different from the wire number?
Yes. ACH payments and domestic wire transfers can use different routing numbers. Wells Fargo uses 121000248 for domestic wire transfers, while your ACH routing number may differ. Checking the payment instructions before sending or receiving money helps ensure the transaction reaches the correct account without unnecessary delays.
Does Wells Fargo have one routing number for all states?
Wells Fargo uses a single routing number for domestic wire transfers nationwide: 121000248. However, ACH routing numbers can vary depending on where your account was opened. That means the answer depends on the type of payment you are making and the specific Wells Fargo account involved.
Where is the routing number on a Wells Fargo cheque?
Your Wells Fargo routing number appears along the bottom of the cheque. It is the first nine-digit number in the sequence, followed by your account number and cheque number. Looking at the bottom-left corner of the cheque makes it easy to identify the routing number quickly.
Can I use my Wells Fargo routing number for international transfers?
A routing number alone is generally not enough for an international wire transfer. International payments usually require Wells Fargo’s SWIFT code, along with your account details. For inbound international wires, Wells Fargo’s primary SWIFT code is WFBNDDNYXXXX, while domestic wires use the routing number.


.jpg)







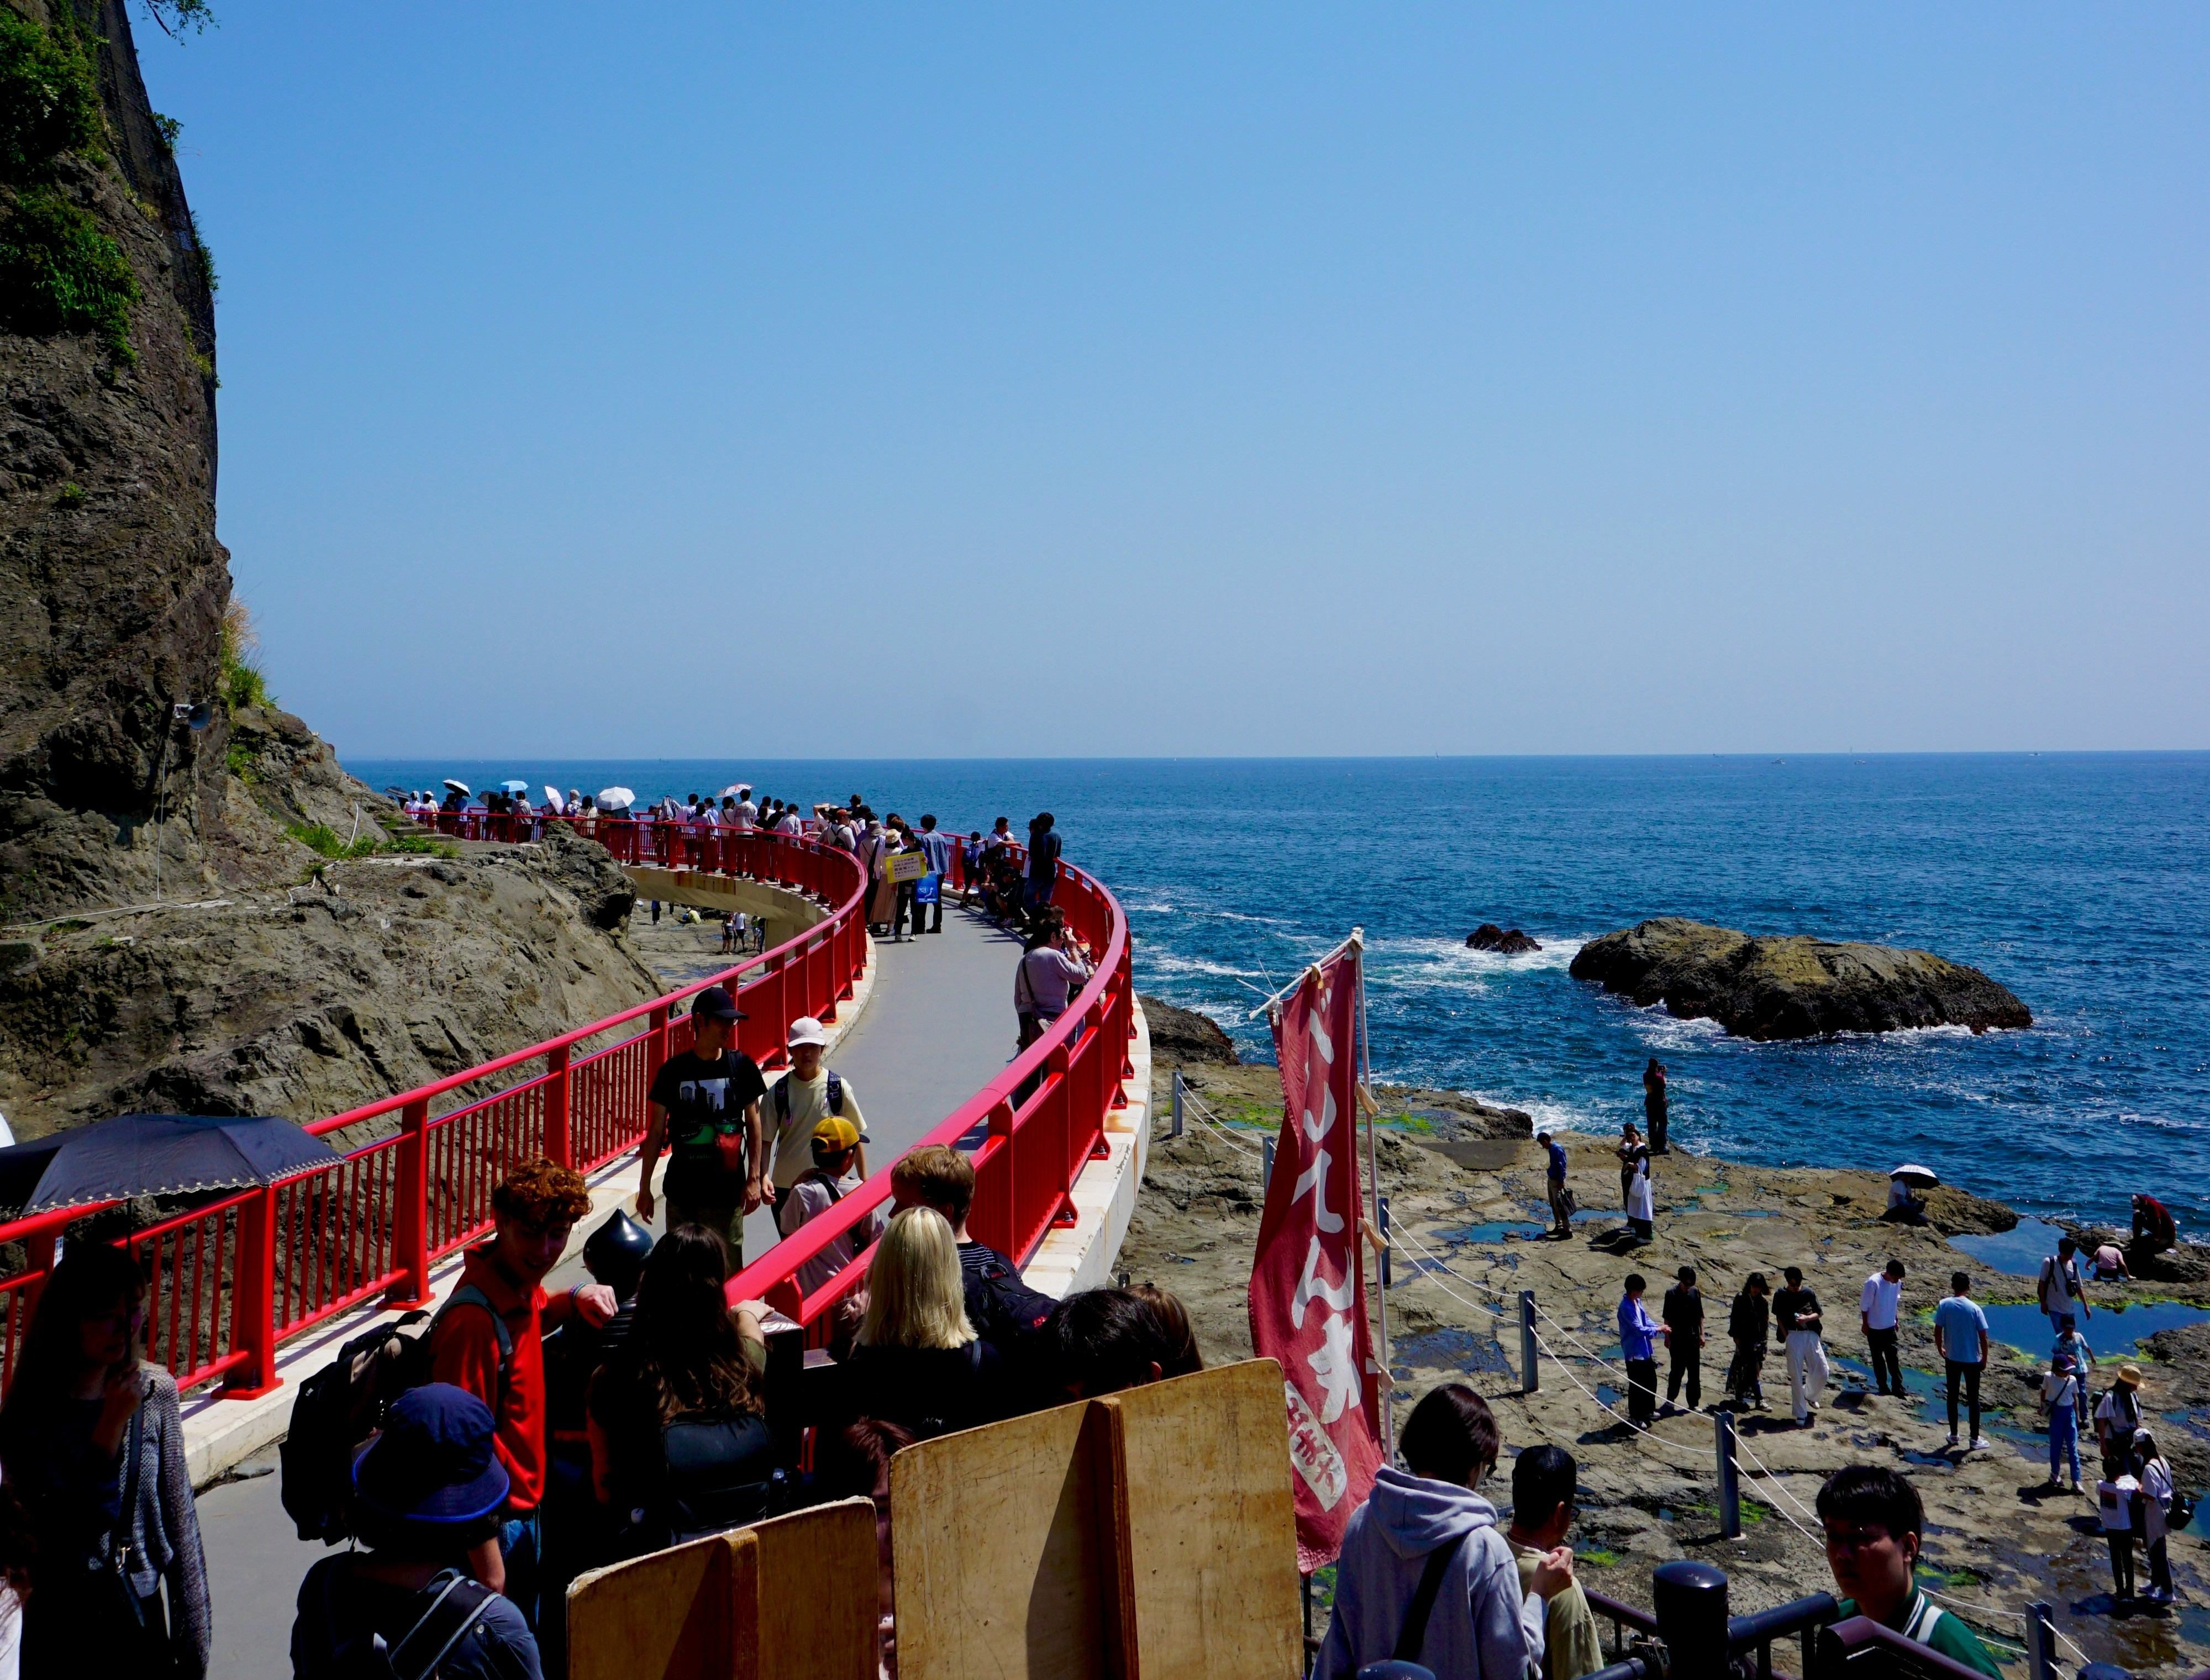













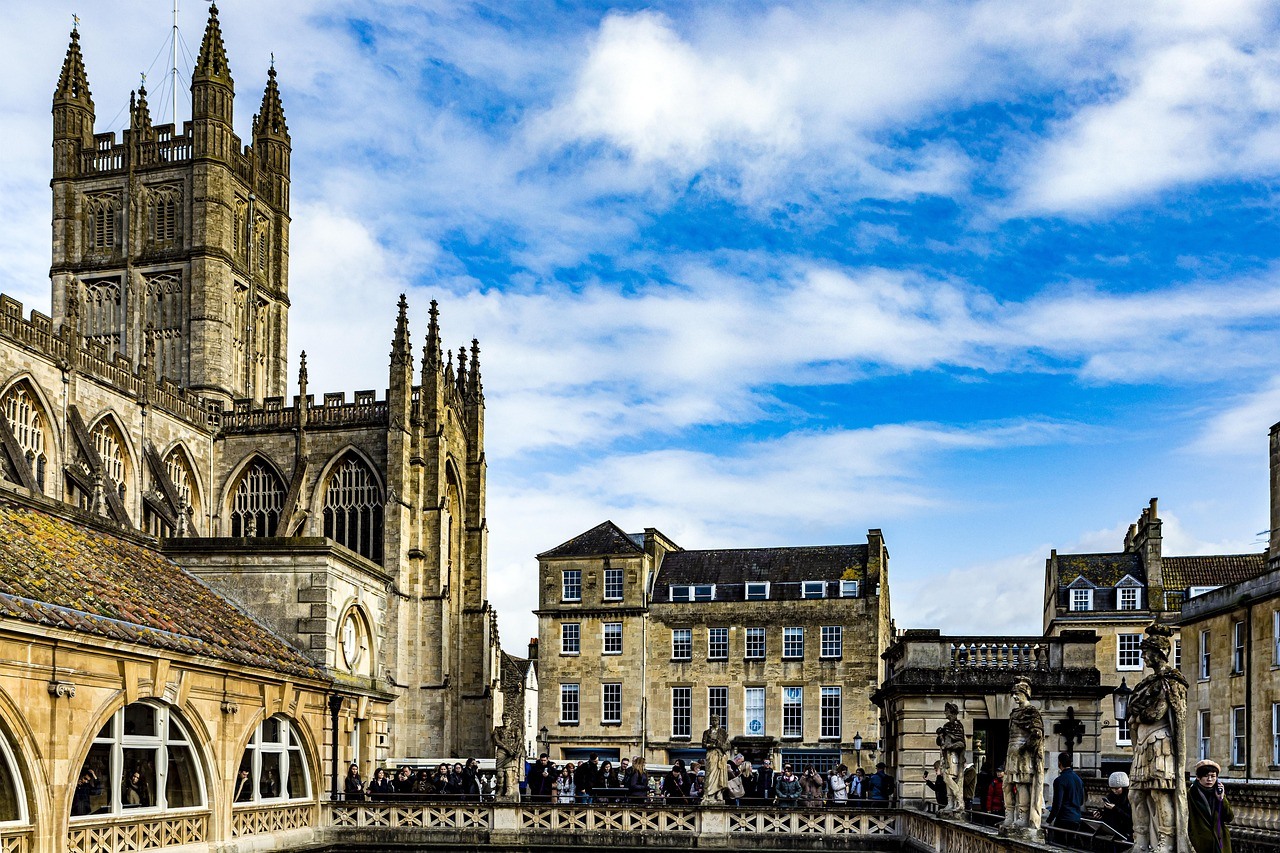

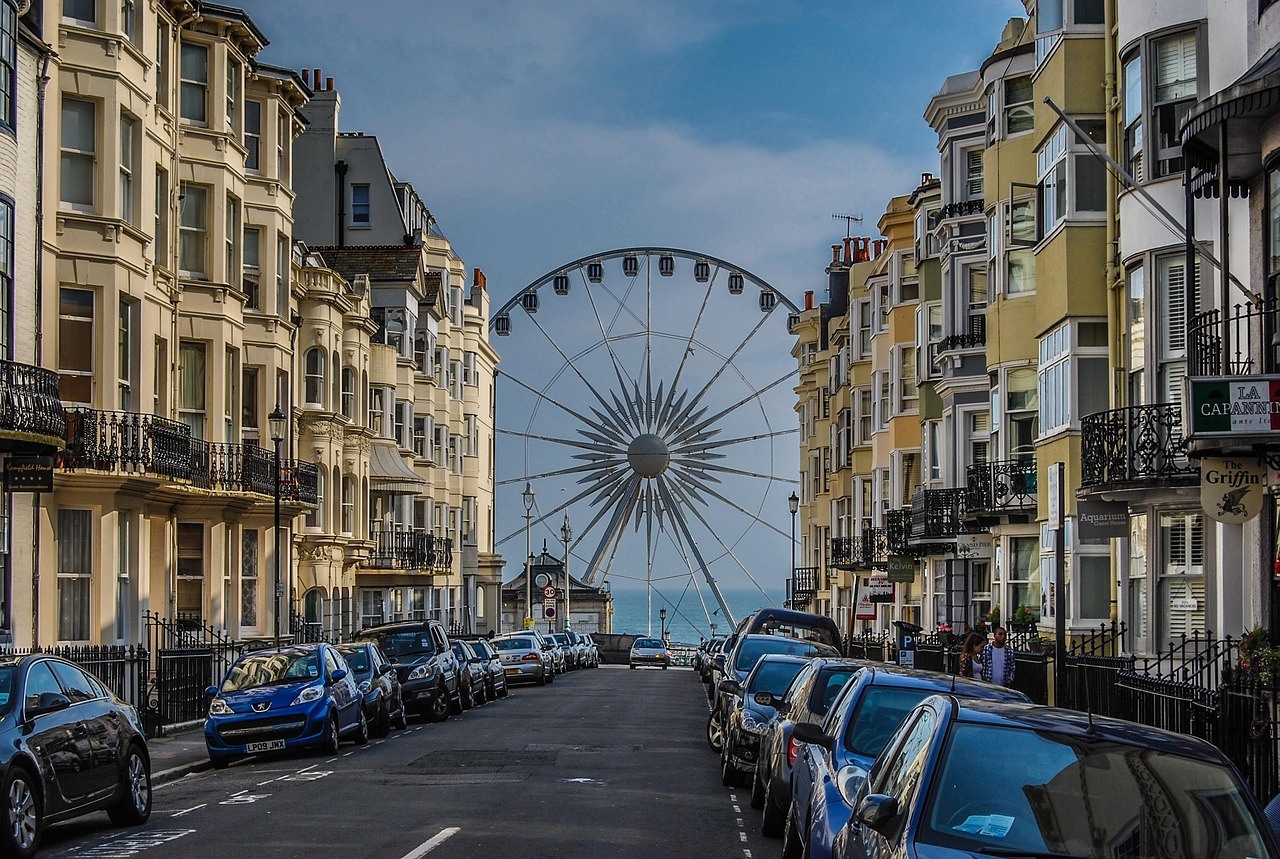
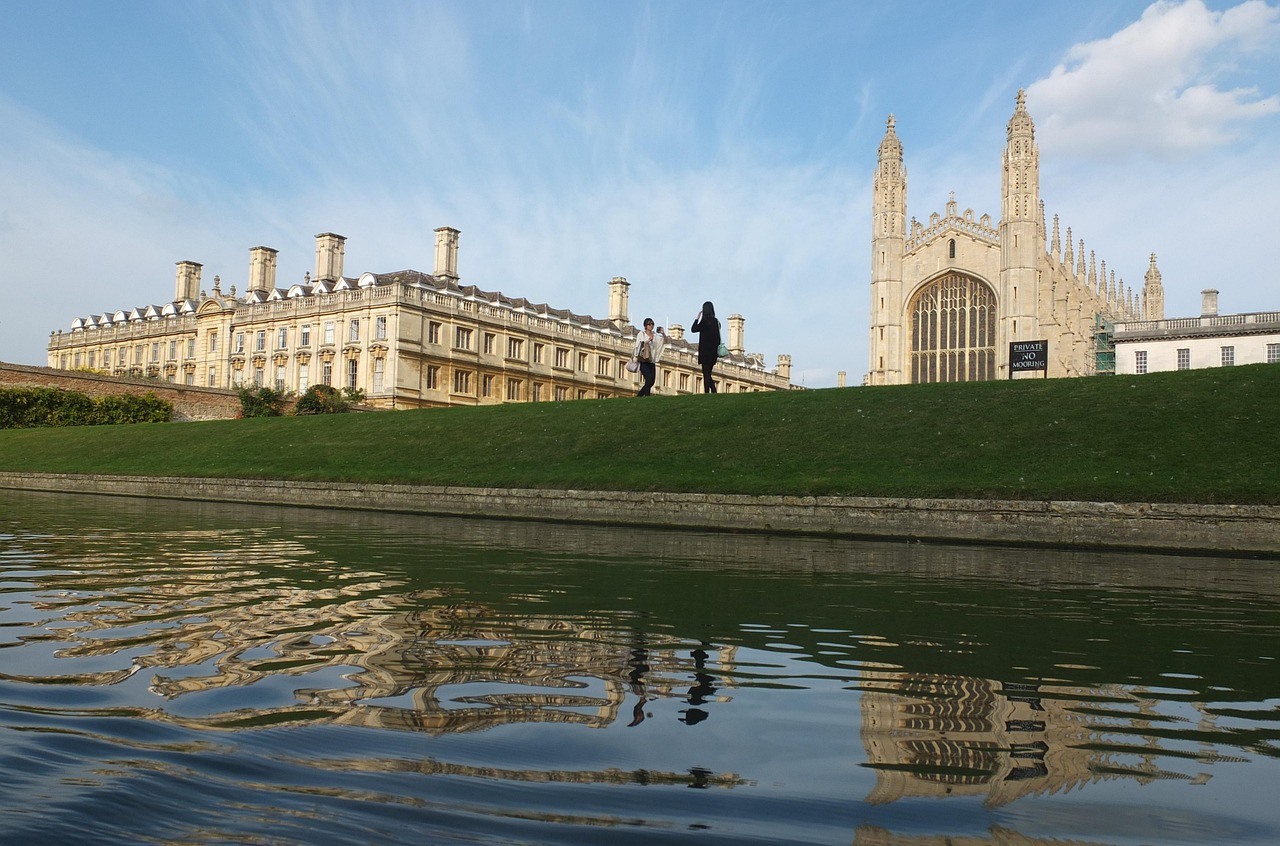
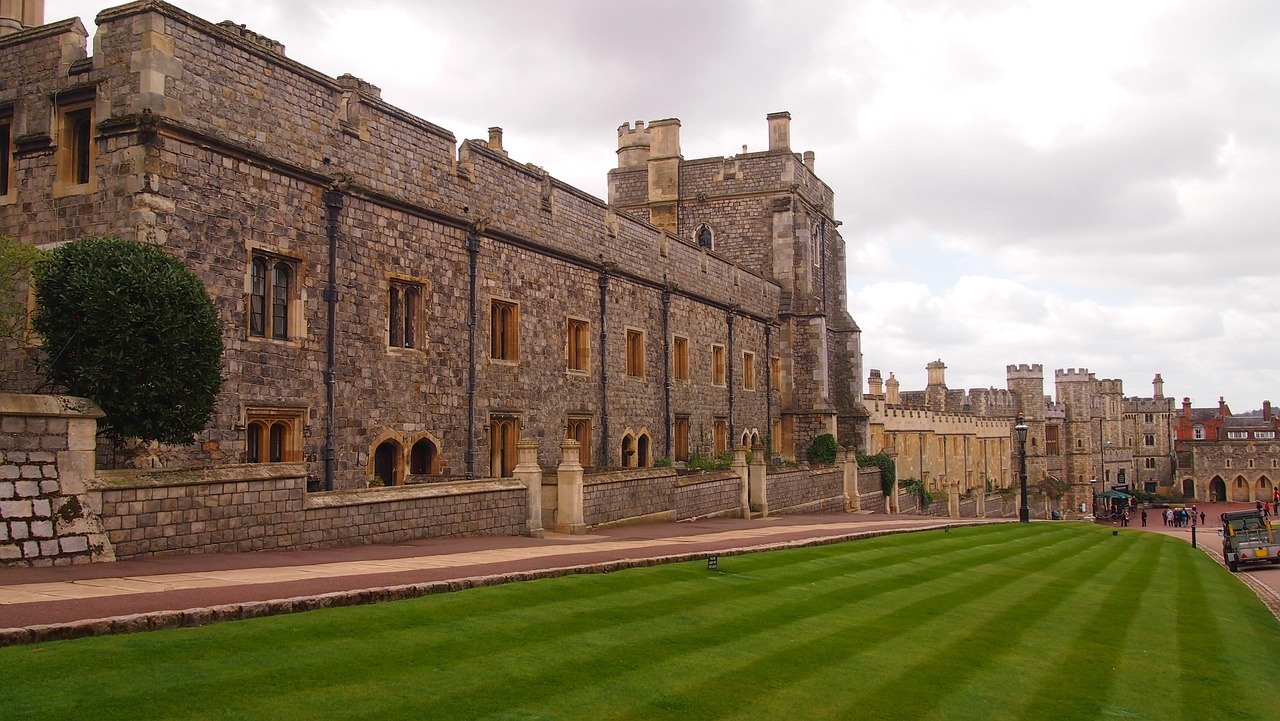

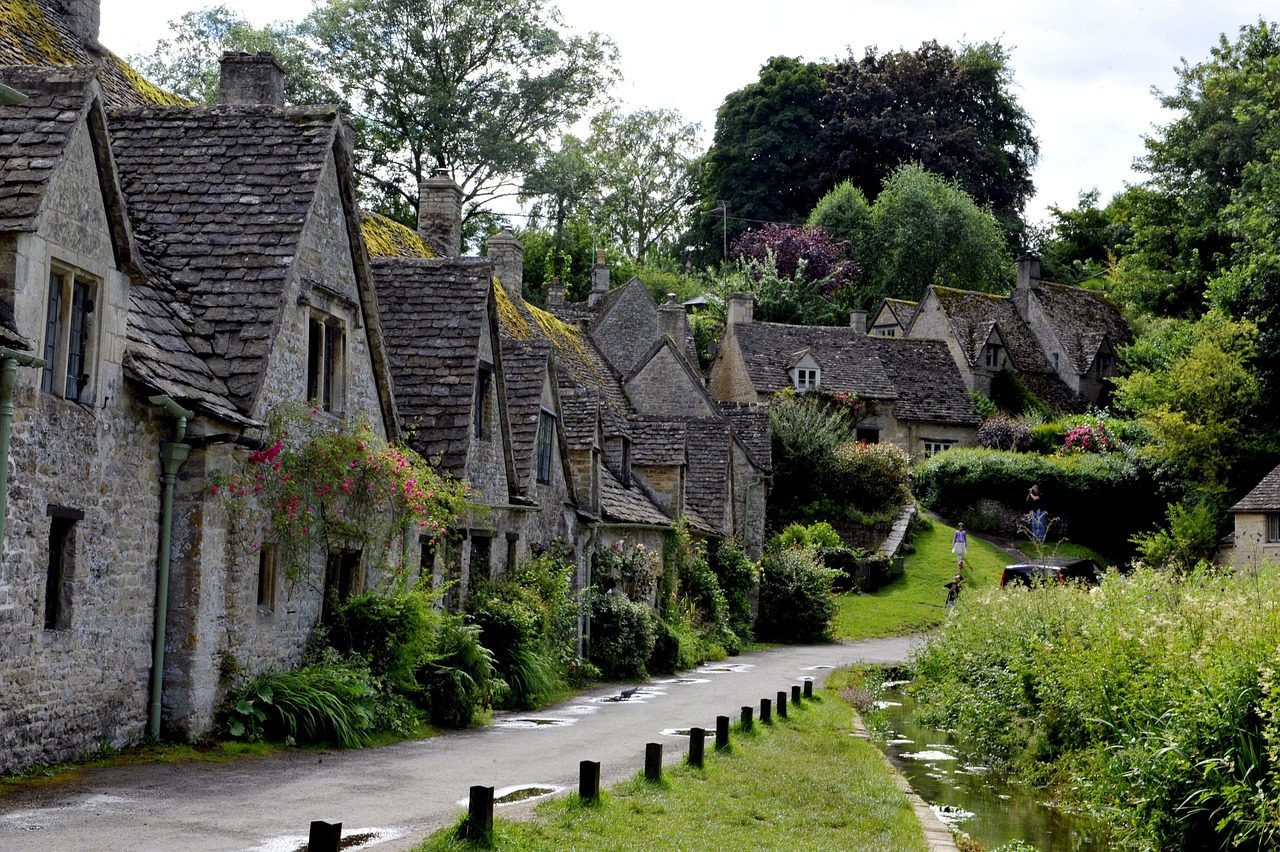
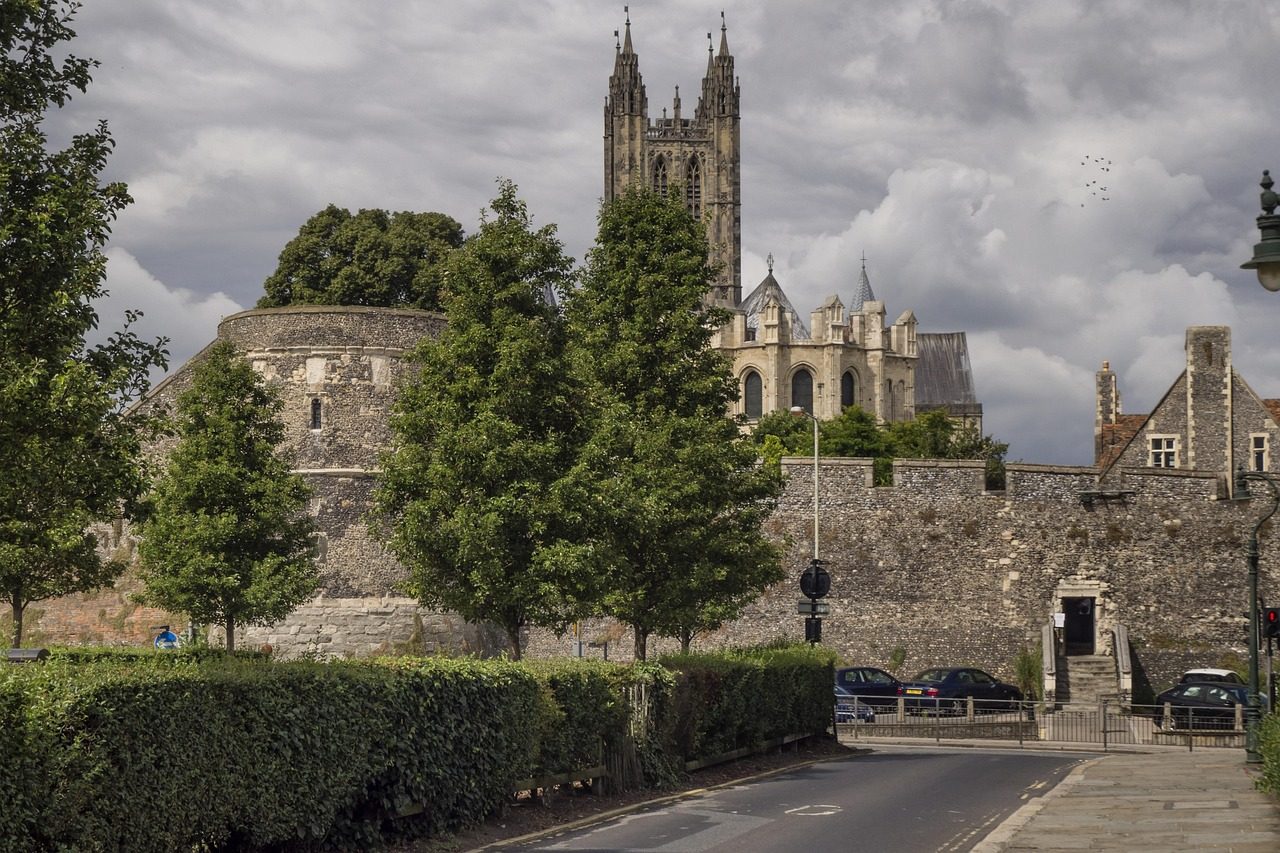
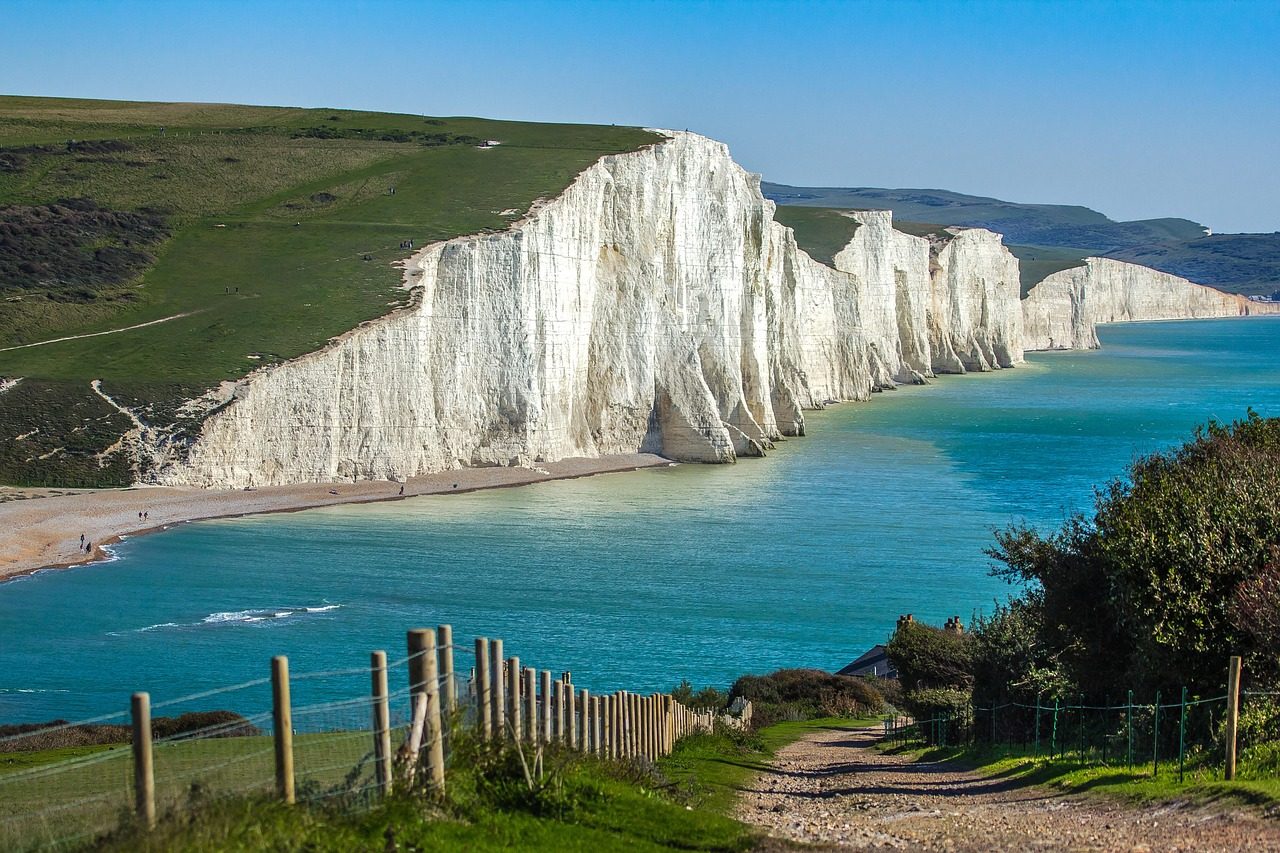
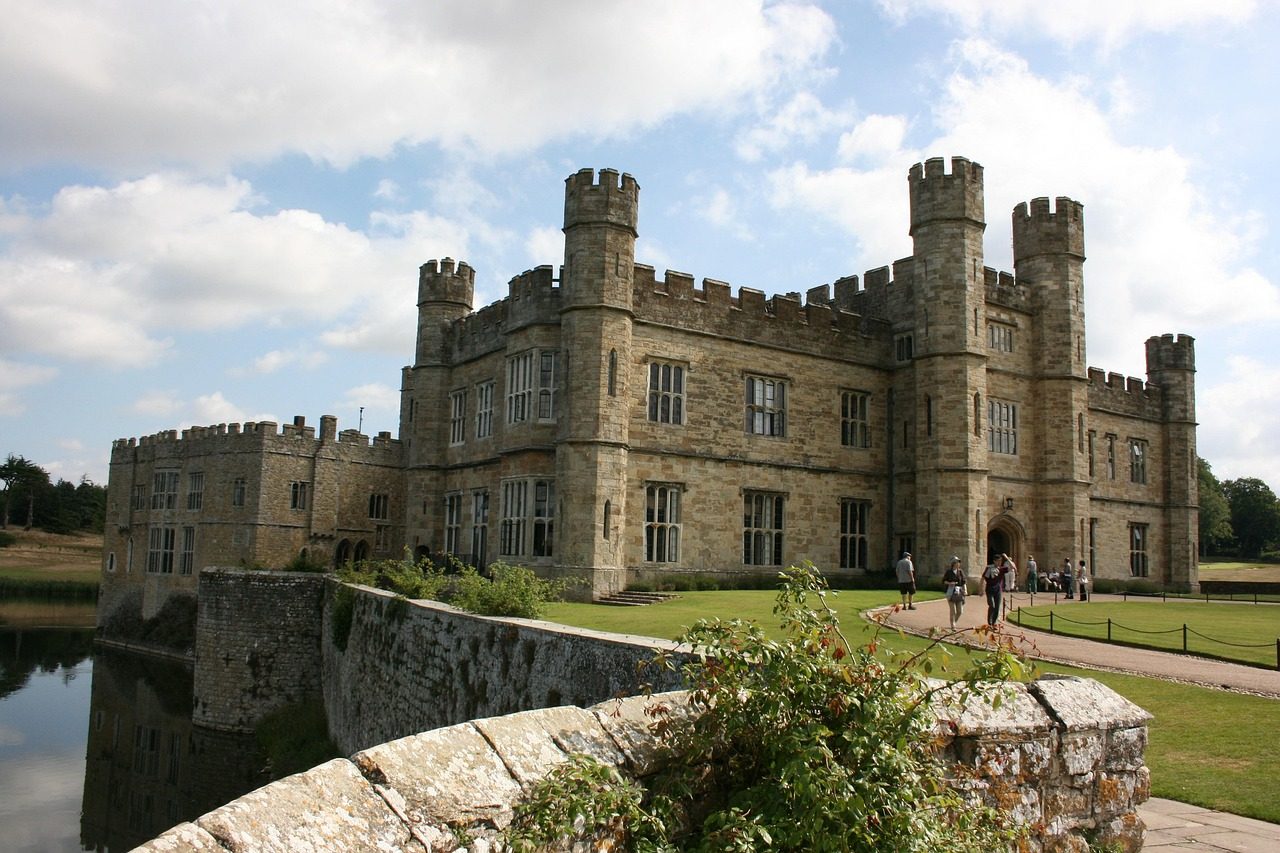





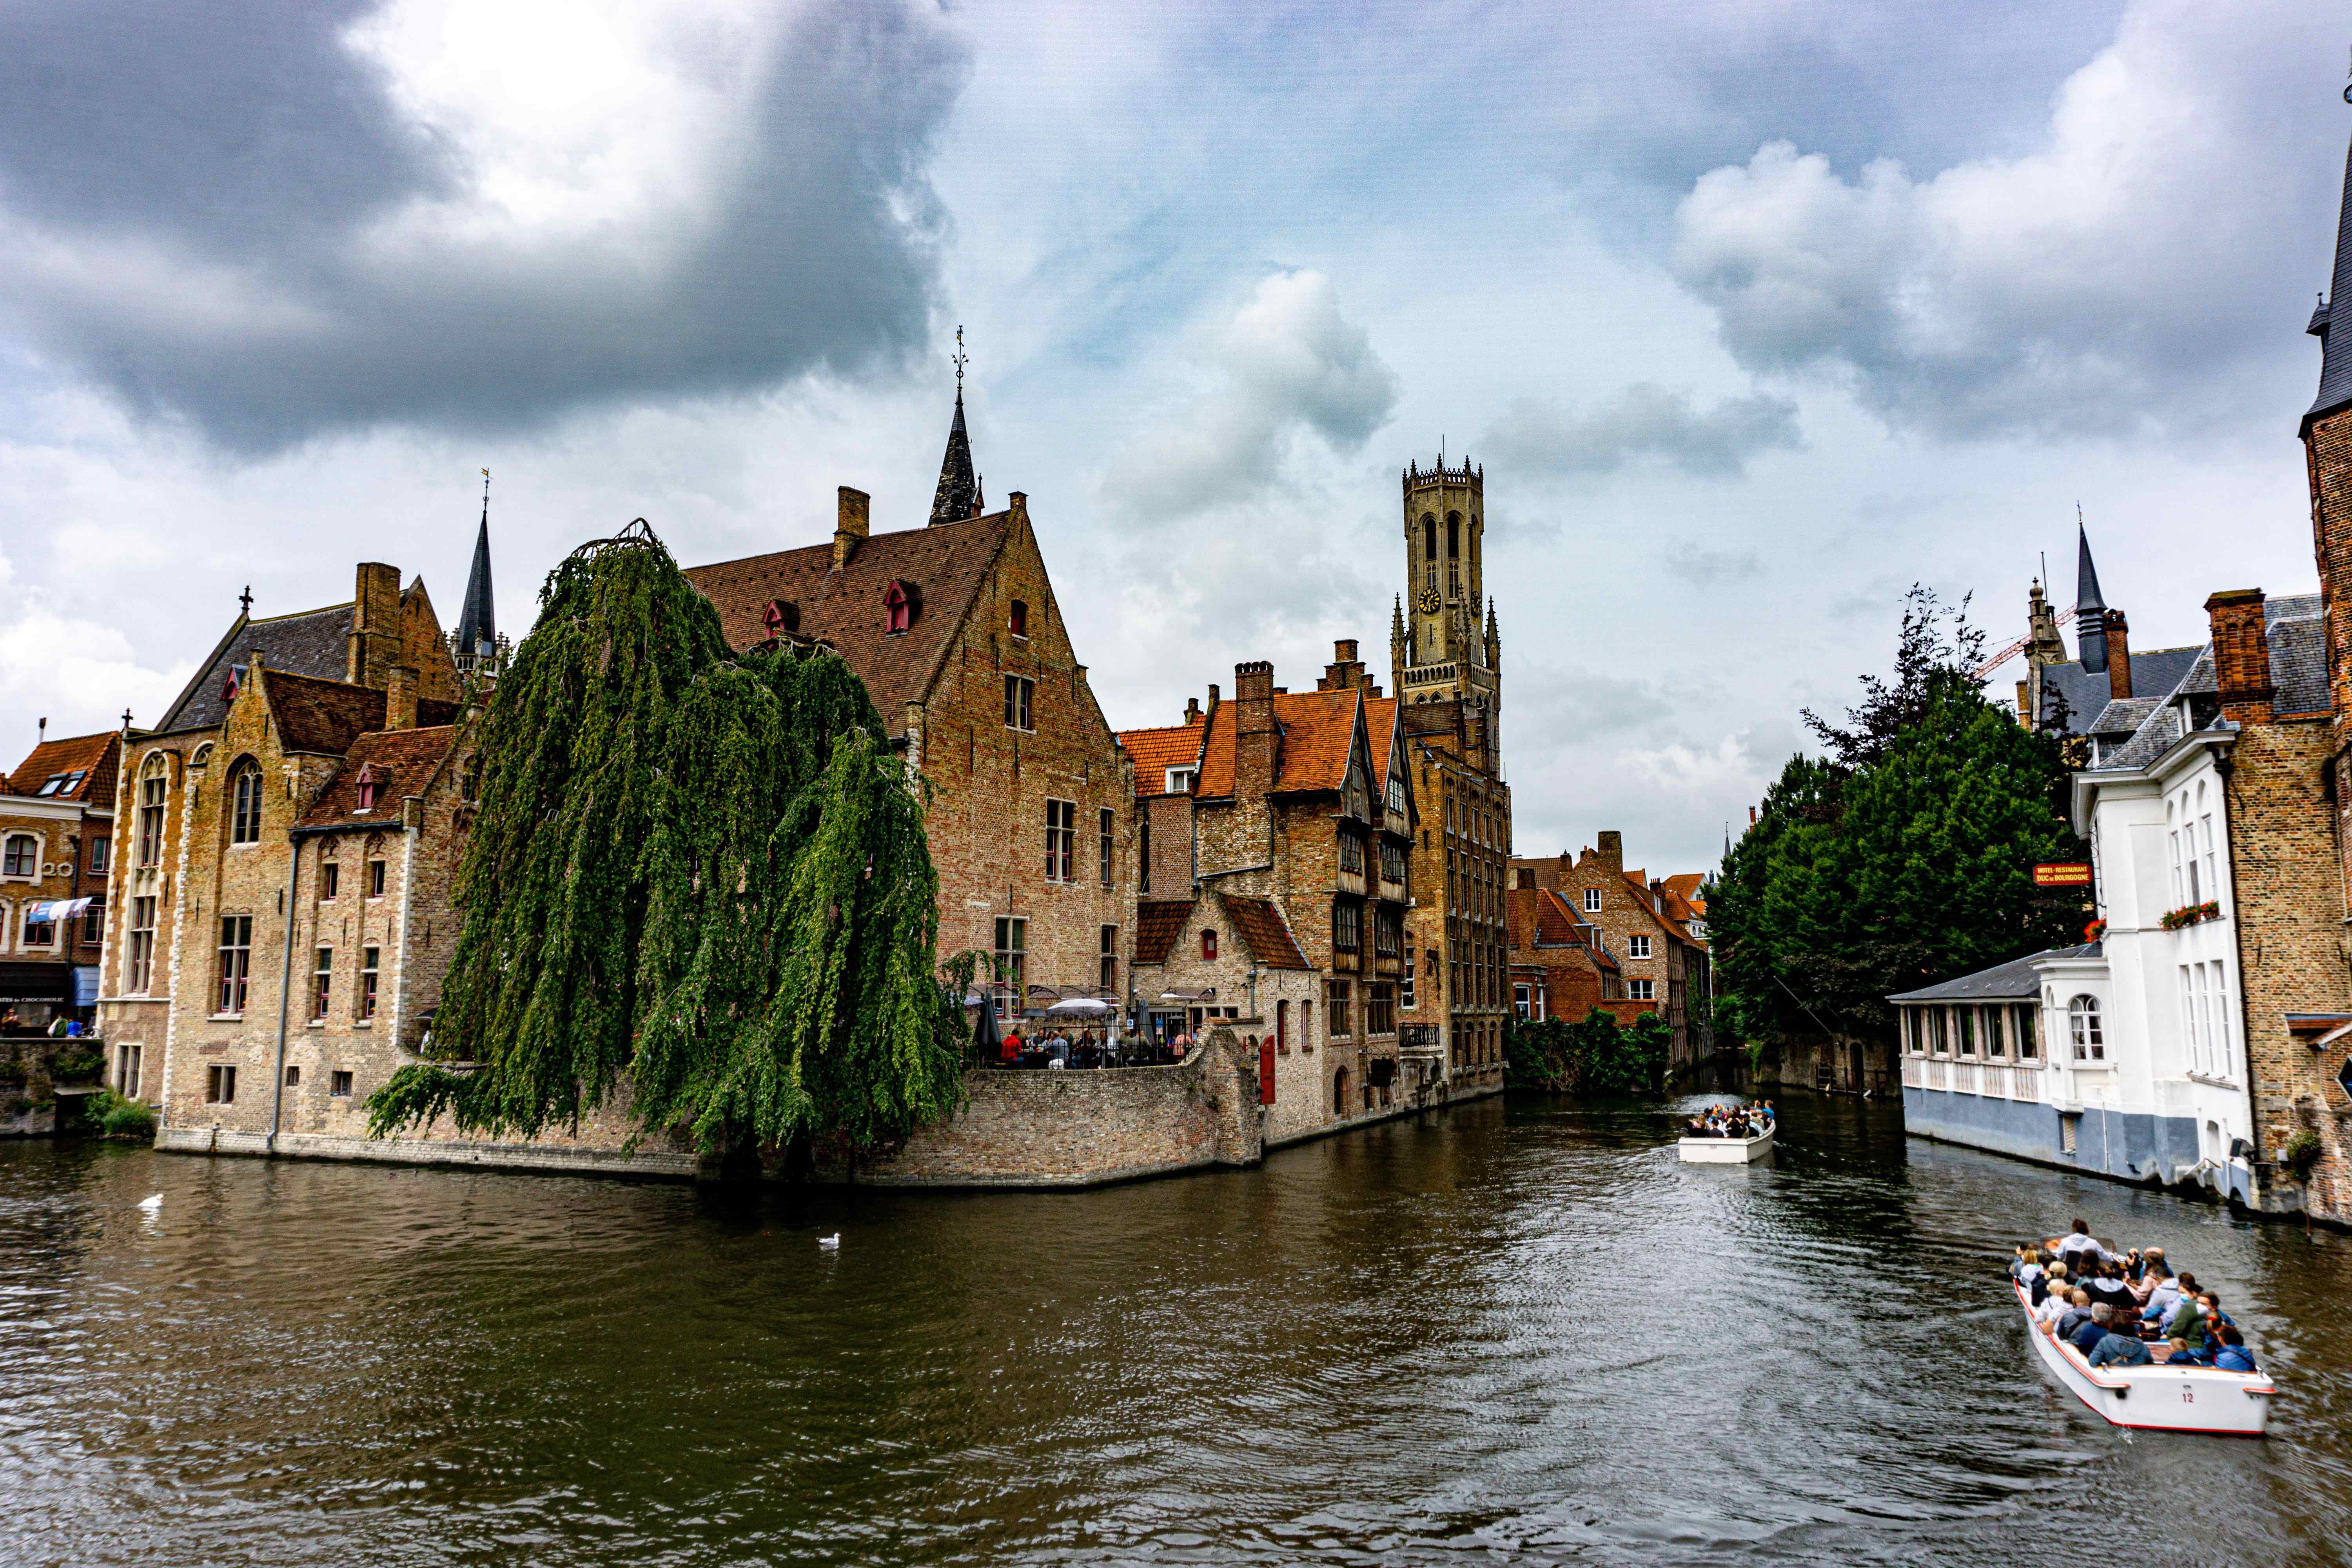








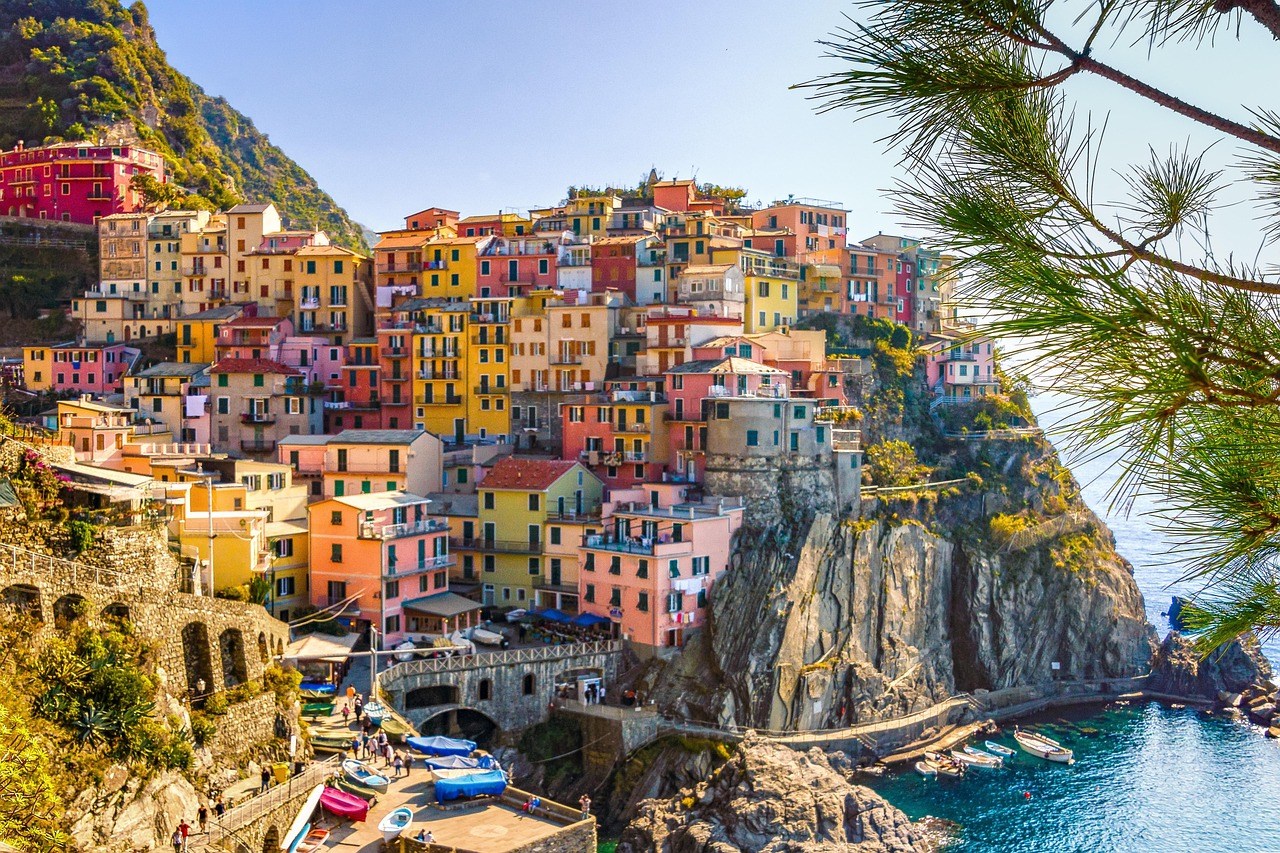



.svg)

