


STAY UP TO DATE
The Grey Blog


FEATURED ARTICLES

Virtual cards in Egypt for online payments
Grey, EverTry, Card-Y, Fyatu, and AstroPay: Here is how virtual cards work for online payments in Egypt and your top options.

Adeolu Titus Adekunle
•
6 min read
It is one thing to have the funds for online payments; it is another thing to have the means to complete the payment without getting frustrated. Managing international payments in Egypt can be quite a hassle. If you’ve tried paying for an international subscription, a work tool, online shopping, or an online course from Egypt, perhaps you can relate to the struggle. Local Egyptian bank cards are often restricted from international transactions, offer poor exchange rates, or aren’t supported by global platforms.
Virtual cards exist mostly to solve these problems, and they have become one of the most efficient options for anyone who shops online, pays for subscriptions, or needs a reliable way to spend in foreign currency without the limitations of a standard local bank card.
This article explains how virtual cards work, who they are for, and the main options available to people in Egypt right now.
What is a virtual card, and how does it work?
A virtual card is a digital payment card that works just like a traditional debit or credit card, except it exists only electronically. Instead of receiving a plastic card, you get the card details instantly on your phone or computer, including the card number, expiration date, and CVV security code.
Because virtual cards are issued digitally, they are typically available within minutes, unlike physical cards that must be printed and delivered.
Most virtual cards operate as prepaid or debit cards, meaning you spend funds you already have. In many cases, the card is connected to a multi-currency account, so payments are deducted directly from your balance in currencies such as USD, GBP, or EUR. This eliminates the need to manually top up the card before each purchase.
For example, Grey virtual cards are linked directly to your foreign currency balance, allowing you to pay online or in apps without transferring funds to the card first.
In practice, using a virtual card is no different from using a physical one. You simply enter the card details at checkout when making online payments, subscriptions, or international purchases. Many virtual cards can also be added to Apple Pay or Google Pay, enabling secure contactless payments with your phone wherever mobile wallets are supported.
Also read: Managing USD income as a remote worker in Egypt
What to look for when choosing
Not all virtual cards work the same way. The best option for you will depend on how you plan to use it, which currencies you deal with most often, and how frequently you make international payments. Before choosing a provider, it’s worth looking closely at a few key factors.
Currency support. Many virtual cards are designed primarily for USD payments, but international platforms often charge in other currencies such as EUR or GBP. If you regularly use services based in Europe or the UK, a card that supports multiple currencies can help you avoid additional conversion fees. Choosing a provider with a multi-currency account allows you to hold and spend different currencies more efficiently.
Funding options. Different platforms allow you to add funds in different ways. Some accept local bank transfers, others allow crypto deposits such as USDT, and some link directly to a multi-currency account balance, like Grey. Before signing up, check that the funding method available actually works for your situation and location.
Platform compatibility. Not every virtual card works equally well across all international platforms. Some services, particularly advertising platforms or large marketplaces, may reject certain cards depending on the issuing network or region. If you plan to use your card for a specific purpose, such as paying for Google Ads or cloud hosting, it’s worth confirming that the card is widely accepted on those platforms.
Fees and exchange rates. Virtual card costs can vary significantly between providers. Some charge a card creation fee, others add transaction fees, and most apply a small markup on currency conversions. A card that appears free at first glance may become more expensive if the exchange rate spread is high. Always look at the total cost of using the card, not just the upfront fee.
Security and regulation. Security should always be a priority when choosing a financial platform. Look for providers that follow proper identity verification processes and operate with licensed financial partners. Features such as two-factor authentication, transaction alerts, spending limits, and the ability to instantly freeze your card add an important layer of protection.
Contactless payments. Some virtual cards can be added to mobile wallets like Apple Pay or Google Pay, allowing you to make contactless payments with your phone. This can be particularly useful when travelling or making in-store purchases abroad. If this feature matters to you, make sure the card supports mobile wallet integration in your region.
Taking a few minutes to compare these factors can help you choose a virtual card that fits your spending habits and avoids unnecessary fees or payment issues later.
The top virtual cards in Egypt for online payments
While cards issued by local banks work well for domestic spending, they are not always reliable for international payments. Here is a list of the top virtual cards in Egypt for online payments.
Grey
Grey offers virtual cards linked to a multi-currency account that supports USD, EUR, and GBP. You can create multiple cards for various uses to properly plan your finances. One card can be for online shopping while another could be for subscriptions and or online course. Grey cards are globally accepted and works with the full range of international platforms
You can receive international payments into your Grey USD, GBP, or EUR account or fund your account in EGP and convert to USD to spend on your cards directly.
Fees: Grey virtual USD cards cost a one-time creation fee of $4, plus a minimum of $1 to fund the card, totalling $5 to get started. There are no monthly maintenance fees.
EverTry
EverTry offers a solution for international payment restrictions in Egypt through their virtual dollar card platform. It allows Egyptian users to pay for global services that often decline local bank cards. It supports funding in local currency and USDT, making it accessible to users who are comfortable with crypto. The card works across a wide range of international platforms, including Netflix, Spotify, AWS, DigitalOcean, Namecheap, Facebook Ads, and Google Ads.
Fees: Card creation typically costs $2.5, with no monthly maintenance fees.
Card-Y
Card-Y is a fintech platform that offers multi-currency global accounts with a linked virtual card, designed for Egyptian freelancers and remote workers. It offers USD and EUR account details for receiving international payments, with a free virtual card included that draws from those account balances. It also issues local Egyptian bank cards to subscribers.
Fees: Card-Y offers virtual Mastercard issuance for a $20 USD fee, which is valid for one year and does not add to the card balance. The service features a $1 monthly maintenance fee, a 1% USD transaction fee ($1 min/$5 max), and a 1.5% foreign currency conversion fee.
Fyatu
Fyatu provides instant virtual Mastercards with support for multiple currencies, aimed at users who need to make global payments and manage international subscriptions. Onboarding is digital, and card issuance is immediate. It is a straightforward option for users whose primary need is an international spending card rather than a full suite of banking features.
Fees: Fyatu virtual card costs include a 1.5% fee for card usage (for either withdrawal or payments), with card replacement fees of $5 for World cards and $10 for Platinum cards. A $1.00 fee applies to declined transactions. Funding methods vary, with fees such as 3% for MTN MoMo and various percentages for online wallets like PayPal (3.5% + $0.30).
AstroPay
AstroPay is a globally recognised digital wallet and virtual card platform, available in over 150 countries, including Egypt. It has been around since 2009 and has a particularly strong footprint in emerging markets across Africa, Latin America, and Asia. The platform supports more than 50 currencies, issues virtual prepaid cards instantly, and does not require a traditional bank account to sign up.
For Egyptian users, AstroPay works as a prepaid spending tool. You load funds onto your wallet using a local payment method, then use the virtual card for international purchases on platforms that accept Visa or Mastercard. Card details are issued instantly through the app, and the platform supports one-time or multi-use cards depending on the denomination.
However, bank withdrawals from AstroPay can attract fees of up to 6% depending on the institution. There is a margin of 1% to 3% on exchange rate.
Fees: No card purchase or maintenance fee. No annual fee. Transaction fees of 2–5% depending on the payment method used. FX markup of approximately 1–3% on non-native currency transactions. Withdrawals to a bank account: up to 6%.
Comparison of the top virtual cards in Egypt
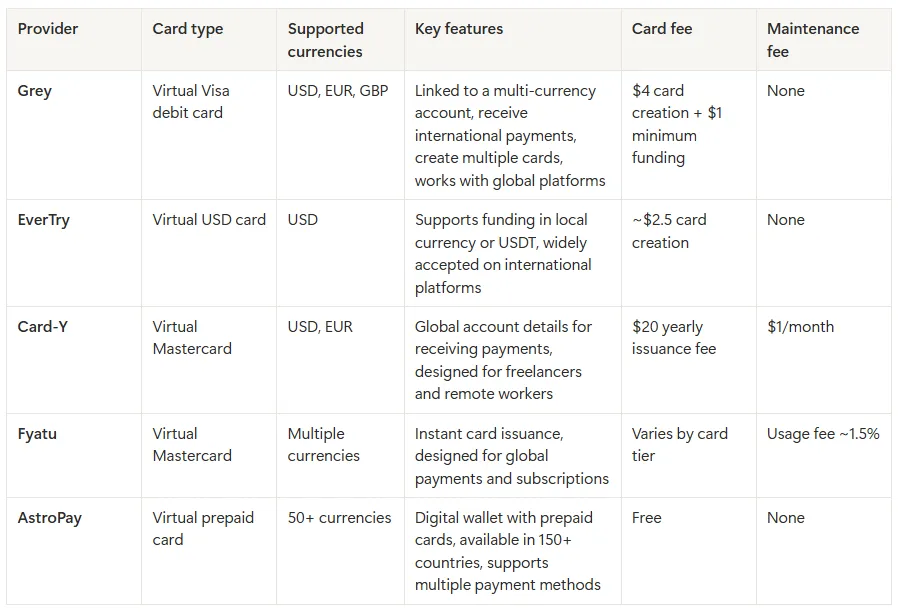
Before exploring each option in detail, the table below summarises some of the key differences between the most popular virtual cards available to users in Egypt, including supported currencies, card type, and typical fees.
Quick recommendations
If you’re not sure which virtual card to choose, here’s a quick guide based on common use cases in Egypt.
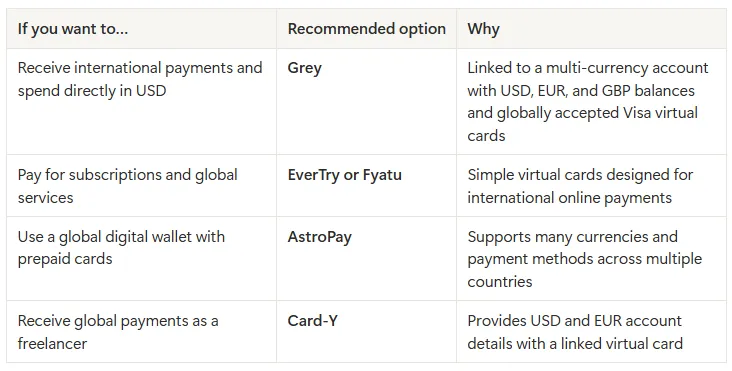
For most freelancers, remote workers, and online entrepreneurs in Egypt, a virtual card linked to a multi-currency account is often the most practical option. It allows you to receive money from abroad, hold foreign currencies, and pay for global services without converting funds every time you make a transaction.
Also read: Grey card vs other virtual cards: What you should know
Make international payments with Grey
The advent of virtual cards has brought significant flexibility to managing international payments. Grey gives Egyptians a virtual card linked to your multi-currency account. This allows you to receive international payments and spend internationally from the same platform. Whether you are paying for software subscriptions, running digital ads, shopping on international platforms, or managing online tools for your work, Grey's virtual card is accepted globally and straightforward to set up.
Ready to get your virtual card? Sign up on Grey and download the app to create your virtual USD card in minutes.
ALL ARTICLES

How to plan a road trip in the US (plus the best scenic routes)
Learn how to plan a road trip step by step, with the best scenic US routes, a budget planner, and the easy way to pay for fuel and tolls.
Priscila Marotti
•
October 6, 2026
•
6 min read
You've got two weeks off, a car, and roughly $2,000. That's enough for an incredible US road trip if you plan it right, and barely enough for a frustrating one if you don't. Most people start by picking a route. That's actually step two. Step one is deciding how many hours you're willing to drive each day, because that single number determines where you can go, how many stops you can make, and whether you'll enjoy the trip or just survive it.
To plan a road trip, pick your route and stops, set a daily driving limit, budget for fuel, food, and stays, book key accommodation early, and prepare your car. Build in buffer time for detours. Use a card with no foreign transaction fees if you're visiting from abroad.
We've planned this guide around the decisions in the order you actually need to make them, not the order most articles put them in. You'll also find the four best scenic road trips in the US with real distances, costs, and timing, so you can compare routes before committing.
How to plan a road trip: step by step
Planning a road trip comes down to six decisions, made in this order. Skip one and the rest get harder.
1. Choose your route. Start with a destination or a theme. Do you want coastline (Pacific Coast Highway), desert (Utah's Mighty Five parks), history (Route 66), or mountains (Blue Ridge Parkway)? Once you've picked the theme, map the route and identify overnight stops roughly every 3 to 5 hours of driving. Google Maps and Roadtrippers are the two best tools for this.
2. Set a daily driving limit. The number one mistake on road trips is overestimating how far you want to drive in a day. 4 to 5 hours of actual driving is sustainable. Six is fine occasionally. Eight is miserable and dangerous. Plan your stops around a 4-hour average, and you'll enjoy the drive instead of enduring it.
3. Book accommodation for your first and last nights, plus any national parks. Everything in between can stay flexible. But the first night sets the tone (don't arrive exhausted because you drove too far), and national park lodges and campsites book months in advance. If you're visiting in summer, book Yosemite, Zion, or Yellowstone accommodation 3 to 6 months ahead.
4. Budget the trip before you leave. Fuel, food, accommodation, tolls, park entrance fees, and one unexpected cost. We'll break this down below with a worked example.
5. Prepare the car. Tyres, oil, coolant, wipers, and a safety kit. A breakdown 100 miles from the nearest town is the kind of adventure nobody wants. If you're renting, inspect the car before you leave the lot and document any existing damage.
6. Download offline maps. Cell coverage is patchy in rural America, especially through the desert Southwest, mountain passes, and stretches of Montana and Wyoming. Download your entire route on Google Maps or Maps.me before you leave. If you're visiting from abroad and need data on the road, a travel eSIM is cheaper and more reliable than roaming on your home plan.
Best scenic road trips in the US
If you're looking for road trip ideas, these are the four routes that consistently rank as the best road trips in the USA. Here's a quick comparison:
Pacific Coast Highway is probably the most photographed road trip in the country. San Francisco to Los Angeles (or the reverse), hugging the coast through Big Sur, Monterey, Santa Barbara, and Malibu. It's short enough for a long weekend if you push it, but 5 to 7 days lets you stop at every viewpoint without rushing.
Route 66 is the classic. 2,400 miles from Chicago to Santa Monica, crossing eight states and three time zones. It's a trip through small-town America, roadside diners, and neon signs. Budget at least 10 days. Some stretches of the original route have been replaced by interstate, but most of the iconic stops are still there.
Blue Ridge Parkway is the most underrated route on this list. 469 miles through the Appalachian Mountains from Virginia to North Carolina, with no commercial traffic (trucks are banned). In autumn, the foliage is extraordinary. It's also one of the cheapest road trips because there are no tolls and fuel distances are short.
Utah's Mighty Five hits all five of Utah's national parks in a single loop: Arches, Canyonlands, Capitol Reef, Bryce Canyon, and Zion. The landscape is unlike anything else in the US. Spring and autumn are the sweet spots; summer is brutally hot and parks are overcrowded. An America the Beautiful pass ($80 per vehicle per year), from the National Park Service, covers entrance fees for all five parks.
All fuel costs are estimates based on a vehicle averaging 25 to 30 mpg at mid-2026 US fuel prices. Your actual cost will vary by vehicle, driving style, and fuel price at the time of travel.
How to budget for a road trip
The number that catches most people off guard isn't fuel. It's food. A two-week road trip where you eat at restaurants for every meal can easily cost $1,500 to $2,000 per person. Pack a cooler, buy groceries, and save restaurants for the stops that deserve them.
Here's a worked budget for a 7-day Pacific Coast Highway trip for two people:
The range is wide because accommodation drives most of the variance. Camping ($20 to $40 per night) versus a beachfront motel in Big Sur ($250+ per night) changes the total dramatically. If you're saving up for the trip, save for your road trip in a Pouch so the money is set aside and visible, separate from your everyday spending.
All costs are estimates based on mid-2026 prices. Fuel, accommodation, and food costs vary seasonally and by region.
Road trip packing and car prep
Two lists: one for the car, one for you.
Car prep (do this at least a week before you leave): check tyre pressure and tread depth (including the spare), check oil level and coolant, test all lights (headlights, brake lights, indicators, fog lights), replace wiper blades if they streak, and make sure your breakdown cover is active and covers your route.
Safety kit: jump cables or a portable jump starter, a basic tool kit, a torch with fresh batteries, a first aid kit, a reflective warning triangle or flares, and a printed copy of your route (in case your phone dies and there's no signal).
Packing for you: pack light. Road trip luggage lives in the boot, not in overhead bins, so you have more space than flying, but overpacking means less room for souvenirs and groceries. Bring layers (mountain and coastal temperatures swing 15 to 20 degrees between morning and afternoon), comfortable driving shoes, sunscreen, a reusable water bottle, and a cooler if you're planning to buy groceries.
One thing most people forget: a phone mount for the dashboard. Using your phone as a GPS while it sits in your lap is unsafe and illegal in many states. A $15 mount solves this completely.
How to pay on a US road trip
If you live in the US, your regular debit or credit card handles everything. Fuel, tolls, accommodation, food. The only thing to watch is whether your card charges foreign transaction fees if you cross into Canada or Mexico during the trip.
If you're visiting the US from abroad, paying for a road trip gets more complicated. Your home bank card works at most fuel stations and restaurants, but foreign transaction fees of 1.5 to 3% add up fast over a two-week trip. On $3,000 in spending, that's $45 to $90 in fees you didn't need to pay.
A card with no foreign transaction fees is the simplest fix. Grey's virtual Mastercard works at US fuel stations, restaurants, and toll booths. You load USD before you leave and spend from your dollar balance, so there's no conversion markup on every transaction. Pay for fuel and tolls on a virtual card.
For data and navigation, a travel eSIM is cheaper than international roaming. You buy it before you leave, activate it when you land, and get US data for maps, music, and booking accommodation on the road. Buy a travel eSIM for the US. And if you need to move money before you travel, Grey handles that too.
Cash tip: carry $100 to $200 in small bills. Some rural fuel stations, farm stands, and small-town diners are cash-only.
Frequently asked questions about planning a road trip IN the US
How do I plan a road trip for the first time?
Start with a route (pick a destination or a scenic drive). Map your overnight stops every 3 to 5 hours of driving. Book your first night, last night, and any national park accommodation in advance. Budget for fuel, food, stays, and one unexpected cost. Prep the car (tyres, oil, lights). Download offline maps. Everything else can be flexible.
What is the best US road trip for beginners?
The Pacific Coast Highway from San Francisco to Los Angeles. It's short (650 miles, 5 to 7 days), the route is well-marked, accommodation is plentiful, and the scenery is spectacular from start to finish. Reliable cell coverage for most of the route makes navigation easy.
How much does a road trip across the US cost?
A coast-to-coast trip (roughly 2,800 miles, 10 to 14 days) typically costs $2,500 to $5,000 per person. Budget roughly: $300 to $500 for fuel, $1,000 to $2,500 for accommodation, $500 to $1,000 for food, and $200 to $500 for tolls, attractions, and unexpected costs. Camping and cooking drop the total significantly.
How far should I drive per day on a road trip?
4 to 5 hours of actual driving (200 to 300 miles on highways) is the sweet spot. You can push to 6 to 8 hours on long transfer days, but doing that daily will burn you out by day three. Plan around a 4-hour average and add a rest day every three or four driving days.
Do I need an America the Beautiful pass?
If you're visiting two or more national parks, yes. The pass costs $80 per vehicle per year and covers all 400+ National Park Service sites. A single park entry is typically $30 to $35, so the pass pays for itself after three parks. For the Utah Mighty Five loop, it saves roughly $95 in entrance fees.
Can I do a US road trip without a car?
You'll need a car. Public transport doesn't cover most scenic routes. If you don't own a car, rent one early for the best rates. Airport pickup is usually cheaper than city-centre. Under-25 drivers can expect a surcharge of $20 to $30 per day. International visitors need a valid driving licence from their home country.
Hitting the road? Save for your trip in a Grey Pouch and pay for fuel and tolls on a virtual card, wherever the highway takes you.
Disclaimer: This article is for informational purposes only. Fuel prices, accommodation rates, park fees, and toll charges change seasonally. All cost estimates are based on mid-2026 data. Verify current prices before you travel. Grey isn't a bank. We're a licensed financial services provider offering multi-currency accounts.
How much does an all-inclusive Caribbean trip cost?
How much does an all-inclusive Caribbean trip cost? Prices by island, resort tier, and season. Budget your trip accurately before you book. Compare now.
Priscila Marotti
•
October 5, 2026
•
6 min read
The average all-inclusive Caribbean trip for two people runs $3,000 to $8,000 for a week, and that's before flights, tips, off-resort excursions, and the spa treatments that aren't actually included. "All-inclusive" covers a lot, but it doesn't cover everything.
An all-inclusive Caribbean trip typically costs $150 to $400 per person per night at the resort, plus $300 to $800 per person for flights from the US. The total cost for a 7-night trip for two ranges from $3,000 to $8,000, depending on the island, resort tier, and time of year. Punta Cana and Cancun are the most affordable. Turks and Caicos and St. Barts are the most expensive.
Skip all-inclusive entirely if you love exploring local restaurants, markets, and street food. The resort model keeps you on-site, and that's the point. If discovering a country through its food is half your trip, go hotel-only and eat locally. You'll spend less and see more.
This guide breaks down costs by island, shows you what's actually included (and what isn't), and helps you set a realistic budget.
What does "all-inclusive" actually include?
Before comparing prices, understand what the package covers. A standard all-inclusive includes: accommodation, all meals (buffet plus 2 to 4 a la carte restaurants with reservations), drinks (alcoholic and non-alcoholic, usually house brands), pool and beach access, basic water sports (kayaking, snorkelling gear, paddleboarding), and entertainment (live music, evening shows, kids' clubs at family resorts).
What's usually NOT included: flights, airport transfers (some resorts include these, most charge $30 to $80 per car each way), spa treatments ($100 to $300 per treatment), premium excursions (catamaran tours $80 to $150, zip-lining $60 to $120, scuba diving $100 to $200), premium alcohol brands (top-shelf spirits and imported wine), room service at some resorts, Wi-Fi at older properties, tips for staff (varies by resort and country), and travel insurance.
The "not included" list is where the real cost hides. A couple spending $300 on a spa day, $200 on a catamaran tour, and $100 on premium drinks adds $600 to a trip they thought was already paid for. Budget an extra 15 to 25% above the resort rate for these extras. If you're strict about staying on-site and sticking to included drinks, you can avoid most of this. But most people don't.
One thing most comparison sites don't tell you: the quality gap between a $150/night resort and a $250/night resort is enormous. The extra $100/night buys you edible a la carte restaurants instead of repetitive buffet food, drinkable house wine instead of headache-inducing cheap spirits, and a beach that isn't shared with 500 other guests. The mid-range tier is where all-inclusive actually delivers on its promise.
All-inclusive costs by island
Punta Cana (Dominican Republic). The most popular and affordable all-inclusive destination in the Caribbean. Budget resorts: $120 to $180/night per person per night. Mid-range: $180-$280/night. Luxury: $280 to $500+/night. Flights from the US East Coast: $250 to $450 return. The DR has more all-inclusive resorts than any other Caribbean island, which keeps prices competitive.
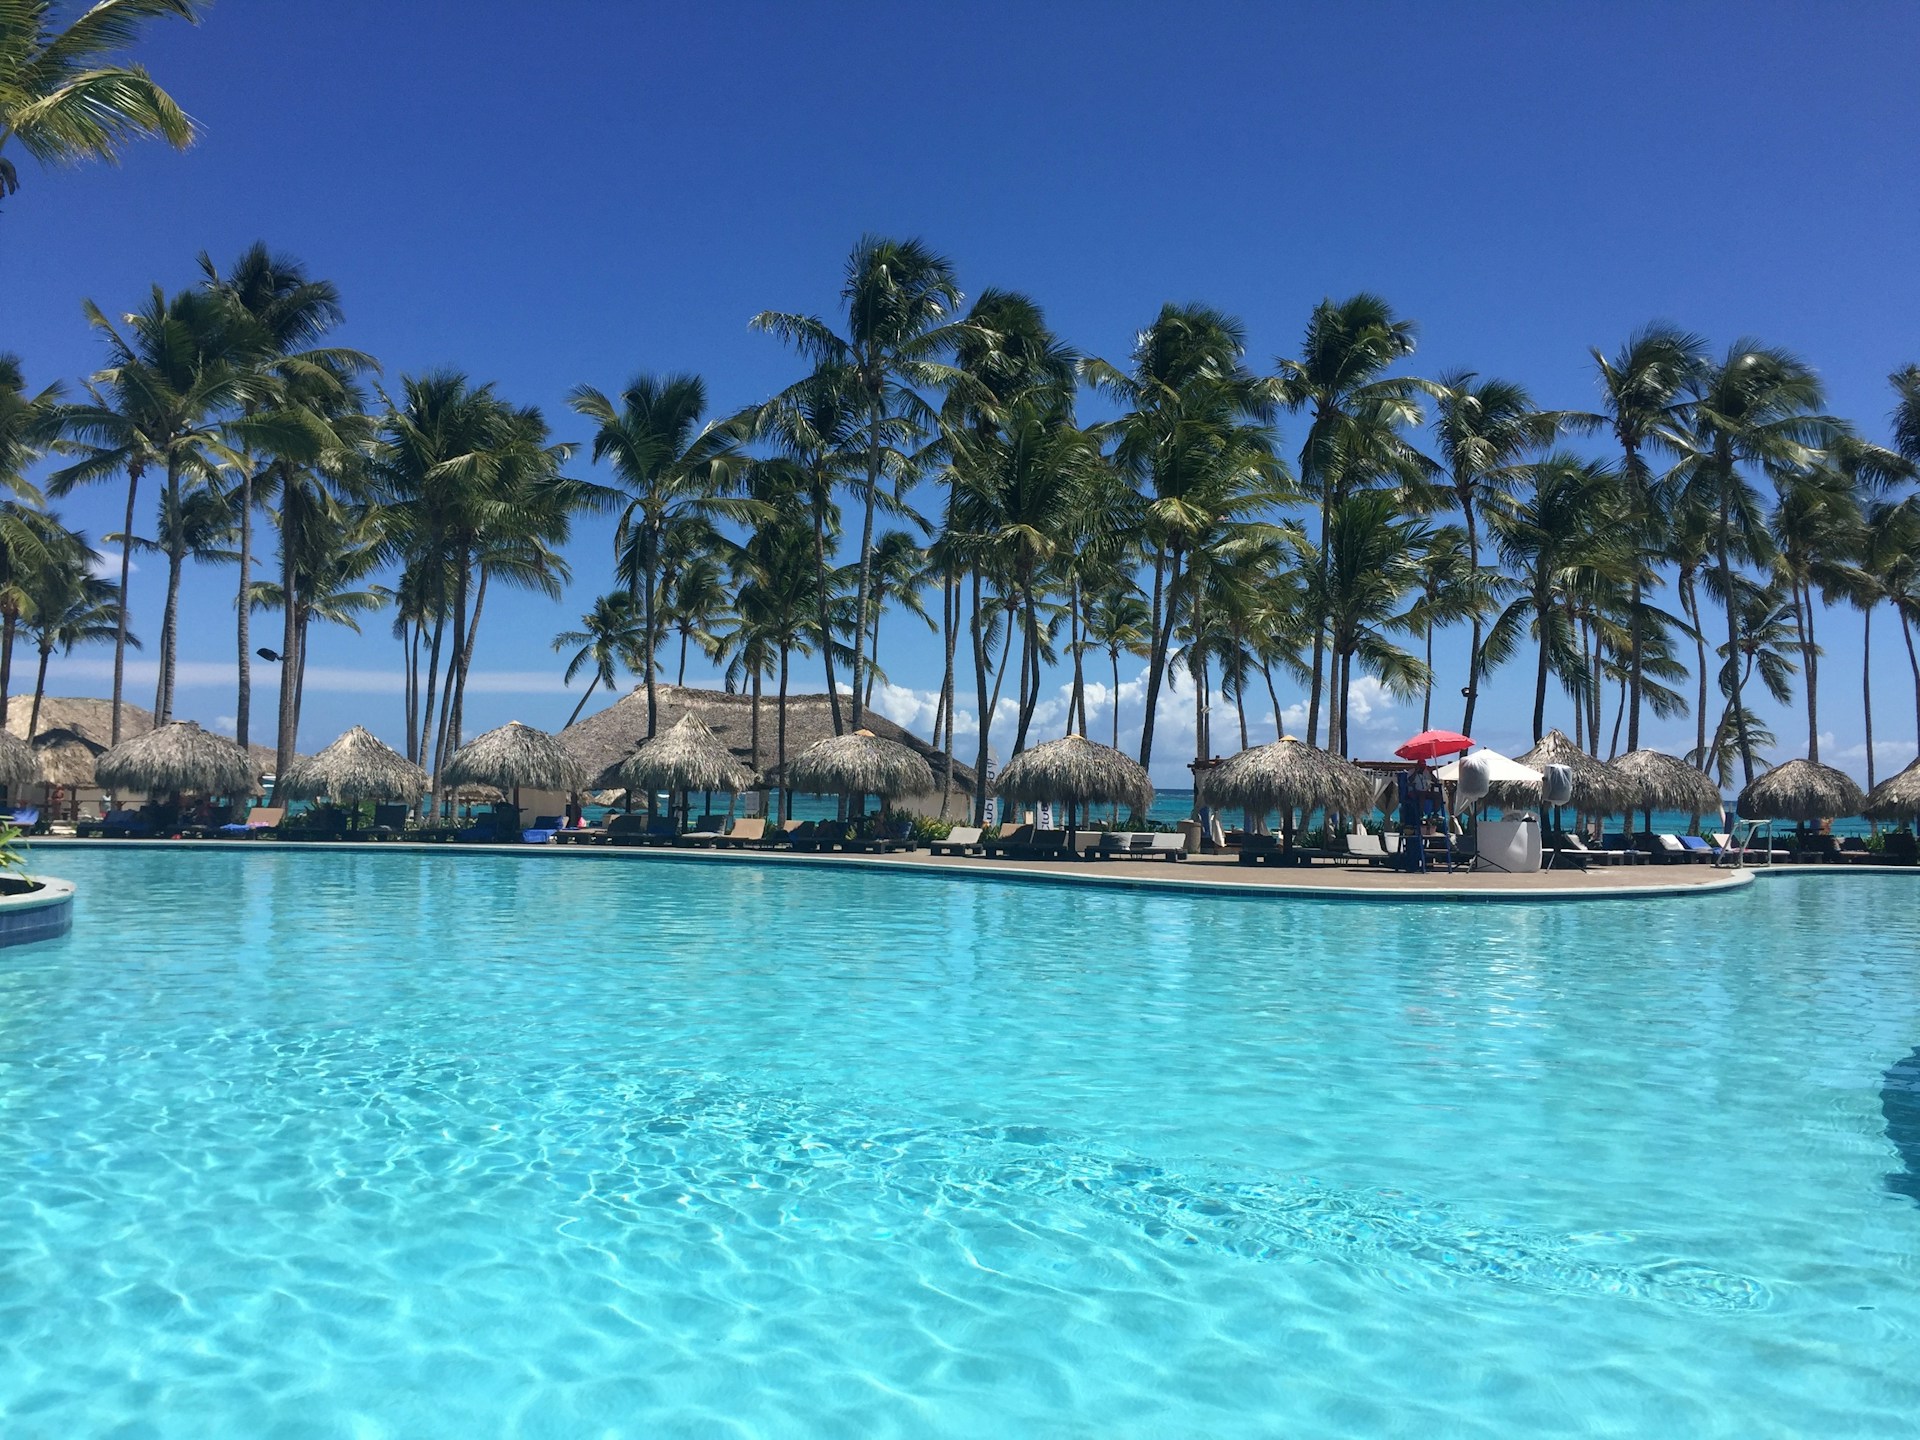
The Bavaro Beach strip has the highest concentration of resorts, which means easy comparison shopping but also the most crowded beaches. Hard Rock and Hyatt Ziva are solid mid-range options. Secrets and Excellence are the best adults-only properties.
Cancun/Riviera Maya (Mexico). Close second to Punta Cana on value. Budget: $120 to $200/night. Mid-range: $200-$350/night. Luxury: $350 to $600+/night. Flights from the US: $200 to $400 round-trip. The Riviera Maya (Playa del Carmen, Tulum) is slightly pricier than Cancun's hotel zone but quieter and with better snorkelling at cenotes and nearby reefs.
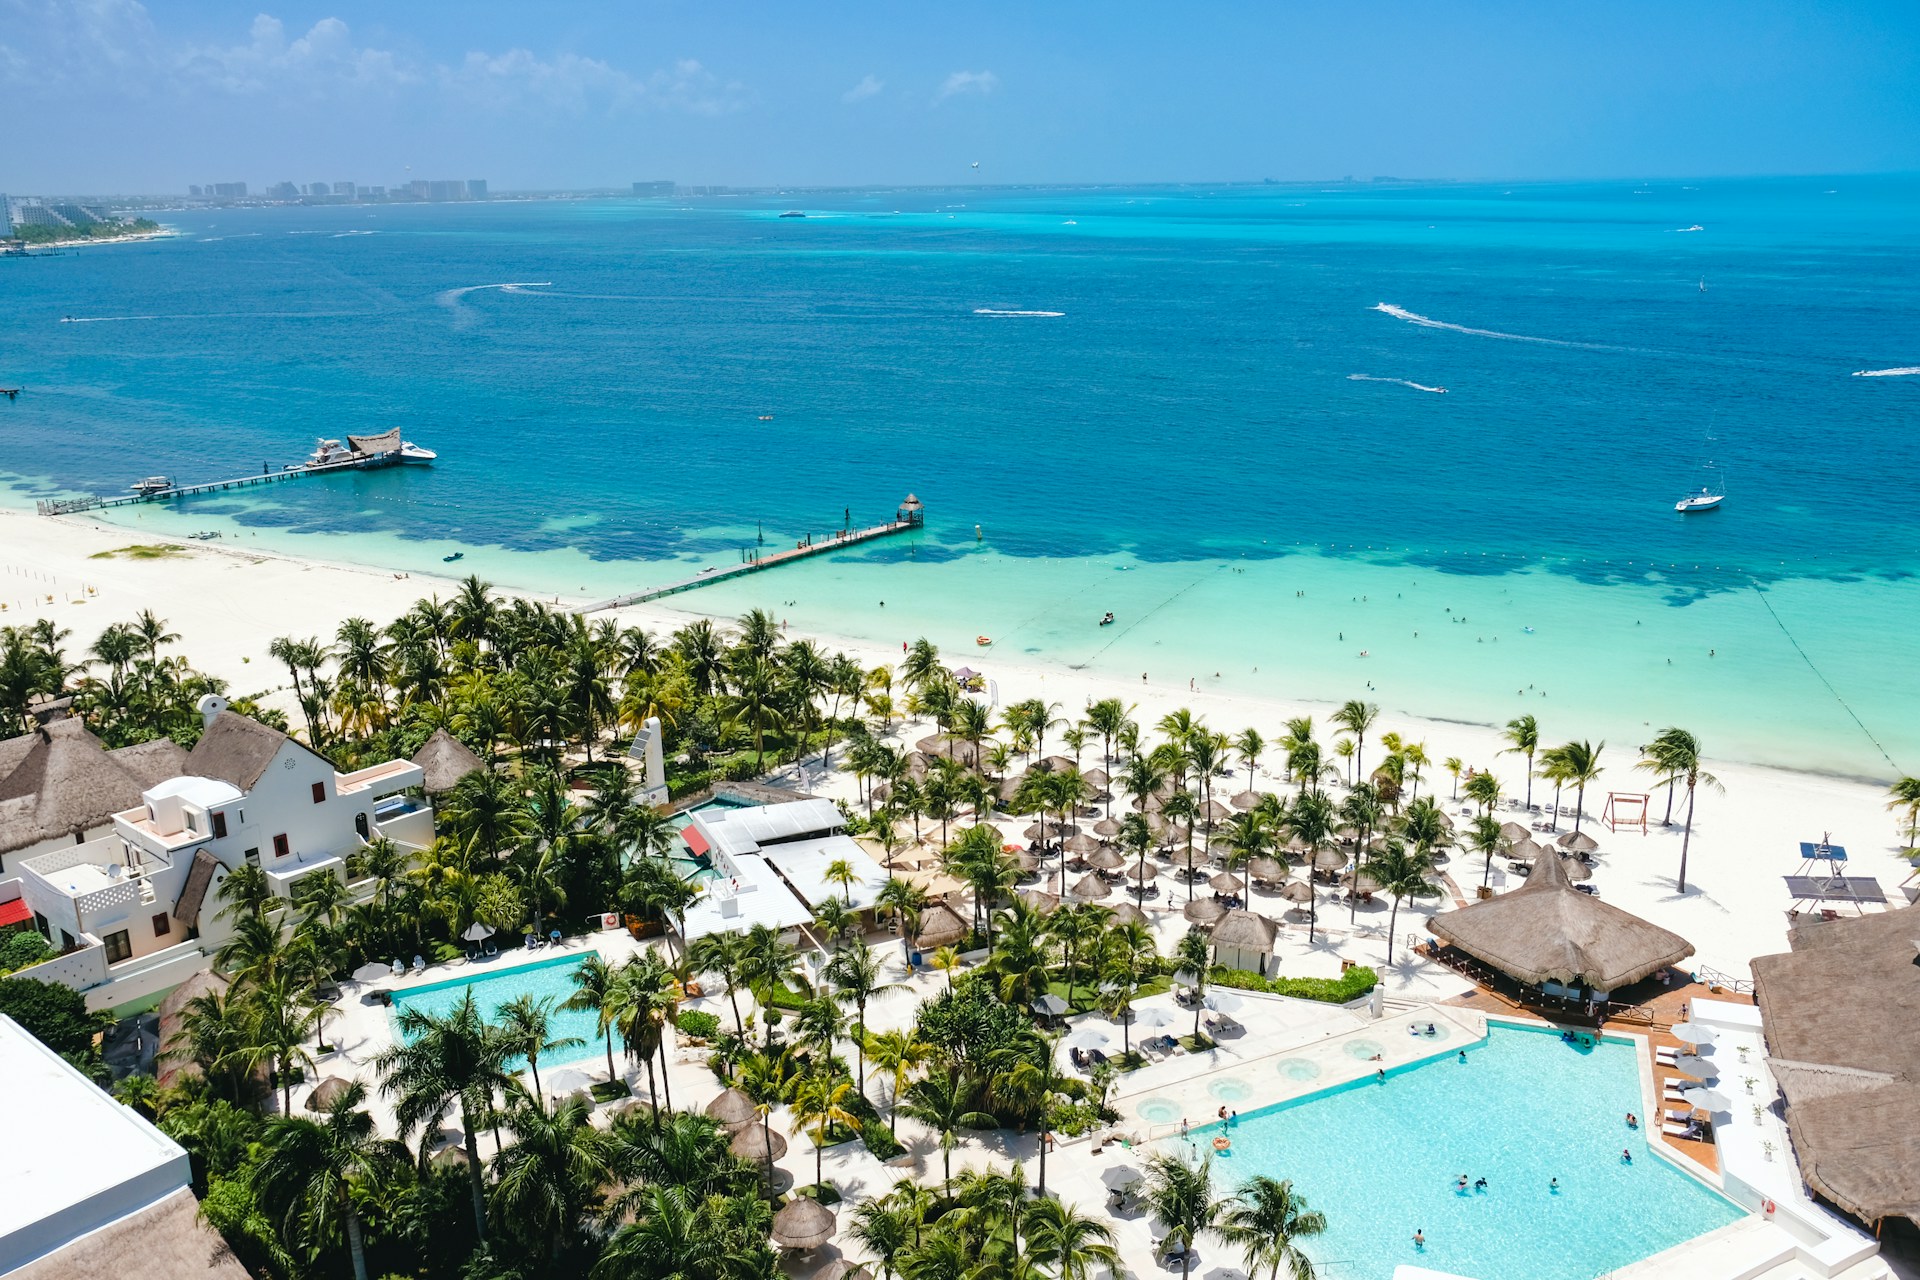
Cancun has more nightlife options, which matters if you want to explore beyond the property. The domestic flight connections from Cancun are also cheaper if you want to add Mexico City or Oaxaca to your trip.
Jamaica. Montego Bay and Negril are the main all-inclusive hubs. Budget: $150 to $220/night. Mid-range: $220 to $350/night. Luxury (Sandals, Secrets): $350 to $600+/night. Flights: $300 to $500 return. Jamaica's all-inclusives tend to include more in the base package than the cheapest DR options: better drink selections, more included restaurants, and more activities.
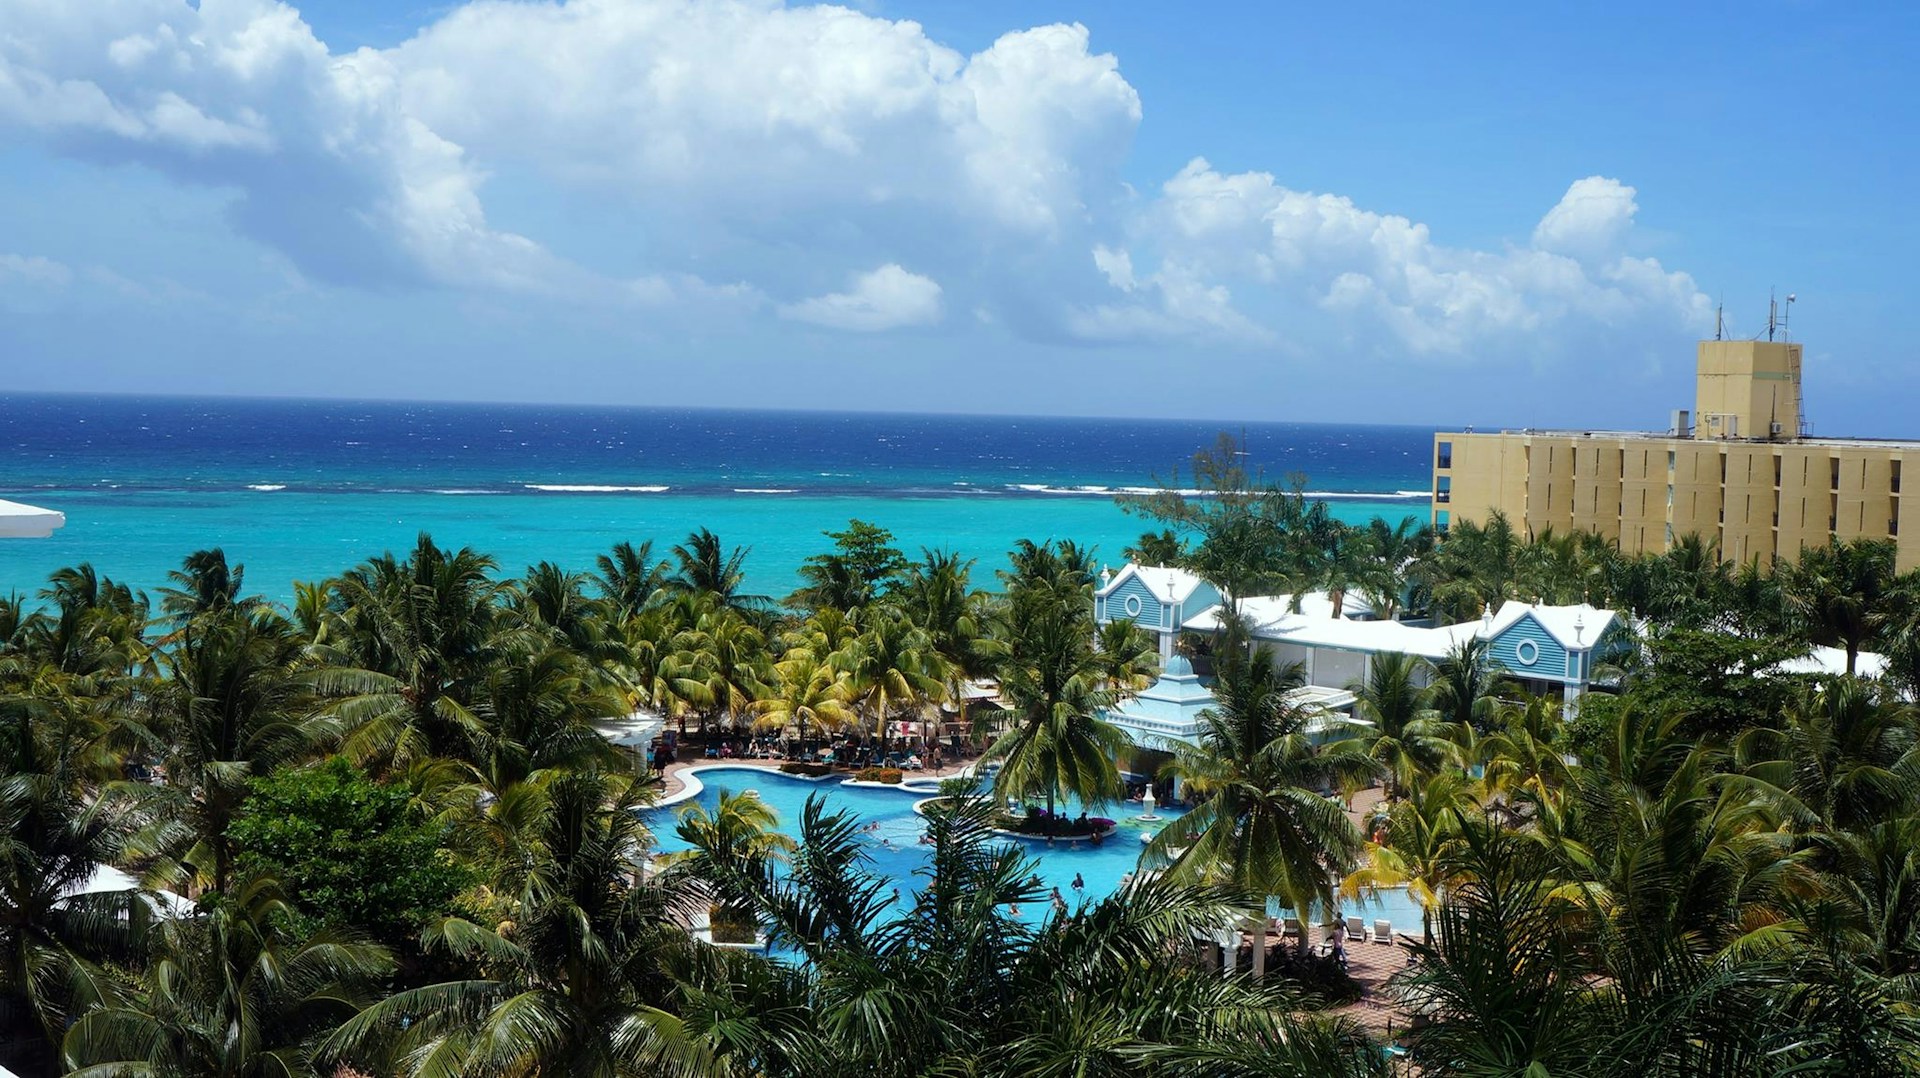
Sandals properties are couples-only and include premium spirits and top-shelf wine that would cost extra at most other chains. The trade-off is that Jamaica's resorts are more spread out, and getting between them (or to town) requires taxis or organised transport.
Aruba. Fewer true all-inclusives than DR or Jamaica, and generally pricier. Mid-range: $250 to $400/night. Luxury: $400 to $700+/night. Flights: $300 to $550 return. Aruba's appeal is the guaranteed weather.

It sits outside the hurricane belt, so you can book August to October without weather anxiety and get low-season pricing without the storm risk. The European-influenced dining scene and the island's compact size (you can drive end to end in 45 minutes) make it easy to explore off-resort too.
Turks and Caicos. Premium destination. Very few budget options exist. Mid-range: $350 to $550/night. Luxury: $600 to $1,200+/night. Flights: $350 to $600 return. Grace Bay Beach consistently ranks among the world's best beaches, and the price reflects it.
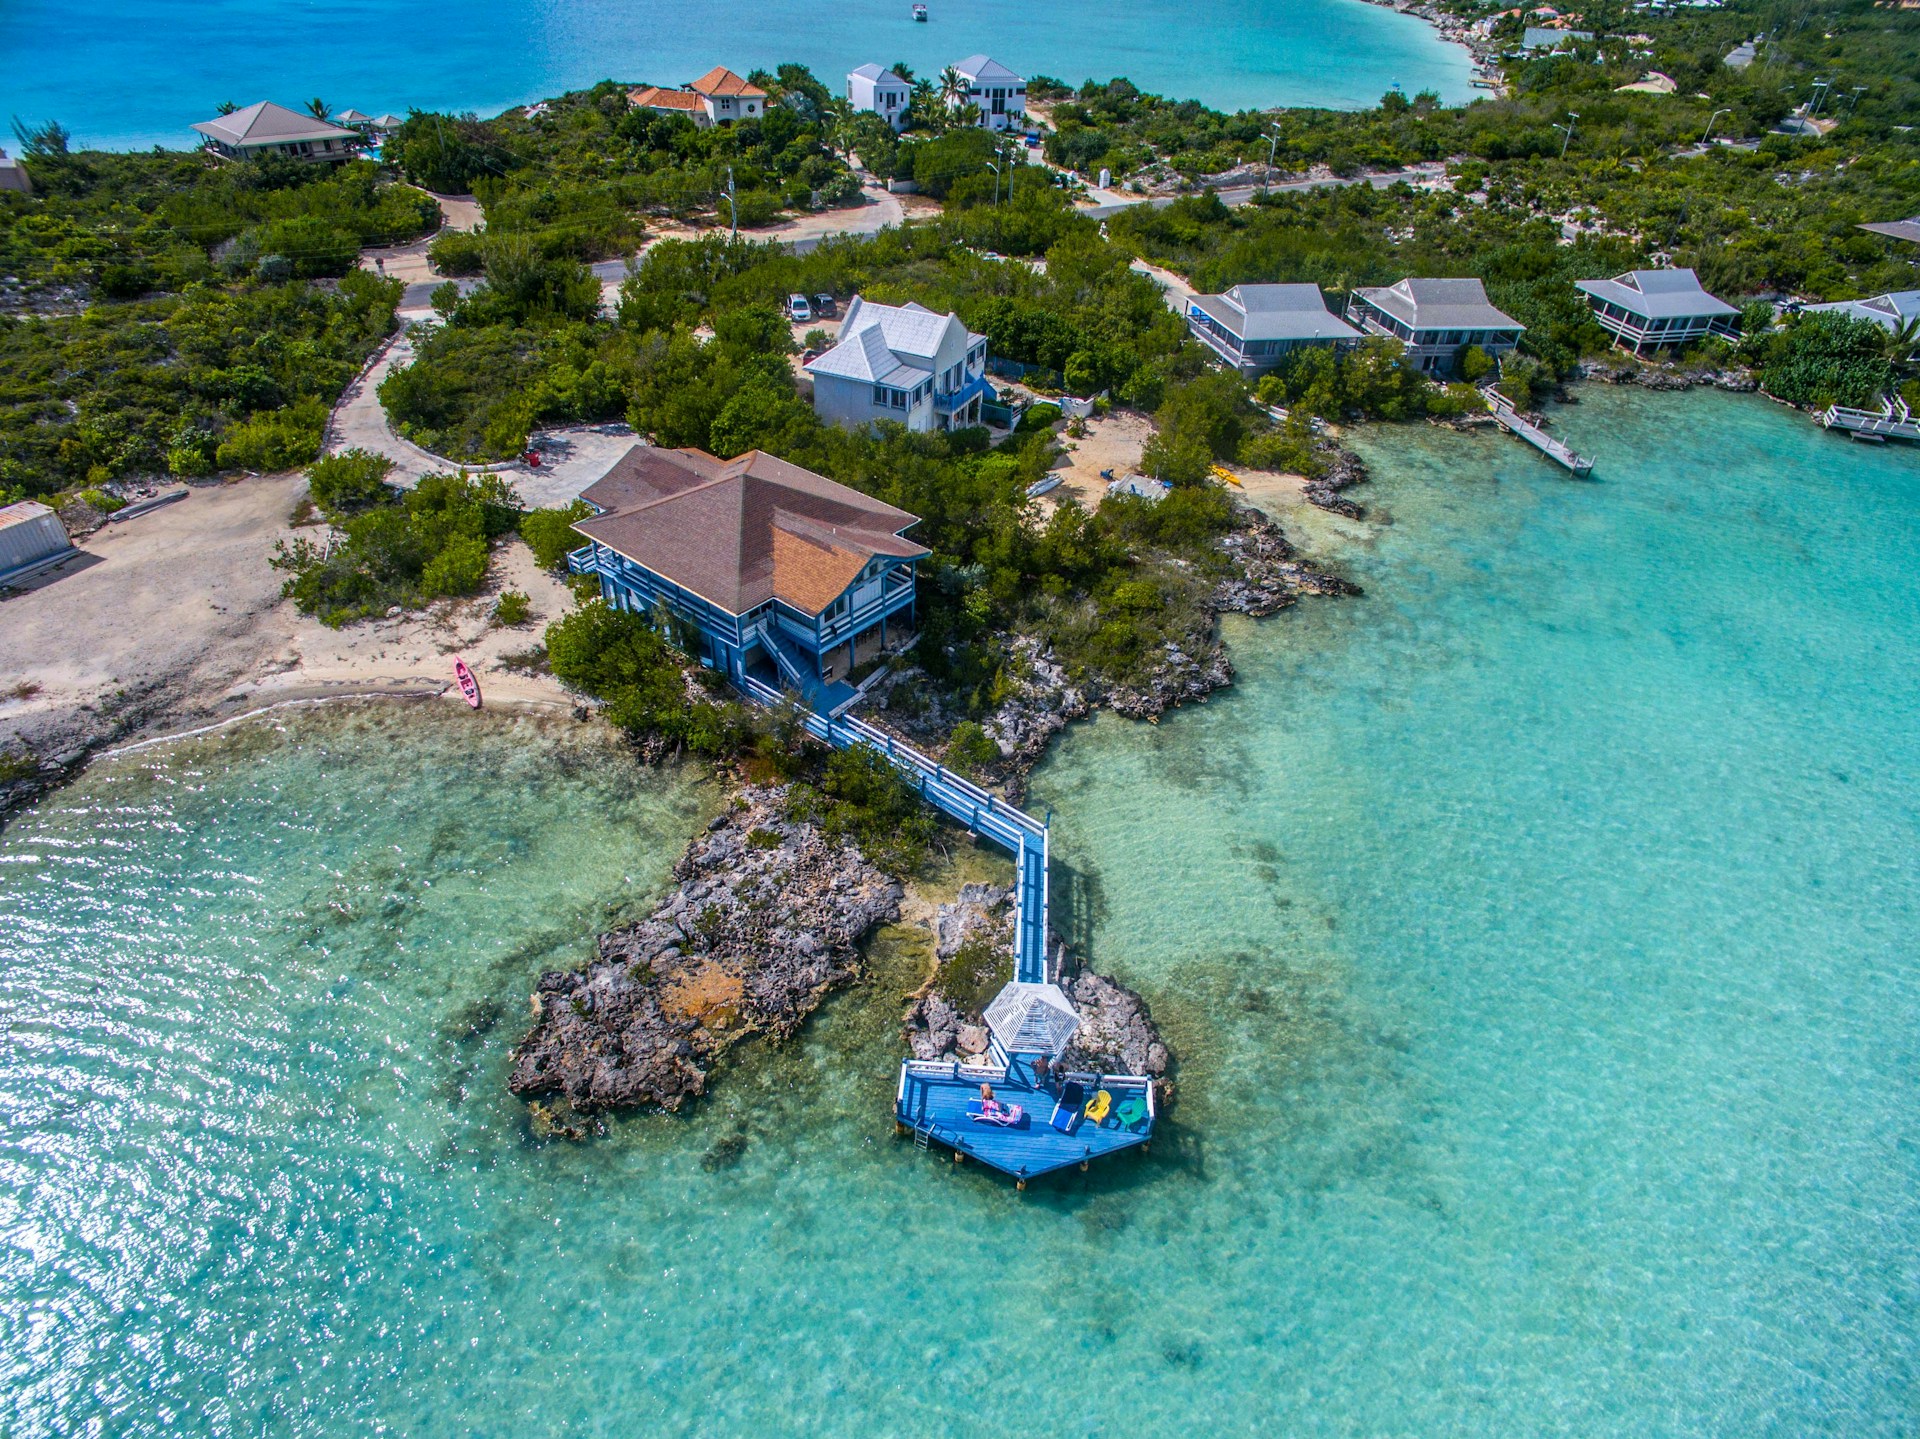
This is where you go for a special occasion or once-in-a-lifetime trip, not a budget beach break. The water clarity and turquoise colour are genuinely in a different league from most Caribbean islands.
St. Lucia. Romantic favourite. Budget options are rare. Mid-range: $300 to $500/night. Luxury (Sandals, Jade Mountain): $500 to $1,500+/night. Flights: $350 to $650 return. The Pitons (twin volcanic peaks) make every sunset photo look professional.
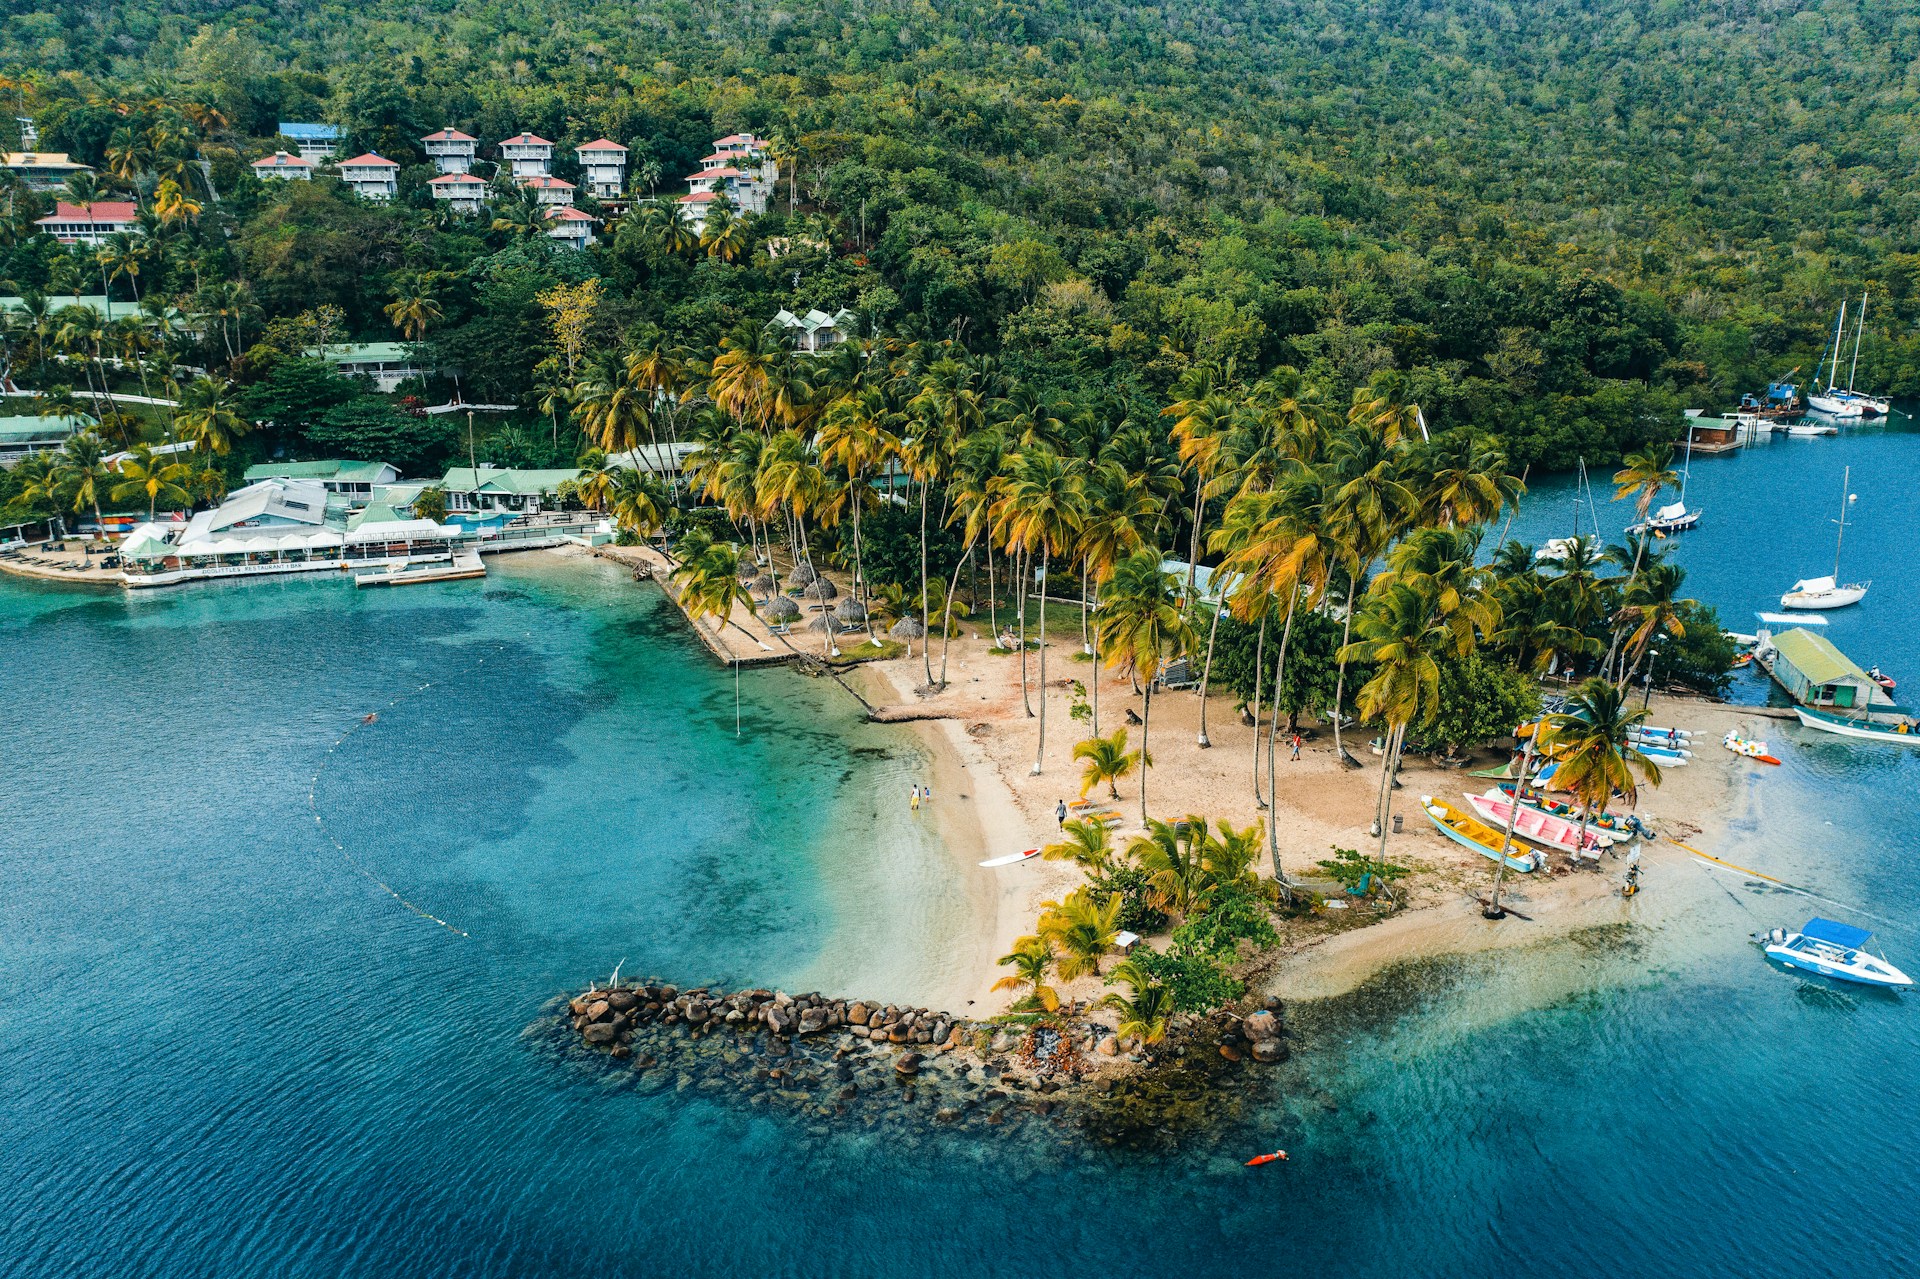
St. Lucia is the Caribbean's top honeymoon destination for a reason: dramatic scenery, boutique resorts, and a lush, mountainous interior that feels more like Hawaii than a flat coral island.
All prices are estimates based on mid-2026 data for 7-night stays. Prices fluctuate significantly by season, with December to April (high season) commanding 30 to 50% premiums over May to November (low season, which overlaps with hurricane season). If you're planning a trip for two, you can find more inspiration in our guide to 15 romantic destinations for couples.
When to book for the best price
Timing matters more than haggling. Three rules:
1. Book 2 to 4 months in advance for the best combination of availability and price. Last-minute deals exist but they're unpredictable, and you lose the ability to choose your room type or preferred resort. The sweet spot is 8 to 16 weeks before departure. Earlier bookings (6+ months) lock in availability but rarely offer the lowest price.
2. Travel in shoulder season (late April to May, or November). Prices drop 20 to 40% from peak, the weather is still good (warm, occasional rain, fewer tourists), and resorts are less crowded. Avoid hurricane peak (August to October) unless you're comfortable with the risk and want the absolute lowest prices. If you do book during hurricane season, travel insurance that covers weather-related cancellations is non-negotiable. A cancelled trip without insurance means you lose the full resort cost.
3. Compare the package, not just the nightly rate. A resort at $250/night that includes airport transfers, premium drinks, and a la carte dining may cost less overall than a $180/night resort where transfers are $80 round trip, good drinks are extra, and you end up eating off-resort twice because the buffet disappoints. The per-night rate is the starting point, not the final answer.
Sample budget: 7-night Punta Cana trip for two
Here's what a realistic mid-range all-inclusive week looks like for two people:
Flights (US East Coast): $600 to $900 total (two return tickets booked 2 to 3 months ahead).
Resort (mid-range, 7 nights): $2,500 to $3,900 total (based on $180 to $280/night per person). This gets you a Hyatt Ziva, Hard Rock, or Secrets-tier property with multiple restaurants, pool bars, and beach service.
Airport transfers: $60 to $100 total (shared shuttle is cheapest, private car is $80 to $100).
Excursions (2 activities): $150 to $300 total (catamaran tour with snorkelling plus a zip-line or ATV adventure).
Tips and extras: $100 to $200 total (staff tips throughout the week, one spa treatment, premium drinks upgrade).
Travel insurance: $80 to $150 total (covers cancellation, medical, and evacuation).
TOTAL: $3,490 to $5,550 for two people, 7 nights.
If you're saving up before the trip, set aside money in a Grey Pouch so the funds are earmarked and visible. You can track your savings growing toward the target and know exactly where you stand before booking.
How to pay at Caribbean resorts
Most Caribbean resorts accept Visa and Mastercard for extras, excursions, and tips. If you're paying in USD (most Caribbean destinations price in USD for tourists), your home bank card may charge 1.5 to 3% in foreign transaction fees on every tap. On a $500 extras bill across the week, that's $7.50 to $15 in hidden fees you wouldn't notice until the statement arrives.
A Grey virtual card lets you spend from your dollar balance with no conversion markup. You can also hold USD before you travel, so every payment at the resort comes from your pre-loaded balance rather than triggering a live conversion. For data and maps at the resort, grab a travel eSIM and skip the international roaming charges that add up when you're googling snorkelling spots and restaurant reviews.
Bring $50 to $100 in small USD bills for tipping housekeeping, bartenders, and tour guides. Cash tips are preferred over adding them to the room bill, and many staff members don't see room-bill tips until weeks later.
Frequently asked questions
How much does an all-inclusive Caribbean trip cost for two?
$3,000 to $8,000 for a 7-night trip, including flights, depending on the island and resort tier. Punta Cana (DR) and Cancun (Mexico) are the most affordable at $3,000 to $5,500. Turks and Caicos starts at $6,000+. These figures include flights, resort, transfers, excursions, tips, and insurance. The resort rate alone is only part of the total.
Is Punta Cana or Cancun cheaper?
They're close, but Punta Cana edges ahead slightly on resort prices due to higher competition among properties. Cancun has cheaper flights from the US West Coast and Midwest. For the US East Coast, Punta Cana is usually the better overall deal because flights are shorter (3 to 4 hours vs 4 to 5) and cheaper.
Are all-inclusive resorts worth it?
For beach holidays where you plan to spend most of your time at the resort, yes. The value is strongest at mid-range resorts ($200 to $350/night) where meals, drinks, and activities are genuinely included and genuinely good. Skip all-inclusive if you love exploring local restaurants and markets. The resort model is designed to keep you on-site.
When is hurricane season in the Caribbean?
June to November, with August to October being the highest-risk months. Resorts offer their lowest prices during this period (20 to 40% below peak). Travel insurance that covers weather-related cancellations is essential if you book during hurricane season. Aruba, Bonaire, and Curacao sit outside the hurricane belt and are safer bets.
Do I need a passport for the Caribbean?
US citizens need a valid passport for all Caribbean destinations except US territories (US Virgin Islands, Puerto Rico). Your passport must be valid for at least 6 months beyond your travel dates for most islands. Apply or renew at least 3 months before your trip; processing times can stretch to 8 to 10 weeks.
Should I tip at an all-inclusive resort?
Not required, but it's customary and appreciated. $1 to $5 per interaction for bartenders, housekeeping, and restaurant servers. $5 to $20 for tour guides and excursion leaders. Some resorts add a service charge automatically to your bill. Check before doubling up. Bring small USD bills since cash is strongly preferred.
Planning a Caribbean getaway? Save for the trip in a Grey Pouch and pay for extras on a virtual card with no conversion fees.
Disclaimer: This article is for informational purposes only. All costs and details are estimates based on mid-2026 data. Verify current information before making decisions. Grey isn't a bank. We're a licensed financial services provider offering multi-currency accounts.

How much does a trip to Japan from the US cost? A full budget breakdown
See how much a trip to Japan costs from the US, Europe, Africa, South America and North America, with flight, hotel and daily budgets. Compare.
Priscila Marotti
•
October 5, 2026
•
6 min read
You pull up flights to Tokyo. $1,200 round trip from New York. You check hotels. $150 a night in Shinjuku. You start doing the maths and the number climbs past $3,000 before you've added food or a single bullet train ticket. Then you land and discover that a bowl of tonkotsu ramen costs $7, a metro ride across Tokyo is $2, and a Shinto shrine charges $3 to enter. The flights and hotels are expensive. Everything else is cheaper than a week in most European or American cities.
A one-week trip to Japan costs roughly $1,500 to $4,000 per person, depending on where you fly from and your travel style. Budget travellers can manage around $1,500 to $2,200, mid-range around $2,500 to $4,000, and luxury $6,000 or more. Flights are the biggest variable by region.
This guide breaks down costs from five origin regions so you can budget accurately regardless of where you're flying from. For help building your itinerary, use the free trip itinerary template.
How much does a trip to Japan cost? Budget range overview
How much is a trip to Japan? The answer depends on three things: where you fly from, how you sleep, and how fast you move between cities. Here's the range for a solo traveller spending 7 nights:
The highest single cost is always the flight. After that, accommodation and intercity transport (especially bullet trains) determine which tier you're in. Food, attractions, and local transport are comparatively cheap. A budget traveller eating at convenience stores, taking local trains, and sleeping in hostels can see most of what Japan offers for under $100 a day.
How much does a trip to Japan cost from the USA?
Round-trip flights from major US cities to Tokyo (Narita or Haneda) typically cost $800 to $1,400 in economy. Direct flights from the West Coast (LA, San Francisco, Seattle) are cheaper and shorter (10 to 11 hours). East Coast departures (New York, Chicago) are more expensive and add connection time or a longer direct route (13 to 14 hours).
Low season (January to early March, excluding holidays) drops fares to the $700 to $900 range. Cherry blossom season (late March to mid-April) and Golden Week (late April to early May) push fares past $1,200. Summer (July to August) and autumn foliage (October to November) sit in the middle.
How much does a trip to Japan cost from North America (Canada and Mexico)?
From Canada, round-trip flights from Vancouver are the cheapest, ranging from $800 to $1,200 (direct flights available). Toronto adds $200 to $400 to those ranges because most routes connect through Vancouver, Seattle, or a Pacific hub. From Mexico City, flights typically route through the US or via a transpacific airline and cost $1,000 to $1,700.
Once in Japan, daily costs are identical to those for US travellers. The only difference is the flight. Budget total for 7 nights from Canada: $1,600 to $2,400. From Mexico: $1,800 to $2,800.
How much does a trip to Japan cost from Europe?
Flights from London, Paris, and Frankfurt to Tokyo run $700 to $1,300 (roughly EUR 650 to EUR 1,200). Airlines like Finnair (via Helsinki), Turkish Airlines (via Istanbul), and ANA (direct from London or Paris) compete on this route, keeping prices reasonable despite the distance. Low-season fares dip below $700.
The yen's weakness against the euro and pound in recent years has made Japan's daily costs cheaper for European travellers than they look in dollar terms. A meal that costs 1,500 yen ($10) feels like a bargain against London or Paris restaurant prices. Budget total for 7 nights from Europe: $1,500 to $2,200. Mid-range: $2,300 to $3,800.
How much does a trip to japan cost from Africa?
There are no direct flights from any African city to Japan. The most common routes connect through Dubai (Emirates), Doha (Qatar Airways), or Istanbul (Turkish Airlines). From Lagos, Nairobi, or Johannesburg, round-trip fares range from $900 to $1,800, depending on the season and layover time. Two-stop itineraries are cheaper but add 20+ hours of travel.
Once in Japan, costs are the same as for any other origin. The flight premium is the main budget difference. Budget total for 7 nights from Africa: $1,700 to $2,600. Mid-range: $2,700 to $4,200. Currency conversion is a factor: if you're earning in naira, rand, or shillings, holding USD or yen before travel avoids unfavourable airport exchange rates.
How much does a trip to Japan cost from South America?
Flights from Sao Paulo or Buenos Aires to Tokyo are among the longest and most expensive: $1,300 to $2,200 round trip. Most routes connect through the US (Dallas, Houston, LA) or the Middle East. Timing matters: January and February fares are lowest. No direct flights exist from South America to Japan as of 2026.
Budget total for 7 nights from South America: $2,000 to $3,000. Mid-range: $3,000 to $4,500. The flight is the single largest expense. Once on the ground, Japan's daily costs are manageable, but the airfare takes a bigger bite of the total budget than from any other region.
Trip to Japan cost breakdown: Flights, hotels, food and activities
Here's every line item for a 7-day Japan trip, regardless of origin:
On the JR Pass: at $335 for 7 days, the Japan Rail Pass is only worth buying if you plan at least 2 to 3 long-distance bullet train trips (Tokyo to Kyoto is $100 each way). If you're staying in one city, local trains and metro passes are much cheaper. If you're buying JR tickets individually, hold Japanese yen in advance and pay at station kiosks to avoid airport exchange markups.
How to Budget and Pay for Your Trip to Japan
Japan is still heavily cash-dependent in smaller shops, izakayas, and rural areas. Major chains and department stores accept cards, but you'll need cash for temple admission, street food, local buses, and smaller restaurants. Here's how to handle the money side:
Carry some yen in cash. Withdraw from 7-Eleven ATMs (available nationwide, 24/7) or exchange before departure. Airport exchange desks give the worst rates.
Use a card with no foreign transaction fee. Japan's card acceptance has improved, but foreign transaction fees of 1.5 to 3% eat into your budget on every tap. Grey's virtual card charges a 1% conversion fee capped at $6. That's cheaper than most bank cards on any purchase over $600. The Grey card works everywhere Visa is accepted, including convenience stores, department stores, and train stations.
Get a travel eSIM before you fly. Japan has free Wi-Fi in stations and convenience stores, but it's patchy and slow. A prepaid eSIM plan gives you data for Google Maps, Google Translate, and train schedules without hunting for hotspots. Buy a travel eSIM for Japan through Grey's Lifestyle tab before departure.
Move money before you travel. Sending money ahead to a Japanese bank account for tuition, a rent deposit, or a ryokan booking? Move money before you travel through Grey. The fee is 1% capped at $6. Far cheaper than a bank wire.
Frequently asked questions about the cost of a trip to Japan from the US
How much does a trip to Japan cost for 7 days?
A 7-day trip to Japan costs $1,500 to $4,000 per person from the US, depending on travel style. Budget travellers staying in hostels and eating at convenience stores spend $1,500 to $2,200. Mid-range travellers using business hotels, JR Pass, and restaurants spend $2,500 to $4,000. Flights are the biggest variable: West Coast departures are $200 to $400 cheaper than East Coast.
Is Japan expensive for tourists?
Japan's reputation for being expensive is outdated. Daily spending (food, transport, activities) is lower than in London, Paris, or New York. A bowl of ramen costs $7 to $12. A metro ride is $2 to $4. Temple admission is $3 to $5. The expensive parts are flights (especially from Africa and South America) and bullet trains ($100+ per trip). The weak yen has also made Japan cheaper for visitors holding dollars, euros, or pounds.
How much spending money do I need per day in Japan?
Budget travellers need $80 to $120 per day for accommodation, food, transport, and activities. Mid-range travellers need $150 to $250 per day. This excludes flights. Carry some cash (yen) for smaller shops and rural areas. Use a card with no foreign transaction fee for larger purchases to avoid 1.5 to 3% markups on every tap.
Is the JR Pass worth it?
Only if you take 3 or more long-distance bullet train trips in 7 days. At $335, the JR Pass breaks even if you ride from Tokyo to Kyoto round-trip ($200) plus one more Shinkansen trip. If you're staying in one city or only making one intercity trip, buying individual tickets is cheaper. The JR Pass also covers some local JR lines, which adds value if you're moving between cities daily.
What is the cheapest month to visit Japan?
January and February are the cheapest months. Flights drop to $700 to $900 from the US, and hotels offer low-season rates. The weather is cold but dry. Avoid the last week of December (New Year) and the first week of January (holiday crowds). Late May (after Golden Week) and September are also good values with better weather.
How much would a trip to Japan cost from Africa?
A 7-day trip to Japan from Lagos, Nairobi, or Johannesburg costs $1,700 to $4,200, depending on travel style. Flights are the biggest expense: $900 to $1,800 round trip via Dubai, Doha, or Istanbul. Daily costs in Japan are the same regardless of origin. Consider holding USD or yen before departure to avoid poor exchange rates at African airports.
Travelling to Japan? Open a Grey account, spend in yen on a virtual card, and buy a travel eSIM before you fly.
Disclaimer: All prices are estimates based on publicly available data and may change. Flight prices vary by season, airline, and booking date. Hotel prices vary by location and demand. Grey isn't a bank. We're a licensed financial services provider offering multi-currency accounts and virtual cards.
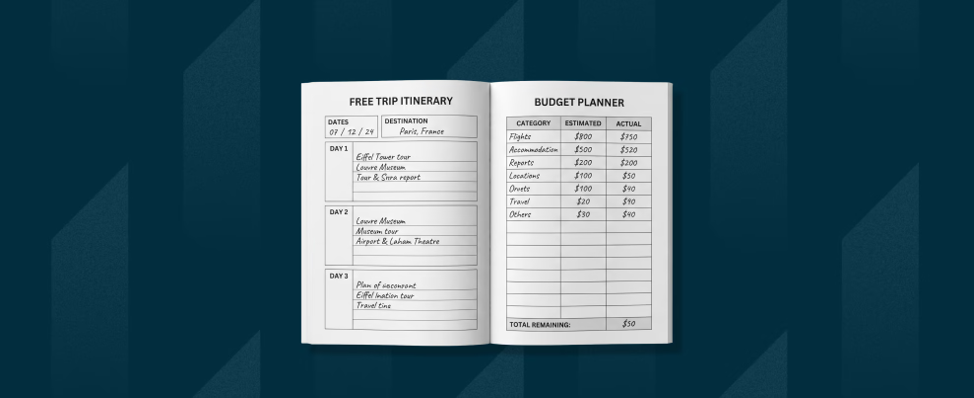
Free trip itinerary template with a built-in budget planner
Plan your trip with this free itinerary template. Copy it to organise flights, hotels, activities, daily plans, and travel costs in one place.
Priscila Marotti
•
October 5, 2026
•
6 min read
Planning a trip without an itinerary is like cooking without a recipe. You might end up with something great, or you might end up at the airport without a hotel booking, $500 over budget, and an argument about whose fault it is. A good itinerary doesn't constrain you. It frees you to enjoy the trip because the logistics are already handled.
Skip the detailed itinerary if you're taking a 3-day beach holiday with no flights to catch and no bookings to keep. Not every trip needs a spreadsheet. A note with your hotel address and flight times is enough for a short, simple getaway. But anything longer than 4 days, with multiple destinations, or involving international travel, benefits from a proper plan.
A trip itinerary template organises your flights, accommodation, activities, and daily budget in one document. The best templates include a day-by-day schedule, a cost tracker, a packing checklist, and a section for booking confirmations. You fill it in once before the trip and reference it every morning.
We've built a template below that works for any destination, any length of trip, and any budget.
What a good trip itinerary includes
Most free templates online are either too simple (just a list of dates) or too complex (30 fields per day that nobody fills in). A useful template balances structure with flexibility. Here's what it should contain:
1. Trip overview. Destination, travel dates, number of travellers, total budget, and emergency contacts (embassy phone number, travel insurance policy number and claims line, local emergency number). This goes on page one, so it's accessible instantly, even without internet. If your phone dies in a foreign country, this page is the one you need printed.
2. Day-by-day schedule. Each day gets a date, location (if you're moving between cities), morning activity, afternoon activity, evening plans, accommodation name and address, and check-in/check-out times. Leave gaps. Over-scheduling kills the spontaneity that makes trips memorable. Two planned activities per day is the sweet spot. Three is pushing it. Four means you'll see everything and enjoy nothing.
3. Budget tracker. Daily budget (set a target per day), actual spend (update each evening), running total, and category breakdown (accommodation, food, transport, activities, miscellaneous). The gap between your daily budget and actual spend tells you whether you're on track or need to adjust before it's too late. Most overspending happens because people don't track until it's too late.
4. Booking confirmations. A section with confirmation numbers, booking references, and links for flights, hotels, car rentals, and pre-booked activities. Having these in one place saves you from searching your email at the airport check-in counter while the queue builds behind you. It also means anyone travelling with you can find the information without asking you.
5. Packing checklist. A simple checkbox list. Clothes, toiletries, documents, electronics, chargers, medications. Check each item as you pack it. Uncheck when you repack for the return journey so you don't leave anything in the hotel.
6. Transport details. For multi-city trips, note how you're getting between locations: flight number and terminal, train time and station, car rental pickup/dropoff address. This prevents the panic of arriving at a train station and not knowing which platform, or discovering your car rental is at a different terminal.
Also read: What to pack for a Europe trip (plus how to handle your money)
How to fill in your itinerary: Step by step
Step 1: Start with the fixed elements. Flights, accommodation, and any pre-booked activities go in first. These are the non-negotiable time slots that everything else fits around. Note departure times, check-in times, and anything with a timed entry (museums, tours, restaurants with reservations).
Step 2: Add your must-do activities. The 3 to 5 things you'd be disappointed to miss. Place them on specific days, accounting for travel time and opening hours. Don't schedule more than 2 major activities per day. You'll be more tired than you think, especially with jet lag on the first and second days.
Step 3: Fill in meals. You don't need to book every restaurant, but noting "lunch near the museum" or "dinner in the old town" gives each day a loose structure without over-planning. Research one must-try restaurant per city in advance and make a reservation if it's popular. Leave the rest to spontaneity and local recommendations.
Step 4: Leave a blank space. At least one "free afternoon" for every three planned days. This is where the best travel moments happen: a cafe you stumble into, a market you didn't know about, a local's recommendation that changes your whole day. Resist the urge to fill every gap. The blank space isn't wasted time. It's the time that makes the trip feel like yours rather than a checklist.
Step 5: Set your daily budget. Divide your total trip budget by the number of days. This gives you a target per day. Some days will be over (a museum plus a nice dinner), others under (a beach day plus street food). As long as the running average stays near your target, you're fine. Track it every evening. Two minutes on your phone, not twenty minutes with a spreadsheet.
Step 6: Share with everyone. Send the finished itinerary to every person on the trip. Use a Google Doc (free, editable, works offline if downloaded) or print one copy as backup. If your phone dies or you get separated, everyone needs access to the day's plan, the hotel address, and the emergency contacts.
If you are looking for romantic trips getaways, check our list of 15 romantic trips for couples: Ideas and budgets.
Trip itinerary template
Here's a sample structure for a 7-day trip. Copy this format for any destination:
TRIP OVERVIEW
Destination: [City/Country].
Dates: [Departure date] to [Return date].
Travellers: [Number and names].
Total budget: $[amount] / Daily target: $[amount/days].
Emergency: Embassy [number], Insurance [policy number + phone], Local emergency [number].
BOOKING CONFIRMATIONS
Flight out: [Airline, flight #, confirmation #, departure time, terminal].
Flight return: [Same details]. Hotels: [Name, confirmation #, check-in/out, address] for each property.
Activities: [Name, confirmation #, date/time] for each pre-booked experience.
Car rental: [Company, confirmation #, pickup/dropoff location and time].
PACKING CHECKLIST
Passport (valid 6+ months)
Travel insurance documents
Phone charger
Universal power adaptor
Medications (in original packaging)
Comfortable walking shoes
Layers for weather changes
Toiletries
Reusable water bottle
Day bag/backpack
Copies of booking confirmations (printed)
Cash in local currency for arrival day
Add destination-specific items (swimwear, hiking boots, formal wear for restaurants) as needed.
DAY 1: [Date] [City]
Accommodation: [Hotel/Airbnb name, address, check-in time, confirmation #].
Morning: [Activity or arrival details].
Afternoon: [Activity].
Evening: [Dinner plans or free time].
Budget target: $[amount] | Actual: $[fill in evening].
[Repeat this structure for each day of your trip.]
How to budget your trip
The budget section is the most underused part of any itinerary. Most people fill in the fun stuff (activities, restaurants) and ignore the numbers until they check their bank balance on day five and panic. Don't be that person.
Here's a simple framework. Set a daily budget based on the destination's cost level. Budget destinations (Southeast Asia, Eastern Europe, Central America, Morocco): $50 to $100/day per person. Mid-range (Western Europe, Japan, major US cities, Australia): $120 to $250/day. Premium (Scandinavia, Switzerland, Maldives, Iceland): $250 to $500+/day. These include accommodation, food, transport, and activities.
Track actual spend every evening. It takes 2 minutes. Open your banking app, add up the day's transactions, and write the number next to the day's budget target. If you're over budget by day three, you have four days to adjust: eat local instead of restaurants, skip one paid activity, or switch to free attractions. If you don't track, you won't know until you're home and the credit card bill arrives.
Before you leave, save for the trip in a Grey Pouch so the money is set aside and visible. On the trip, spend on a Grey card with no foreign transaction fees, and your spending is automatically logged in the app. For data and maps, grab a travel eSIM and skip roaming charges that can add $10 to $15 per day.
Common itinerary mistakes
Over-scheduling. Three museums, two tours, and a cooking class in one day isn't ambitious. It's exhausting. You'll rush through each one, remember none of them properly, and spend the evening too tired to enjoy dinner. Two activities per day is the maximum for enjoying a trip, not just completing it. One morning activity and one afternoon experience, with meals and walking in between, is a full and satisfying day.
No buffer between activities. Travel time between locations is real. Google Maps says 30 minutes, but finding the entrance, queuing, getting lost, and dealing with unexpected closures adds 15 to 30 minutes. Build in 30- to 60-minute buffers between each scheduled activity. These buffers become coffee stops, photo opportunities, and the unplanned discoveries that make trips memorable.
Ignoring time zones and jet lag. If you land at 7 am after an overnight flight, don't schedule a museum visit for 9 am. You'll be a zombie. Plan day one as a recovery day: check in, walk the neighbourhood, eat well, sleep early. Your trip starts properly on day two. Most itineraries assume you'll hit the ground running. You won't.
Not sharing the itinerary. Everyone on the trip should have access. Share it as a Google Doc, a shared note, or print a copy. If your phone dies, someone else can navigate. If you get separated, everyone knows the day's plan and where to meet. A shared itinerary also prevents the "what are we doing today?" conversation that starts every morning of a poorly planned trip.
Booking everything in advance. Book flights, first and last night accommodation, and any activity that sells out (popular museum time slots, well-known restaurants, national park entries). Leave mid-trip accommodation flexible if you can. You might want to stay an extra night somewhere you love or leave early from a place that disappoints.
Plan your trip, set your budget, and pay for it all with Grey. Save in a Pouch, spend on a virtual card, stay connected with an eSIM.
Frequently asked questions about trip itineraries
What is the best app for trip itineraries?
Google Docs or Google Sheets for simplicity: free, shared in real-time, and editable from any device. TripIt for automatic itinerary building from forwarded confirmation emails. Notion for customisable templates with linked databases. Wanderlog for map-based visual itineraries. For most travellers, a simple shared Google Doc with the template structure above works better than a specialised app.
How detailed should my itinerary be?
Detailed enough to avoid logistical stress, flexible enough to allow spontaneity. Fix the non-negotiables (flights, hotels, timed-entry activities). Plan 1 to 2 activities per day. Leave at least one free afternoon for every 3 planned days. The best trips have structure in the morning and freedom in the afternoon.
Should I book everything in advance?
Book flights, first and last night accommodation, and activities that sell out (popular museums, tours, national park entries). Leave mid-trip accommodation flexible if you can. You might want to stay an extra night somewhere you love or leave a place that disappoints you. Over-booking removes the flexibility that makes travel enjoyable.
How do I share my itinerary with travel companions?
Google Docs with edit access so everyone can add restaurant finds and updated costs. Print one physical copy as backup. Take a screenshot of each day's plan so it's accessible without internet. The shared document becomes the single source of truth. No more group chats asking "what time is check-in?"
Disclaimer: This article is for informational purposes only. All costs and details are estimates based on mid-2026 data. Verify current information before making decisions. Grey isn't a bank. We're a licensed financial services provider offering multi-currency accounts.

What to pack for a Europe trip (plus how to handle your money)
What to pack for a Europe trip. Practical checklist plus how to handle money across multiple currencies. Travel lighter and smarter. Read now.
Priscila Marotti
•
October 2, 2026
•
6 min read
The internet has convinced people they need a 47-item packing list, a compression cube system, and a capsule wardrobe colour-coordinated to their destination’s architecture. You need a carry-on bag, 5 days of clothes, and a plan for handling money across 2 to 4 currencies. That's it.
Pack for 5 days regardless of trip length. You'll do laundry. Every European city has laundromats, and most hotels and Airbnbs have washing machines. Packing for 14 days means lugging a checked bag through cobblestone streets, up narrow hotel staircases, and onto trains where overhead racks are sized for Europeans who pack lighter than you.
Skip packing cubes unless you genuinely find them useful. They're a gear-industry solution to a problem caused by overpacking. If you pack 5 days of clothes in a 40L backpack, everything fits without elaborate organisational systems.
This guide covers what to pack, what to leave behind, and how to handle money in euros, pounds, Swiss francs, and other currencies you'll encounter. For day trip planning, once you arrive, see the best day trips from Paris.
What clothes to pack for a Europe trip
3 t-shirts or tops. Neutral colours (black, grey, navy, white) that mix and match. Cotton blends dry faster than pure cotton. Merino wool is worth the investment for travel: it doesn't smell after multiple wears, dries quickly, and regulates temperature. One merino t-shirt and two cotton tops cover most situations.
2 pairs of trousers/bottoms. One pair of comfortable jeans or chinos for evenings and nicer restaurants. One pair of quick-dry hiking/travel trousers for active days. Skip the "zip-off" travel trousers unless you're actually hiking. They look terrible in cities, and most European restaurants enforce a "no shorts that look like you just came from a trek" dress code.
5 pairs of underwear and socks. This is the one category where matching your trip length makes sense. Underwear and socks are small, and not having enough is genuinely unpleasant. Quick-dry travel underwear (ExOfficio, Uniqlo Airism) dries overnight after hand-washing.
1 light jacket or fleece. Even Mediterranean summers get cool in the evening. A packable down jacket (Uniqlo Ultra Light Down or similar) weighs almost nothing and compresses to the size of a water bottle. It saves you from buying a jacket at a European price when the temperature drops unexpectedly.
1 rain layer. A lightweight waterproof shell. Not an umbrella. Umbrellas are awkward on crowded European streets, break in the wind, and get forgotten in cafes. A packable rain jacket (Patagonia Torrentshell, North Face Venture) works in rain, doubles as a windbreaker, and stuffs into your day bag.
1 "nice" outfit. One slightly dressier shirt or blouse and your better trousers. Some European restaurants (especially in Italy and France) expect a minimum level of dress. You don't need formal wear, but a step above hiking gear shows respect for the culture and gets you into places that turn away obvious tourists.
Comfortable walking shoes. This is the single most important packing decision. You'll walk 8 to 15 miles per day in European cities. Cobblestones destroy unsupported shoes. Pack one pair of comfortable, broken-in walking shoes with good arch support. White trainers (Nike, Adidas, New Balance) work for both walking and casual dining. Leave the flip-flops for the beach.
Tech essentials for travelling in Europe
Phone + charger + power bank. Your phone replaces maps, guidebooks, translators, cameras, boarding passes, and booking confirmations. Keep it charged. A 10,000mAh power bank adds one full charge and weighs about 200g. Charge both every night.
Universal power adaptor. Europe uses Type C (two round pins) in most countries, Type G (three rectangular pins) in the UK and Ireland. One universal adaptor covers both plus Switzerland's Type J. Don't pack country-specific adaptors for each destination. One universal unit is smaller and more versatile.
Travel eSIM. A travel eSIM gives you data across Europe without swapping SIM cards or paying roaming charges. You download it before you leave, activate on arrival, and have data for maps, messaging, and translations. This is the single biggest quality-of-life improvement in modern travel. Not having reliable data in a foreign city means you can't navigate, translate, or look up anything.
Noise-cancelling earbuds or headphones. For flights, trains, and noisy hostels. Also useful for audio guides at museums (better than renting the museum's clunky device).
Key travel documents for Europe
Passport. Valid for at least 6 months beyond your travel dates. Check now, not 2 weeks before departure. Passport renewal takes 6 to 10 weeks in the US and 3 to 6 weeks in the UK.
Travel insurance. Non-negotiable. A European hospital visit without insurance can cost $5,000 to $50,000. Annual multi-trip policies ($100 to $200/year) are cheaper than single-trip policies if you travel more than once. Check that your policy covers medical evacuation, trip cancellation, and baggage loss.
Copies of important documents. Passport photo page, travel insurance policy number, credit/debit card emergency numbers, and hotel confirmations. Keep digital copies in your email and physical copies separate from the originals. If your passport is stolen, a photocopy dramatically speeds up the replacement process at your embassy.
Toiletries to pack for Europe
The TSA 3-1-1 rule applies to EU flights too. Liquids in containers of 100ml (3.4oz) or less, in one clear zip-lock bag per person. Pack travel-size versions of essentials only: toothpaste, deodorant, sunscreen, any prescription medications. Buy shampoo, conditioner, and body wash at a European pharmacy or supermarket after arrival. They cost the same or less than travel sizes at home, and you're not carrying them through airport security.
Prescription medications. Keep in original packaging with your name on the label. Carry a copy of the prescription for controlled substances. Pack in carry-on, never checked luggage (if your checked bag is lost, you can't replace prescription medication easily in a foreign country).
Sunscreen. Even in Northern Europe. The sun in June to August is strong enough to burn, and European pharmacies charge premium prices for sunscreen (EUR 15 to 25 for a decent bottle). Pack one travel-size bottle and buy more locally if needed.
What NOT to pack
A checked bag. Carry-on only. European budget airlines (Ryanair, easyJet, Wizz Air) charge $25 to $60 for checked bags each way. European hotel staircases are narrow. Cobblestone streets destroy rolling suitcase wheels. A 40L backpack or carry-on suitcase forces you to pack efficiently and move easily on any surface.
A hair dryer. Every European hotel provides one. Even most Airbnbs have one. Packing your own waste space and weight.
"Just in case" clothes. If you haven't worn it in the last 2 weeks at home, you won't wear it in Europe. Every extra item takes space from the things you'll actually use. The "what if we go somewhere nice?" outfit is the one dressier option listed above, not three additional outfits.
A full-size towel. Hotels provide them. If you're staying in hostels, a microfiber travel towel (PackTowl or similar) dries fast, packs small, and weighs almost nothing.
Excessive electronics. A laptop, tablet, and e-reader are too many screens. Pick one. Most travellers find their phone handles everything a tablet does, and a Kindle weighs far less than a laptop.
How to handle money across Europe
This is where most packing guides stop. They tell you what clothes to bring, but not how to handle the financial side of visiting 3 countries with 2 different currencies in 10 days.
The problem: Western Europe uses the euro (most countries), the British pound (UK), the Swiss franc (Switzerland), the Swedish krona (Sweden), and several others. Every card payment in a non-home currency carries a foreign transaction fee of 1.5 to 3% from your bank. On a $3,000 trip, that's $45 to $90 in hidden fees.
The solution: hold euros and pounds in a Grey account before you leave. Spend on a Grey virtual card from your pre-loaded balance. No conversion markup on each tap. Your spending is tracked in the Grey app automatically, which doubles as your trip budget tracker.
Cash: carry EUR 50 to 100 in cash for arrival (taxi, first meal, tips if needed). ATMs at European airports and train stations accept international cards. Avoid currency exchange booths at airports. Their rates include a 5 to 10% markup. ATM withdrawals are almost always better, even with a per-withdrawal fee.
Contactless payments: Europe is more contactless-friendly than the US. Tap-to-pay works at virtually all retailers, restaurants, transport, and vending machines. Apple Pay and Google Pay are widely accepted. Some small markets and rural businesses are cash-only, but these are the exception in Western Europe.
Tipping: not expected in most of Europe the way it is in the US. Rounding up the bill (EUR 47 → EUR 50) or leaving 5 to 10% at a sit-down restaurant is normal. Don't tip 20%. No one expects it, and some servers find it awkward.
Travelling Europe? Hold euros and pounds in Grey, spend on a virtual card with no conversion fees, and stay connected with a travel eSIM.
Frequently asked questions about what to pack for a Europe trip
What size bag should I take to Europe?
40L backpack or carry-on suitcase (55x40x20cm or smaller for budget airlines). Pack for 5 days and do laundry. A carry-on avoids checked bag fees ($25 to $60 per flight on European budget airlines), fits in overhead bins and narrow hotel staircases, and moves easily on cobblestones. Avoid rolling suitcases for backpacking-style trips.
Do I need a power adaptor for Europe?
Yes. Europe uses Type C plugs (most countries) and Type G (UK, Ireland). One universal adaptor covers all European countries plus Switzerland. Don't buy country-specific adaptors. Budget EUR 10 to 15 for a good universal adaptor from Amazon before you leave. European pharmacies and electronics stores charge double.
How much cash should I bring to Europe?
EUR 50 to 100 for arrival day (taxi, first meal, small purchases). After that, use ATMs for cash withdrawals as needed. Contactless card payments work almost everywhere in Western Europe. Avoid airport currency exchange booths (5 to 10% markup). ATM withdrawals give better rates. Carry a small cash reserve for markets and rural businesses.
Do I need travel insurance for Europe?
Yes. A European hospital visit without insurance costs $5,000 to $50,000, depending on the treatment. Annual multi-trip policies cost $100 to $200/year and cover medical, cancellation, and baggage. Single-trip policies cost $50 to $150. Some credit cards include travel insurance. Check your card benefits before buying a separate policy.
What shoes should I pack for Europe?
One pair of comfortable, broken-in walking shoes with good arch support. You'll walk 8 to 15 miles per day on cobblestones. White trainers (Nike, Adidas, New Balance) work for both walking and casual dining in most European cities. Leave flip-flops for beach destinations only. Leave dress shoes at home unless you have a specific formal event.
Disclaimer: This article is for informational purposes only. All costs and details are estimates based on mid-2026 data. Verify current information before making decisions. Grey isn't a bank. We're a licensed financial services provider offering multi-currency accounts.

15 romantic trips for couples: Ideas and budgets
15 romantic trips for couples at every budget. Weekend city breaks, beach escapes, and adventure getaways with real costs. Find your perfect trip. Read now.
Priscila Marotti
•
October 2, 2026
•
6 min read
The internet is full of "romantic trip" lists that recommend the Maldives and Santorini as if everyone has $10,000 to spend on a week away. Great romantic trips exist at every price point. A $300 weekend in a cabin can be more memorable than a $5,000 resort stay if you pick the right destination and plan around what you both actually enjoy, not what looks good on Instagram.
The best romantic trips for couples range from budget weekends ($300 to $800 for two) to splurge-worthy escapes ($3,000 to $8,000+). Budget picks: Lisbon, Marrakech, and Bali. Mid-range: Amalfi Coast, Kyoto, and Cape Town. Luxury: Maldives, Santorini, and the Swiss Alps. Each destination suits different types of couples and travel styles.
Skip any destination where one of you will be bored. A beach resort is only romantic if both of you like beaches. If one partner wants culture and museums while the other wants poolside cocktails, pick a city with both. Paris, Barcelona, and Cape Town all deliver romance with enough variety to keep both people engaged.
This guide covers 15 destinations organised by budget, with realistic costs for flights, accommodation, food, and activities.
Budget romantic trips ($300 to $800 for two)
1. Lisbon, Portugal. Flights from the US: $400 to $600 return for two. From the UK: $60 to $150. Accommodation: boutique hotel in Alfama or Bairro Alto for $60 to $120/night. Lisbon is hilly, colourful, and built for wandering. Tram 28 through the old town costs EUR 3.30 and is more scenic than most guided tours.

Pasteis de nata at Pasteis de Belem (EUR 1.30 each) and sunset drinks at a rooftop bar in Bairro Alto cost almost nothing. The Miradouro da Graca viewpoint is free, uncrowded, and overlooks the entire city. Budget for 4 nights: $600 to $1,200 total including flights.
2. Marrakech, Morocco. Flights from Europe: $100 to $300 return for two. Accommodation: a traditional riad (courtyard hotel) in the Medina for $50 to $100/night, including breakfast. Marrakech is sensory overload in the best way: the souks, the food stalls at Jemaa el-Fna square, the call to prayer echoing over the rooftops. A couples' hammam and massage at a mid-range spa costs $30 to $60 per person.
-compressed.jpg)
The Jardin Majorelle (EUR 15 entry) is the most romantic garden in North Africa. Budget for 4 nights: $400 to $800 total.
3. Bali, Indonesia. Flights from Australia: $300 to $500 return for two. From the US/Europe: $800 to $1,400. Accommodation: a private pool villa in Ubud or Seminyak for $50 to $150/night. Bali is the budget romantic destination that feels like a splurge. A couples' spa treatment costs $30 to $60. A private sunset dinner at a rice terrace restaurant costs $50 to $80 for two, including wine.
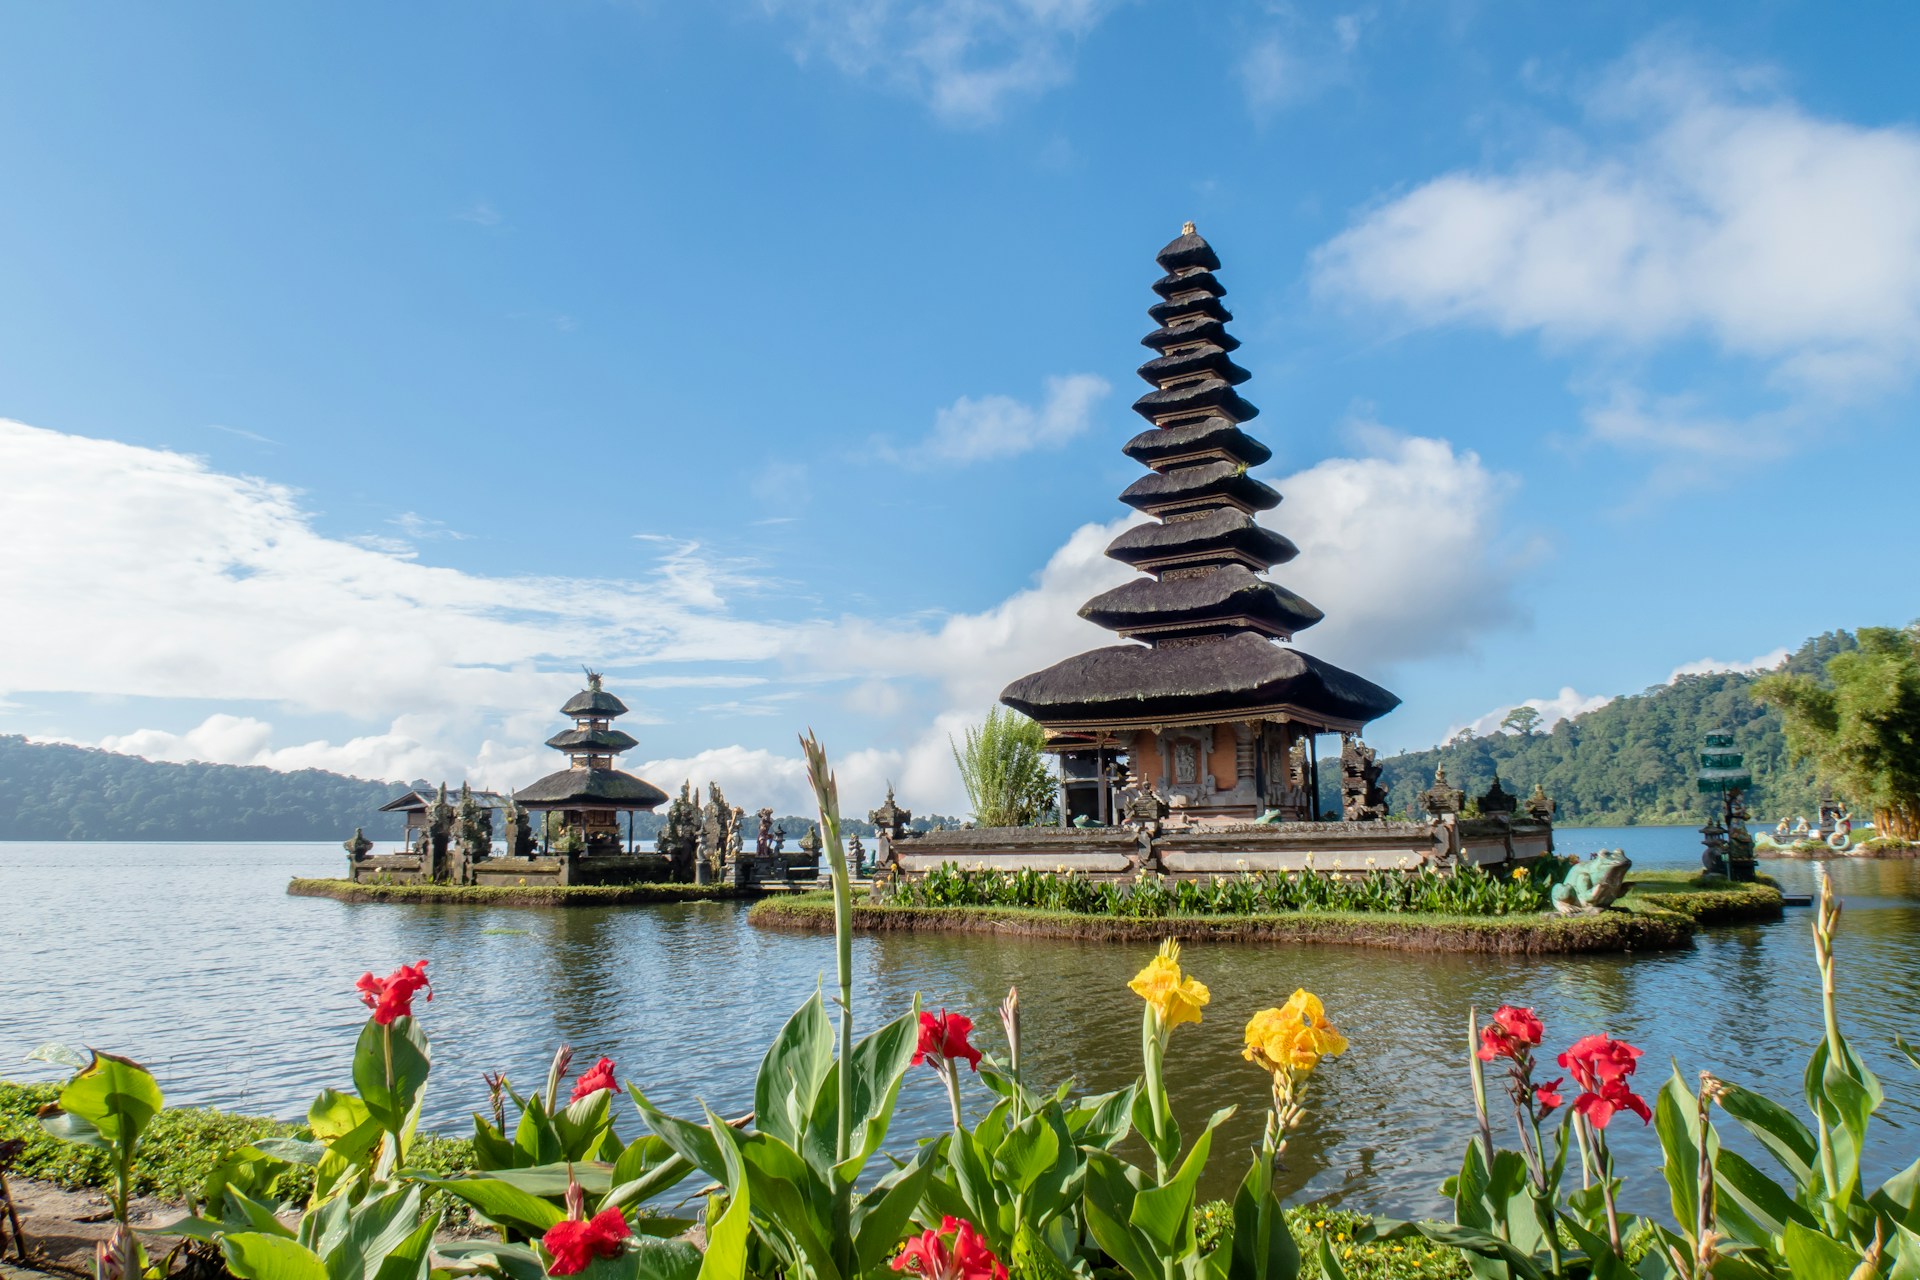
The Tegallalang rice terraces, Uluwatu Temple at sunset, and the Campuhan Ridge Walk in Ubud are all free or nearly free. Budget for 7 nights: $1,000 to $2,500, including flights. For coworking options, if you're combining work and romance, see coworking spaces in Bali.
4. Budapest, Hungary. Flights from Europe: $50 to $150 return for two. From the US: $500 to $800. Accommodation: $60 to $120/night for a boutique hotel along the Danube. Budapest's thermal baths (Szechenyi, Gellert) are built for couples: warm mineral water, ornate architecture, and a pace that forces you to slow down. Entry: $20 to $30 per person.

The ruin bars in the Jewish Quarter are unlike anything else in Europe: crumbling courtyards converted into eccentric bars with mismatched furniture and art installations. Budget for 4 nights: $500 to $1,000 total.
5. San Juan, Puerto Rico. No passport needed for US citizens. Flights from the US East Coast: $150 to $350 return for two. Accommodation: $80 to $150/night in Old San Juan.
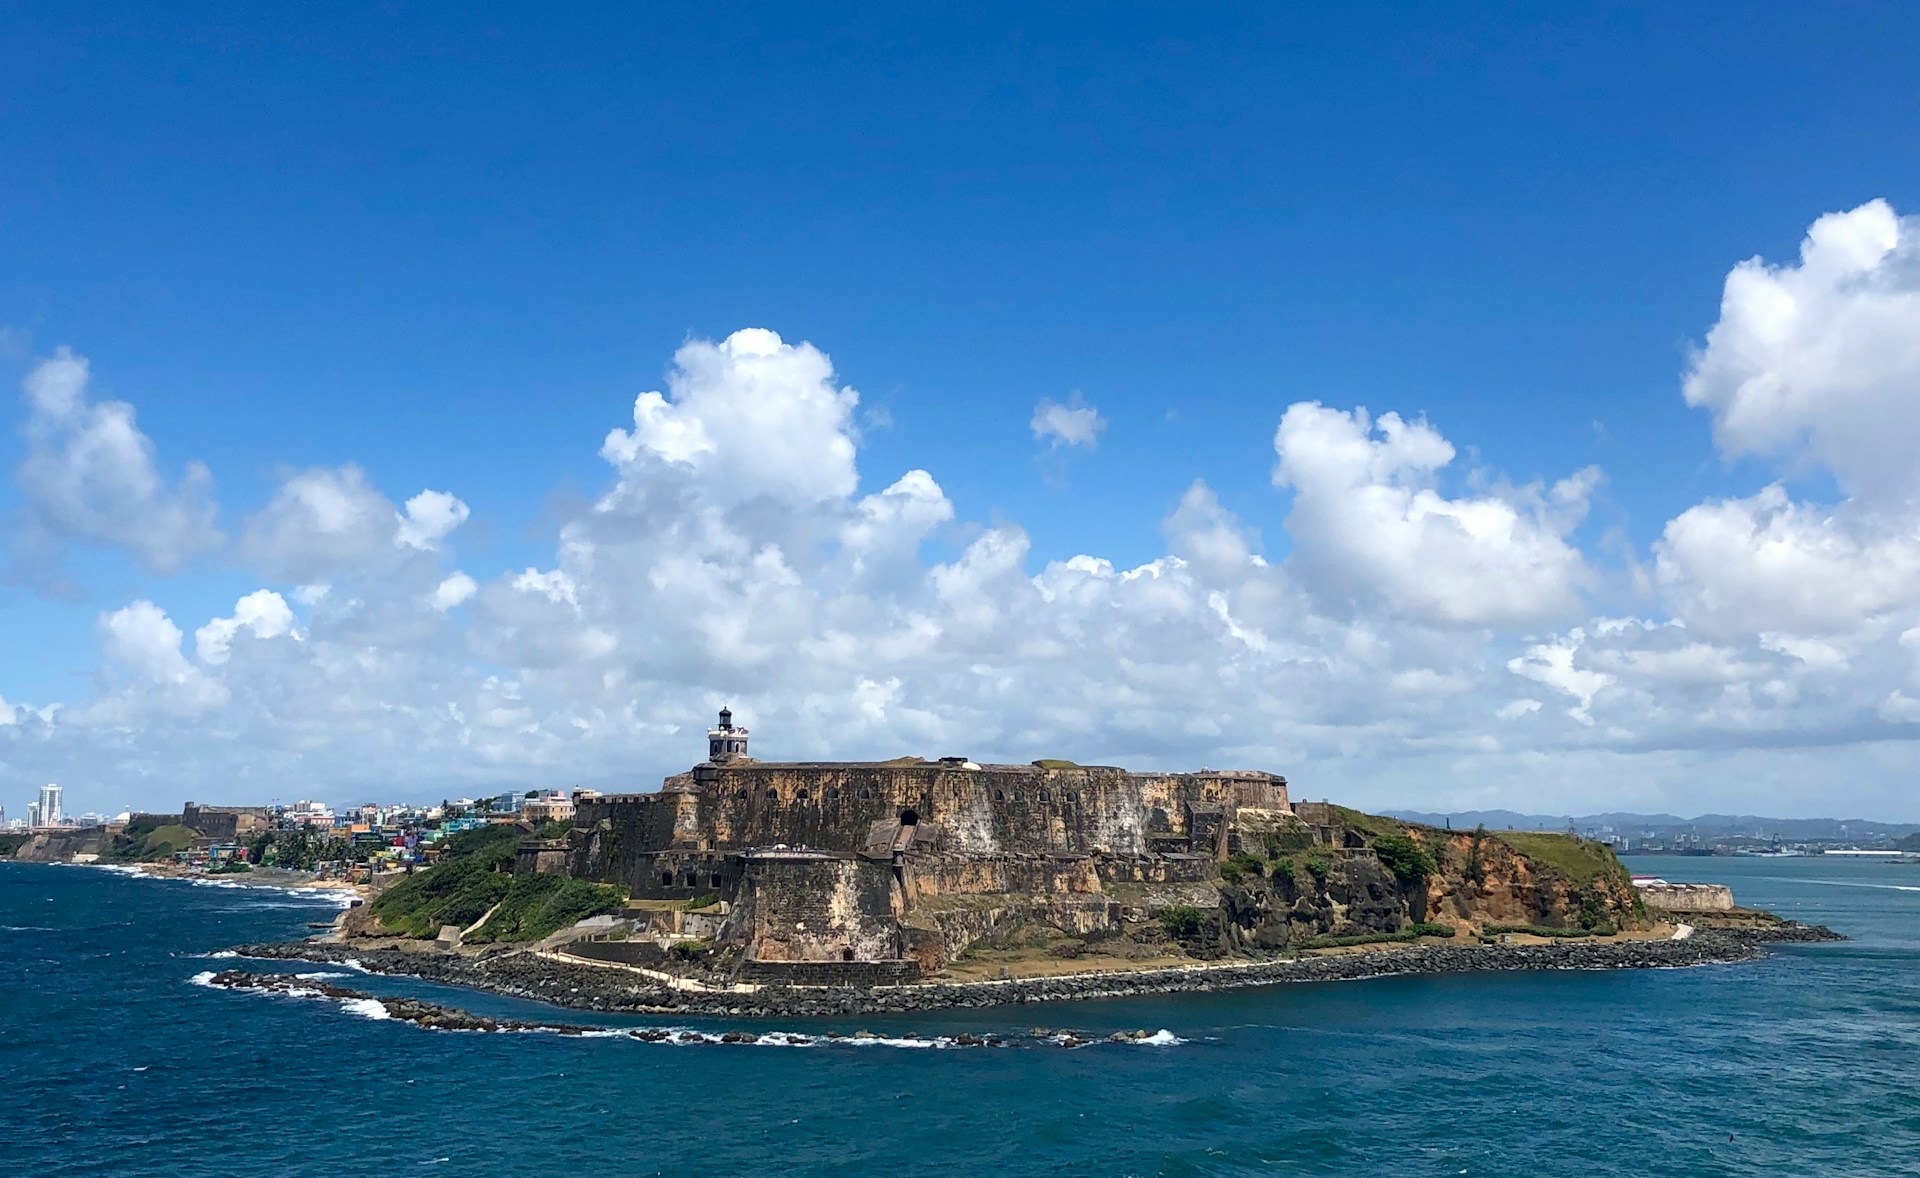
Walking the colourful streets of Viejo San Juan, exploring El Morro fortress (free with National Parks Pass, $10 without), and eating mofongo at a local restaurant ($15 to $25 per plate) make a romantic long weekend without the hassle of international travel. Budget for 3 nights: $400 to $800 total.
Mid-range romantic trips ($1,000 to $3,000 for Two)
6. Amalfi Coast, Italy. Fly into Naples, train to Sorrento, ferry to Positano or Amalfi. Flights from the US: $600 to $1,000 return for two. Accommodation: $150 to $300/night (book 3+ months ahead in summer). The Amalfi Coast is the most reliably romantic landscape in Europe: pastel villages clinging to sea cliffs, lemon groves, and blue water.
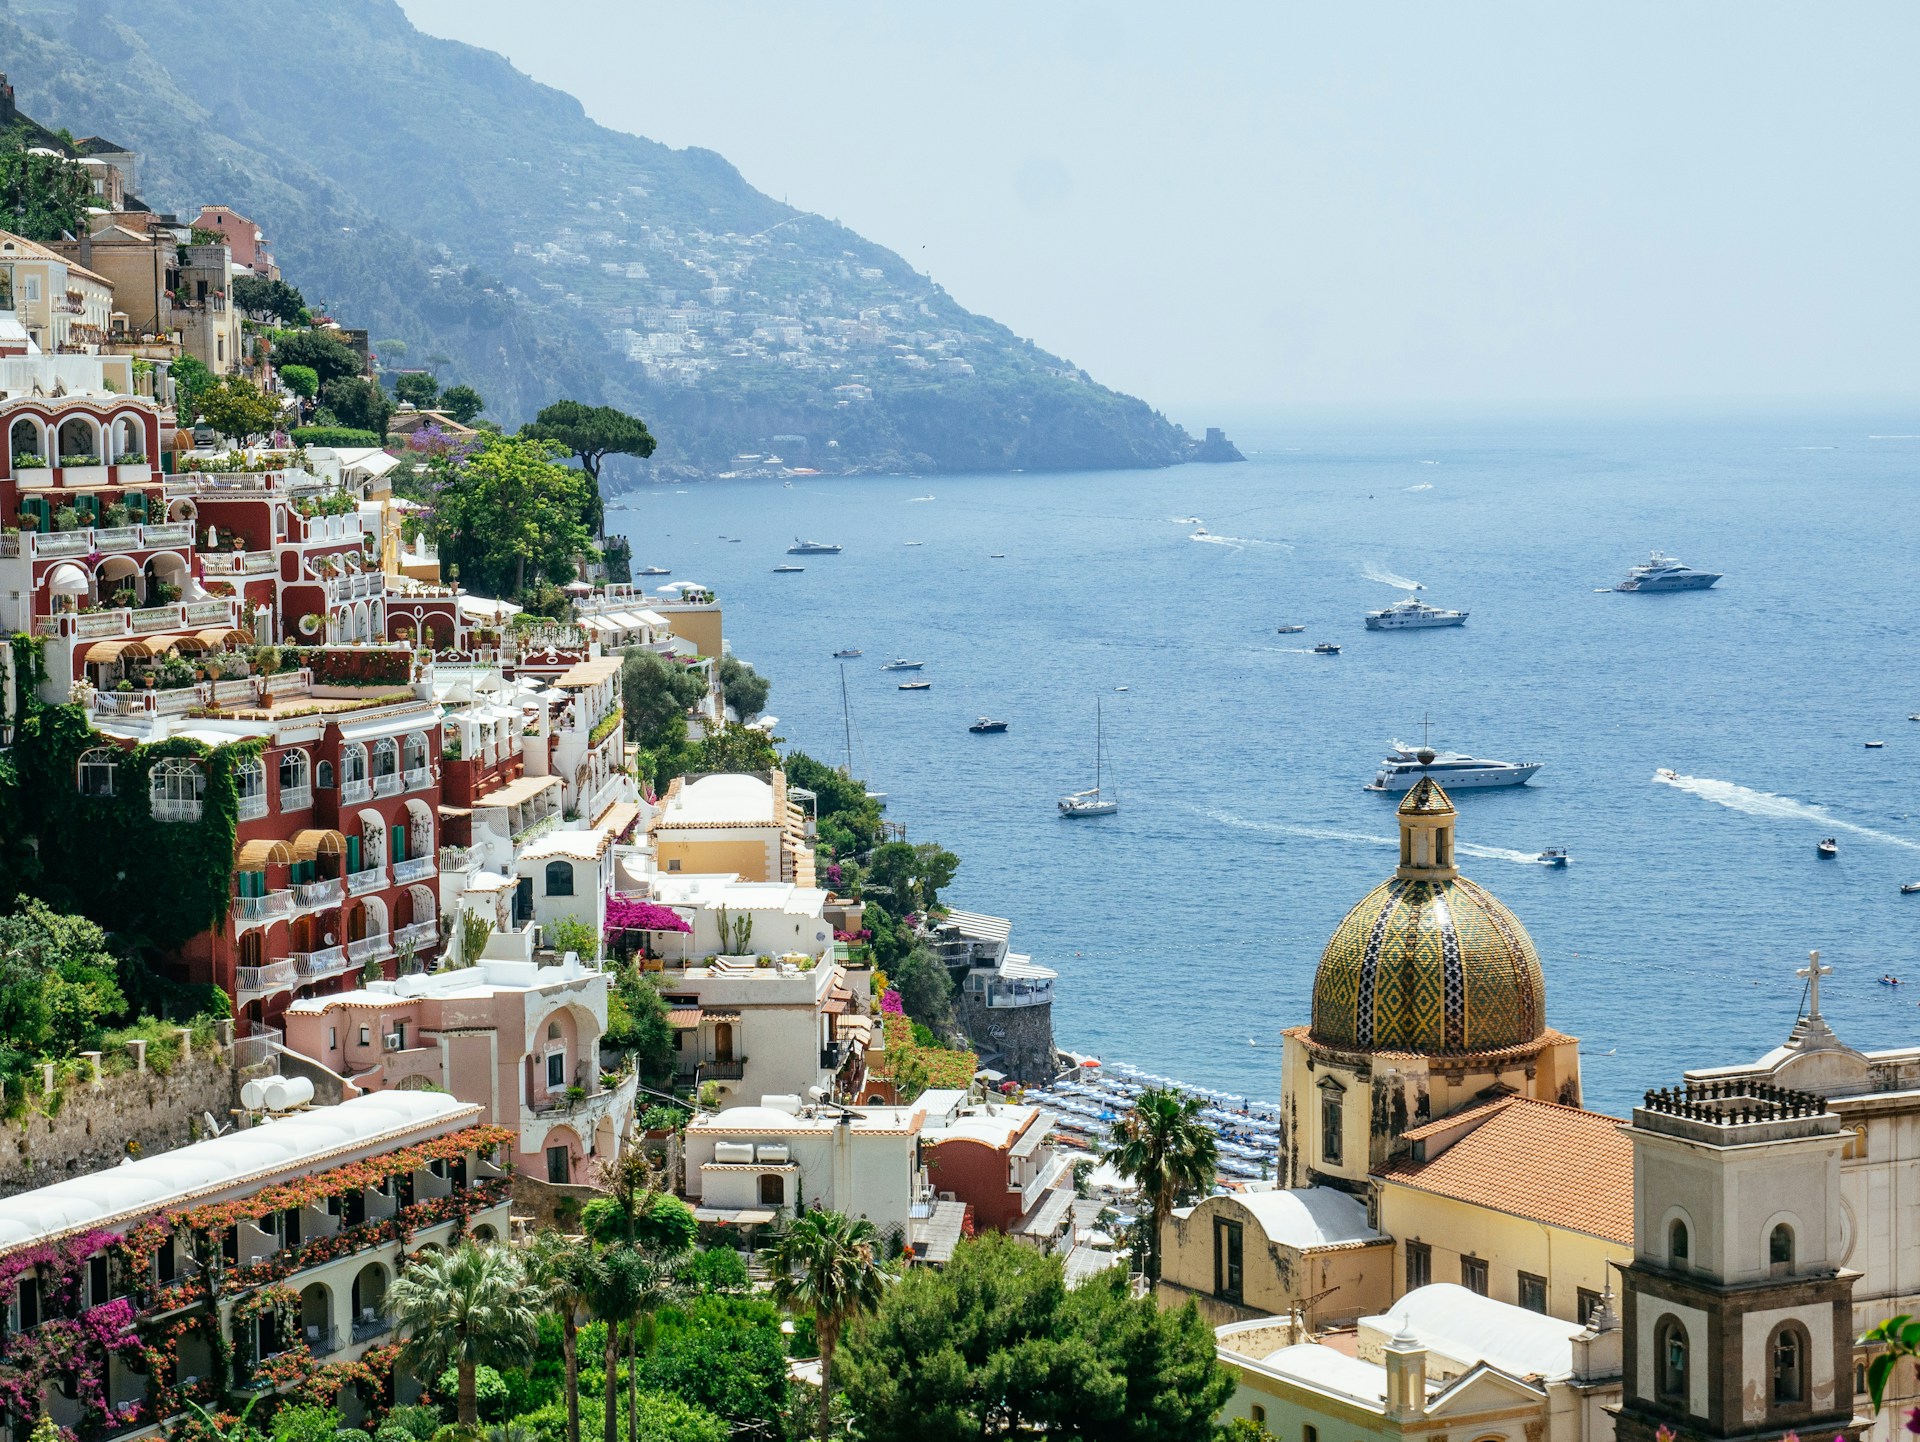
The Path of the Gods hike (Sentiero degli Dei) from Agerola to Positano is free, takes 3 to 4 hours, and has views that justify the entire trip. Budget for 5 nights: $2,000 to $3,500 total.
7. Kyoto, Japan. Flights from the US: $700 to $1,200 return for two. Accommodation: a traditional ryokan (Japanese inn) with tatami rooms and private onsen for $150 to $350/night. Kyoto has 2,000 temples and shrines, and the best are free or nearly free: Fushimi Inari (free, go at 6 am for empty torii gates), Arashiyama Bamboo Grove (free), and Kinkaku-ji Golden Pavilion (JPY 400).

A private tea ceremony costs $30 to $50 per person and is one of the most meditative couple experiences you can book anywhere. Budget for 5 nights: $2,000 to $3,500 total.
8. Cape Town, South Africa. Flights from the US: $700 to $1,100 return for two. From the UK: $500 to $800. Accommodation: $80 to $200/night in the Cape Winelands or Camps Bay. Table Mountain at sunset (cable car ZAR 360 return), wine tasting in Stellenbosch and Franschhoek (ZAR 50 to 150 per tasting), and a penguin colony at Boulders Beach (ZAR 176 entry).
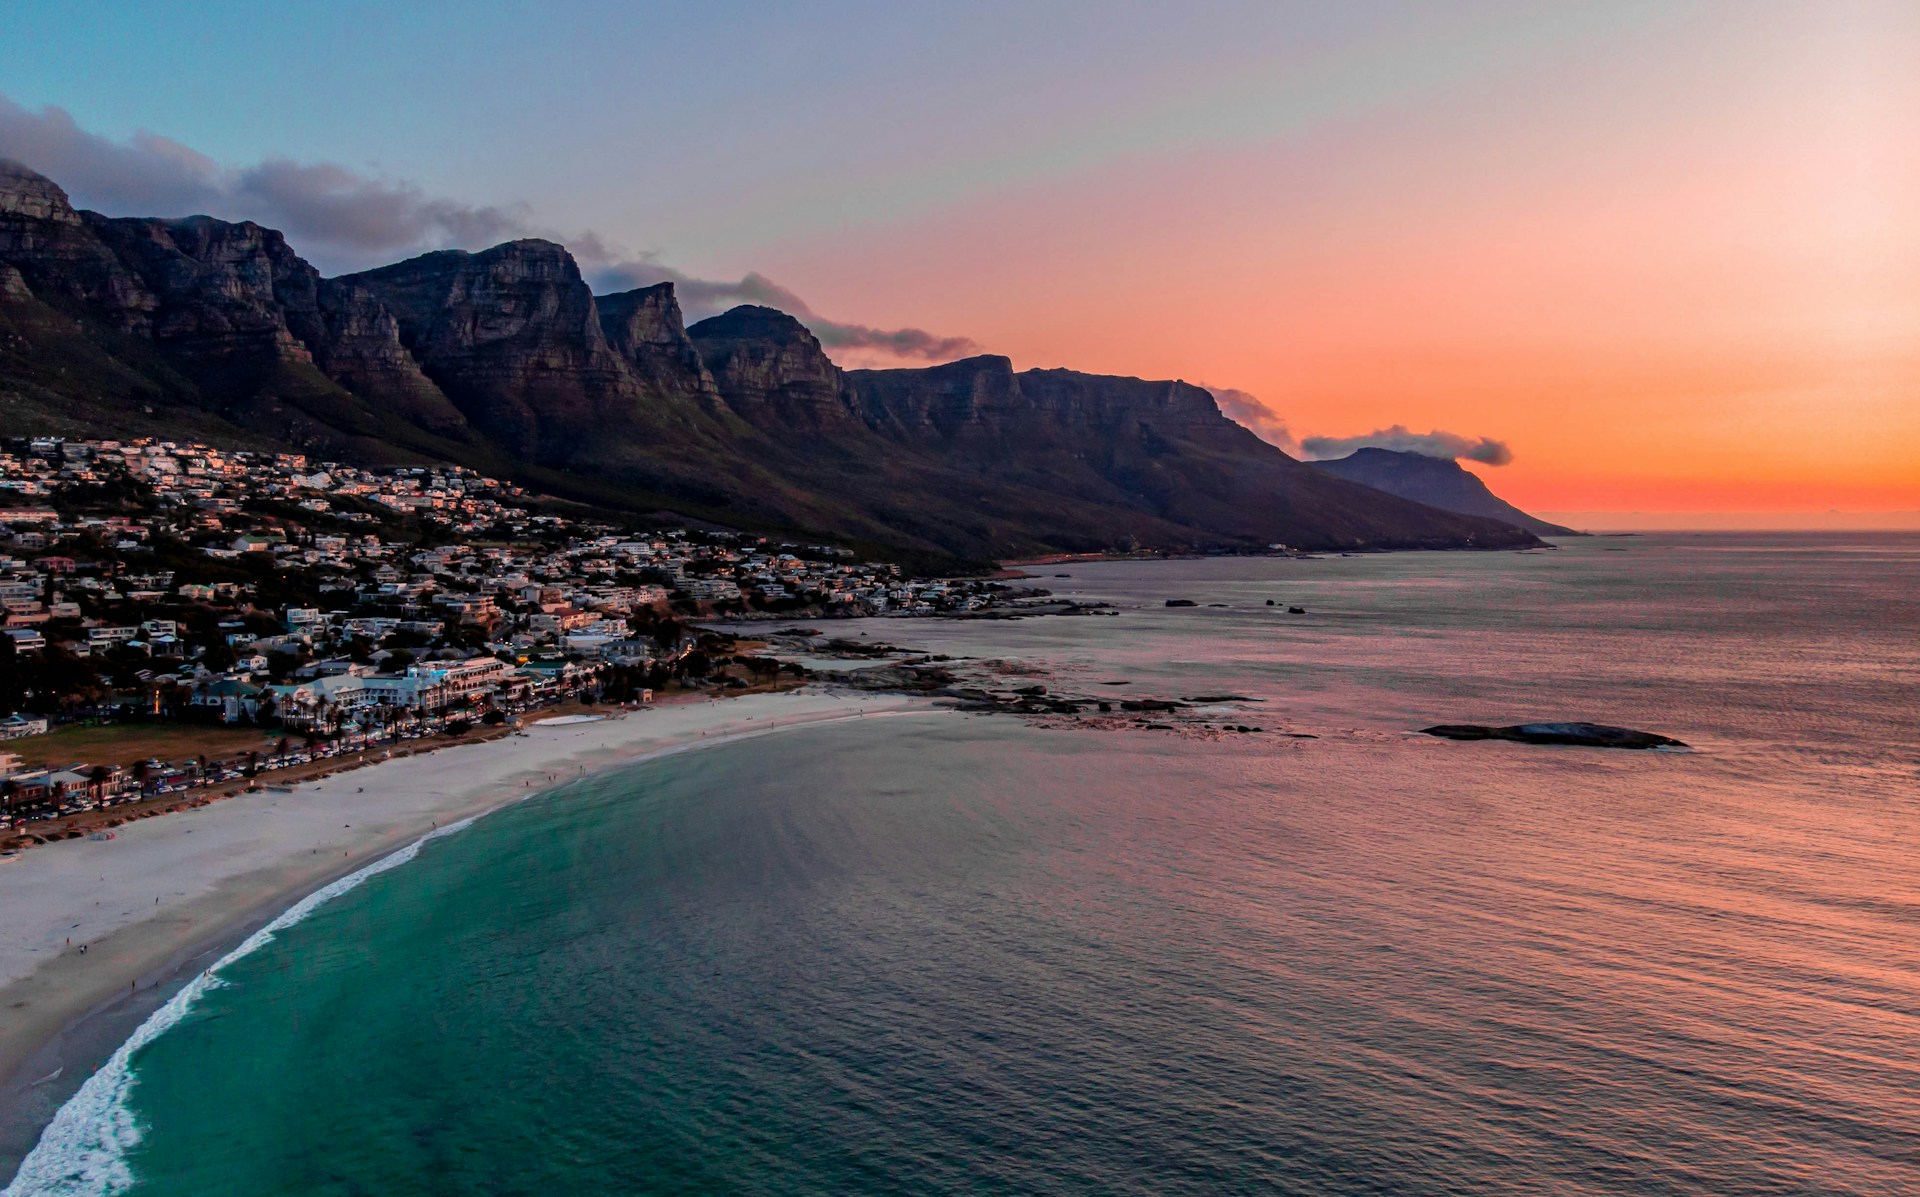
The exchange rate makes Cape Town exceptionally valuable: a tasting menu at a top restaurant costs $40 to $70 per person, roughly a third of the equivalent quality in London or New York. Budget for 7 nights: $2,000 to $3,500 total.
9. Costa Rica. See our full cost breakdown: how much does a trip to Costa Rica cost. Highlights for couples: Arenal volcano hot springs ($20 to $60 per person), Manuel Antonio National Park ($18 entry), and a private sunset catamaran tour ($80 to $120 per person).
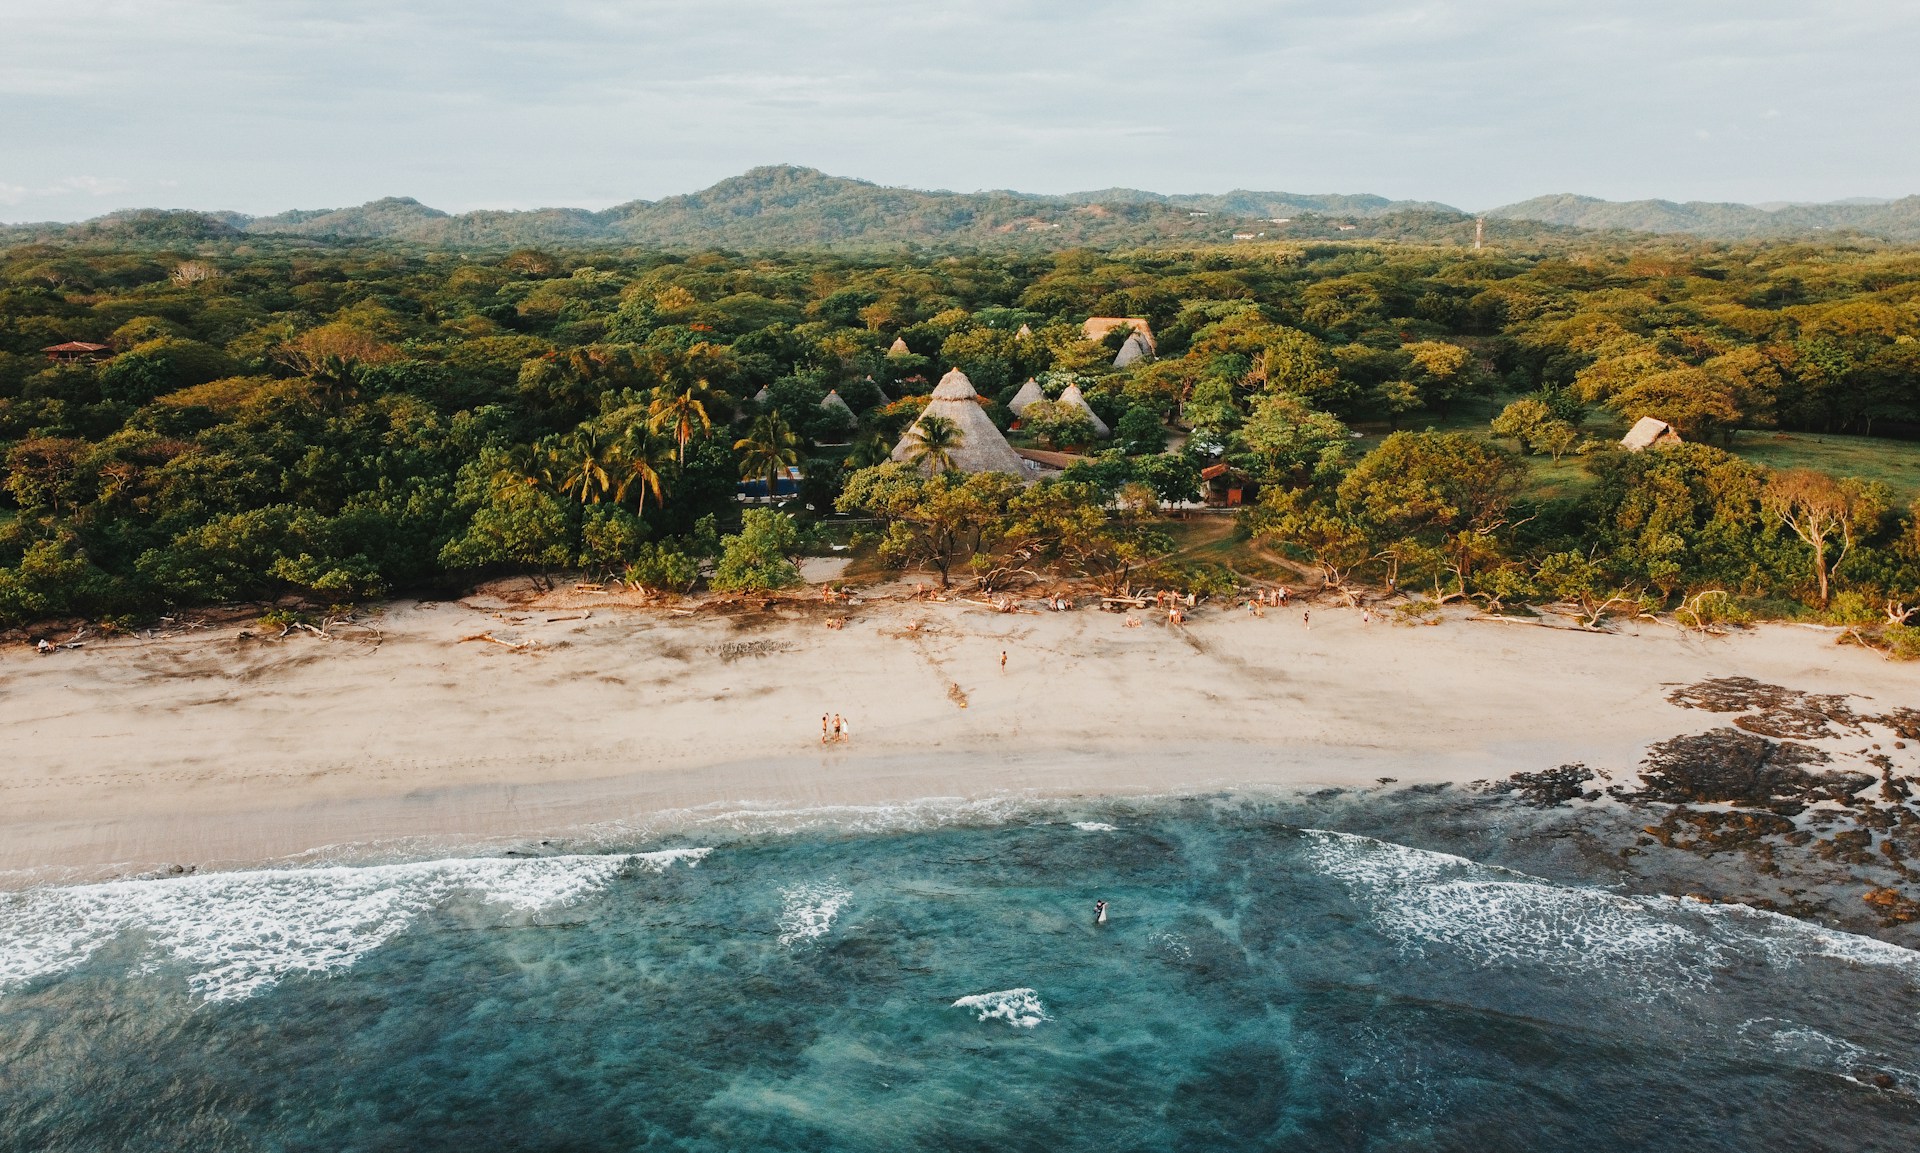
Budget for 7 nights: $2,500 to $4,000 total.
10. Greek Islands (Crete or Naxos). Skip Santorini if you're on a mid-range budget. Crete and Naxos deliver the same blue water and white buildings at half the price. Flights from Europe: $100 to $300 return for two.
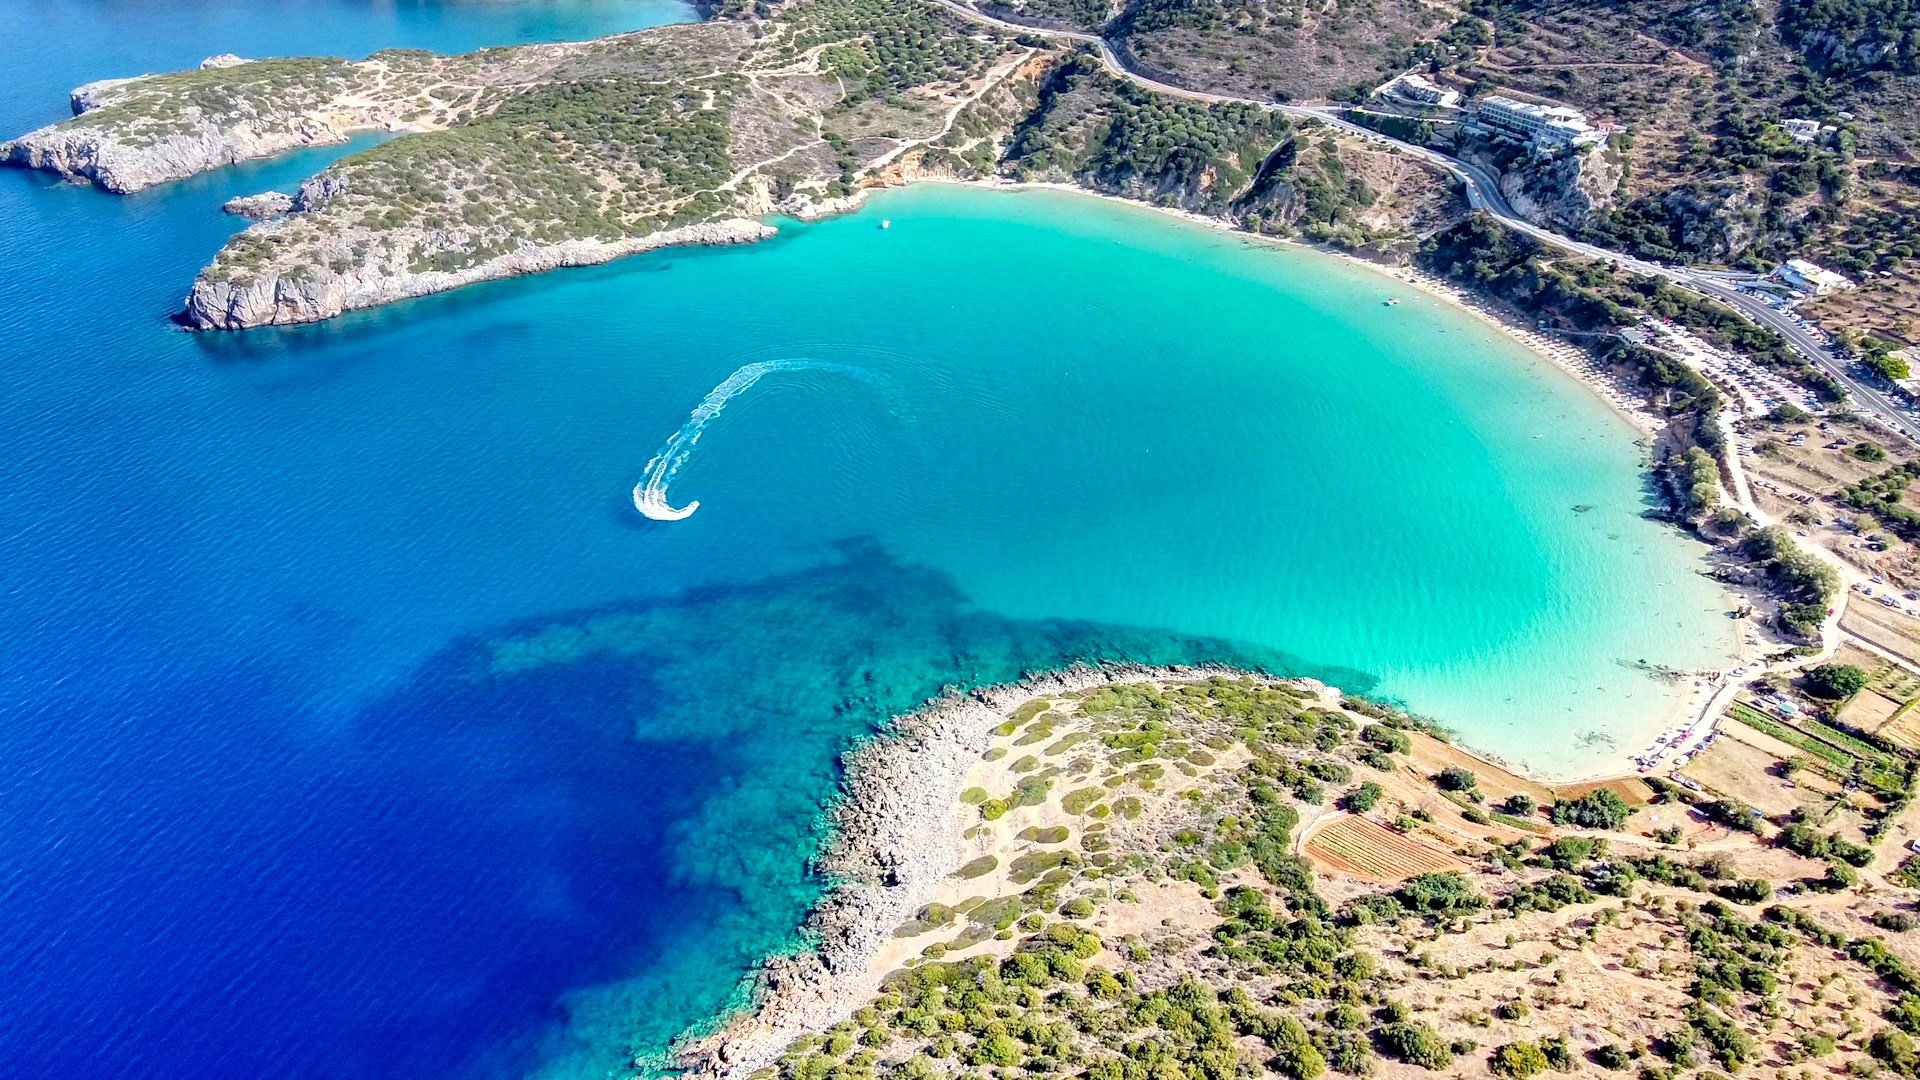
Accommodation: $80 to $150/night. Renting a car (EUR 30 to 50/day) opens up hidden beaches and mountain villages. Budget for 7 nights: $1,500 to $2,500 total.
Luxury romantic trips ($3,000+)
11. Santorini, Greece. The caldera view from Oia at sunset is one of the most photographed scenes on earth, and it delivers even when you've seen it a thousand times in photos.
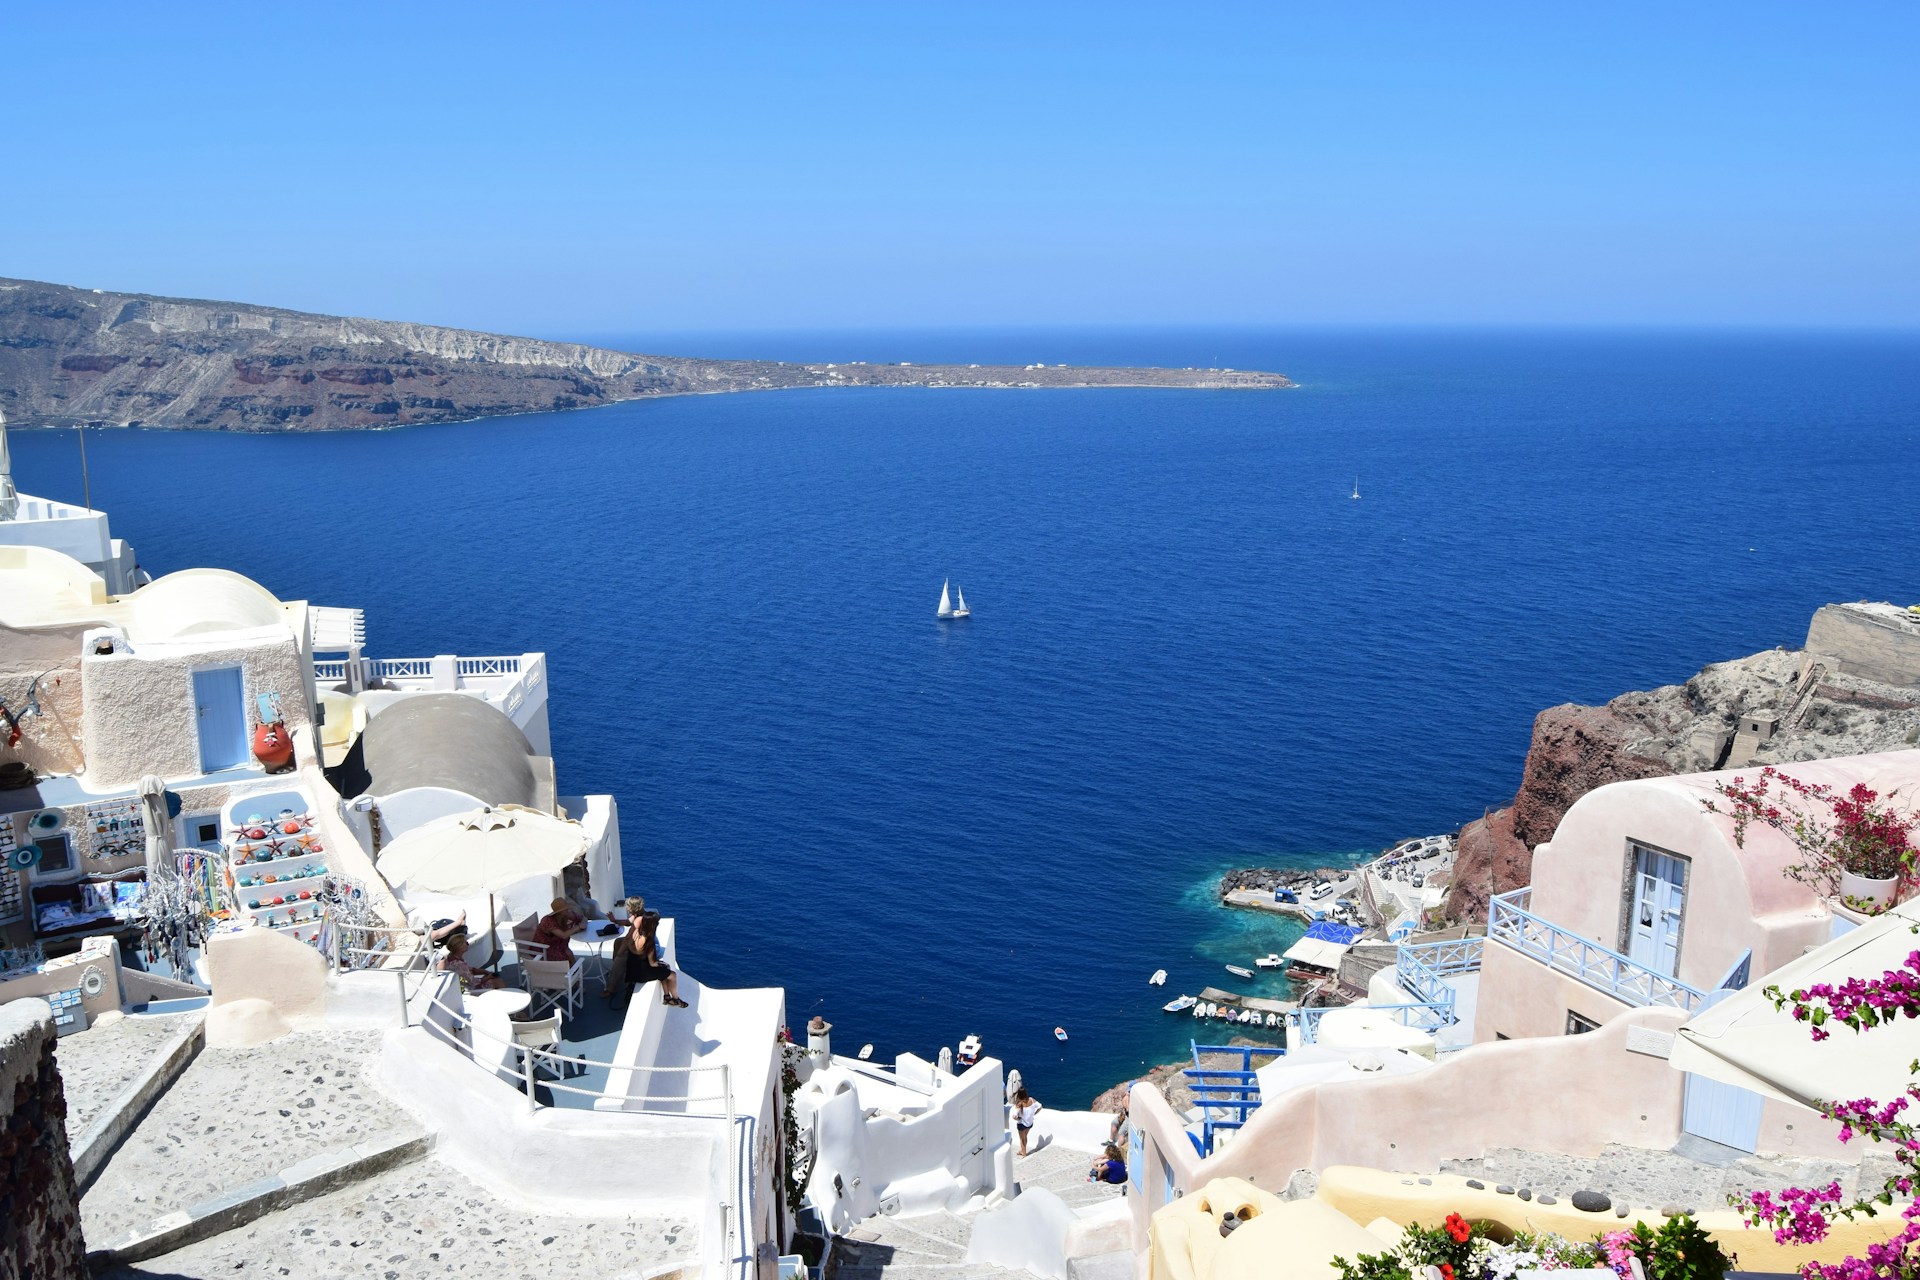
Accommodation: $250 to $600+/night for a cave hotel with a private plunge pool overlooking the caldera. Flights from the US: $800 to $1,200 return for two. Budget for 5 nights: $3,500 to $6,000 total.
12. Maldives. Overwater bungalows, private beaches, and water so clear you can see fish from your deck. Flights from the US: $1,000 to $1,800 return for two. Accommodation: $300 to $1,500+/night all-inclusive.
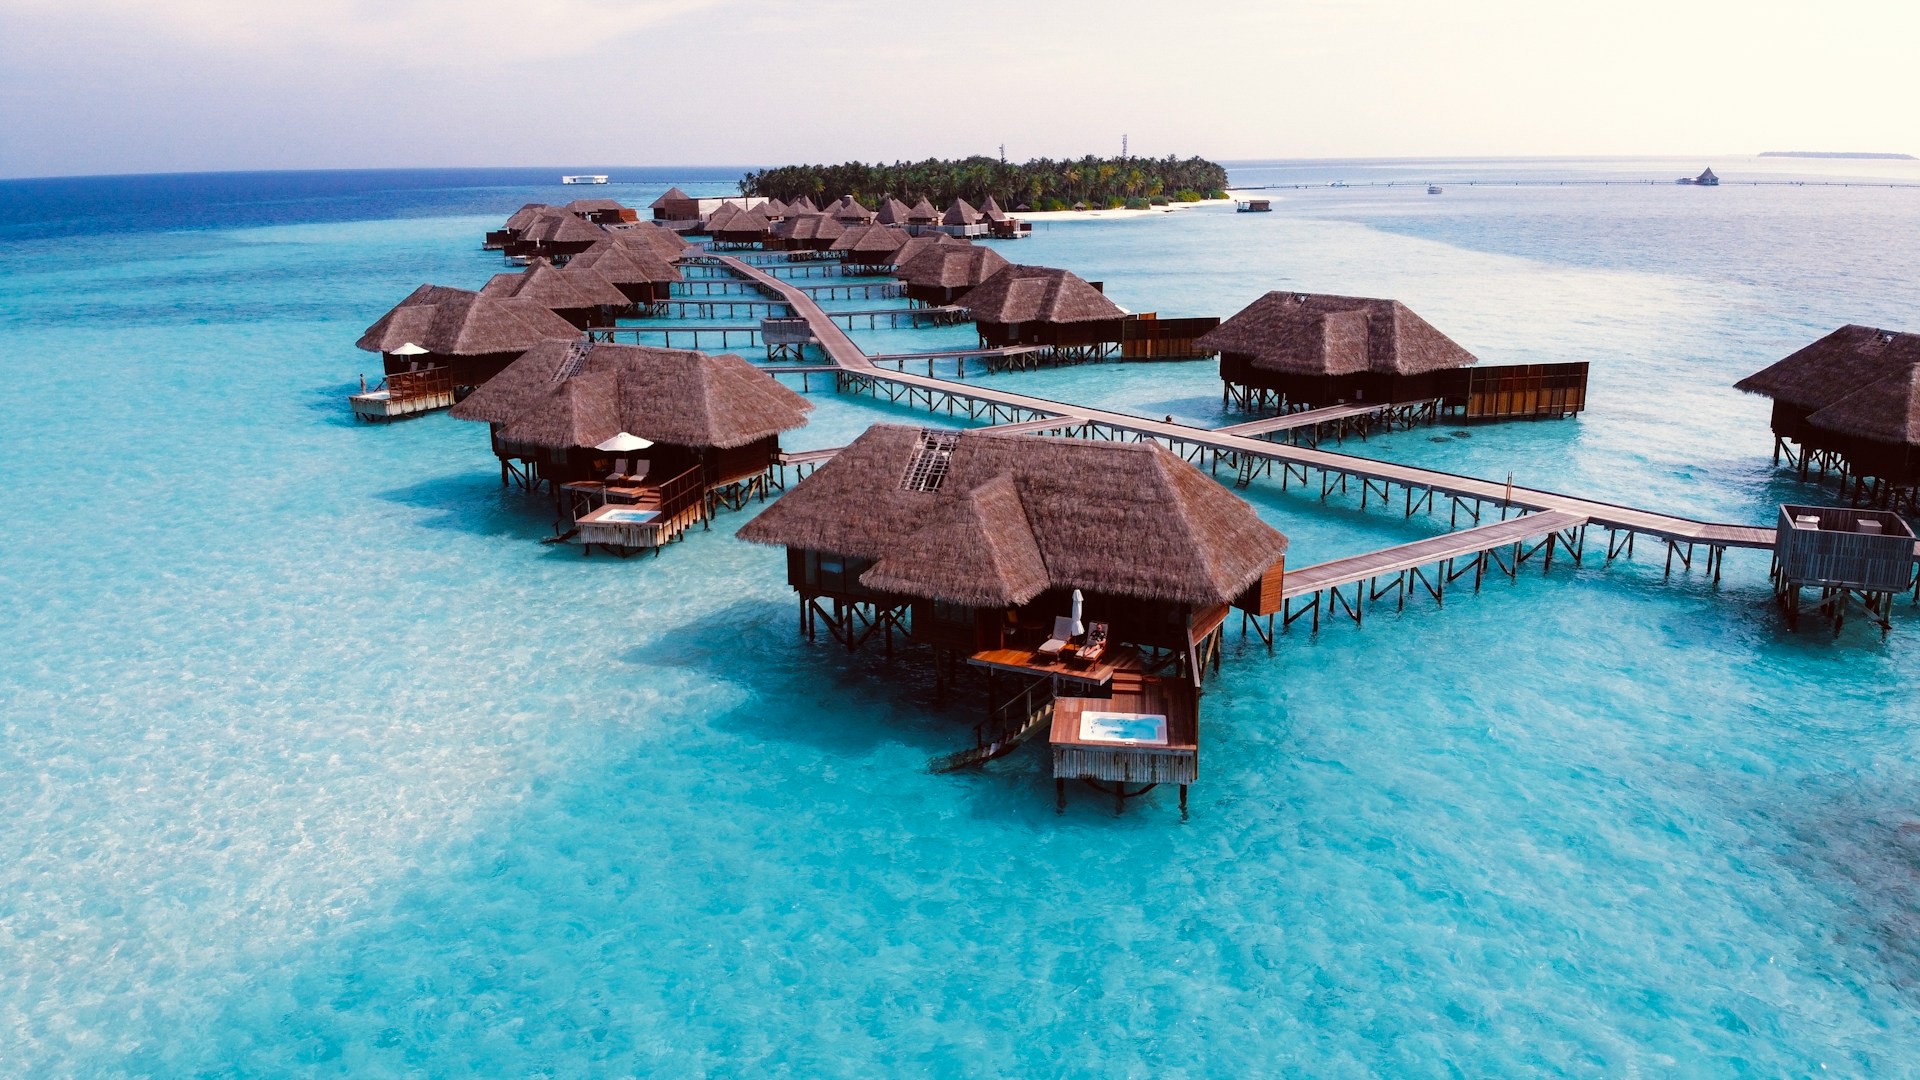
The Maldives is the ultimate splurge romantic trip: expensive, remote, and worth every penny if snorkelling, diving, and doing absolutely nothing is your idea of paradise. Budget for 5 nights: $4,000 to $10,000+ total.
13. Swiss Alps (Zermatt or Grindelwald). Mountain romance: snowy peaks, alpine villages, fondue, and train rides through scenery that looks computer-generated. Accommodation: $200 to $500/night.
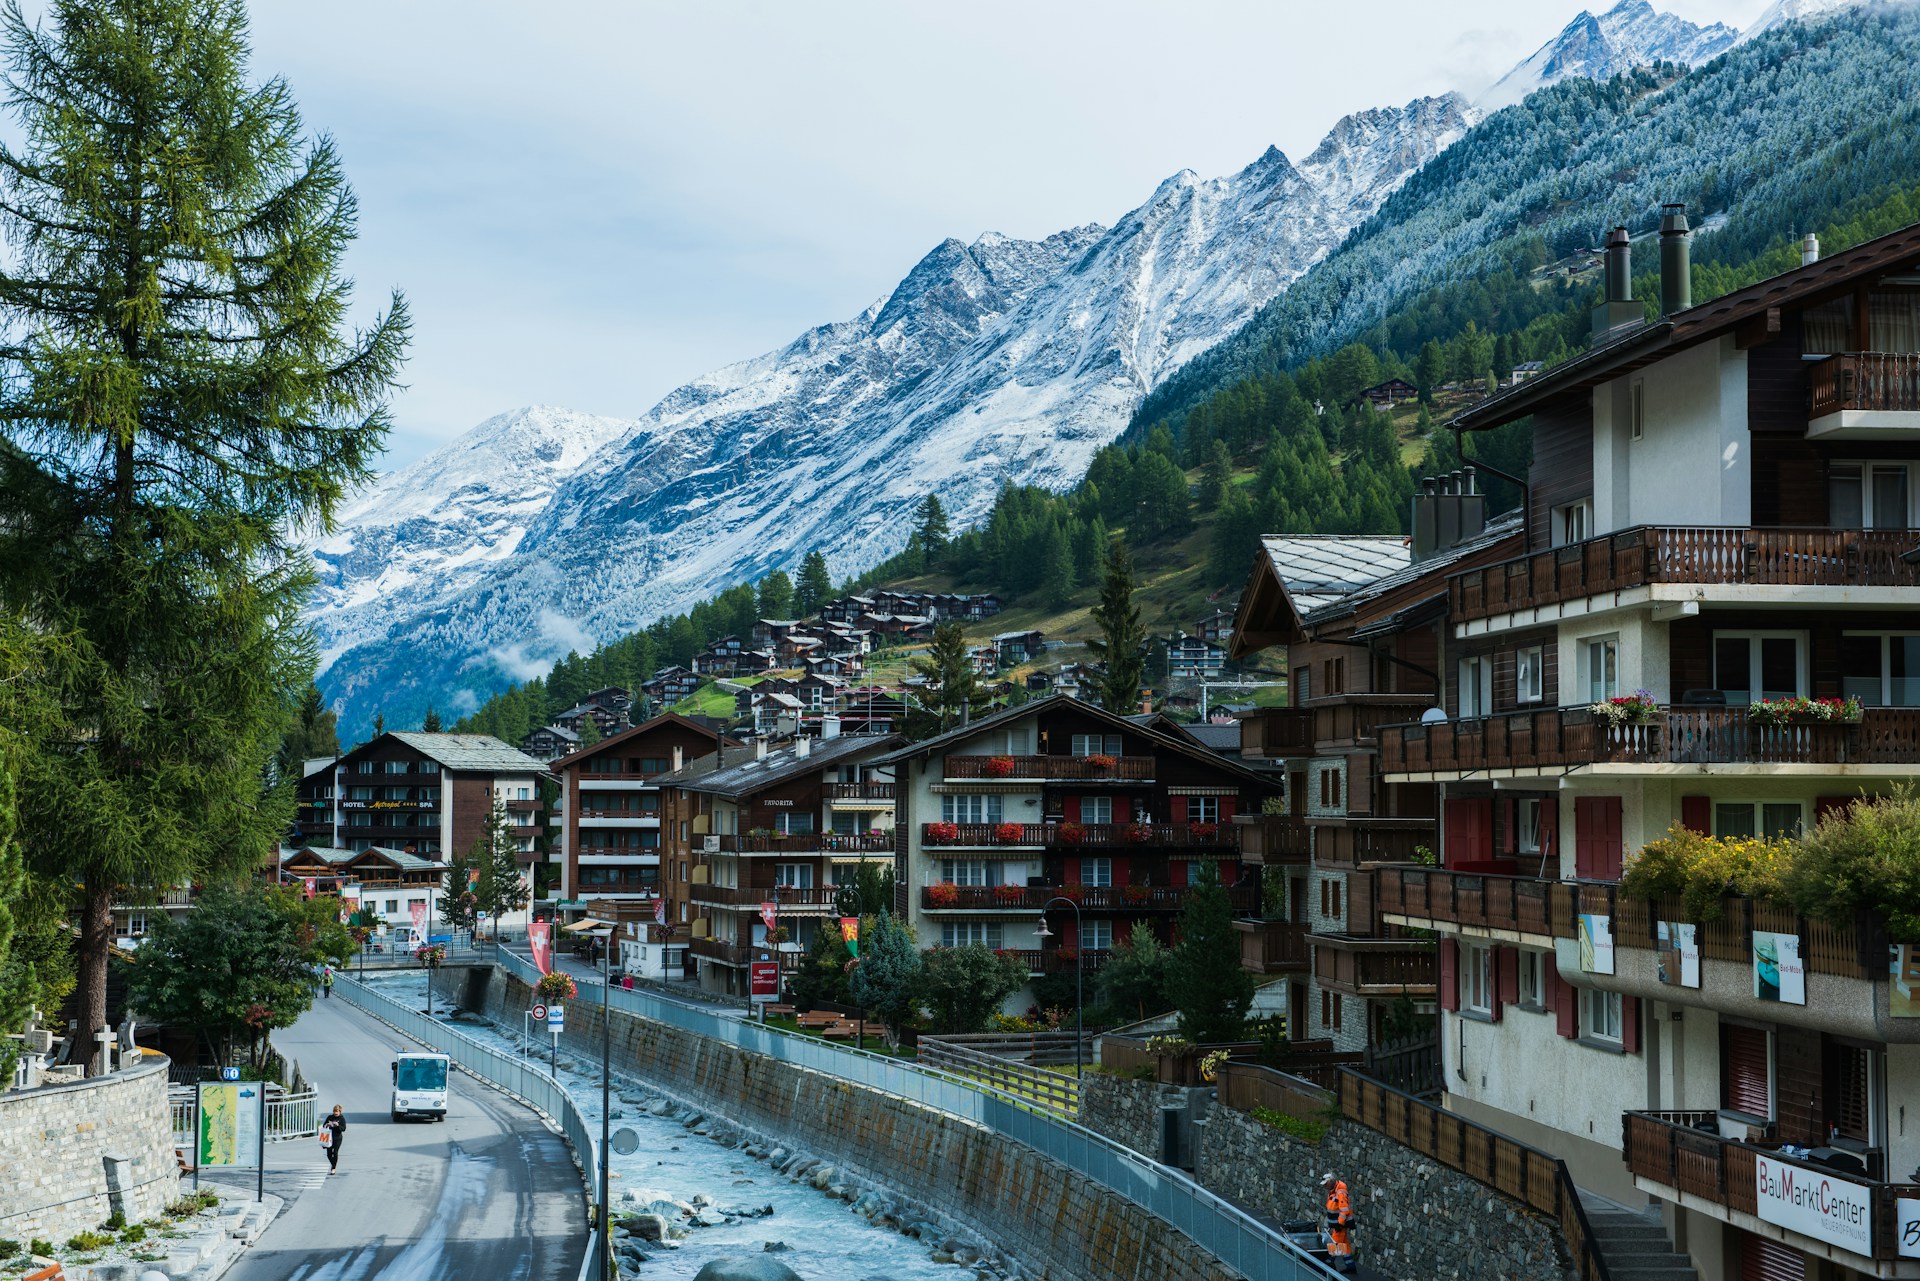
The Glacier Express or Bernina Express train rides ($100 to $300 per person) are the highlight. Budget for 5 nights: $3,000 to $6,000 total.
14. Patagonia (Argentina/Chile). For adventurous couples. Torres del Paine National Park, glacier hikes, and empty landscapes. Flights from the US: $800 to $1,500 return for two.

Accommodation: $100 to $300/night (lodges near the park). The W Trek (4 to 5 days) is a bucket-list hike. Budget for 7 nights: $3,000 to $5,500 total.
15. Paris, France. The classic. Flights from the US: $600 to $1,000 return for two. Accommodation: $150 to $350/night in the Marais or Saint-Germain. Seine river cruise ($15 to $20), a picnic under the Eiffel Tower with wine and cheese from a local market ($20 for two), and a patisserie crawl through the 6th arrondissement.

Paris earns its romantic reputation through accumulation: every meal, every walk, every candlelit bistro adds to the atmosphere. For day trips, see best day trips from Paris (grey.co/blog/best-day-trips-from-paris). Budget for 5 nights: $2,500 to $4,500 total.
Paying for romance abroad
Foreign transaction fees add 1.5 to 3% to every card payment outside your home currency zone. On a $3,000 trip, that's $45 to $90 in hidden fees. A Grey virtual card lets you spend from your pre-loaded EUR, GBP, or USD balance with no conversion markup. Hold the destination currency before you travel, and every payment comes from your own funds, not a live conversion.
Save for the trip in a Grey Pouch so the money is set aside and growing toward your target. For mobile data abroad, grab a travel eSIM and skip roaming charges that can run $10 to $15 per day on some carriers.
Planning a romantic getaway? Save in a Grey Pouch, spend on a virtual card, and keep more of your travel budget for the trip itself.
Frequently asked questions about romantic trips for couples
What is the most romantic trip for couples?
Depends on what romance means to you. Beach and relaxation: Maldives or Bali. Culture and food: Paris or Kyoto. Adventure: Patagonia or Costa Rica. Budget romantic: Lisbon, Budapest, or Marrakech. The best romantic trip is one where both partners are excited about the destination, not one that just looks good online.
How much should a romantic trip cost?
Budget: $300 to $800 for a long weekend in a nearby destination (Lisbon, Budapest, San Juan). Mid-range: $1,000 to $3,000 for a week in a destination with moderate costs (Amalfi Coast, Kyoto, Cape Town). Luxury: $3,000 to $10,000+ for a once-in-a-lifetime trip (Maldives, Santorini, Swiss Alps). Set a budget both partners are comfortable with before researching destinations.
When is the best time for a romantic trip?
Shoulder seasons (April to May, September to October) offer the best combination of good weather, lower prices, and fewer crowds at most destinations. Avoid peak holiday weeks (Christmas, New Year, Valentine's Day week) when prices spike 30 to 50%. The exception: if a specific season defines the destination (Swiss Alps in winter, cherry blossoms in Kyoto in April), time it to the season.
Should we book all-inclusive or independent?
All-inclusive for pure relaxation trips where you want to stay at the resort (Maldives, Caribbean). Independent for destination exploration trips where eating local, walking the streets, and discovering hidden spots is the point (Paris, Lisbon, Kyoto). An all-inclusive in a culturally rich destination wastes the destination.
Disclaimer: This article is for informational purposes only. All costs and details are estimates based on mid-2026 data. Verify current information before making decisions. Grey isn't a bank. We're a licensed financial services provider offering multi-currency accounts.
How much does a trip to Costa Rica cost? A full budget breakdown
How much does a trip to Costa Rica cost? Flights, hotels, food, and activities broken down by budget, mid-range, and luxury. Plan your trip now.
Priscila Marotti
•
October 2, 2026
•
6 min read
Costa Rica can catch you off guard when it comes to cost. You might picture an affordable Central American trip, then start checking hotels, rental cars and tours and realise your budget needs a rethink. Prices have changed a lot over the years, and in 2026, you’ll need considerably more than the $30-a-day budgets you might still find in older travel guides.
A good starting point is around $100 to $200 per person per day for a mid-range trip, covering a comfortable hotel, restaurant meals, transport and activities. If you’re happy with hostels, buses and local food, $50 to $80 a day is possible. At the other end, boutique stays, private tours and fine dining can push your daily spend to $300 to $600 or more.
Does that make Costa Rica too expensive? I don’t think that’s really the question. You come here for experiences that are difficult to squeeze into one trip elsewhere: waking up near a volcano, hiking through a cloud forest, spotting sloths in the trees and ending the day by the Pacific. If that’s the kind of trip you’re after, it’s easier to understand where the money goes.
This guide breaks down every major cost category with real prices.
Flights to Costa Rica: prices and booking tips
From the US: $250 to $600 return per person, depending on origin city and booking timing. Miami, Houston, and LA have the cheapest fares. JFK, Chicago, and Seattle run higher. Direct flights are available from most major US cities to San Jose (SJO) or Liberia (LIR). Liberia is closer to the Pacific coast beaches (Guanacaste, Tamarindo, Nosara). San Jose is better for the central valley, Arenal, and the Caribbean coast.
From Canada: $350 to $700 return per person. Toronto and Montreal have direct options. Vancouver routes often connect through the US.
From Europe: $500 to $900 return per person. Madrid and Amsterdam have direct routes. London connects through the US or Panama City. European fares fluctuate more than US fares, so booking 3 to 4 months ahead is important.
Booking tip: flights to Costa Rica are cheapest in May to June (early rainy season, lowest demand) and September to November (deep rainy season). December to April (dry season) is peak pricing, especially around Christmas and Easter. The difference between peak and off-peak can be $150 to $300 per ticket.
Accommodation costs in Costa Rica
Budget ($20 to $50/night): hostels, basic cabinas (Costa Rican guesthouses), and budget eco-lodges. Dorm beds in popular backpacker towns (Santa Teresa, Puerto Viejo, La Fortuna) run $12 to $25. Private rooms at basic hotels or Airbnbs run $30 to $50. Quality varies dramatically. Read recent reviews. A "basic but clean" cabina in Costa Rica can mean anything from a charming family-run guesthouse to a bare concrete room with a cold shower.
Mid-range ($80 to $200/night): boutique hotels, mid-range eco-lodges, and well-reviewed Airbnbs. This is the sweet spot for Costa Rica. At $100 to $150/night, you get air conditioning (essential in coastal areas), a pool, decent breakfast, and often stunning natural settings. Nayara in Arenal, Pacuare Lodge on the Pacuare River, and Lapa Rios in the Osa Peninsula are standout mid-range lodges where the setting is the experience.
Luxury ($250 to $800+/night): high-end eco-resorts, private villas, and all-inclusive lodges. Four Seasons Peninsula Papagayo, Andaz Costa Rica, and Kura Design Villas are at this tier. The premium buys you privacy, exclusive wildlife encounters, personal guides, and settings that feel like a private national park.
Food and drink prices in Costa Rica
Budget eating ($15 to $25/day per person): sodas (local eateries serving casados, the traditional rice-beans-meat-plantain-salad plate) cost $5 to $8 for a filling lunch. Street food, bakeries, and supermarket groceries keep costs down. Cooking in your Airbnb is the cheapest option. Rice, beans, eggs, and tropical fruit from a local market cost $3 to $5 per meal.
Mid-range eating ($30 to $60/day per person): restaurant breakfast ($8 to $15), a soda lunch ($5 to $8), and a restaurant dinner ($15 to $30). A beer at a restaurant costs $3 to $5. A cocktail costs $6 to $10. Costa Rican coffee is excellent and cheap: $2 to $3 at most cafes.
Luxury eating ($60 to $150+/day per person): resort restaurants, tasting menus, and premium dining. Fine dining exists in San Jose, Tamarindo, and resort areas. A tasting menu at a top restaurant runs $60 to $100 per person before drinks. Wine is expensive because it's all imported. Expect $30 to $60 for a decent bottle.
Costa Rica activities and tour costs
Activities are where Costa Rica costs add up fastest. Most adventure and wildlife experiences require a guide, transport to the site, and an entry or tour fee. The flip side: the experiences are extraordinary and often unavailable elsewhere.
Budget-friendly and free: hiking in national parks (entry $12 to $18 per person at most parks), swimming at waterfalls (many are free or $3 to $5 entry), beach days (free), bird watching from your lodge terrace (free and surprisingly rewarding).
Mid-range ($40 to $120 per person): zip-lining in Monteverde ($50 to $80), white-water rafting on the Pacuare River ($80 to $110 for a full day), Arenal hot springs ($20 to $60 depending on the facility), snorkelling tours ($40 to $60), guided night walks in cloud forests ($25 to $40), coffee plantation tours ($30 to $50).
Premium ($120 to $400 per person): multi-day treks in Corcovado National Park ($200 to $400 including guide, transport, and food), private catamaran sunset cruises ($100 to $200), helicopter tours over volcanoes ($250 to $400), exclusive wildlife photography tours ($150 to $300).
The honest advice: budget 2 to 3 paid activities per week and fill the rest with free or low-cost options. Four paid activities in one week at $80 each is $320 per person, which can blow a mid-range budget quickly.
Getting around Costa Rica: transport costs
Rental car ($40 to $80/day): the best way to explore Costa Rica if you're comfortable with challenging roads. Many destinations require gravel or dirt roads, especially during the rainy season (May to November). Rent a 4x4 (not optional for Monteverde, Osa Peninsula, or mountain roads). Insurance adds $15 to $30/day and is highly recommended. Gas is about $1.10 to $1.30 per litre.
Public buses ($2 to $15 per route): Costa Rica's bus network connects major towns. San Jose to La Fortuna: $5, about 4 hours. San Jose to Manuel Antonio: $8, about 3.5 hours. Buses are cheap but slow, and schedules are limited. Great for budget travellers with flexible timelines. Not great for tight itineraries or remote destinations.
Shared shuttles ($30 to $60 per person): tourist shuttle services (Interbus, Caribe Shuttle) run between popular destinations. More comfortable than buses, with hotel pickup. Good middle ground between renting a car and taking the bus.
Domestic flights ($80 to $200 one way): Sansa and local charter operators connect San Jose to Liberia, Quepos (Manuel Antonio), Tortuguero, Drake Bay, and Tambor. Saves 4 to 8 hours of driving on some routes. Worth it for Tortuguero (the alternative is a 4-hour boat ride) and Drake Bay (the alternative is a bumpy 5-hour drive).
How much does a 10-day trip to Costa Rica cost?
Budget ($2,000 to $3,000 total): flights $600, hostels/cabinas $400, food $500, buses $150, 4 activities $350. Tight but doable. Cook some meals, take buses, prioritise free activities (national parks, beaches, waterfalls), and splurge on one or two paid experiences.
Mid-range ($3,500 to $5,500 total): flights $800, mid-range hotels $1,200, food $800, rental car $600, 6 activities $600, miscellaneous $300. The most rewarding balance of comfort and experience. You see everything, eat well, and sleep comfortably without feeling extravagant.
Luxury ($6,000 to $12,000+ total): flights $1,200, boutique lodges $3,000, food $1,200, private transfers $800, premium activities $1,500, spa/extras $500. The full Costa Rica experience with no compromises on comfort or access.
Paying in Costa Rica: cash, cards and currency
Costa Rica uses the Costa Rican colon (CRC), but USD is widely accepted in tourist areas. Most hotels, tours, and upscale restaurants price in USD. Local sodas, buses, and markets use colones. ATMs are available in all towns (Banco Nacional and BAC have the widest ATM networks). Withdraw colones in larger amounts to minimise per-withdrawal fees of $3 to $5.
A Grey virtual card works at Visa terminals across Costa Rica. Hold USD in your Grey account before you travel. For mobile data, grab a travel eSIM for Costa Rica instead of buying a local SIM on arrival.
Planning a Costa Rica trip? Save in a Grey Pouch and spend on a virtual card with no conversion fees.
Frequently asked questions about trips to Costa Rica
How much does a trip to Costa Rica cost?
$2,500 to $5,500 for a 10-day trip for two at a mid-range budget, including flights, accommodation, food, transport, and activities. Budget travellers can do it for $2,000 to $3,000. Luxury: $6,000 to $12,000+. The biggest variable is how many paid activities you do (zip-lining, rafting, tours add up fast).
Is Costa Rica expensive?
More expensive than other Central American countries (Nicaragua, Guatemala, Honduras) but cheaper than the US or Europe. Expect mid-range daily costs of $100 to $200 per person. Budget travellers can manage $50 to $80/day. Costa Rica's costs are justified by the quality of wildlife, adventure activities, and natural settings.
When is the best time to visit Costa Rica?
December to April (dry season) for guaranteed sunshine, especially on the Pacific coast. May to November (rainy season) for lower prices and fewer tourists. Rain typically falls in the afternoon, leaving mornings clear. September and October are the wettest months. The Caribbean coast has its own weather pattern: driest in September and October.
Do I need a rental car in Costa Rica?
Recommended for flexibility, especially for Monteverde, Osa Peninsula, and remote beaches. Rent a 4x4 (essential for gravel roads). If you're sticking to popular routes (San Jose, La Fortuna, Manuel Antonio), shared shuttles and buses work fine. Driving in Costa Rica requires comfort with narrow mountain roads and river crossings in the rainy season.
Is Costa Rica safe?
Generally safe for tourists. Petty theft (car break-ins, bag snatching) is the main risk, especially in San Jose and crowded beach areas. Use hotel safes, don't leave valuables in parked cars, and avoid walking alone at night in San Jose. Rural and tourist areas are very safe. Costa Rica has no army and one of the highest literacy rates in the Americas.
Planning Costa Rica? Save in a Grey Pouch and spend on a virtual card.
Disclaimer: This article is for informational purposes only. All costs and details are estimates based on mid-2026 data. Verify current information before making decisions. Grey isn't a bank. We're a licensed financial services provider offering multi-currency accounts.
15 best day trips from Tokyo
The 15 best day trips from Tokyo by train. Travel times, costs, and what to see at each destination. Plan your perfect side trip from Tokyo. Read now.
Priscila Marotti
•
October 1, 2026
•
6 min read
When you start looking for day trips from Tokyo, the same names come up again and again: Hakone, Kamakura, Nikko, Yokohama, and maybe Mount Fuji if you’re feeling ambitious. They’re popular for a reason, but I wouldn’t stop there. Tokyo’s incredible train network puts more than 15 destinations within easy reach, including plenty that most visitors never think to add to their itinerary. Some of my favourite options are less than an hour away and can cost less to reach than a restaurant lunch in Tokyo.
The best day trips from Tokyo include Kamakura (1 hour), Hakone (1.5 hours), Nikko (2 hours), Yokohama (30 minutes), and Kawagoe (30 minutes). Kamakura has the Great Buddha and a surf beach. Hakone has hot springs and Fuji views. Nikko has ornate shrines in a mountain forest. Most are reachable on a Japan Rail Pass or regular Suica/Pasmo card.
Skip Mount Fuji as a day trip unless you're only going to the 5th station viewpoint. Actually, climbing Fuji requires an overnight stay during the July to September climbing season. The 5th station bus-and-view trip is doable in a day, but less rewarding than spending that time in Hakone or Kamakura, where you'll see more and stress less.
This guide covers 15 destinations with train times, costs, and what makes each one worth your time. If you're also planning European travel, see best day trips from Paris.
Under 1 hour from Tokyo
1. Kamakura. 1 hour from Tokyo Station via JR Yokosuka Line. A coastal town with the Great Buddha (Kotoku-in, JPY 300 entry), dozens of smaller temples, excellent hiking trails between shrines, and a surf beach. Start at Kita-Kamakura station, walk the temple trail to Hase station (about 2 hours with stops), see the Great Buddha, then walk to the beach for the afternoon.
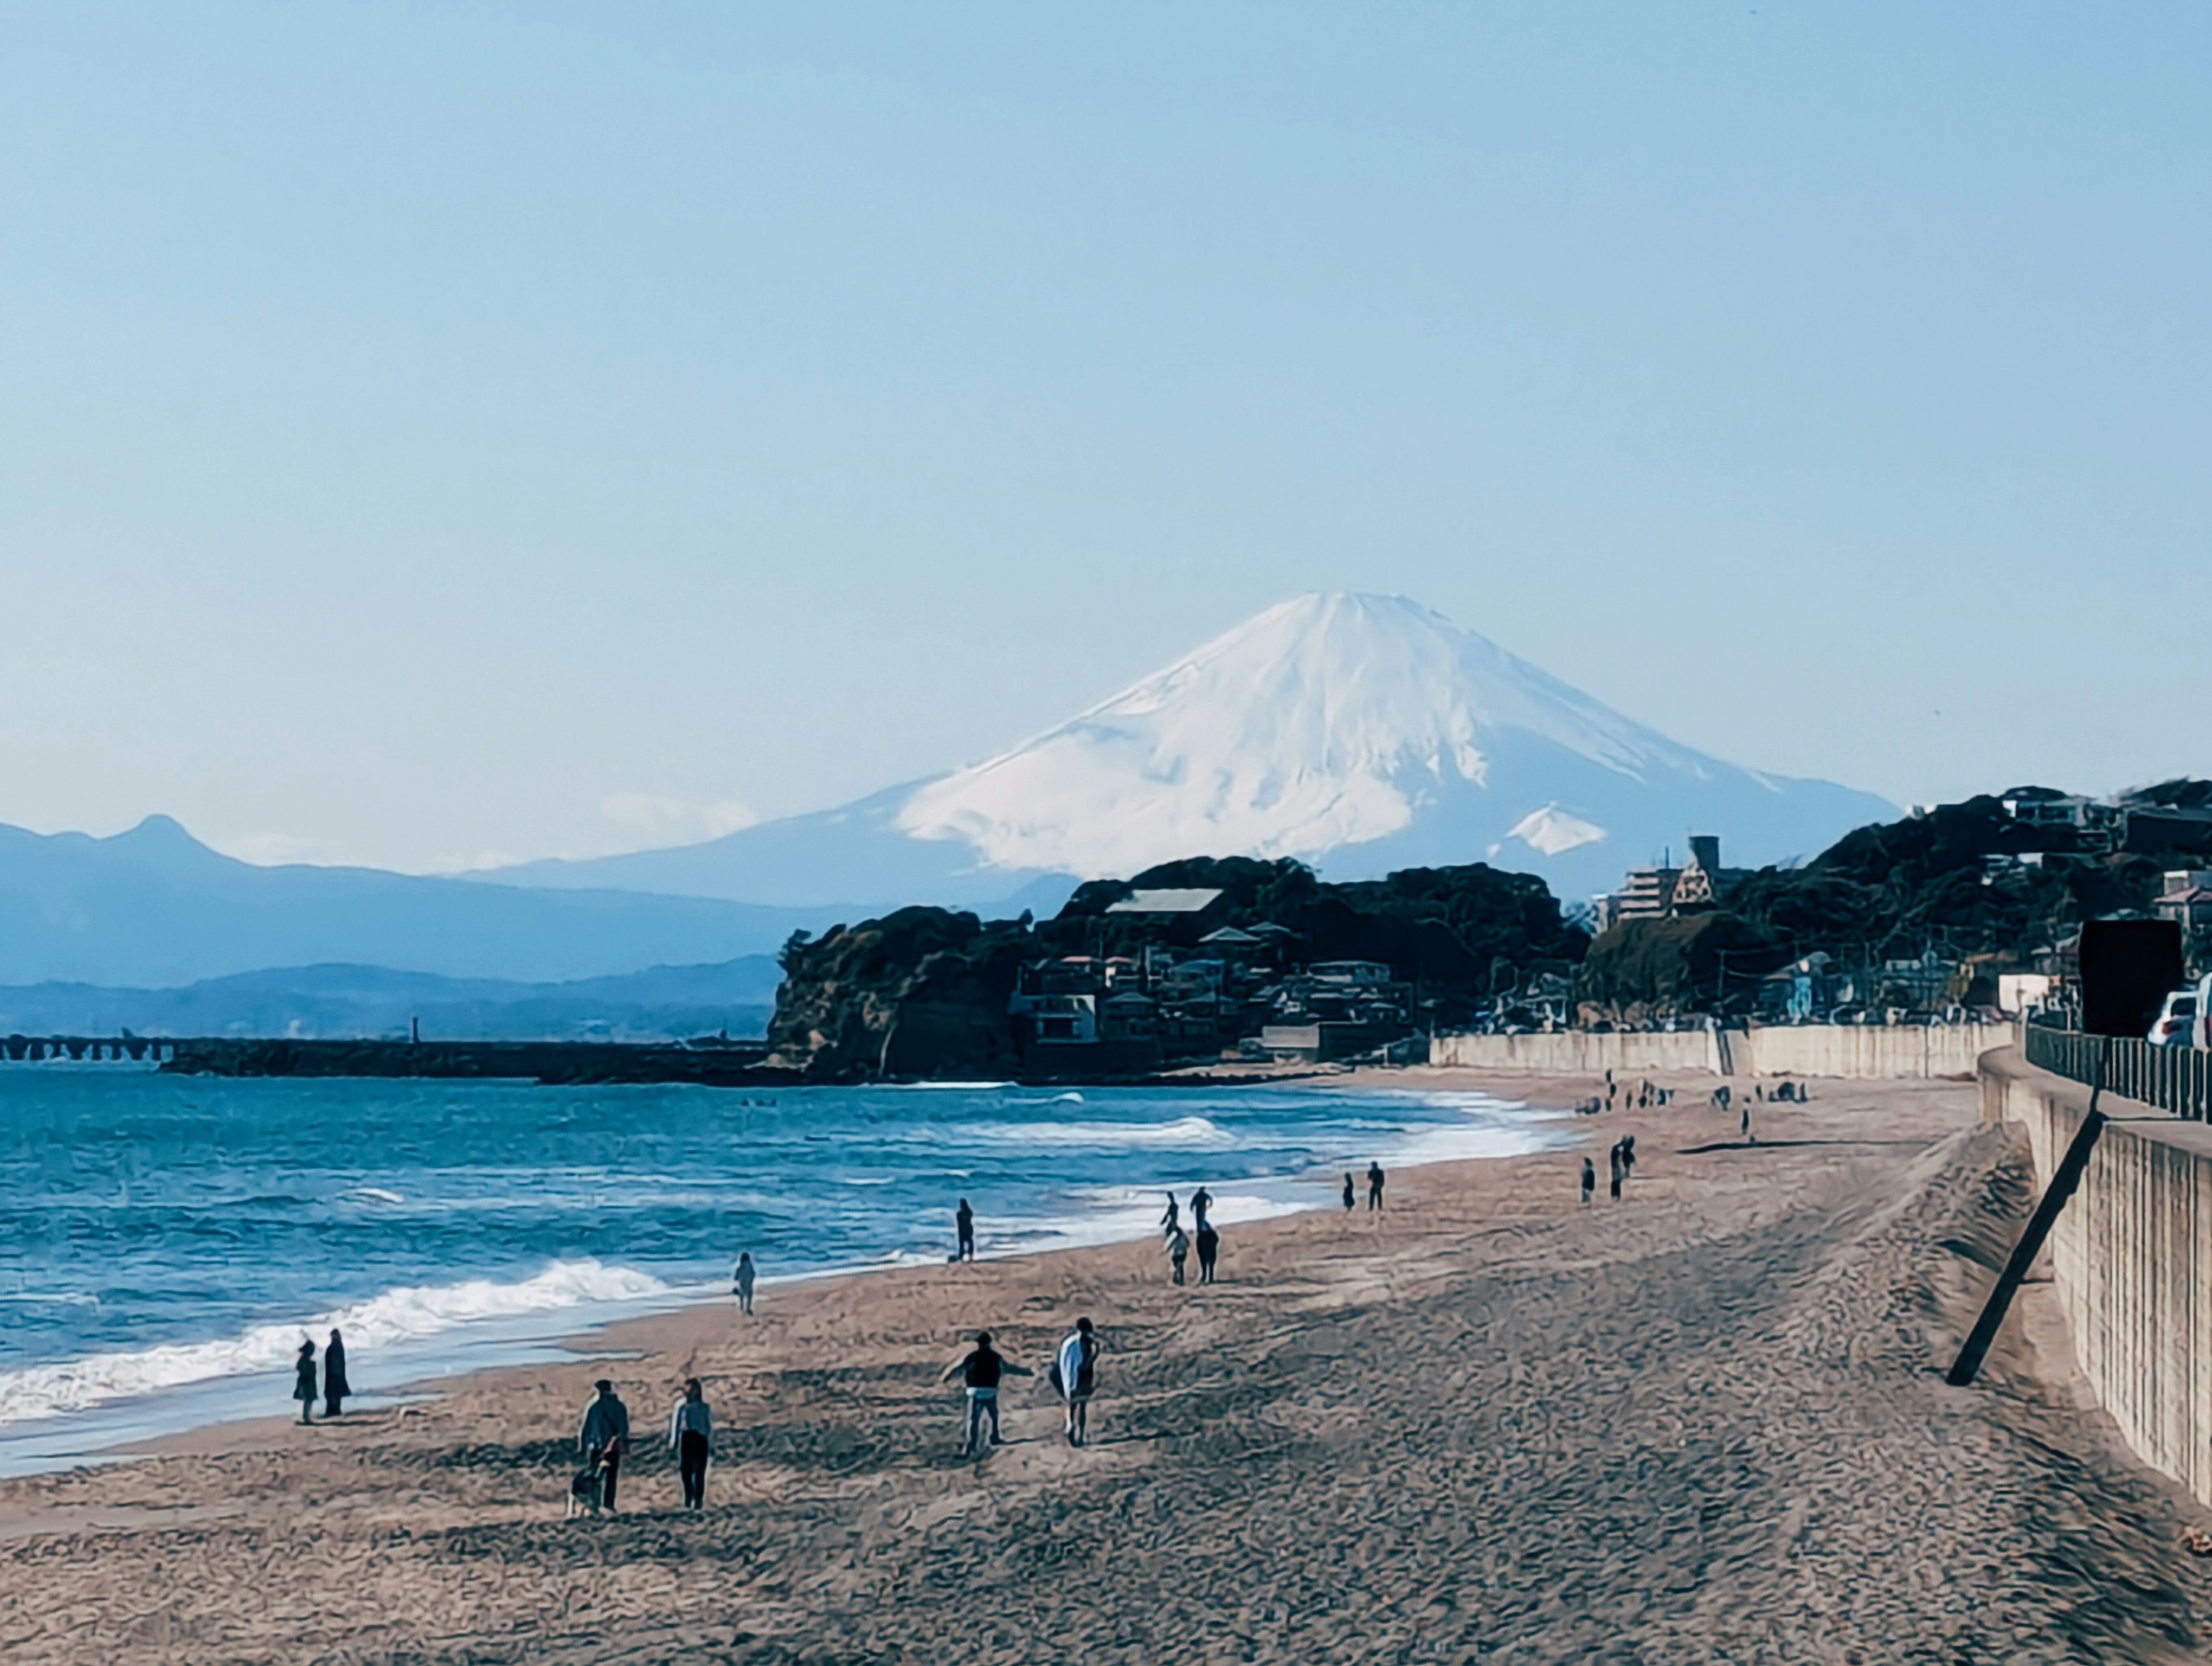
The Daibutsu hiking trail connects Kita-Kamakura to the Great Buddha through bamboo forests and ridge paths. It's the most scenic walk within day-trip distance of Tokyo.
Budget: JPY 3,000 to 5,000 ($20 to $35) for transport, entry fees, and lunch.
2. Yokohama. 30 minutes from Tokyo Station via JR Tokaido Line or Tokyu Toyoko Line. Japan's second-largest city, but it feels completely different from Tokyo. Chinatown (the largest in Asia with 500+ restaurants), the Cup Noodle Museum (JPY 500, worth it for the custom cup noodle experience), Sankeien Garden, and the Red Brick Warehouse waterfront district.

Yokohama is the easiest day trip from Tokyo: short travel time, lots to do, easy navigation. Good for days when you want a change of scenery without committing to a long train ride. Budget: JPY 2,000 to 4,000 ($14 to $28).
3. Kawagoe. 30 minutes from Ikebukuro via the Tobu Tojo Line. Known as "Little Edo" for its preserved Edo-period merchant houses and kurazukuri (clay-walled warehouse) streetscape. The bell tower (Toki no Kane) is the icon. Penny Candy Alley (Kashiya Yokocho) sells traditional Japanese sweets from 20+ tiny shops.
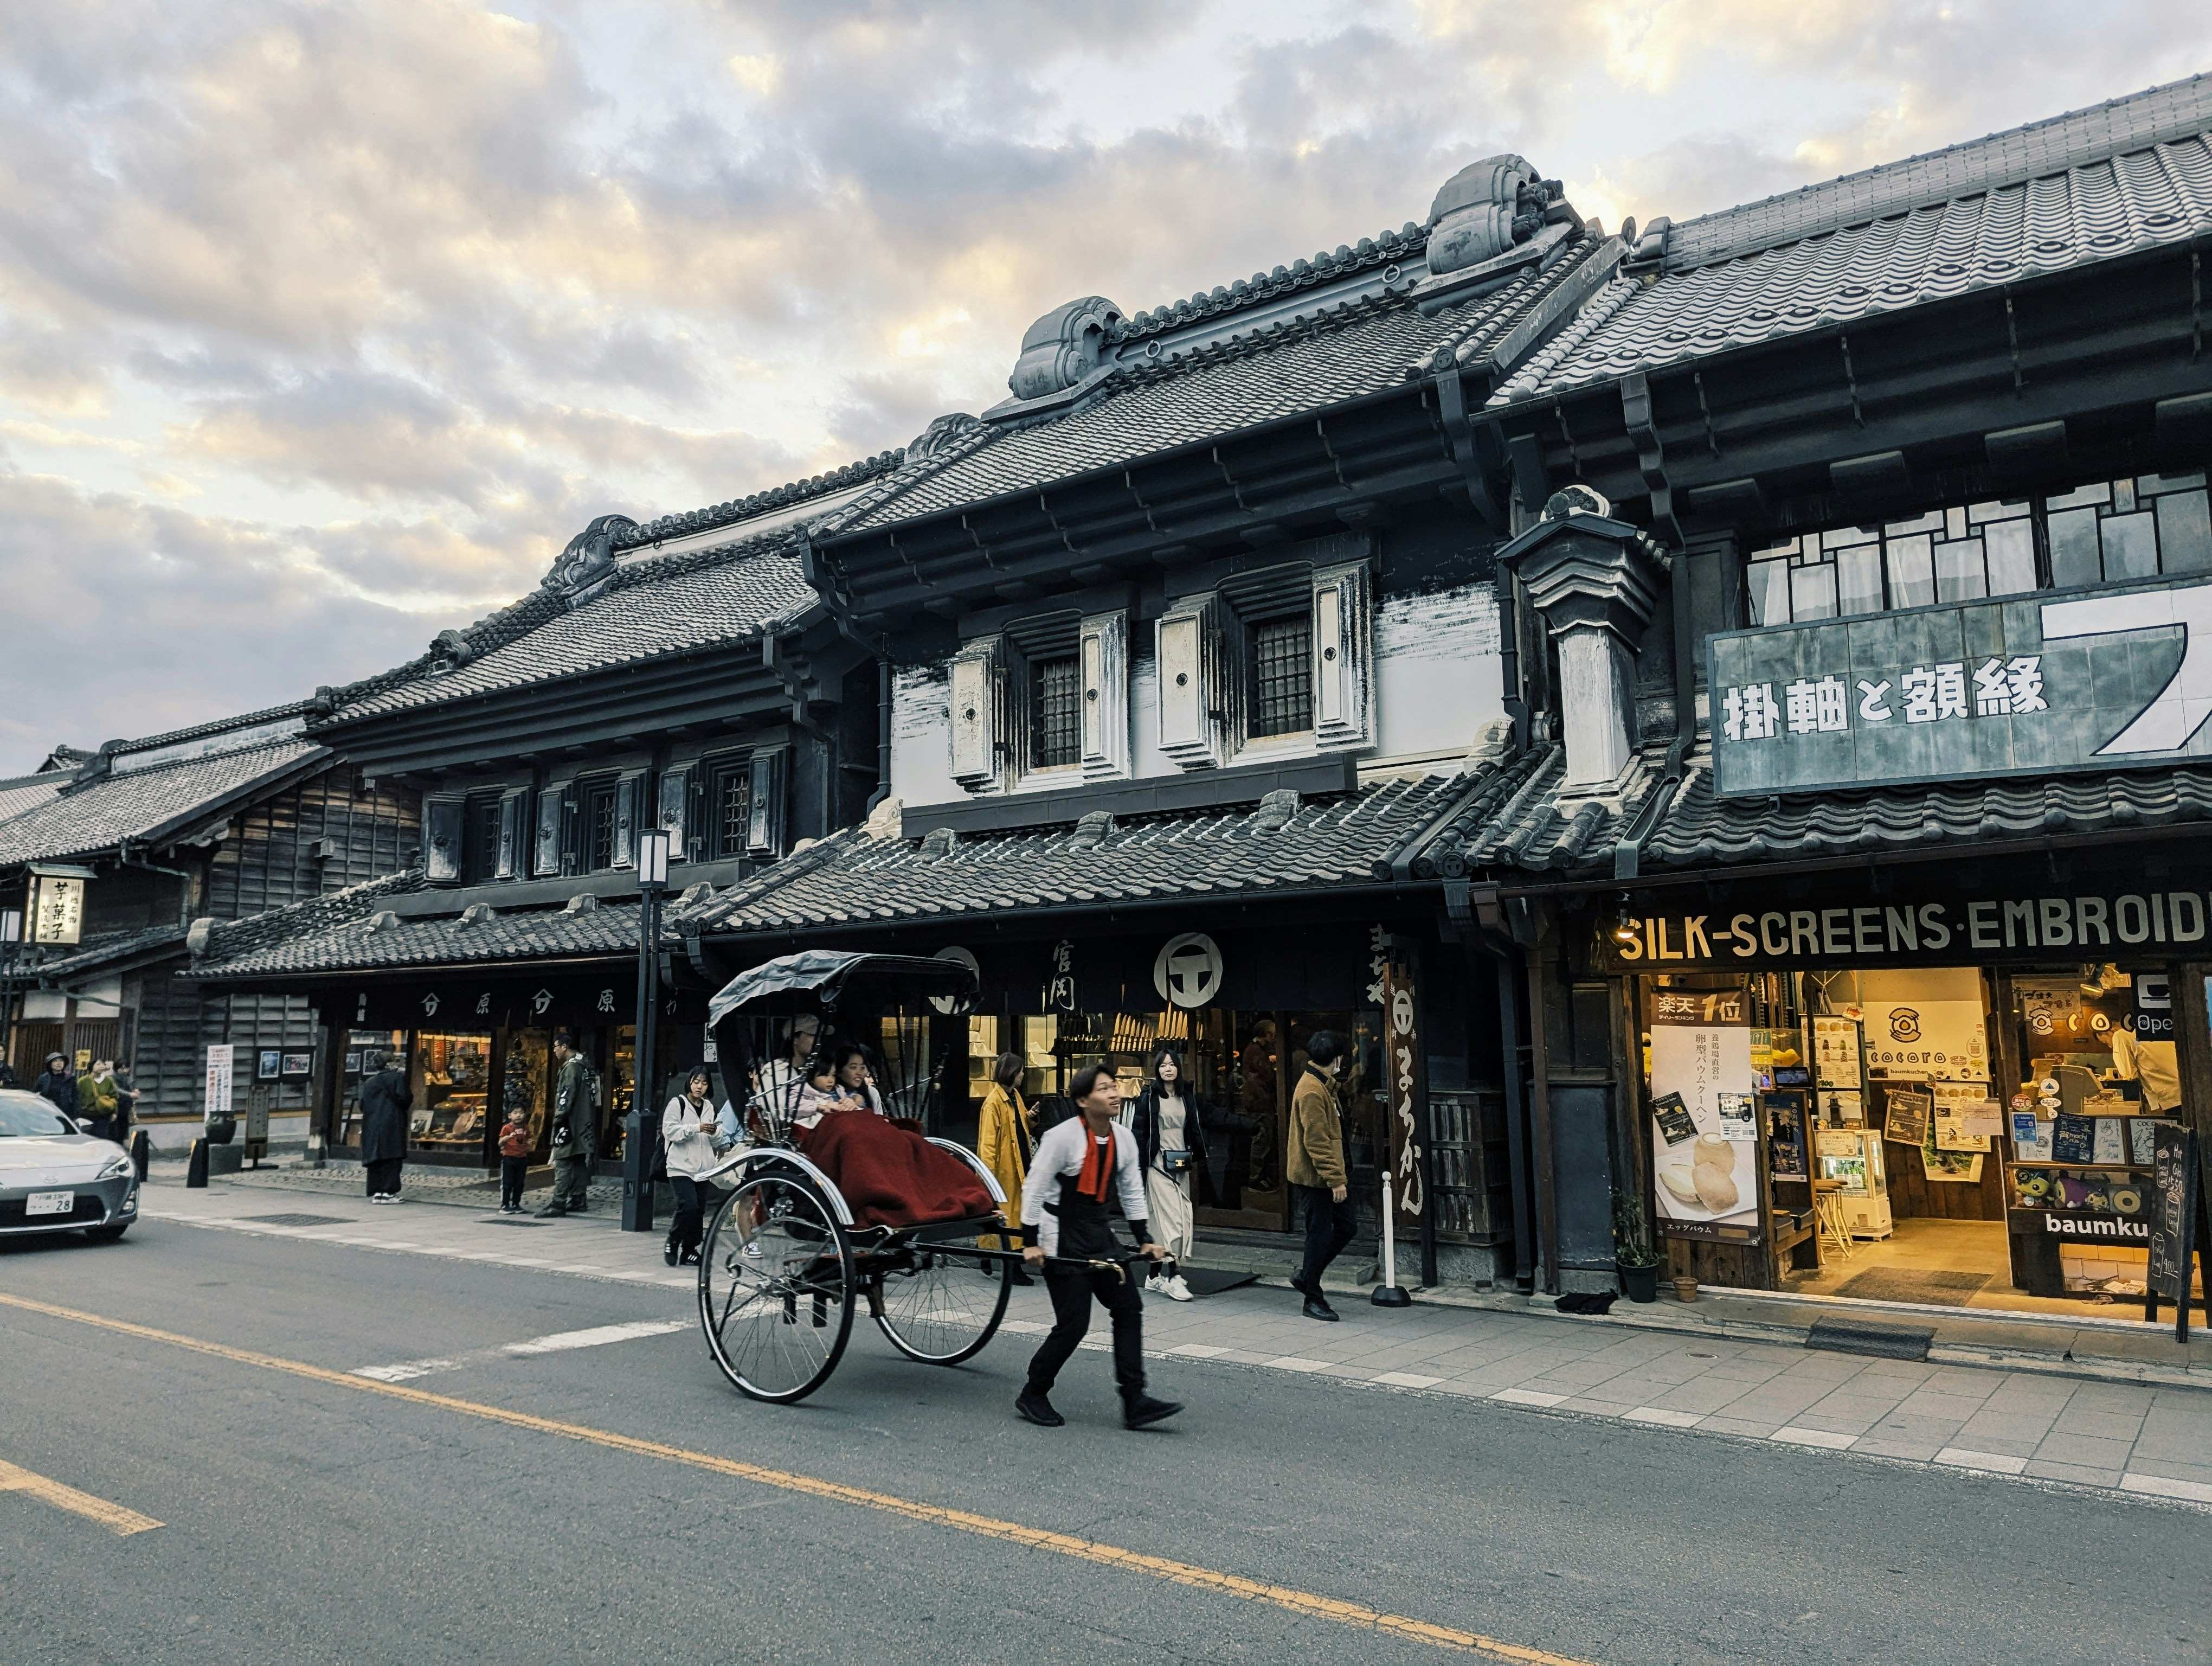
Less crowded than Kamakura, more photogenic than Yokohama, and close enough for a half-day trip. Go on a weekday to avoid the weekend crowds that can overwhelm the narrow streets.
Budget: JPY 2,000 to 3,500 ($14 to $24).
4. Enoshima. 1 hour from Shinjuku via Odakyu Line to Katase-Enoshima. A small island connected to the mainland by a bridge, with a shrine, sea caves, a lighthouse observation tower, and views of Mount Fuji on clear days. Combine with Kamakura for a full day: temples in the morning, Enoshima in the afternoon.
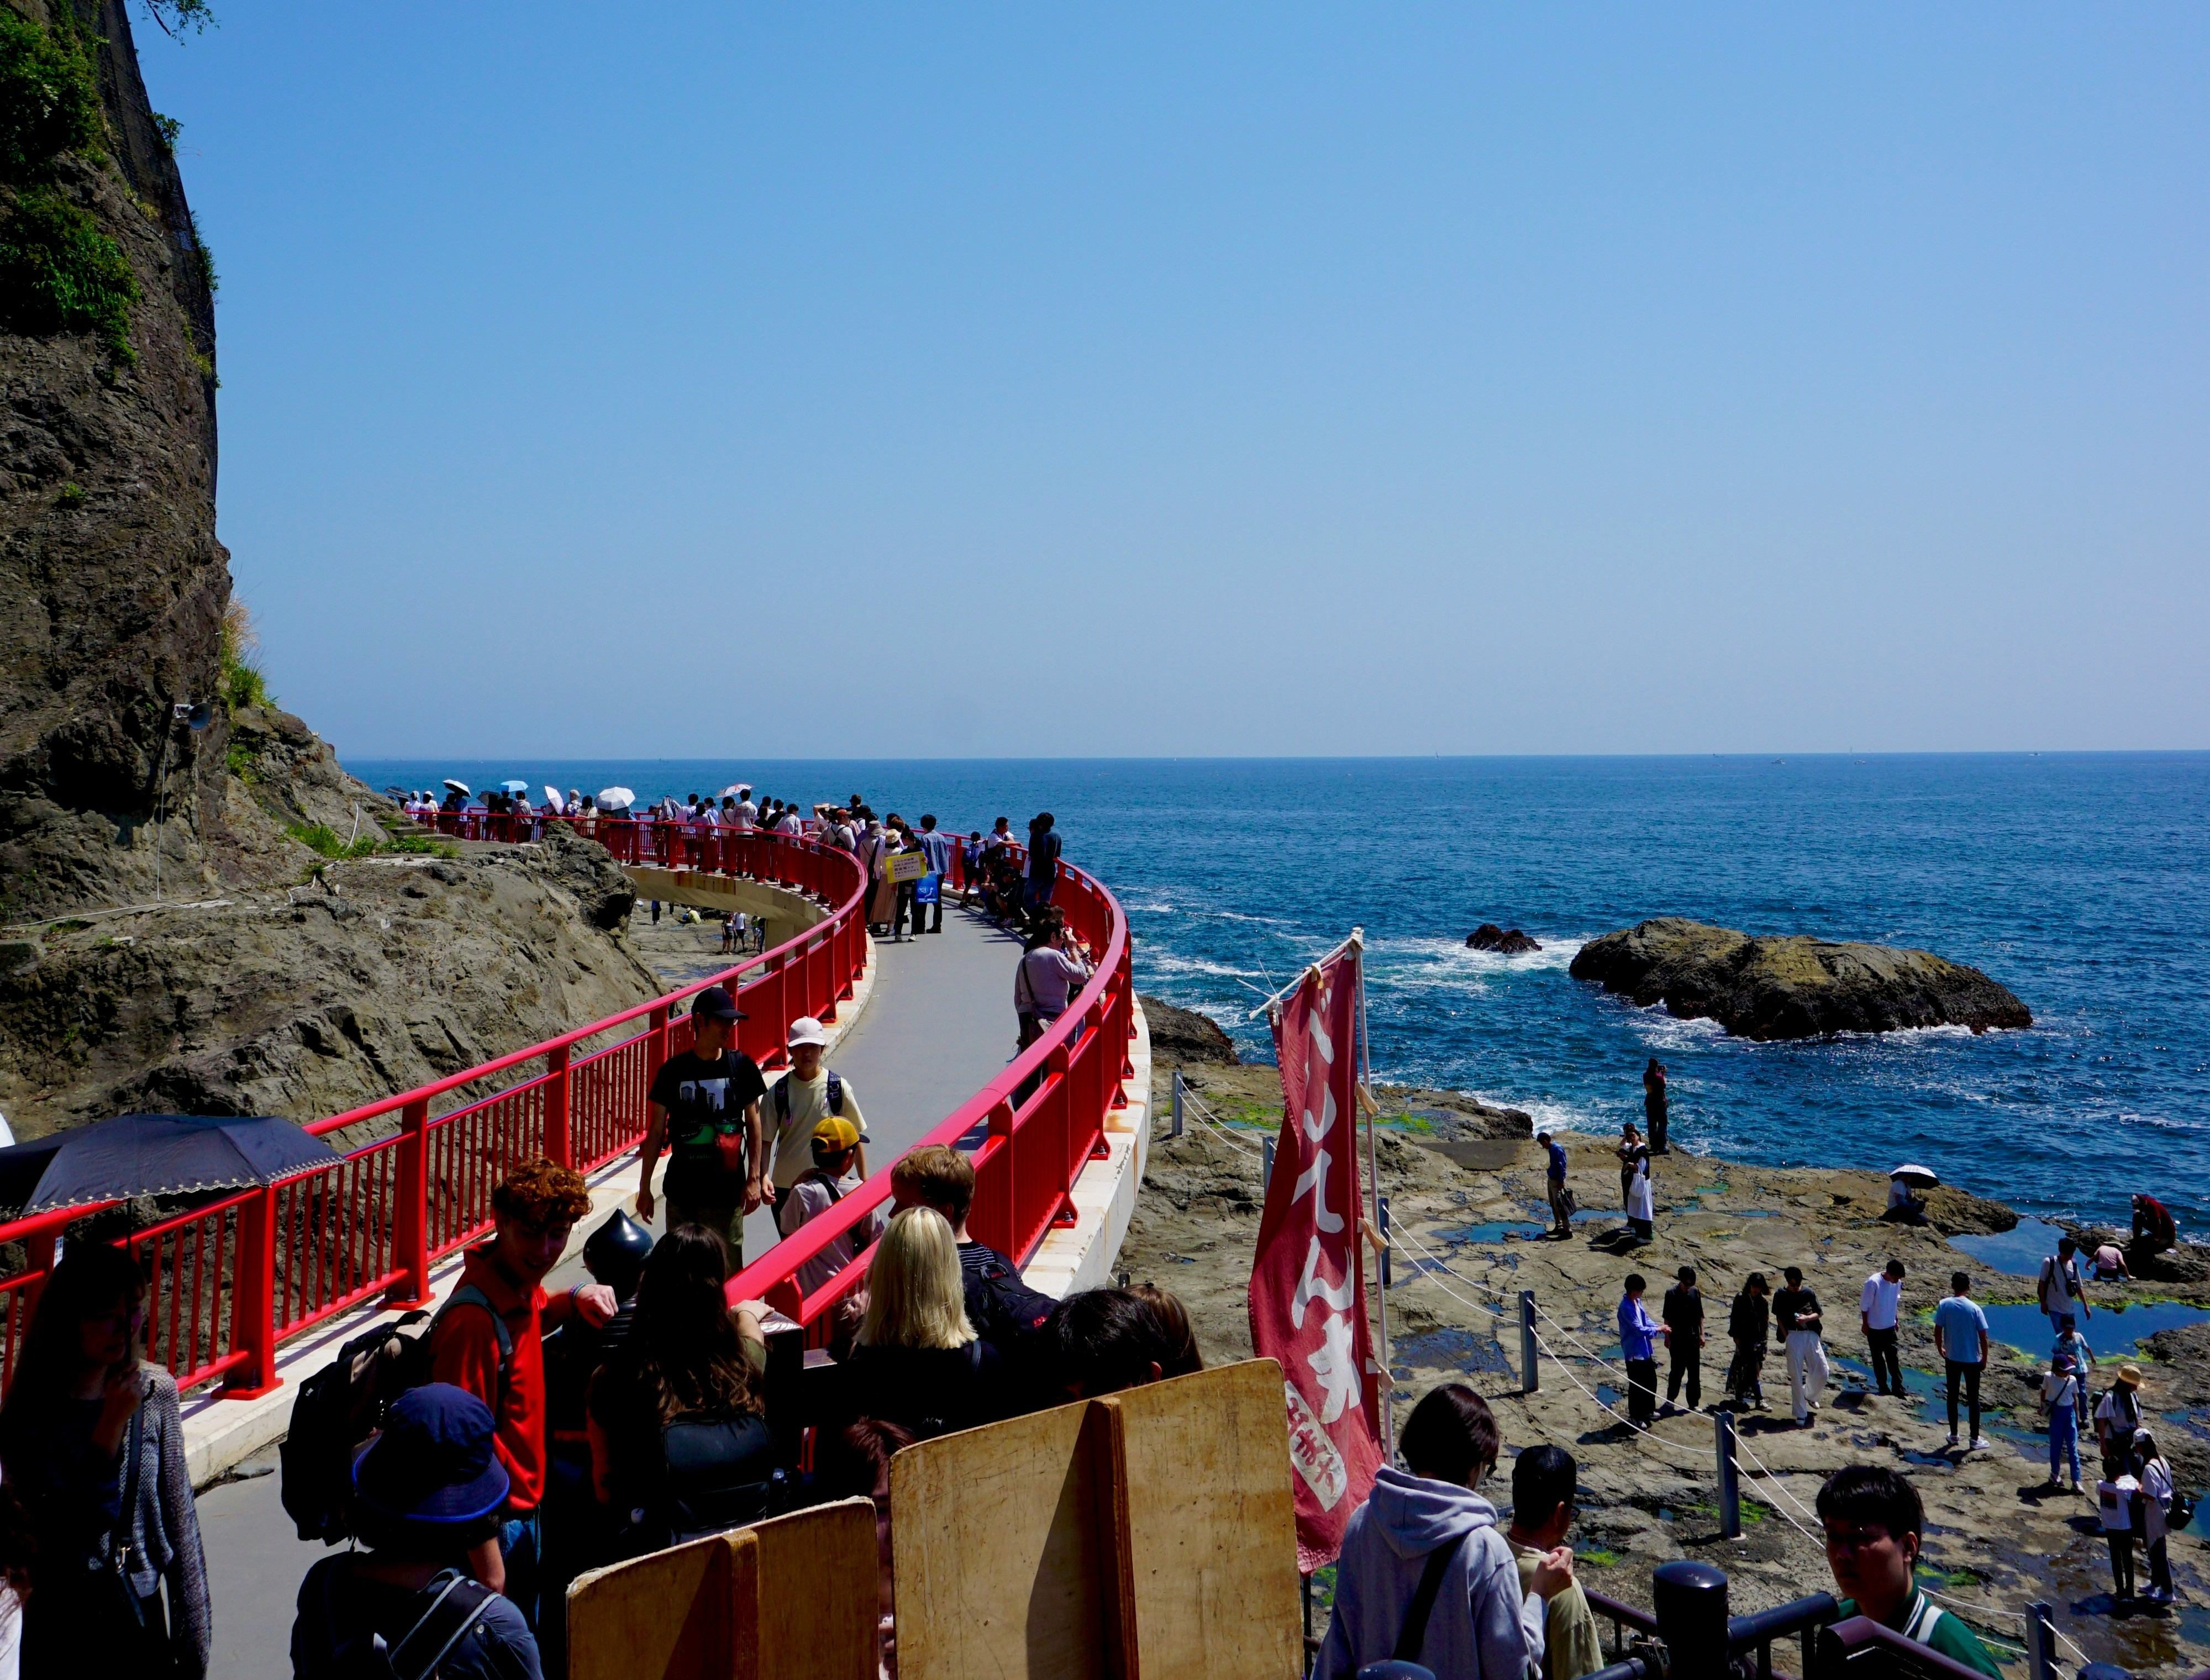
The island is small enough to walk in 2 to 3 hours. The shirasu (whitebait) rice bowls at the island's restaurants are a local speciality worth trying.
Budget: JPY 2,500 to 4,000 ($17 to $28).
5. Mount Takao. 50 minutes from Shinjuku via the Keio Line to Takaosanguchi. The most accessible mountain hike from Tokyo. The main trail (Trail 1) takes about 90 minutes to the summit and is paved the entire way. For more challenge, Trail 6 follows a stream through the forest. The cable car (JPY 490 one way) covers the first half of the ascent if you want to save energy.

Summit views include Mount Fuji on clear days. Best in autumn (late November) for red maple leaves and spring (April) for cherry blossoms.
Budget: JPY 1,500 to 2,500 ($10 to $17).
1 to 1.5 hours from Tokyo
6. Hakone. 1.5 hours from Shinjuku via Odakyu Romance Car (JPY 2,330 reserved seat). The classic day trip for hot springs and Mount Fuji views. The Hakone Free Pass (JPY 6,100 for 2 days from Shinjuku) covers the Romance Car, cable car, ropeway, pirate ship on Lake Ashi, and buses. It's excellent value if you use even half of the included transport.
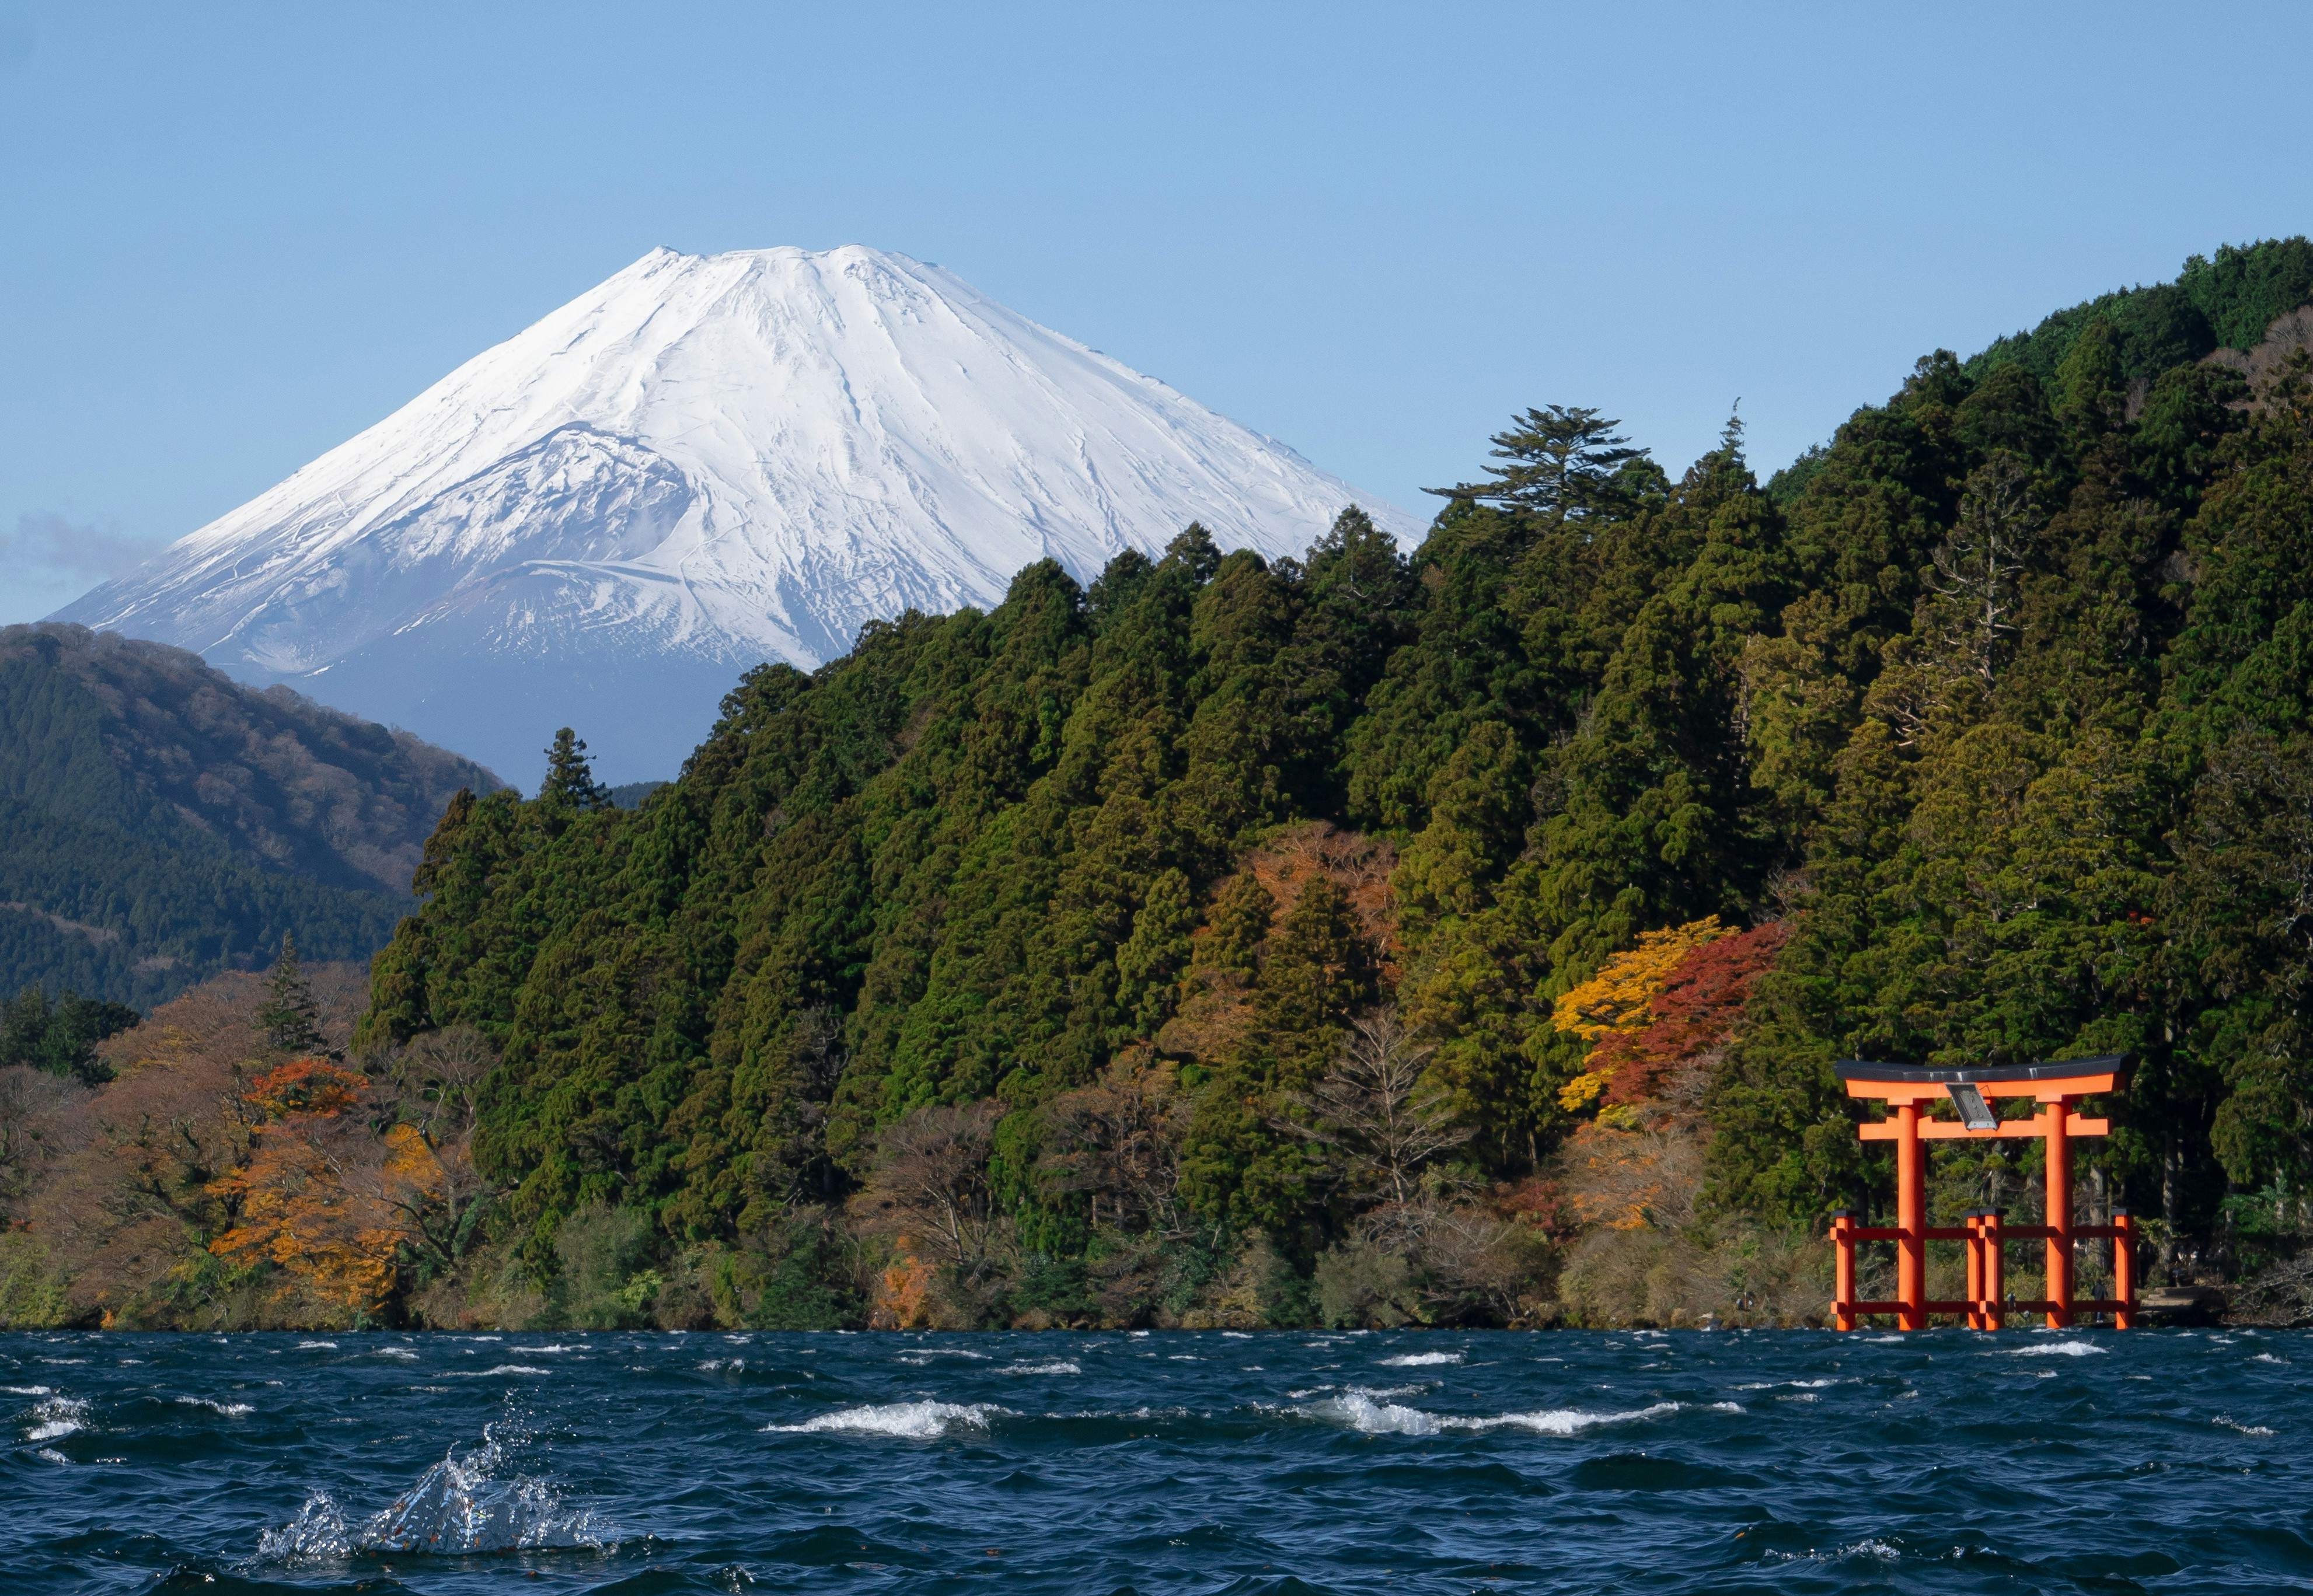
The loop route (train to Hakone-Yumoto, bus to Togendai, pirate ship across Lake Ashi, cable car and ropeway back) takes a full day. The open-air museum is worth an hour. Owakudani's volcanic valley smells like sulfur and sells black eggs boiled in the volcanic springs that supposedly add 7 years to your life.
Budget: JPY 6,000 to 10,000 ($40 to $70) with the Free Pass.
7. Nikko. 2 hours from Asakusa via Tobu Railway (JPY 2,800 round trip with the Nikko Pass). Toshogu Shrine is one of Japan's most ornate: gold leaf, intricate carvings (including the famous "see no evil" monkeys and the sleeping cat), and set in a towering cedar forest that filters the light in a way that makes the whole complex feel otherworldly.

The Kegon Falls (100m drop, JPY 570 elevator to the viewing platform) are 30 minutes by bus from Nikko station. Nikko is more expensive and time-consuming than Kamakura, but the visual payoff is bigger. The shrine complex alone justifies the trip.
Budget: JPY 5,000 to 8,000 ($35 to $55).
8. Fuji Five Lakes (Kawaguchiko). 2 hours from Shinjuku via JR Chuo Line + Fuji Kyuko Line, or direct highway bus (JPY 2,200). The best Mount Fuji viewing point that doesn't require climbing. Kawaguchiko (Lake Kawaguchi) has multiple photo spots along the northern shore, a ropeway with panoramic views (JPY 900), and the Chureito Pagoda (free but 400 steps), which produces the iconic five-tiered pagoda framing Mount Fuji that appears on every Japanese tourism poster.

Cloud cover is the risk: Fuji hides behind clouds roughly 60% of days.
Check the webcam at fujigoko.tv before you go. Early morning (before 10 am) offers the best visibility. Budget: JPY 4,000 to 7,000 ($28 to $48).
9. Chichibu. 1.5 hours from Ikebukuro via Seibu Railway. A mountain town that feels rural despite being 90 minutes from central Tokyo. Famous for the 34-temple Chichibu Pilgrimage, sake breweries, and the Nagatoro river gorge, where you can take a traditional boat ride through rapids (JPY 1,800). Much less touristy than Kamakura or Hakone.
The Chichibu Night Festival (December) is one of Japan's most spectacular festivals with illuminated floats, but the town is rewarding year-round. Budget: JPY 3,000 to 5,000 ($20 to $35).
1.5 to 2.5 hours from Tokyo
10. Kusatsu Onsen. 2.5 hours from Tokyo via Shinkansen to Naganohara-Kusatsuguchi, then bus. One of Japan's top three hot spring towns. The yubatake (hot water field) in the town centre is a steaming, sulfurous wooden channel that cools the spring water before it flows to the bathhouses. Free public foot baths line the streets. The Sainokawara open-air bath (JPY 600) is enormous and surrounded by forest.
Kusatsu is the best day trip for onsen (hot spring) culture, better than Hakone's commercialised baths. Budget: JPY 5,000 to 8,000 ($35 to $55).
11. Izu Peninsula. 2 hours from Tokyo via Shinkansen to Atami or Ito. A coastal resort area with hot springs, dramatic cliffs, and seafood. Atami has a castle and fireworks shows (weekends in summer). Jogasaki Coast (near Ito) has a 9km cliff walk with suspension bridges over volcanic rock formations.
Izu is where Tokyo residents go for weekend getaways, so it has excellent infrastructure (ryokans, onsen hotels, seafood restaurants) without the international tourist crowds of Hakone. Budget: JPY 4,000 to 7,000 ($28 to $48).
12. Takayama. 2.5 hours from Tokyo via Shinkansen to Nagoya, then Hida Wide View Express (or direct bus, 5.5 hours). A preserved Edo-period mountain town known for its morning markets, sake breweries, and Hida beef (the rival to Kobe beef that locals insist is better). The old town (Sanmachi Suji) is three streets of wooden merchant houses converted to sake shops, craft stores, and restaurants. Takayama is at the limit of a comfortable day trip.
It's better as an overnight, but if you catch the earliest Shinkansen, you can get 5 to 6 hours in town. Budget: JPY 8,000 to 15,000 ($55 to $100) including Shinkansen.
13. Matsumoto. 2.5 hours from Shinjuku via Azusa Limited Express. Home to Matsumoto Castle, one of Japan's five original castles (most Japanese castles are concrete reconstructions). The black exterior earned it the nickname "Crow Castle." The castle interior climb is steep, narrow wooden stairs through six floors.
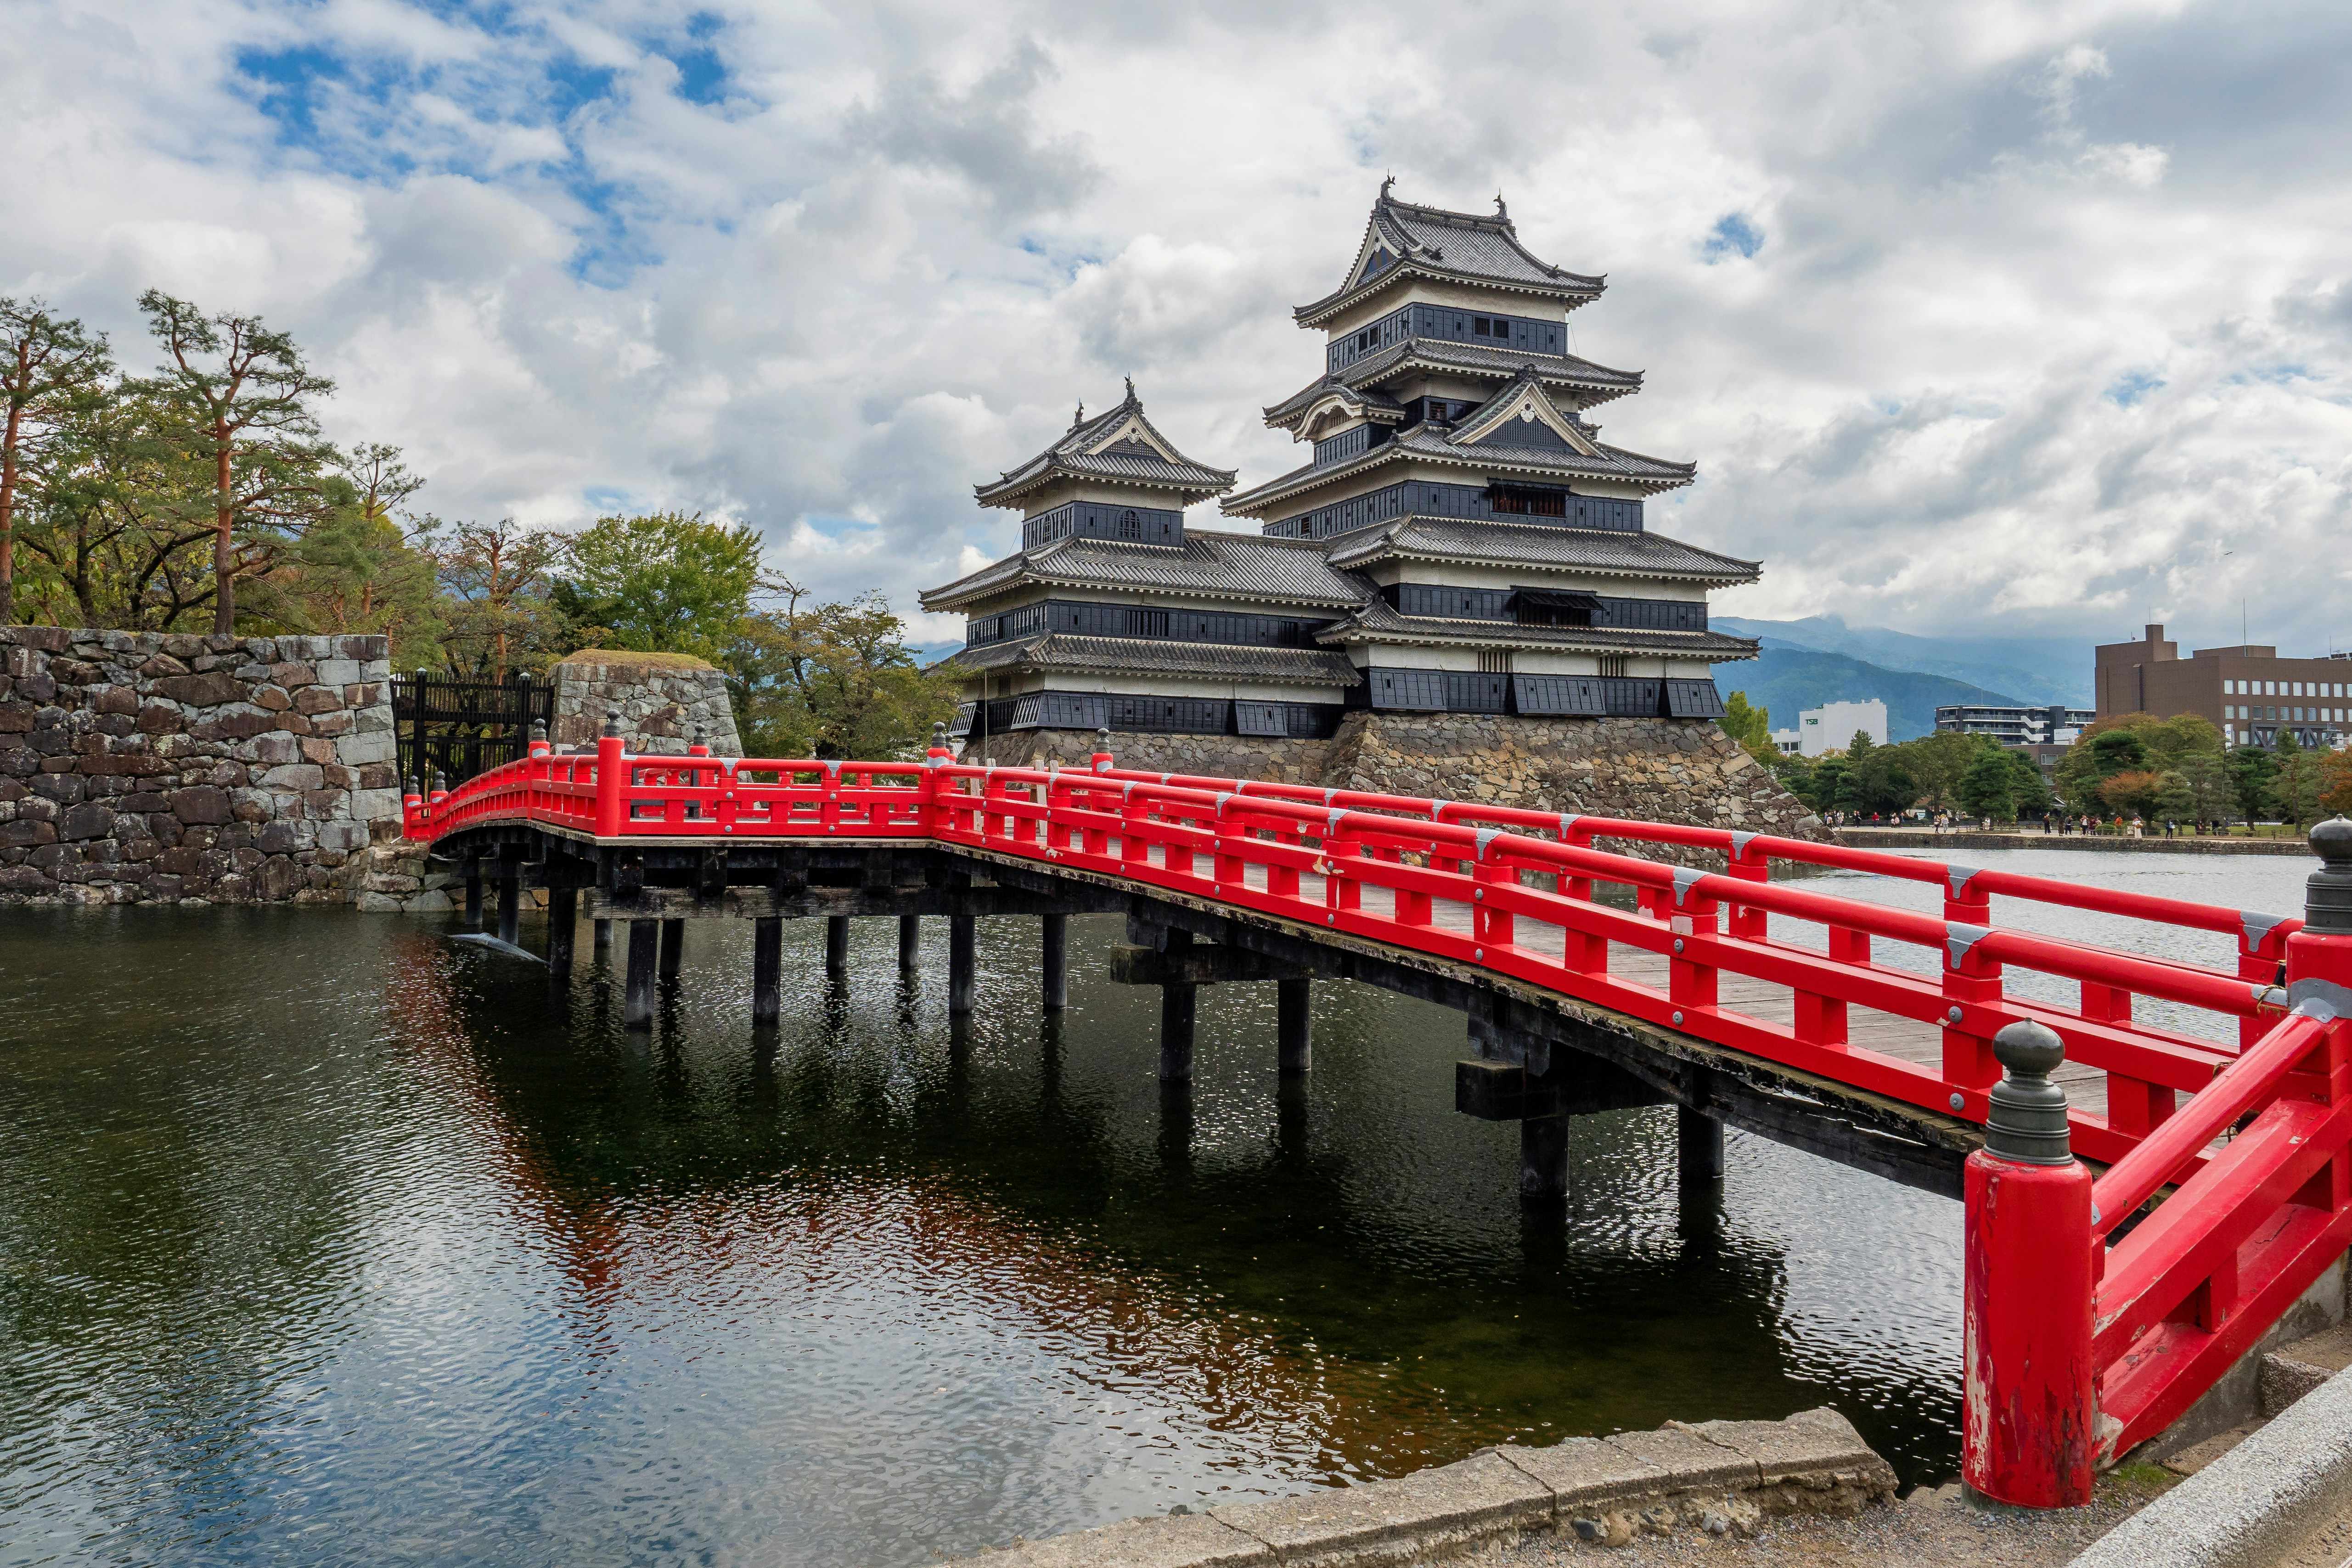
The city itself is a pleasant university town with craft beer bars and soba noodle shops. Like Takayama, this stretches the day trip definition, but is doable with an early departure. Budget: JPY 6,000 to 10,000 ($40 to $70).
14. Hitachi Seaside Park. 2 hours from Tokyo via JR Joban Line to Katsuta, then bus. Famous for two spectacular flower seasons: nemophila (baby blue eyes) covering rolling hills in late April to early May, and kochia bushes turning bright red in October. Outside these seasons, the park is pleasant but unremarkable.

Time your visit to the bloom calendar published on the park's website. Entry: JPY 450. Budget: JPY 3,000 to 5,000 ($20 to $35).
15. Odawara. 1 hour from Tokyo via Shinkansen (or 1.5 hours via JR Tokaido Line for the budget option). Odawara Castle is a well-restored hilltop castle with a free garden and JPY 510 keep entry. The castle town has a fish market, a kamaboko (fish cake) museum, and lantern-lit streets.

Often overlooked because it's the gateway to Hakone, and most visitors pass through without stopping. That's a mistake. Odawara deserves 2 to 3 hours before or after Hakone. Budget: JPY 2,000 to 4,000 ($14 to $28).
Paying for day trips from Tokyo
Japan is still a cash-heavy country, though IC cards (Suica, Pasmo) work for all trains and many convenience stores and vending machines. Smaller temples, street food vendors, and rural businesses are often cash-only. ATMs at 7-Eleven and Japan Post accept international cards. Withdraw JPY in larger amounts to avoid per-withdrawal fees.
If you're visiting Japan, it’s worth checking how your card handles payments in yen before you travel. With a Grey virtual card, you can spend directly from your available Grey balance, with no separate card top-up required. For non-USD card transactions, a cross-border fee of 2% + $0.50 may apply. You can also get a travel eSIM through Grey Lifestyle, depending on availability, so you can stay connected for maps, train schedules, and translations without relying on your usual mobile roaming plan.
The Japan Rail Pass is worth it if you're taking the Shinkansen to 3+ destinations. A 7-day pass costs approximately JPY 50,000 ($340) and covers unlimited JR trains, including Shinkansen. If you're only doing 1 to 2-day trips from Tokyo on local JR lines, a regular Suica card is cheaper.
Exploring beyond Tokyo? Spend on a Grey virtual card with no markup and grab a travel eSIM for Japan.
Frequently asked questions about day trips from Tokio
What is the best day trip from Tokyo?
Kamakura for temples and beach. Hakone for hot springs and Fuji views. Nikko for ornate shrines in forest. Yokohama for food and city atmosphere. The best choice depends on what kind of day you want: spiritual and historical (Kamakura, Nikko), scenic and relaxing (Hakone, Kawaguchiko), or urban and culinary (Yokohama, Kawagoe).
Do I need a Japan Rail Pass for day trips?
Only if you're doing 3+ Shinkansen trips. A 7-day JR Pass (~JPY 50,000) covers unlimited JR travel. For 1 to 2-day trips on local JR lines, a Suica or Pasmo IC card is cheaper and more flexible. Non-JR railways (Odakyu, Tobu, Keio, Seibu) aren't covered by the JR Pass anyway.
Can I use credit cards on day trips from Tokyo?
Major stations, chain restaurants, and department stores accept cards. Smaller temples, street food, rural shops, and many local restaurants are cash-only. Withdraw JPY at 7-Eleven ATMs (they accept international cards). Bring JPY 5,000 to 10,000 in cash per day trip as backup.
What is the cheapest day trip from Tokyo?
Mount Takao: JPY 1,500 to 2,500 total ($10 to $17). Train from Shinjuku is JPY 390 each way. No entry fee for the mountain. Cable car is optional (JPY 490). Pack lunch to keep costs down. Kawagoe and Yokohama are also budget-friendly at JPY 2,000 to 3,500.
Is Mount Fuji worth a day trip?
Only for the 5th station viewpoint (bus from Kawaguchiko, 50 minutes). Climbing Fuji requires an overnight trip from July to September. For Fuji views, Kawaguchiko (2 hours from Shinjuku) offers better photo opportunities from the lakeside without the summit commitment. Check the webcam before going. Fuji hides behind clouds roughly 60% of the time.
Disclaimer: This article is for informational purposes only. All costs and details are estimates based on mid-2026 data. Verify current information before making decisions. Grey isn't a bank. We're a licensed financial services provider offering multi-currency accounts.
11 best day trips from London: Where to go and what to spend
Discover the 11 best day trips from London, with travel times, what to see, and what each costs, plus the easy way to pay on the day. Compare.
Priscila Marotti
•
September 29, 2026
•
6 min read
If you have time for just one day trip from London, I’d choose Bath. If you can fit in a second, add Oxford. And for a third, Brighton is perfect when you want a break from the city and some sea air. But those are only the beginning. There are at least 11 destinations within easy reach of London that are worth giving a full day to, and getting to most of them costs less than a nice dinner in central London.
The best day trips from London include Oxford, Bath, Windsor, Cambridge, Brighton, Stonehenge, and the Cotswolds. Most are 1 to 2 hours by train or coach, with return fares from around £15 to £50. Book train tickets early for the lowest fares and plan one main sight per trip.
This guide covers all 11, ranked by how much you'll enjoy them relative to how much effort they take. We've included train times, return fares, what to see, and the one thing most visitors miss at each destination. If you're planning a longer European trip, see also the best day trips from Paris.
Best day trips from London: Quick overview
Here's a quick comparison of all 11 destinations so you can pick the right one for your day:
All train fares are estimates for off-peak return tickets booked 1 to 2 weeks in advance. Walk-up fares on the day can be 2 to 3 times higher. Booking through Trainline or National Rail typically gets the best price.
1. Bath
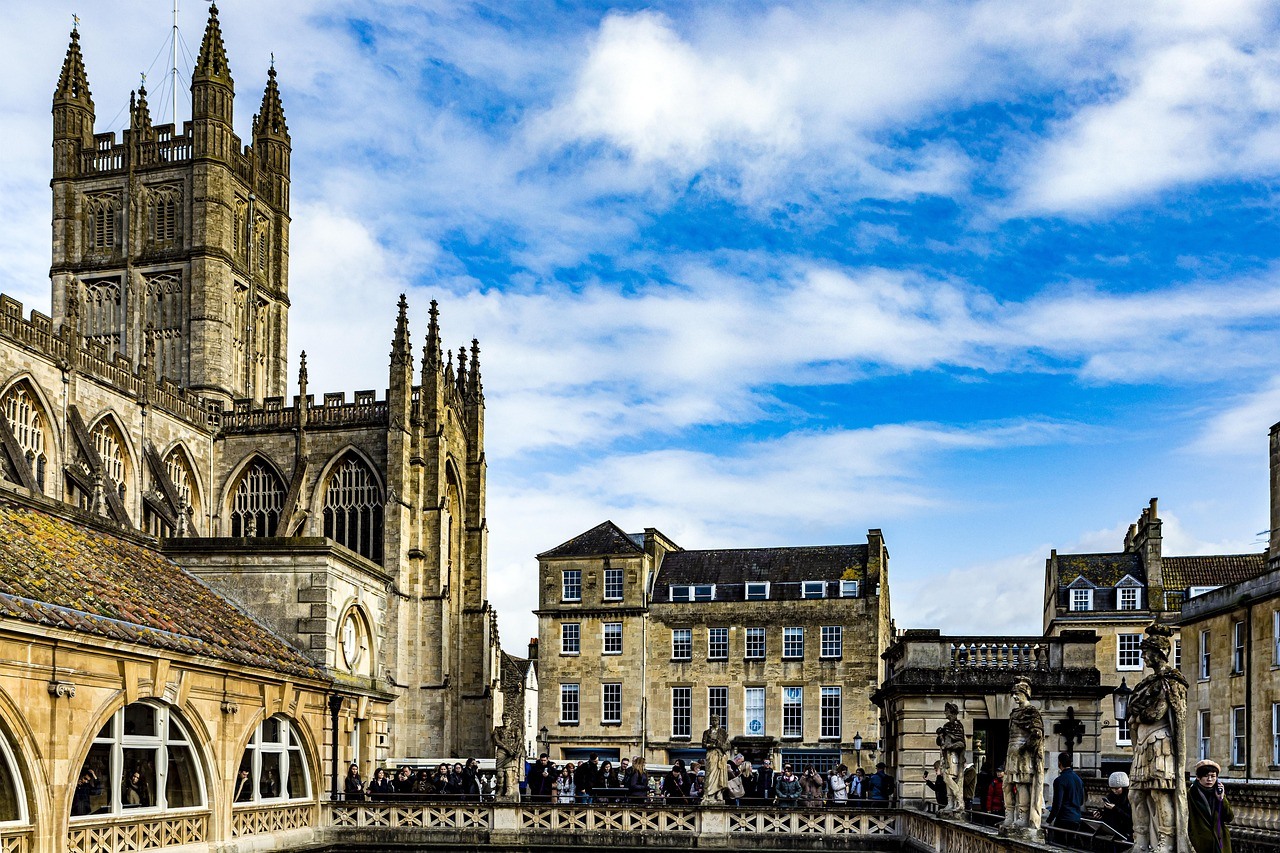
Bath is the most complete day trip from London. Georgian architecture that looks like it was designed for Instagram, the Roman Baths (genuinely fascinating, not a tourist trap), the Royal Crescent, and independent shops along Milsom Street. It's a proper city with 2,000 years of history, not a village with one attraction.
Getting there: Great Western Railway from London Paddington, 1 hour 25 minutes. Return fare: £20 to £50 (advance), £70+ walk-up.
Don't miss: the Thermae Bath Spa rooftop pool. It's the only place in the UK where you can bathe in naturally warm, mineral-rich waters, and the views over the city from the rooftop are worth the £44 weekday or £49 weekend entry.
Budget for the day: £80 to £150 per person (train + Roman Baths entry £21 to £33 depending on date + food + optional spa).
2. Oxford
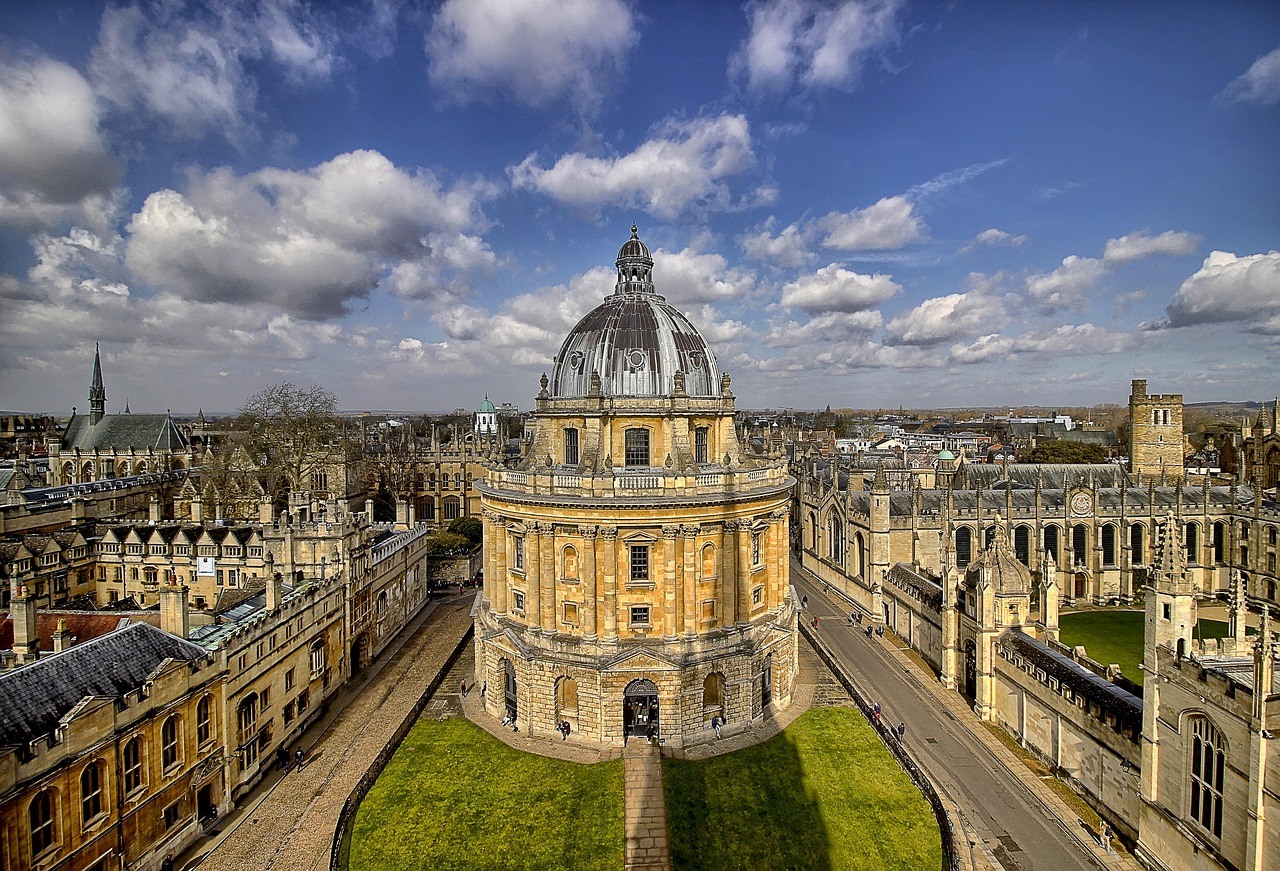
Oxford feels like stepping into a film set, largely because it literally is one. The Bodleian Library, Christ Church College (the Great Hall inspired Hogwarts), the Radcliffe Camera, and the covered market are all within a 15-minute walk of each other. The city is small enough to see the highlights in a day.
Getting there: GWR from Paddington or Chiltern Railways from Marylebone, about 1 hour. Return fare: from around £20 to £40 when booked in advance.
Don't miss: Blackwell's Bookshop on Broad Street. The Norrington Room in the basement is one of the largest book-selling rooms in the world.
Budget for the day: £50 to £90 per person (train + Christ Church entry from around £20 + food).
3. Brighton
Brighton is London's beach. One hour south and you're on the seafront with fish and chips, Brighton Pier, and The Lanes (a maze of independent shops, vintage stores, and cafes). The vibe is more relaxed and creative than anywhere in central London.
Getting there: Southern or Thameslink from London Victoria or London Bridge, about 1 hour. Return fare: £15 to £25 (advance).
Don't miss: the Royal Pavilion. It looks like an Indian palace dropped into a seaside town, and the interior is even more extravagant than the outside suggests. Entry is £21.50 for adults, with a 5% discount when booked online.
Budget for the day: £50 to £90 per person (train + Pavilion + seafood lunch).
4. Cambridge
Cambridge is Oxford's quieter, greener rival. The colleges are equally beautiful, the Fitzwilliam Museum is free, and punting on the River Cam is one of those experiences that's exactly as charming as it sounds. Hire a punt yourself (£25 to £30 per hour) or pay a chauffeur (£20 per person) and let someone else do the work.
Getting there: Greater Anglia from Liverpool Street or services from King's Cross, around 50 minutes to 1 hour 25 minutes depending on the train. Return fare: from £13 for a Weekend Day Return or £19 for a weekday Off-Peak Day Return with Greater Anglia; Advance fares can also be available.
Don't miss: King's College Chapel. The fan-vaulted ceiling is one of the finest examples of Gothic architecture in Europe. Entry: £15.75 online in advance or £17 on a standard weekday; weekend prices are slightly higher.
Budget for the day: £50 to £100 per person (train + punting + college entry + food).
5. Windsor
Windsor is dominated by its castle, the oldest and largest occupied castle in the world and still a working royal residence. The state apartments, St George's Chapel (where Harry and Meghan married), and the Changing of the Guard are all included in the castle ticket (£30 for adults).
Getting there: GWR from Paddington (change at Slough) or SWR from Waterloo, about 55 minutes. Return fare: fares vary depending on the service and ticket type (£12 to £20 - advance).
Don't miss: the Long Walk. A 2.65-mile tree-lined avenue stretching from the castle to the Copper Horse statue, free and spectacular in any season.
Budget for the day: £60 to £100 per person (train + castle entry + lunch).
6. Stonehenge
Stonehenge is the one destination on this list that divides opinion. Some visitors find it profoundly moving. Others see a circle of rocks behind a rope barrier and feel underwhelmed. The key to enjoying it: pair it with Salisbury. Take the train to Salisbury (1 hour 25 minutes from Waterloo), visit the cathedral (home to one of four surviving Magna Carta copies), then catch the Stonehenge Tour bus from the station (£16 return, runs every 30 minutes).
Getting there: SWR to Salisbury, then Stonehenge Tour bus, total around 2 hours. Return fare: varies depending on the train and bus ticket (£30 to £50 - train + bus). Stonehenge entry: £25 to £30 for an adult advance ticket without donation, depending on the date. Booking ahead can save up to 15%.
Don't miss: Old Sarum (the original Salisbury), a ruined hilltop fort 2 miles north of the city centre.
Budget for the day: £75 to £110 per person.
7. The Cotswolds
The Cotswolds aren't one place. They're a collection of honey-coloured stone villages spread across 800 square miles. Without a car, the easiest day trip is to Moreton-in-Marsh (direct train from Paddington, 1 hour 30 minutes), then walk or bus to nearby villages like Bourton-on-the-Water, Stow-on-the-Wold, or Broadway.
Getting there: GWR from Paddington to Moreton-in-Marsh, about 1 hour 30 minutes. Return fare: £25 to £45.
Don't miss: the walk from Moreton-in-Marsh to Bourton-on-the-Water (about 8 miles, 3 hours, flat and signposted). It's the best way to experience the Cotswolds without a car.
Budget for the day: £50 to £90 per person (train + pub lunch + cream tea).
8. Canterbury
Canterbury is a pilgrimage city, and the cathedral is the draw. It's the mother church of the Anglican Communion, a UNESCO World Heritage Site, and one of the oldest Christian structures in England. The medieval streets around it are charming and walkable, with plenty of independent shops and tea rooms.
Getting there: Southeastern from London St Pancras, about 55 minutes (high-speed). Return fare: £15 to £30. Cathedral entry: £18 from October to March, £19.50 from April to September, or £21 on weekends in July and August.
Don't miss: the medieval Eastbridge Hospital, a 12th-century almshouse that's still in use. Entry £10.
Budget for the day: £60 to £100 per person.
9. Warner Bros Studio Tour
Warner Bros Studio Tour (The Making of Harry Potter) is the only destination on this list that requires a timed ticket booked weeks or months in advance. It's not a theme park. It's the actual film sets, props, and costumes from all eight Harry Potter films, displayed in the studios where they were shot. Allow 3 to 4 hours inside.
Getting there: Train from Euston to Watford Junction (20 minutes), then shuttle bus to the studio. Return fare: £10 to £15 (train) + studio ticket £60 (adult).
Don't miss: the butterbeer. It's a theme park cliché at any other attraction, but here it's part of the experience.
Budget for the day: £80 to £110 per person.
10. Seven Sisters Cliffs
Seven Sisters is the outdoor option. A series of chalk cliffs along the Sussex coast that look like the White Cliffs of Dover but without the crowds. The cliff walk from Seaford to Eastbourne (about 13 miles, 5 to 6 hours) is one of the best coastal hikes in southern England.
Getting there: Southern from London Victoria or London Bridge to Seaford, about 1 hour 20 minutes. Return fare: varies depending on the ticket type and travel time (£15 to £25).
Don't miss: the view from Birling Gap. It's the most photographed angle of the Seven Sisters, and there's a National Trust cafe at the bottom.
Budget for the day: £30 to £55 per person (train + packed lunch + cafe).
11. Leeds Castle
Leeds Castle calls itself "the loveliest castle in the world," and while that's a bold claim, it's hard to argue when you see it reflected in the surrounding moat on a still morning. The castle, gardens, maze, and grounds easily fill a full day, especially with children.
Getting there: Southeastern from London Victoria to Bearsted (about 1 hour), then shuttle bus to the castle. Return fare: £20 to £35 (train + bus). Castle entry: around £40 (adult), £30 (children).
Don't miss: the yew tree maze. It's one of the most beautiful hedge mazes in England, and finding the centre takes about 15 minutes.
Budget for the day: £75 to £110 per person.
Getting around and paying on your day trips
If you're visiting London from abroad, your main concern is paying for trains, attractions, and food without losing money to foreign transaction fees. A 1.5 to 3% markup on every card payment adds up across a full day of spending. On a £100 day trip, that's £1.50 to £3 in fees you didn't need to pay.
Grey's virtual Mastercard lets you spend on a virtual card with no conversion markup. Load GBP before your trip and pay at train stations, restaurants, and attractions from your pound balance. You can also hold pounds and more in your Grey account, so you're not converting every time you tap.
For mobile data (booking tickets, checking train times, navigating to attractions), a travel eSIM is cheaper than roaming. Buy a travel eSIM for the UK. And if you need to send money abroad from the UK while you're here, Grey handles that too.
Oyster or contactless tip: most day trips start at a London mainline station. Use contactless (or Oyster) for the Tube or bus to get to the station, then buy a National Rail ticket for the journey itself. Contactless doesn't work on National Rail beyond Zone 9.
Exploring beyond London? Spend on a Grey virtual card with no markup and grab a travel eSIM for the day.
Frequently asked questions about the best day trips from London
What is the best day trip from London?
Bath. It has the most to see and do in a single day: Roman Baths, Georgian architecture, the Thermae Bath Spa rooftop pool, and excellent food. It's 1 hour 25 minutes by train from Paddington, and the entire city centre is walkable. Oxford is a close second, especially if you're interested in history and architecture.
How much do day trips from London cost?
Budget £40 to £100 per person, depending on the destination, including return train fare, attraction entry, and food. The cheapest day trip is Seven Sisters (£25 to £45 all in). The most expensive is Warner Bros Studio (£75 to £95). Train fares drop significantly when booked 1 to 2 weeks in advance.
Are trains or coaches cheaper for day trips from London?
Coaches are almost always cheaper. A coach to Bath is £10 to £18 return versus £20 to £50 by train. The trade-off is time: coaches take roughly 50 to 100% longer. For a day trip where time matters (you want to maximise your hours at the destination), the train is usually worth the premium. For budget trips where you don't mind the journey, coaches are a solid option.
Can I do a day trip from London to Paris?
Technically, yes, via Eurostar (2 hours 15 minutes to Gare du Nord). But by the time you factor in check-in, travel to and from St Pancras, and the same at the Paris end, you'll have about 6 to 7 hours in Paris. It's doable but rushed. If you have the budget, it's a brilliant day out. Return fares start from about £78 booked well in advance.
When is the best time of year for day trips from London?
Late spring (May to June) and early autumn (September to October). Summer (July to August) is warmer, but crowded and more expensive. Autumn is ideal for the Cotswolds and Blue Ridge-style countryside colour. Winter works for indoor-heavy trips like Oxford, Canterbury, or Warner Bros Studio, and off-peak train fares are lower.
Do I need to book train tickets in advance?
For the best price, yes. Advance tickets are typically 40 to 60% cheaper than walk-up fares. Book through Trainline or National Rail 1 to 2 weeks ahead. Anytime tickets (walk-up, flexible) are available on the day, but cost significantly more. If your plans might change, an off-peak return offers a middle ground: cheaper than anytime, no fixed train.
Exploring beyond London? Spend on a Grey virtual card with no markup, and grab a travel eSIM for maps and tickets on the go.
Disclaimer: This article is for informational purposes only. Train fares, attraction prices, and opening times change seasonally. All costs are estimates based on mid-2026 data. Verify current prices with National Rail and individual attractions before you travel. Grey isn't a bank. We're a licensed financial services provider offering multi-currency accounts.
9 best day trips from Paris: Where to go and what to spend
The 9 best day trips from Paris by train, with travel times, what to see, and costs. Plus the smartest way to pay once you arrive. Compare now.
Priscila Marotti
•
September 29, 2026
•
6 min read
When you start looking at day trips from Paris, Versailles seems to be everywhere. And it makes sense: it’s famous, easy to reach, and absolutely worth seeing. But it’s also one of the busiest and most tiring options you can choose. If you’d rather start somewhere a little quieter, I’d go with Giverny instead. Monet’s garden is smaller and much more relaxed, and you can be back in Paris by mid-afternoon with plenty of energy left to enjoy the evening.
The best day trips from Paris include Versailles, Giverny, Champagne (Reims or Epernay), Mont Saint-Michel, Loire Valley castles, Bruges, Normandy's D-Day beaches, Fontainebleau, and Chartres. Most are 1 to 2.5 hours by train, with return fares from EUR 15 to EUR 80.
In this guide, we'll walk you through all nine destinations with train times, return fares, what to see, and a realistic daily budget. Skip Mont Saint-Michel if you only have a short trip and hate early mornings. Skip Bruges if you want to stay in France. Skip Versailles if crowds make you miserable and you haven't booked timed entry. If you're also visiting London, see the best day trips from London.
Best day trips from Paris: Quick comparison
Here's every destination at a glance.
Versailles: Around 40 minutes by RER C, with a 2026 Metro-Train-RER fare of EUR 2.55 each way. A full-estate Passport costs EUR 25 in low season or EUR 35 in high season. Best for the palace, Hall of Mirrors and gardens.
Giverny: Around 45 to 60 minutes by train from Paris Saint-Lazare to Vernon-Giverny, followed by a shuttle, bus, taxi or bike ride to Giverny. SNCF currently shows Paris-Vernon fares from around EUR 10 each way, although prices vary. Best for Monet's house and gardens and art lovers.
Champagne (Reims): As little as 45 minutes by direct TGV from Paris. SNCF currently lists one-way fares from EUR 15, with prices varying by departure and booking date. Best for Champagne-house tours and Reims Cathedral.
Mont Saint-Michel: Roughly 3 to 4 hours from Paris depending on the train and connection, followed by the local transfer to Mont Saint-Michel. The abbey costs EUR 16 during the 2026 high season (1 April to 30 September) and EUR 13 from 1 October 2026 to 31 March 2027. Best for the medieval island and abbey, but it makes for a very long day trip.
Loire Valley: Travel time depends heavily on which castle you visit. Paris to Blois, a useful base for Chambord, takes as little as 1 hour 23 minutes, with SNCF currently showing fares from EUR 10 one way on selected departures. Reaching Chambord itself takes longer, so allow roughly 2 to 3 hours from Paris when connections are included. Best for castles, gardens and cycling.
Bruges: Allow roughly 2.5 to 3 hours each way from Paris, normally with a connection in Brussels. Also, I would remove “Thalys” from the original: Thalys was absorbed into the Eurostar brand in 2023. Best for canals, medieval architecture and chocolate.
D-Day Beaches: Paris to Bayeux takes around 2 hours 15 to 30 minutes by train, and you'll then need a tour, rental car or other transport to reach the landing beaches. Best for Second World War history.
Fontainebleau: Around 40 minutes by train from Paris Gare de Lyon to Fontainebleau-Avon, followed by a local bus to the château. Best for a quieter alternative to Versailles, with both the palace and Fontainebleau forest to explore.
Chartres: Around 1 hour to 1 hour 20 minutes by direct train from Paris Montparnasse, with fares currently available from EUR 10 one way on selected services. Entry to Chartres Cathedral is free. Best for its Gothic cathedral and stained glass.
All fares are estimates for return tickets booked a few days in advance. SNCF and Trainline typically offer the best prices. Walk-up fares can be 2 to 3 times higher on TGV and Thalys routes.
1. Versailles

Versailles is the most famous day trip from Paris for good reason. The Hall of Mirrors, the gardens (which are genuinely vast, not a courtyard with a fountain), and Marie Antoinette's estate are all extraordinary. But it draws 10 million visitors a year, so timing matters more here than at any other destination on this list.
Getting there: RER C from central Paris to Versailles Château Rive Gauche, about 40 minutes. Trains run every 15 to 20 minutes. Return fare: EUR 5.10 (EUR 2.55 each way).
Palace entry: EUR 25 in low season or EUR 35 in high season for the Passport ticket (book timed entry online to skip the worst of the queue, which can stretch to 90 minutes on summer mornings).
Don't miss: the Grand Trianon. Most visitors never leave the main palace, but the Trianon estate is where the royal family actually lived day-to-day, and it's far less crowded. The gardens are free to enter on most days, but on musical fountain show days (weekends, April to October), there's an additional EUR 10 charge. The fountain shows are worth it.
Budget: EUR 45 to 75 per person, including transport, entry, and lunch at one of the on-site cafes.
2. Giverny
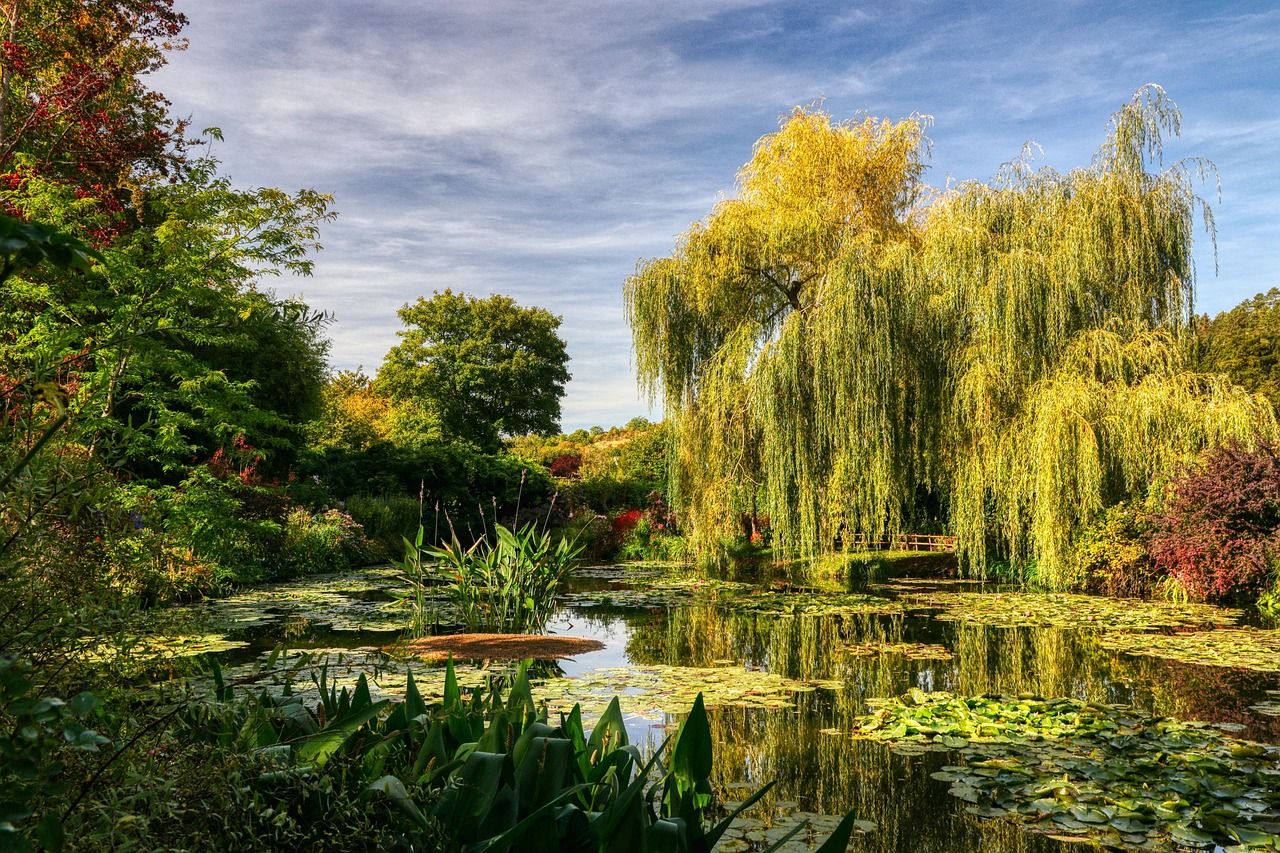
Giverny is Claude Monet's house and garden, and it looks exactly like his paintings. The water lily pond, the Japanese bridge, the flower gardens bursting with colour. It's small enough to see in 2 to 3 hours and peaceful enough to make you forget you're 45 minutes from a city of 12 million.
Getting there: Train from Paris Saint-Lazare to Vernon (45 minutes), then shuttle bus to Giverny (15 minutes, EUR 10 return). Entry: EUR 13.
Don't miss: go in the morning. The garden opens at 9:30 am and the first hour is magical before the tour groups arrive. The house interior is worth seeing too: Monet's kitchen is painted bright yellow, and the dining room is bright blue. Both rooms feel like paintings themselves.
Season matters: the garden is open from April to November only. Peak bloom for water lilies is late June through August. May and September are less crowded, and the garden is still beautiful.
Budget: EUR 45-60 per person.
3. Champagne (Reims)

Reims is the capital of the Champagne region and home to most of the famous houses: Veuve Clicquot, Taittinger, Pommery, and Ruinart. A cellar tour with tasting costs EUR 30 to 60 per person. The Reims Cathedral, where French kings were crowned for 800 years, is free to enter and its Gothic facade is one of the finest in France.
Getting there: TGV from Paris Gare de l'Est to Reims, 45 minutes. Return fare: EUR 20 to 50 (book early for the best prices).
Don't miss: Taittinger's cellars are carved into 4th-century Roman chalk pits. The history is as impressive as the champagne. Ruinart (the oldest champagne house, founded in 1729) offers a more exclusive tour at a higher price (EUR 90+), but the cellars are UNESCO-listed, and the experience is exceptional.
Budget: EUR 70 to 130 per person (train, tour, and lunch). Book cellar tours in advance, especially for Veuve Clicquot and Taittinger, which sell out weeks ahead in summer.
4. Mont Saint-Michel
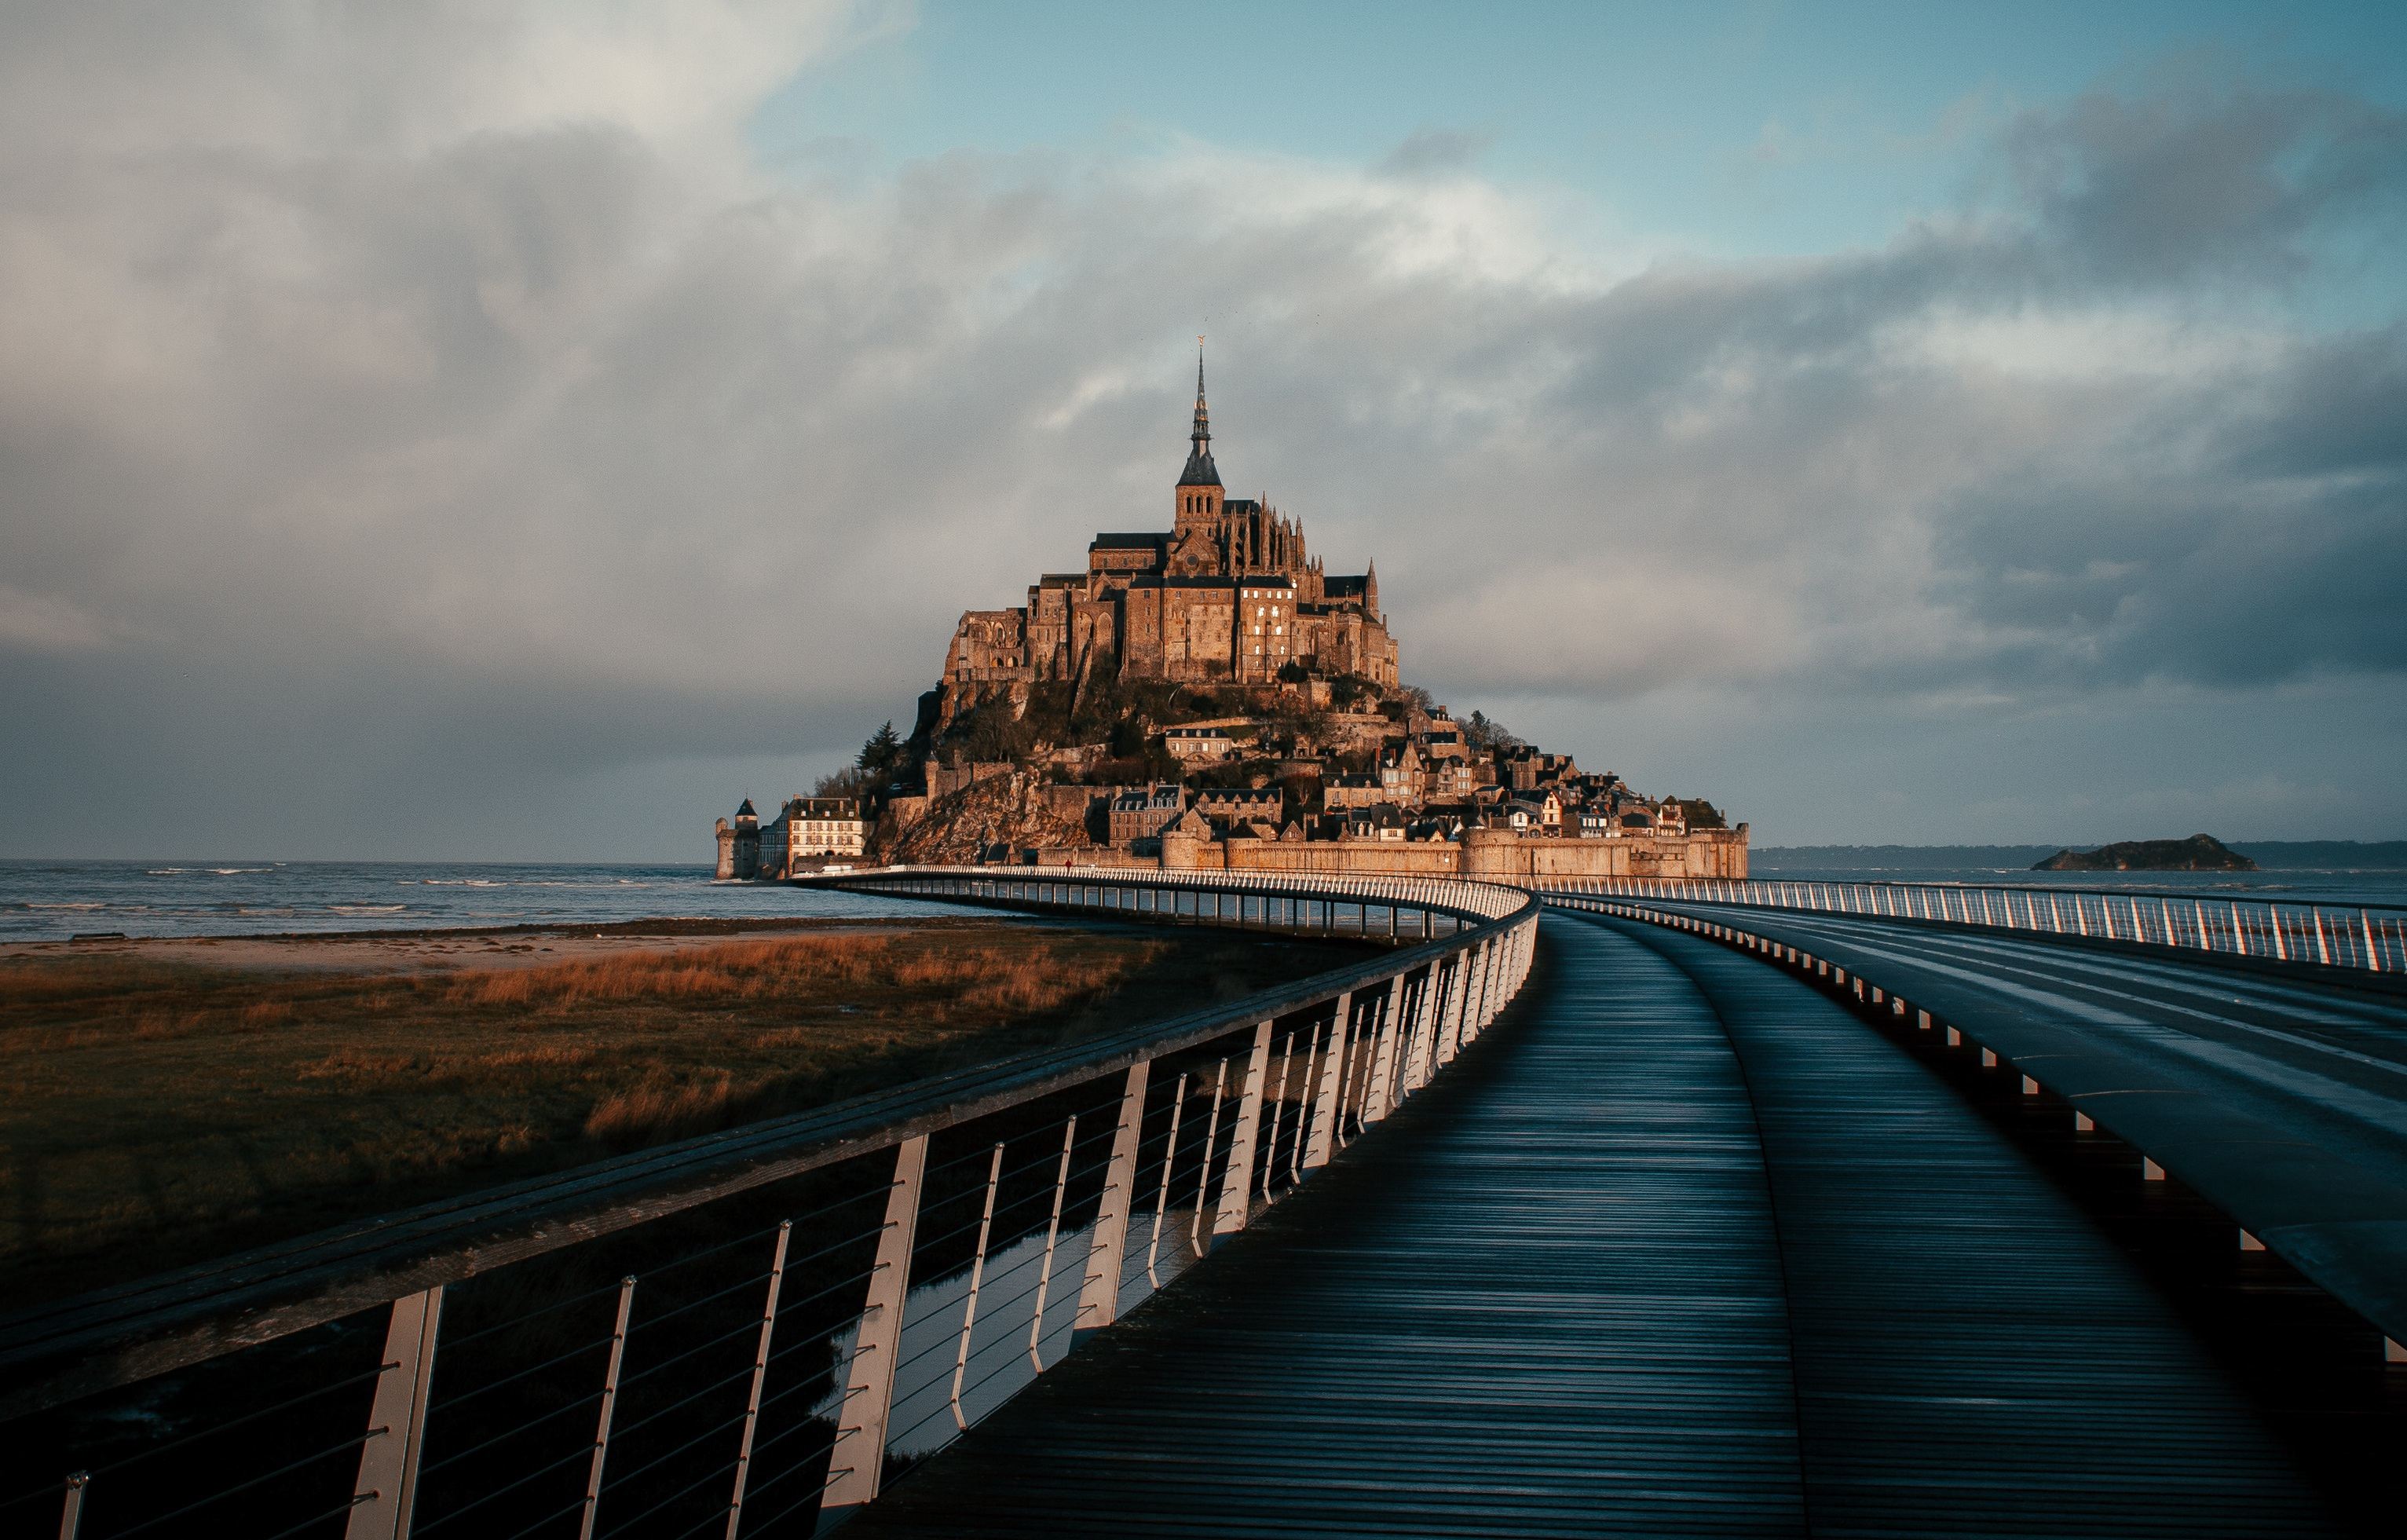
Mont Saint-Michel is the longest day trip on this list, but also the most unforgettable. A medieval abbey perched on a tidal island off the Normandy coast. It looks like a fantasy illustration, and the approach across the causeway is genuinely breathtaking. The abbey has been a pilgrimage site for over 1,000 years.
Getting there: TGV from Paris Montparnasse to Rennes (1h 30m) or Dol-de-Bretagne (2h 40m), then shuttle bus (1 hour). Return fare: From around EUR 50 return, depending on the train and connection. Abbey entry: EUR 16 in high season (April to September) or EUR 13 in low season.
Don't miss: arrive early or stay late. The island empties by 5 pm, and the evening light on the abbey is the view you'll remember. Walking the ramparts after the crowds leave is an entirely different experience from the midday crush.
Budget: EUR 80 to 120 per person. This is a full-day commitment: leave Paris by 7 am, return by 9 pm. Skip this if you only have 4 to 5 days in Paris. If you do go, it's worth every hour.
5. Loire Valley
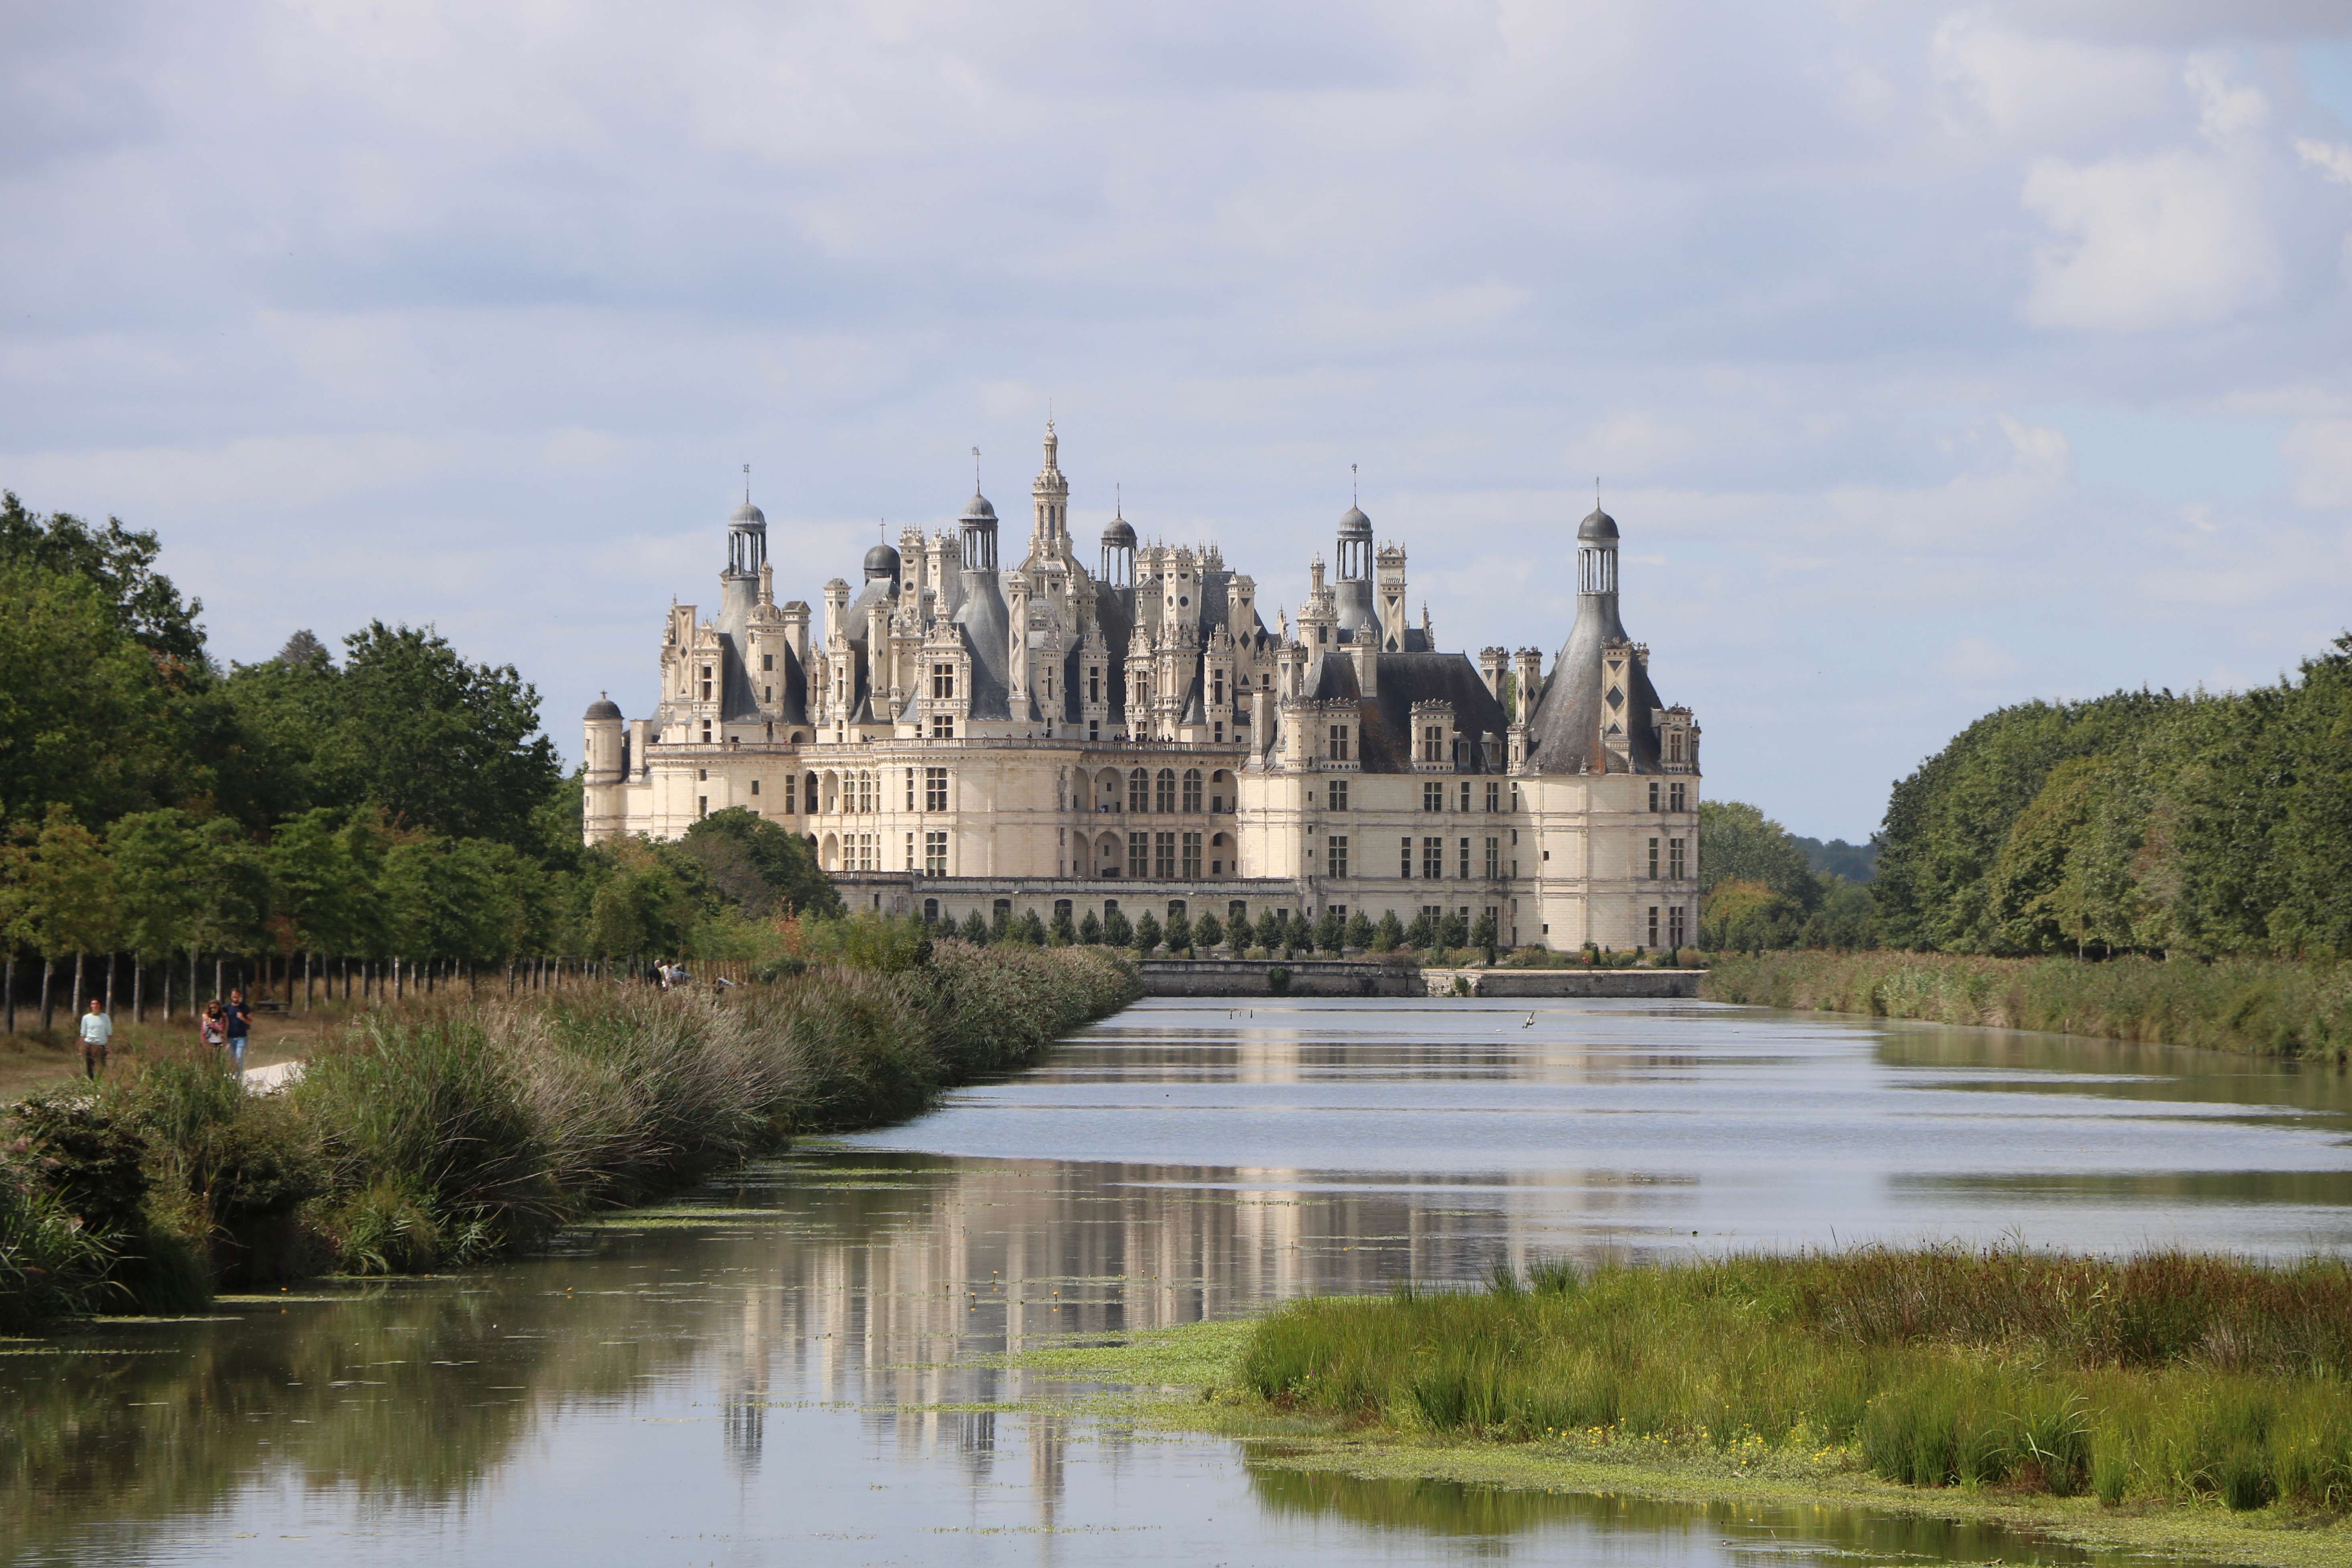
The Loire Valley has over 300 castles. You can't see them all in a day, so pick two: Chambord (the largest and most dramatic, designed as a hunting lodge for Francis I) and Chenonceau (the most elegant, built across a river, run by women for most of its history). Both are accessible by train and local bus from Tours.
Getting there: TGV from Paris Montparnasse to Tours, 1 hour 15 minutes. Then, take the local bus or hire a bike. Return fare: EUR 25 to 50. Castle entry: Chenonceau EUR 19; Chambord EUR 31.
Don't miss: cycling between castles. The Loire à Velo route is flat, well-signposted, and passes through vineyards. Bike hire from about EUR 15 per day from shops near Tours station.
Budget: EUR 75 to 120 per person. If you're choosing just one castle, make it Chenonceau: it's more intimate, less crowded, and the river setting is unlike any other castle in France.
6. Bruges
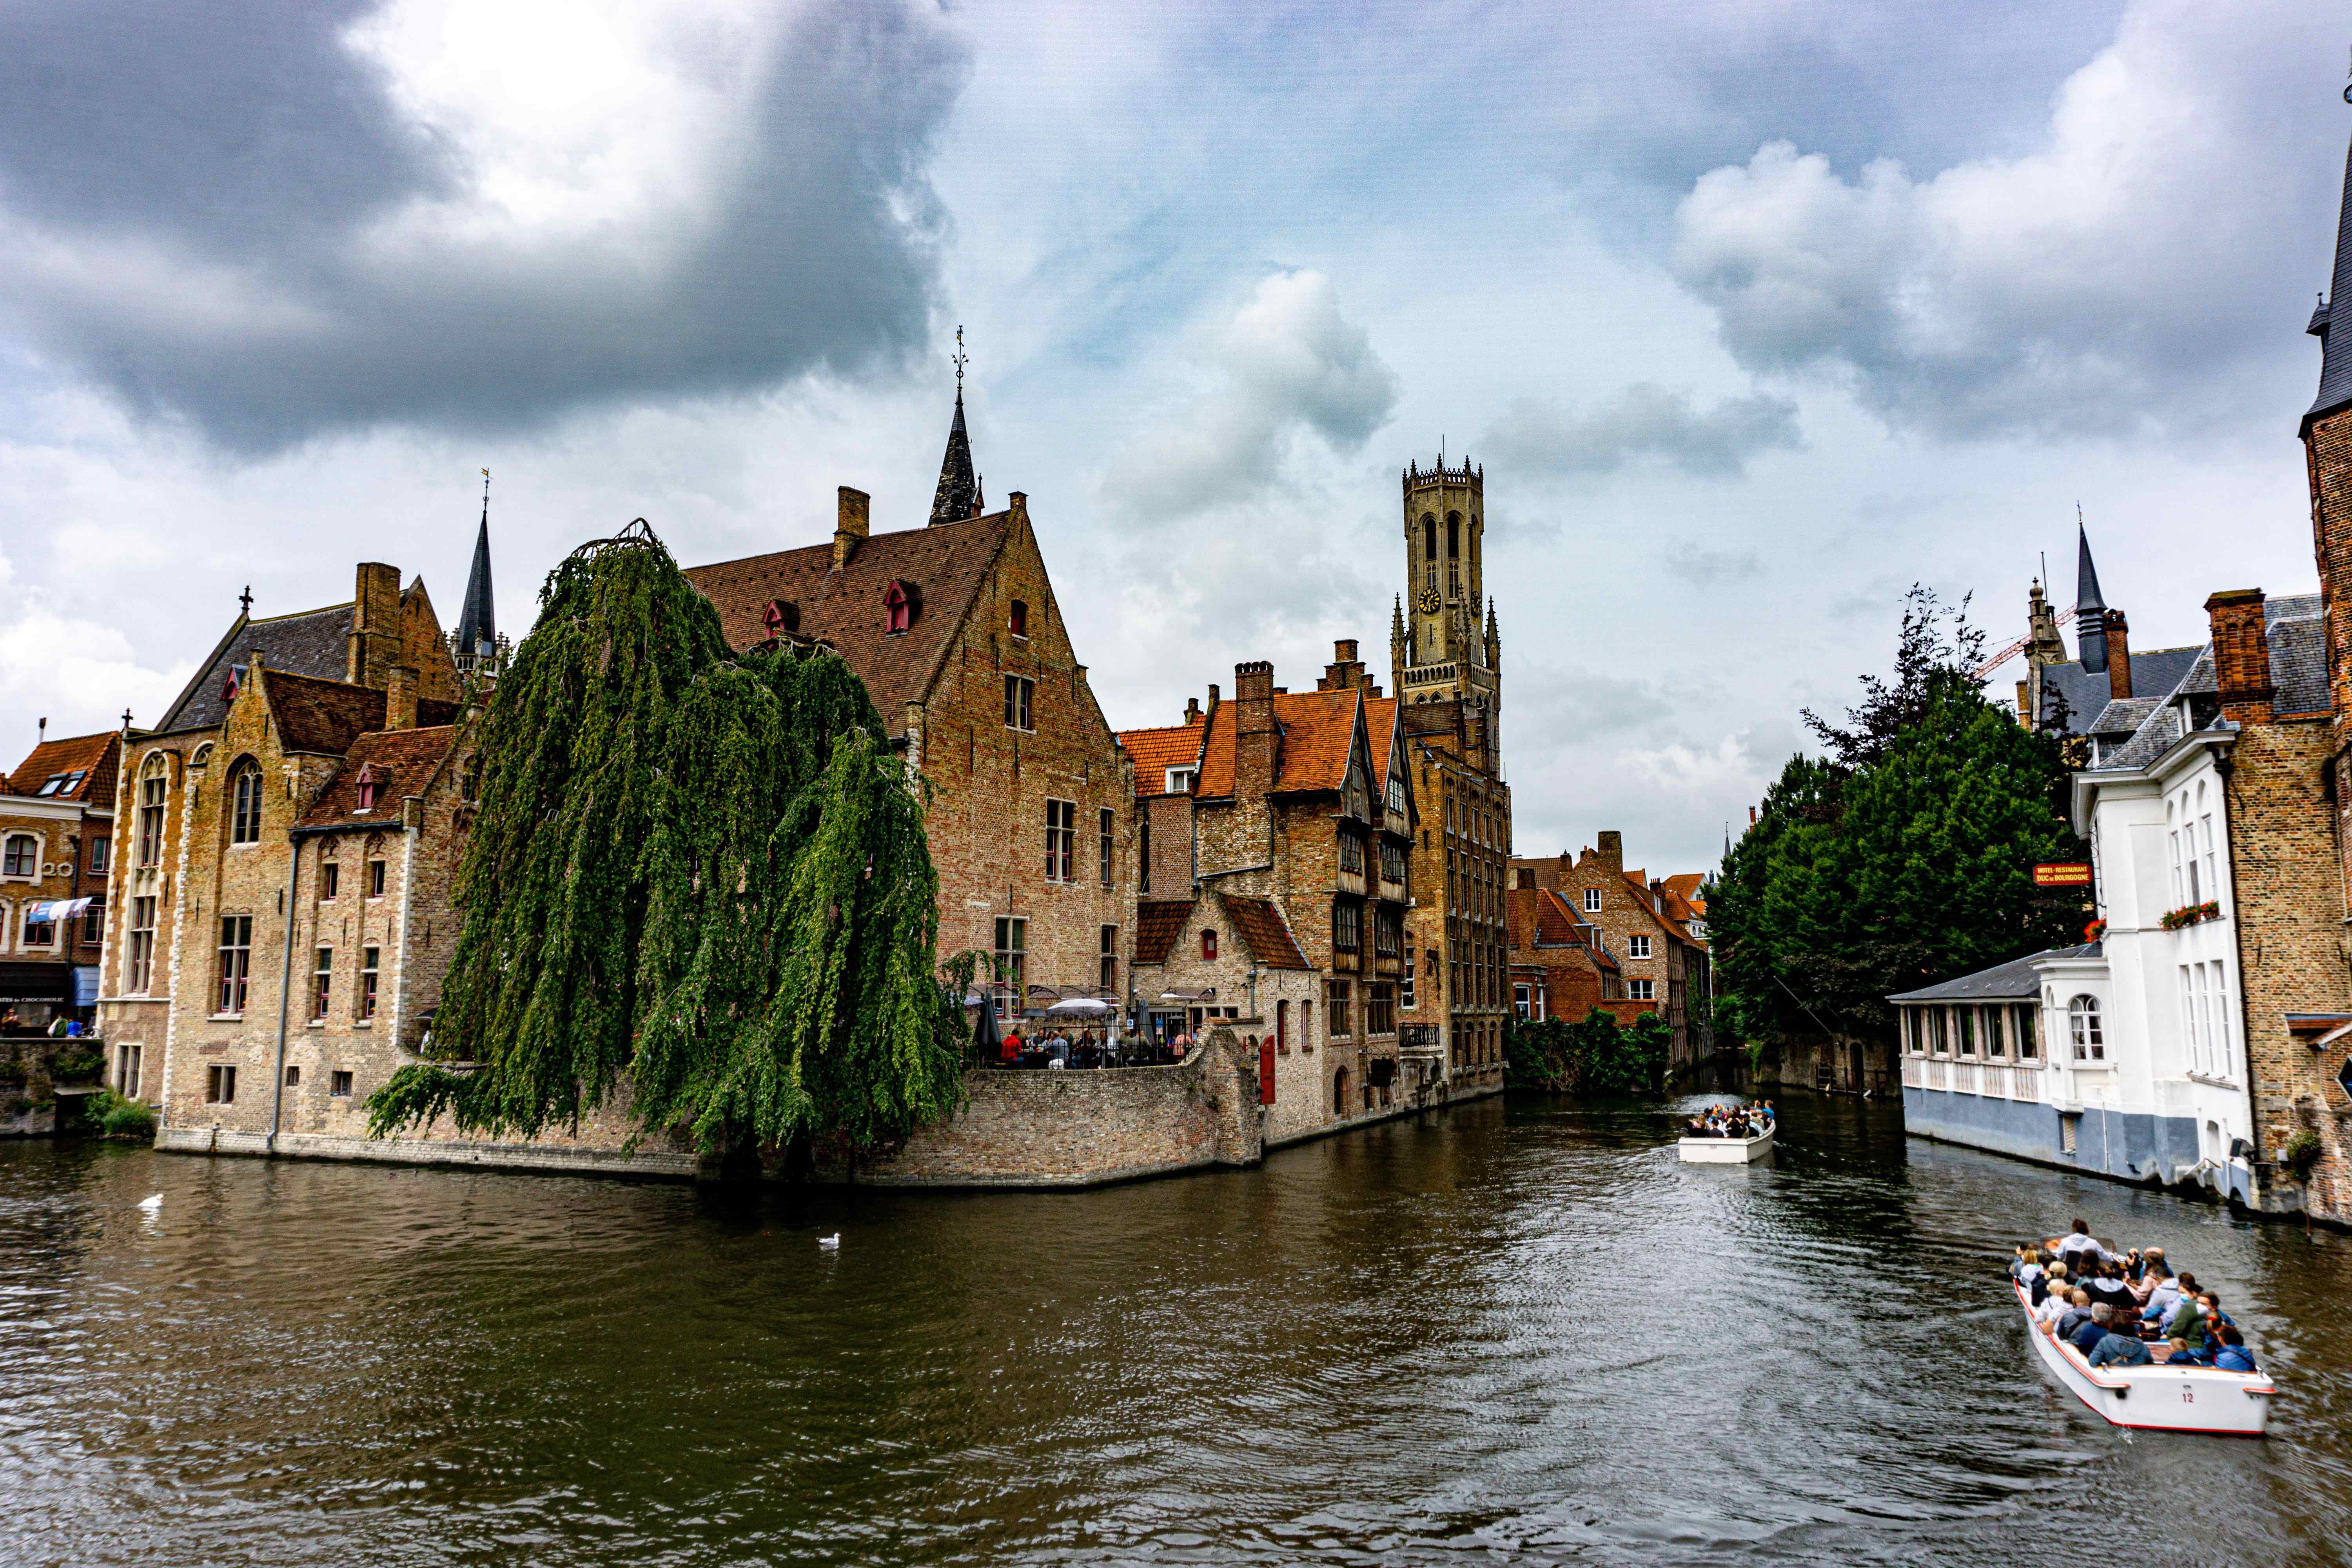
Bruges is in Belgium, not France, but it's only 2.5 hours from Paris by Thalys train, and it's the most photogenic small city in northern Europe. Canals, cobblestones, chocolate shops, and medieval architecture. The entire old town is a UNESCO World Heritage Site.
Getting there: Thalys from Paris Gare du Nord to Bruges, about 2 hours and 30 minutes. Return fare: From around EUR 58 return for the Eurostar portion to Brussels, plus the connecting SNCB fare to Bruges. Book early for the lowest fares.
Don't miss: the Belfry tower (366 steps, EUR 14) for a panoramic view of the city. Then a canal boat tour (EUR 12) to see the buildings from the water. The chocolate shops along Katelijnestraat are better than the ones near the Markt.
Budget: EUR 90 to 140 per person. Belgium uses the euro, so no currency change needed from France. Belgian waffles (the real ones, not the tourist traps) cost EUR 2 to 4 from street vendors.
7. D-Day Beaches (Normandy)
The D-Day beaches are spread across 50 miles of the Normandy coastline. Without a car, the most practical approach is a guided tour from Bayeux (2 hours from Paris by train). Tours typically cover Omaha Beach, Pointe du Hoc, and the American Cemetery at Colleville-sur-Mer.
Getting there: Train from Paris Saint-Lazare to Bayeux, about 2 hours 15 minutes. Then join a guided tour (EUR 60 to 90 per person, half-day). Don't miss: the American Cemetery. 9,387 white crosses overlooking Omaha Beach. It's the most emotionally powerful war memorial in Western Europe, and the audio guide is excellent.
Budget: EUR 130 to 180 per person (train, tour, and meals). Book the tour in advance through Bayeux Shuttle or Overlord Tour. This is another full-day trip: 7 am departure, 9 pm return.
8. Fontainebleau

Fontainebleau is Versailles without the crowds. A royal palace surrounded by 60,000 acres of forest, 40 minutes from Paris. Napoleon called it "the true home of kings." The palace apartments are spectacular, and the forest is one of the best outdoor spaces near Paris for hiking, trail running, and renowned bouldering.
Getting there: Train from Gare de Lyon to Fontainebleau-Avon, 40 minutes. Then bus to the palace (10 minutes).
Return fare: EUR 5.10 by train (EUR 2.55 each way), plus local bus fares. Palace entry: EUR 14.
Don't miss: the forest. Bring walking shoes and spend the afternoon on the trails. The bouldering circuit at Gorge aux Chats is world-famous among climbers.
Budget: EUR 35 to 55 per person. Best combined with a picnic lunch in the forest: pick up bread, cheese, and wine from a Fontainebleau boulangerie before heading into the woods.
9. Chartres
Chartres is worth the trip for one thing: the cathedral. Chartres Cathedral is a UNESCO World Heritage Site with the finest medieval stained glass windows in the world. The blue glass ("Chartres blue") is a colour that hasn't been replicated since the 12th century. The old town around the cathedral is charming and quiet, with half-timbered houses along the Eure River.
Getting there: Train from Paris Montparnasse to Chartres, 1 hour 10 minutes.
Return fare: From EUR 20 return on selected trains. Cathedral entry: free (tower climb EUR 10).
Don't miss: the crypt tour (EUR 5.50). It's the largest crypt in France and includes sections from the 9th century. The labyrinth on the cathedral floor is usually uncovered on Fridays from Lent to October.
Budget: EUR 35 to 55 per person. This is the quickest and cheapest day trip on the list, ideal for a half-day if you want to spend the afternoon back in Paris.
Paying for your day trips from Paris
If you're visiting Paris from outside the eurozone, every card payment at a cafe, train station, or museum entrance carries a foreign transaction fee of 1.5 to 3%. On a EUR 100 day trip, that's EUR 1.50 to 3 in fees you didn't budget for. Across a week of day trips, it adds up to EUR 20 or more.
A Grey virtual Mastercard lets you spend on a Grey virtual card from your euro balance with no conversion markup. You can also hold euros in your Grey account before you travel, so you're not converting on every tap. For mobile data on the go, buy a travel eSIM for France and skip the roaming charges. Google Maps offline is essential for navigating small towns like Giverny and Bayeux, where cell coverage can be patchy.
Frequently asked questions about the best day trips from Paris
What is the best day trip from Paris?
Giverny, if you want beauty and tranquillity. Versailles if you want grandeur and history. Champagne (Reims) if you want wine and architecture. The best choice comes down to what kind of day you want: peaceful and artistic, grand and busy, or indulgent and cultural. For first-timers, Giverny is the most universally delightful.
How much do day trips from Paris cost?
Budget EUR 35 to 110 per person, depending on the destination. The cheapest day trip is Chartres (EUR 30 to 50). The most expensive is the D-Day beaches (EUR 110 to 160, including a guided tour). Train fares drop significantly when booked a few days in advance through SNCF or Trainline.
Can I do a day trip from Paris to London?
Yes, via Eurostar (2 hours 15 minutes to St Pancras). Return fares start from about EUR 78 booked well in advance. You'll get 5 to 6 hours in London if you catch an early morning train. It's a long day but a brilliant one. Book at least 2 weeks ahead for the best fares.
Is it worth visiting Versailles?
Yes, but book a timed entry ticket online and go early (the palace opens at 9 am). By 11 am, the Hall of Mirrors is shoulder-to-shoulder. The gardens are free except on musical fountain show days (EUR 10 extra, worth it). Allow a full day.
Do I need to speak French for day trips?
Not really. Train staff, museum employees, and restaurant servers in tourist areas generally speak enough English. Having a few French phrases goes a long way. Google Translate with a downloaded French language pack works offline for signs and menus.
Exploring France? Spend on a Grey virtual card with no markup, and grab a travel eSIM for maps and tickets on the go.
Disclaimer: This article is for informational purposes only. All costs and details are estimates based on mid-2026 data. Verify current information before making decisions. Grey isn't a bank. We're a licensed financial services provider offering multi-currency accounts.

