What nobody tells you about your first year living abroad

Tunde Aladeloba

TABLE OF CONTENT

SHARE THIS POST

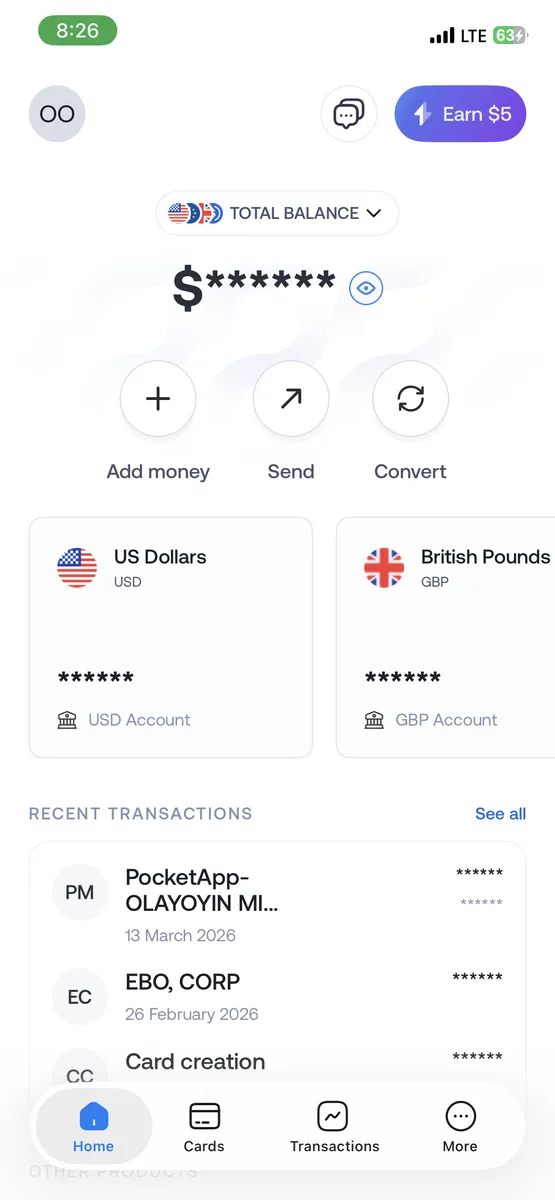
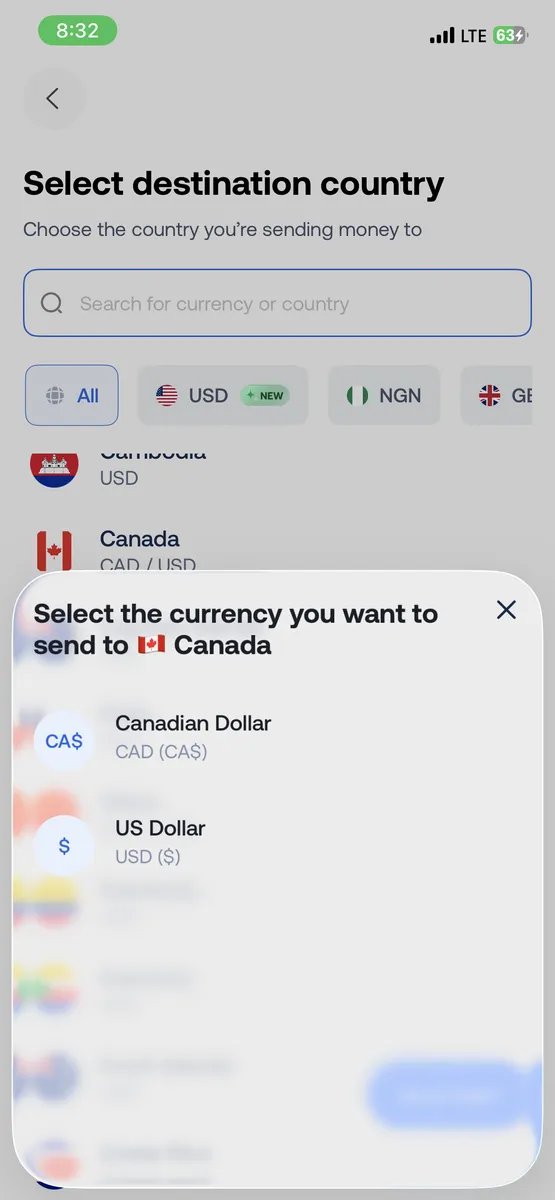
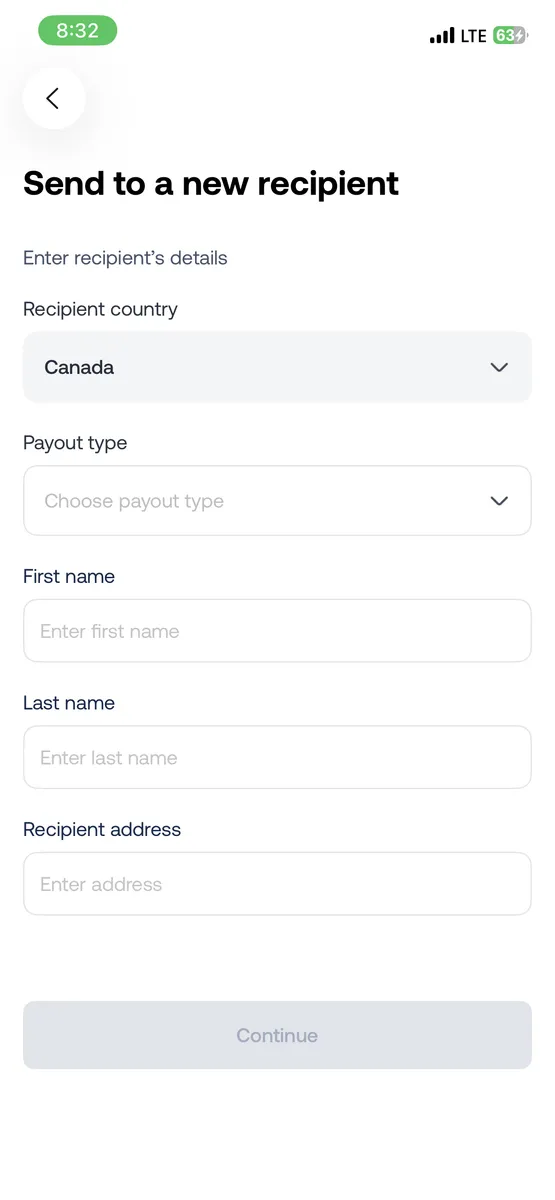
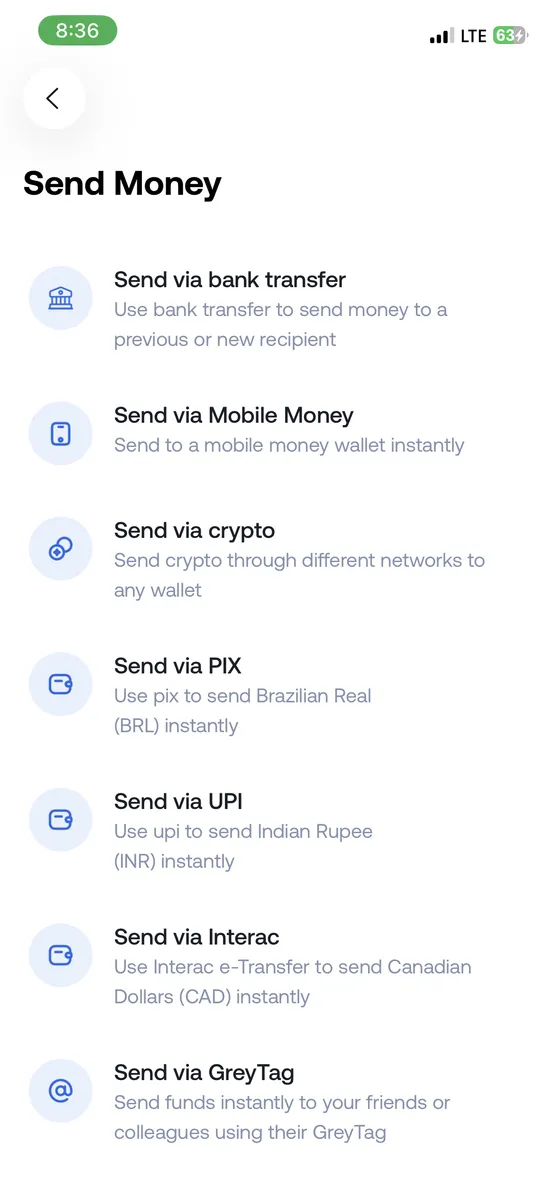
Living abroad sounds glamorous, new cities to explore, fresh opportunities, and endless adventure. But what nobody tells you about your first year is the mix of highs and unexpected lows. Beyond the Instagram-worthy moments, you’ll navigate language barriers, cultural differences, and cross-border payments. With Grey, you can send and receive money globally without hidden fees or delays, giving you more freedom to focus on work, travel, and building your life overseas. With the right tools, your first year abroad can be exciting, smooth, and rewarding.

Read also: Managing remittances while working from abroad

The benefits of living abroad you can’t ignore

1. Discover new perspectives

Living abroad opens your eyes to new ways of thinking, working, and living. You’ll learn to see the world through a different lens, gaining perspectives that expand your creativity and problem-solving skills, an invaluable advantage both personally and professionally.

2. Build global connections

Stepping outside your country gives you the chance to meet people from all walks of life. These relationships often become lifelong friendships or valuable networks, enriching your journey and sometimes even sparking exciting collaborations across industries and borders.

3. Personal transformation

There’s no growth without challenge, and living abroad tests you in powerful ways. You'll learn languages, adapt to unfamiliar environments and become more confident, resourceful, and independent. These are qualities that shape you into a stronger version of yourself.

Read also: How to protect your funds while travelling abroad

What to expect in your first year living abroad

1. Language barriers

Your first year abroad teaches you that language isn’t only grammar, it’s tone, slang, and even gestures. Ordering food, asking for directions, or making jokes feels exhausting at first. You stumble, repeat, and sometimes give up mid-sentence. But slowly, you catch rhythms, celebrate small wins, and realise language mistakes are part of finding your place.

2. Money transfers

Sending and receiving money is never as smooth as you expected. Exchange rates, transfer delays, and hidden charges turn simple transactions into stress. Your first year abroad forces you to budget tightly, find reliable platforms, and think twice before every transfer. Over time, you learn financial discipline, and the relief of money finally landing safely.

Read also: How virtual cards can simplify your life abroad

3. Loneliness

Even in a buzzing city, the quiet moments hit hardest. You miss familiar voices, inside jokes, and people who understand you without long explanations. Making friends abroad takes effort, patience, and openness. In your first year, loneliness shapes you, it pushes you to step out, join communities, and build connections that slowly start to feel like home.

4. Culture shock

It’s not the big differences that shake you most, but the small ones: how people greet, eat, or manage time. The unspoken rules feel like invisible walls at first. You fumble, misread, and sometimes retreat. But your first year abroad shows you that adaptation is a muscle, one that grows stronger the more you lean into it.

5. Homesickness

That familiar plate of food suddenly feels a world away. You crave your country's food , snacks you can’t find, and the comfort of taste you grew up with. Your first year abroad teaches you that food carries memory, and sometimes you learn to cook just to bring pieces of home back.

6. Navigating paperworks

Visas, permits, healthcare and bank accounts as your first year abroad is full of forms, deadlines, and rules you don’t fully understand. One missing document can delay everything. It feels endless and frustrating, but eventually you master it: keeping copies, asking questions, and building patience. Bureaucracy becomes a hidden teacher, showing you resilience in the most unglamorous ways.

How Grey simplifies payments when living abroad

  • Global accounts: Receive and hold funds in multiple currencies no matter where you are.
  • Fast transfers: Send and receive money across borders quickly without long delays.
  • Low fees: Avoid high conversion rates and hidden charges typical with traditional banks.
  • Secure transactions: Your funds are protected with advanced digital security measures, giving peace of mind

Simplify international payments

Your first year abroad is full of first-time experiences, from culture shocks to building new routines. This article has shown you what to expect, but managing money shouldn’t add to the stress. Grey makes receiving, sending, and converting international payments simple and secure, so financial hurdles don’t hold you back.

Open your Grey account today or download the app and enjoy seamless global transactions

‍

Last updated:

June 15, 2026

Open a free Grey account to get startedJoin 1 million digital nomads
IF YOU ENJOYED THIS, CHECK THESE OUT

Going Abroad? Here’s your international travel checklist

•

•

2 min read

International trips come with a longer to-do list than most of us realise.

There are the obvious things, like checking your passport and packing your clothes. Then there are the things you might only remember at the last minute: travel insurance, an adapter, mobile data, copies of your documents or a card that works in another country.

So, instead of trying to keep all of that in your head, use this international travel checklist to work through it before you leave.

It covers your travel documents, health and insurance, packing, phone and connectivity, and money, so you can check each one off as you prepare.

What travel documents do you need for an international trip?

Your passport is the obvious one, but there may be several other documents you need before you can travel.

Start by checking the entry requirements for your destination based on your nationality. Some countries allow visa-free visits, while others require a visa or electronic travel authorisation before arrival. Your passport may also need to remain valid for a certain period beyond your travel dates.

Do this early rather than assuming you can sort everything a few days before your flight. Depending on the destination, getting the right visa or travel authorisation can take time.

Before you travel, check that you have:

  • A valid passport
  • The visa or travel authorisation required for your destination
  • Flight confirmations and your itinerary
  • Accommodation confirmations
  • Proof of onward or return travel, if required
  • Any additional documents requested at immigration
  • Digital or paper copies of important documents

It’s a good idea to keep copies of your passport, visa and other important documents somewhere separate from the originals. Having digital copies you can access from another device can also be useful if your phone or physical documents are lost.

If your journey includes a connection in another country, check its transit requirements too. Depending on your nationality and itinerary, you may need additional documentation even if you’re only changing planes.

What health and insurance preparations should you make?

Nobody wants to spend the weeks before a holiday thinking about getting sick. Still, a little preparation here can make a big difference if something does happen while you’re away.

Check the health requirements and recommendations for your destination well before departure. Depending on where you’re travelling, you may need certain vaccinations or proof of vaccination to enter.

The World Health Organization provides travel health information, but you should also check official guidance for your destination and speak to a healthcare professional if you have questions about vaccinations or medication.

Add these to your checklist:

  • Check vaccination requirements and recommendations
  • Arrange travel insurance
  • Pack enough prescription medication for your trip
  • Keep medication in its original packaging where possible
  • Bring copies of prescriptions or supporting medical documents if needed
  • Check whether your medication is restricted at your destination
  • Save your travel insurer’s emergency contact details

Travel insurance is also worth arranging before you leave. Policies vary, so check what yours actually covers, particularly medical treatment, cancellations, delays and lost belongings.

If you take prescription medication, don’t assume you can simply buy more when you arrive. Rules around medication vary between countries, and some medicines that are commonly available at home may be controlled elsewhere.

What should you pack for international travel?

Packing depends heavily on where you’re going and what you’ll be doing there, but there are a few essentials that belong on almost every travel checklist for international travel.

Start with what you’ll genuinely use rather than trying to prepare for every possible scenario. Check the weather forecast shortly before you pack and think about your plans for each day. A beach holiday, work trip and week of hiking obviously call for very different suitcases.

For the basics, check off:

  • Clothes appropriate for the weather and your plans
  • Comfortable shoes
  • Toiletries
  • Prescription medication
  • Phone and other devices
  • Chargers and cables
  • A travel adapter for your destination
  • Headphones
  • Reusable water bottle, if useful for your trip
  • Any destination-specific essentials

Your carry-on deserves its own mini checklist. Keep anything difficult or expensive to replace with you rather than putting it in checked luggage.

That includes:

  • Passport and travel documents
  • Wallet and cards
  • Phone
  • Medication
  • Valuables
  • Chargers
  • A change of clothes and basic toiletries

If your checked bag is delayed, having the essentials with you can make the first day of your trip considerably easier.

And check your airline’s baggage rules before packing. Cabin bag dimensions, weight allowances and restrictions can vary between airlines and ticket types.

How can you stay connected while travelling abroad?

Working out how you’ll get online is much easier before you arrive than after you land and discover your usual mobile plan charges a small fortune for roaming. International roaming is one option, and for short trips it may be convenient. But depending on your mobile provider and destination, it can be expensive.

A local SIM is another option. You can usually buy one at the airport, a mobile shop or convenience store after arrival, although you may need to show identification and physically swap your existing SIM.

If your phone supports it, an eSIM gives you another option. It’s digital, so there’s no physical SIM to insert or remove. You can buy a data plan for your destination and set it up on your phone, sometimes before you even leave home.

Before travelling, check:

  • Your mobile provider’s international roaming rates
  • If your phone is unlocked
  • Which phones support eSIM
  • How much data you expect to use
  • Coverage at your destination
  • That your eSIM or roaming plan is ready before arrival

If you’re an iPhone user, you can also check how to activate an eSIM on iPhone before your trip. It’s worth downloading anything important while you still have reliable Wi-Fi too. Save your boarding passes, accommodation details, maps and transport information offline where possible.

That way, you’re not completely dependent on finding airport Wi-Fi the moment you arrive.

How should you manage money when travelling abroad?

Money deserves a little more planning than simply checking that there’s enough in your bank account.

Before travelling, think about what currency you’ll need, how you’ll pay for everyday purchases and what you’ll do if your main payment method doesn’t work.

Start with:

  • Check the local currency at your destination
  • Find out how widely cards are accepted
  • Check your card’s foreign transaction and currency conversion fees
  • Make sure your card can be used internationally
  • Have a backup payment method
  • Keep a small amount of local cash if useful
  • Check ATM fees and withdrawal limits
  • Avoid keeping all your cards and cash in the same place

Having a card that works abroad can make everyday spending easier, particularly if you’re travelling between countries or paying in different currencies.

It can also be useful to hold multiple currencies rather than converting money every time you need to make a payment. With Grey, you can hold supported currencies in your account and use your Grey Card for international payments.

Before paying, always check which currency you’re being charged in. Some shops, hotels and ATMs may offer to convert the transaction into your home currency. The rate offered may differ from the rate your card provider would use, so check the amount and conversion before accepting it.

Your card can also be useful before the trip itself. From booking activities to paying on international sites, having an international payment method gives you more flexibility when arranging things in advance.

It’s still sensible to travel with a backup. Keep another card or some emergency cash somewhere separate from your main wallet so one lost wallet doesn’t leave you without access to money.

Your international travel checklist before you leave

A few days before your trip, do one final run-through.

  • Passport is valid and packed
  • Visa or travel authorisation is approved
  • Flights and accommodation are confirmed
  • Important documents are saved offline
  • Travel insurance is active
  • Medication is packed
  • Clothes and essentials are ready
  • Travel adapter and chargers are packed
  • Roaming, SIM or eSIM is sorted
  • Offline maps and important information are downloaded
  • Your main card works internationally
  • You have a backup way to access money
  • You have any local cash you want to carry

You don’t need to prepare for every possible thing that could happen while you’re away. The aim is simply to take care of the things you can sort in advance, so you’re not trying to solve them from an airport terminal or hotel lobby.

Frequently asked questions about preparing for international travel

What should be on an international travel checklist?

Your international travel checklist should cover your passport and other travel documents, visas, health requirements, travel insurance, medication, clothing, chargers and adapters, phone connectivity and how you’ll access and spend money abroad.

You can also add destination-specific items based on the weather, activities you have planned and local entry requirements.

What documents do I need for international travel?

At a minimum, you’ll need a valid passport. Depending on your nationality and destination, you may also need a visa or travel authorisation, proof of accommodation, a return or onward ticket and other supporting documents.

Always check the official entry requirements for your destination before travelling.

Should I get travel insurance for an international trip?

Travel insurance can help cover unexpected costs related to medical treatment, cancellations, delays, lost luggage and other problems, depending on your policy.

Read the terms carefully before buying so you know exactly what is and isn’t covered.

How do I get mobile data abroad?

You can use international roaming from your existing mobile provider, buy a physical SIM at your destination or use an eSIM if your phone supports one.

Compare the cost, data allowance and coverage of each option before choosing.

What is the best way to spend money abroad?

The best option depends on your destination and how you prefer to pay. A card that supports international payments can be useful for everyday purchases, while a small amount of local cash can help in places where cards aren’t accepted.

It’s also a good idea to have a backup payment method and check any currency conversion or international transaction fees before travelling.

How early should I prepare for an international trip?

Start checking passport validity, visa requirements and vaccinations as soon as you know where you’re travelling, as some applications and health preparations can take weeks or longer. Packing, connectivity and spending arrangements can usually be handled closer to departure, but sorting them a few days in advance gives you time to fix any problems.

With the practical details taken care of, there’s one less thing competing for your attention when your trip begins.

Get a Grey virtual card before you travel and have a way to pay when you’re abroad.

How to manage international payments while living abroad

•

•

2 min read

Living abroad comes with exciting opportunities, but managing international payments can often be a challenge. Whether you’re a freelancer, remote worker, student, or entrepreneur, receiving and sending money across different currencies can be costly and stressful. High bank fees, poor exchange rates, and long processing times can make international transactions frustrating.

With Grey, managing international payments is easier, faster, and more affordable. Grey provides a seamless way to send, receive, and convert money across multiple currencies without the hassle of traditional banking systems.

Also read: How international banking works for freelancers and independent contractors

Challenges of managing international payments

  • High transfer fees: Traditional banks and money transfer services often charge excessive fees for international transactions.
  • Poor exchange rates: Converting money through regular banks usually results in unfavourable exchange rates.
  • Delayed transactions: International transfers can take days to process, causing inconvenience and cash flow issues.
  • Limited banking access: Some expatriates struggle to open bank accounts in foreign countries, making payments even more difficult.

Also, read how non-US citizens can open a US bank account online.

How Grey simplifies international payments

1. Open a multi-currency account

  • Sign up on Grey: Download the Grey app or visit the website to create an account.
  • Verify your identity: Complete a quick verification process by uploading your identification documents.
  • Access your virtual accounts: Once verified, you’ll receive bank details for UK, EU, and US bank accounts, making it easy to receive payments globally.

2. Convert currencies at competitive rates

  • Log in to your Grey account and navigate to the "Convert" section.
  • Select the currency you want to convert and enter the amount.
  • Review the real-time exchange rate and confirm the transaction.
  • Your converted funds will instantly appear in your Grey wallet, ready for spending or withdrawal.

3. Send money internationally with ease

Need to send money to family, friends, or business partners across borders? Grey enables fast and secure international transfers at low fees.

  • Faster processing times – No long waiting periods like traditional banks.
  • Lower fees – Avoid the high transaction costs of other payment services.
  • Secure transfers: Your transactions are protected with top-tier security measures.

Also read: How to convert and send US dollars (USD) with Grey

4. Spend locally with a Grey virtual card

Grey’s virtual USD card makes it easy to make online payments, pay for subscriptions, and shop internationally without worrying about conversion issues.

  • Pay for international services like Netflix, Spotify, or online courses.
  • Shop on global websites without hidden charges.
  • Avoid conversion fees when making USD transactions.

With Grey, you can send, receive, and convert money effortlessly, allowing you to focus on enjoying your experience abroad rather than worrying about financial logistics. Sign up for Grey today and simplify your international transactions with ease.

‍

Moving abroad checklist: 6 Essential considerations for a smooth transition

•

•

2 min read

Moving abroad is a great way to step out of your comfort zone and gain new experiences. You get to learn about other cultures, meet new people, and expand your career prospects.

However, before taking this step, you must plan to ensure the relocation process happens smoothly and carefully. So, in this post, we’ll guide you through some important things to consider before making the big move.

Visa requirements:

Understanding the visa process is a big first step when relocating to a new country. You need to know the requirements, eligibility, and costs to be incurred. Since eligibility criteria vary by country, you must consult immigration websites to confirm your eligibility for a visa before starting your application.

Also read: Visa 101: A Comprehensive Guide to Different Types Of Visas

Also, ensure that you choose the right visa type when applying, as this directly influences your duration of stay and the opportunities available to you.

Work opportunities:

While you might have some savings to support you after moving, you will need a job to help you live comfortably. That’s why, before you move to a new country, you should consider the following:

  • Employment rate
  • Skills in demand
  • Language requirements
  • Professional qualifications and credentials
  • Salary and employment benefits
  • Work visa requirements.

By understanding the job market dynamics of your destination country, you can improve your chances of finding opportunities that best suit your skills and interests.

Also read: Best Countries to Work in Europe in 2024

Taxes:

Taxes are another essential factor to consider when relocating. Because each country collects taxes differently, you have to understand the implications of moving abroad to ensure compliance with tax laws in both countries. Doing this protects you from double taxation and helps you better plan and manage your finances. Other vital things to consider include:

  • Residency status: The amount of tax paid may vary depending on whether you’re considered a resident in your home or new country. For instance, some countries, like the United States, tax residents based on their worldwide income, while others only tax income earned within their borders.****
  • Tax treaties: A tax treaty is a written agreement between two countries to avoid double taxation and provide relief to taxpayers. So, before relocating, confirm if there are tax treaties between your home country and the new country to understand how it might affect your tax situation.
  • Reporting requirements: You must familiarize yourself with what you need to report for taxes in your home country and your new country. Reporting requirements might include filing tax returns and reporting income and assets. Not doing this right can lead to fines or more serious legal penalties.

Cost of living:

Before relocating, consider how the cost of living in your new destination will affect your quality of life. Research expenses for accommodation, education, transportation, utility, healthcare, and food.

Knowing these costs in advance can help you make informed decisions about where to move. It can also help you prepare financially, avoiding unwanted surprises and stress.

Culture:

Another essential thing to consider before moving is the culture and lifestyle of your new location. By understanding the beliefs, customs, and values of your new location, you can avoid stereotypes, prejudices, and biases that might offend the locals.

It would help if you also tried to learn the language of your destination, as translation apps can only help you to a point. Doing this will make it easier for you to interact and form new relationships with people in your community.

Banking:

As a foreigner, opening an account in a new country might not be easy, so you need Grey—a global bank account that lets you receive, send, and exchange multiple currencies in one place.

In minutes, you can open a free US, EU, or UK bank account and live like a local anywhere. Open an account today to get started.

‍

14 Canadian companies that sponsor work visas in 2026

•

•

2 min read

A Canadian job offer can be the first real step towards working and living in Canada, but not every employer is prepared to hire someone who needs immigration support. Knowing which companies regularly recruit international workers can save you time and help you focus your applications on employers with a realistic pathway to sponsorship.

Large employers and organisations across technology, healthcare, construction, agriculture, manufacturing and hospitality hire foreign workers frequently, especially for roles they struggle to fill locally. Depending on the position, an employer may need a Labour Market Impact Assessment (LMIA) before you can apply for a work permit. Other jobs can qualify through different immigration programmes without an LMIA. This guide highlights Canadian employers worth checking, what types of workers they hire and what to look for before applying.

Also read: How to register as self-employed in the UK and US

How Canadian work visa sponsorship works

A Canadian job offer does not automatically give you the right to work in Canada. For many employer-specific work permits, the process starts with an employer deciding that it needs to hire someone from outside Canada. In most cases, the employer must obtain a Labour Market Impact Assessment (LMIA), which confirms that there is a genuine need for a foreign worker and that suitable Canadians or permanent residents were not available.

The employer handles the LMIA process where one is required and, once approved, gives you the positive LMIA, job offer and employment contract needed for your work permit application. You then apply to Immigration, Refugees and Citizenship Canada (IRCC) and must meet the requirements for the permit and the job.

Not every job needs an LMIA. Some positions qualify for an exemption under Canada's International Mobility Program or another specific pathway, where the employer submits an offer through the Employer Portal instead.

Express Entry is a separate route to permanent residence for skilled workers. A job offer can still matter for eligibility in some programmes, although Canada removed CRS points for job offers from 25 March 2025

Which Canadian companies sponsor work visas?

The companies below operate in sectors where Canada regularly recruits international talent. However, sponsorship is not automatic: whether a company can support your work permit depends on the specific vacancy, location, employer requirements and immigration programme. Always check the individual job posting and the employer’s current hiring policy before applying.

Technology

  • Google Canada: Software development, artificial intelligence and data science roles can attract international candidates, particularly where specialised technical skills are required.
  • Amazon Canada: Opportunities span cloud computing, software engineering, logistics technology and systems architecture across its Canadian operations.
  • Microsoft Canada: Technical roles in software, cloud services, research and enterprise technology can appeal to experienced international professionals.

Healthcare

  • Alberta Health Services: A major healthcare employer recruiting internationally for roles including registered nurses, physicians and other healthcare professionals.
  • Ontario Health: Supports Ontario’s healthcare system, with opportunities across nursing, clinical and specialised healthcare positions.
  • Vancouver Coastal Health: Offers roles across hospitals, community care and allied health services in British Columbia.

Trades and construction

  • PCL Construction: Large infrastructure and building projects create opportunities for experienced construction professionals, supervisors and project managers.
  • EllisDon: Employs workers across construction, infrastructure and specialised trades on major Canadian projects.
  • Magna International: Automotive manufacturing creates demand for skilled technicians, mechanics, engineers and production specialists.

Agriculture

  • Cargill Canada: Its food and agricultural operations create opportunities across processing, production, maintenance and agricultural supply chains.
  • Maple Leaf Foods: Food production facilities recruit for manufacturing, processing, maintenance and operations roles.
  • Highline Produce: Agricultural operations provide opportunities in farming, food production and seasonal agricultural work.

Hospitality

  • Fairmont Hotels & Resorts: International applicants may find opportunities across culinary, hotel operations, management and guest services.
  • Marriott Canada: Hotel properties recruit across hospitality management, food service, housekeeping and guest-facing positions.
  • Holiday Inn Express: Individual Canadian properties may recruit internationally for hospitality and operational roles where local labour shortages exist.

Also read: How to send Canadian dollars (CAD) to Canada with Grey

Which industries in Canada are most likely to sponsor foreign workers?

Canada’s strongest sponsorship opportunities tend to appear in industries where employers struggle to find enough qualified workers locally. The exact route still depends on the job, employer and immigration programme, but these sectors are worth watching closely when searching for sponsored roles.

Healthcare

Canada’s ageing population continues to increase demand for healthcare workers, creating opportunities for international professionals.

Qualifying roles include:

  • Registered nurses
  • Physicians
  • Home care aides
  • Medical laboratory technicians

Technology

Canada’s growing digital economy has increased demand for specialised technical skills, particularly in areas where employers face talent shortages.

Qualifying roles include:

  • Software engineers
  • Data scientists
  • Cybersecurity analysts
  • Cloud architects

Trades and construction

Housing, infrastructure and commercial development continue to create demand for skilled tradespeople across Canada.

Qualifying roles include:

  • Industrial electricians
  • Structural welders
  • Commercial carpenters
  • Heavy machinery mechanics

Agriculture

Farms and food-processing businesses can struggle to recruit locally, particularly for seasonal work and positions in rural areas.

Qualifying roles include:

  • Agricultural mechanics
  • Food processing workers
  • Farm supervisors
  • Harvesting workers

Hospitality

Hotels, restaurants and tourism businesses often experience high staff turnover, particularly in busy tourism destinations.

Qualifying roles include:

  • Executive chefs
  • Restaurant supervisors
  • Hotel operations managers

How to apply for a Canadian job with visa sponsorship

  • Finding listings: Search Canada’s Job Bank for employers hiring temporary foreign workers and look specifically for roles where international candidates are considered. An LMIA is not guaranteed simply because a company appears on a sponsorship list.
  • Fix your CV: Keep your CV clear and tailored to the Canadian job description. Highlight relevant experience, qualifications, licences and measurable achievements, and make sure your claims match the role you are applying for.
  • Get the offer: Once selected, the employer handles the LMIA where required. After receiving a positive LMIA, you should receive the LMIA number, job offer and employment contract needed for your work permit application.
  • Prepare documents: Expect to provide your résumé, work references, proof of experience, qualifications, identification and other documents from your personalised IRCC checklist. Regulated jobs may also require licences or certifications.
  • Apply and wait: Submit your work permit application to IRCC after receiving the required employer documents. Processing times vary; June 2026 LMIA averages ranged from 9 days for the Global Talent Stream to 79 days for high-wage applications.

How to get paid in Canadian dollars and send money home

Most Canadian employers pay salaries through payroll, with your wages deposited directly into a Canadian bank account in CAD. For example, if your monthly salary is CAD 5,000, that money arrives in your account as Canadian dollars, ready for rent, bills and everyday spending.

A multi-currency account such as Grey can be useful when you need to move some of your money into another currency. Grey lets you hold and convert supported currencies from one account, so you can move CAD into USD, EUR or another supported currency when needed. You can convert currencies at mid-market rates with Grey.

For Nigerians working in Canada, the process can be much simpler when it is time to send money home. You can use Grey to send money to Canada at competitive prices, rather than converting your Canadian dollars into another currency first and then converting again into naira. This can help avoid unnecessary conversion costs.

Frequently asked questions

What is an LMIA?

A Labour Market Impact Assessment (LMIA) is a government assessment that helps determine whether hiring a foreign worker will positively affect Canada’s labour market. A positive LMIA confirms that no Canadian worker was available and the employer needs foreign talent.

Do I need a job offer first?

For most employer-specific work permits, yes. If your position requires an LMIA, you need a Canadian employer, job offer and positive LMIA before applying for the work permit. Some LMIA-exempt routes work differently and require an employment contract and offer number instead.

Which companies sponsor foreign workers?

Canadian employers in healthcare, technology, construction, agriculture and hospitality commonly recruit internationally where skills are difficult to find locally. Companies such as Google Canada, Amazon Canada, Alberta Health Services and PCL Construction are worth researching, but sponsorship depends on the specific vacancy.

How long does the process take?

There is no single timeline because LMIA and work-permit processing are separate stages. In June 2026, average LMIA processing ranged from 9 business days for Global Talent Stream applications to 79 days for high-wage applications. Work-permit processing then depends on IRCC.

Can I bring my family?

Your spouse or partner and eligible dependent children may be able to apply alongside you, depending on their circumstances and your work permit. Family members have separate eligibility requirements, and some may qualify for an open work permit.

How do I send money home from Canada?

Once you are earning in Canada, Grey can help you manage supported currencies and send money internationally. For Nigeria, you can convert supported funds into NGN and send naira directly to a Nigerian bank account through Grey

How to open a bank account in India as a non-resident

•

•

2 min read

India’s banking system has a structured framework for non-residents, built around three specific account types: NRE, NRO, and FCNR. Each serves a different purpose, holds currency differently, and comes with different tax and repatriation rules.

For those who can’t easily open a resident Indian account, whether tourists, short-stay visitors, or freelancers earning internationally, understanding how freelancers in India receive international payments without a local account is often a more practical starting point.

This guide covers who qualifies for which account, what documents you need, how to open one from overseas, and what to do if the Indian banking system isn’t accessible to your specific situation.

Can a foreigner open a bank account in India?

Yes, but the type of account you can open depends on your status.

India’s banking rules, governed by the Foreign Exchange Management Act (FEMA) and administered by the Reserve Bank of India (RBI), draw a clear line between residents and non-residents. Your residency status determines which accounts are available to you, what currency they hold, and how freely you can move money in and out.

Non-Resident Indians (NRIs) are Indian citizens who live outside India for more than 182 days in a financial year. They can open NRE, NRO, and FCNR accounts.

Overseas Citizens of India (OCIs) hold a special status that gives them most of the banking rights of NRIs. OCIs can open NRE, NRO, and in some cases FCNR accounts at most major Indian banks.

Foreign nationals of non-Indian origin face more restrictions. They generally cannot open NRE accounts, which are reserved for those of Indian origin. They can typically open NRO accounts if they have legitimate India-sourced income, or resident accounts if they are living in India on a long-term visa (employment, student, business).

If you are not an NRI or OCI, you typically need a work visa or business visa to open a resident account. Tourists and short-stay visitors have a specific, limited option covered in the section below.

One critical compliance point: under India’s FEMA regulations, once you become an NRI you are not permitted to keep an ordinary resident savings account. It must be converted to an NRO account or closed.

Types of Indian bank accounts for non-residents: NRE, NRO, and FCNR

India’s RBI has established three types of non-resident deposit accounts. Each serves a different function. Understanding the difference before you apply saves significant paperwork and avoids compliance mistakes later.

Feature NRE account NRO account FCNR(B) account
Full name
Non-Resident External Non-Resident Ordinary Foreign Currency Non-Resident (Bank)
Currency held
Indian rupee (INR) Indian rupee (INR) Foreign currency (USD, GBP, EUR, others)
Who can open it NRIs and OCIs (generally not foreign nationals without Indian origin) NRIs, OCIs, and foreign nationals with India-sourced income NRIs (limited access for non-Indian-origin foreigners)
Funded by Foreign earnings remitted to India India-sourced income (rent, dividends, pension) and foreign remittances Foreign earnings; deposited in the original foreign currency
Repatriation Fully and freely repatriable (principal and interest) Up to USD 1 million per financial year (with Forms 15CA/15CB) Fully repatriable
Interest tax in India
Tax-free in India Taxable; TDS applies Tax-free in India for eligible account holders
Exchange rate risk
Yes (converted to INR on deposit) Yes (held in INR) No (held in foreign currency)
Joint account with resident Indian Allowed on "former or survivor" basis Allowed Allowed on "former or survivor" basis
Best for Parking foreign savings in India; repatriating freely Managing rent, dividends, or Indian pension Avoiding rupee depreciation risk on large foreign currency savings

NRE accounts are ideal for repatriable foreign savings. NRO accounts are for India-sourced income. FCNR accounts are for holding dollar savings with no foreign exchange risk. Most NRIs end up with a combination: an NRE and NRO pair (very common), and an FCNR deposit if they want currency protection.

One common mistake worth naming explicitly: income earned in India, such as rent, dividends, or pension, cannot be credited to an NRE account. This is a frequent error. Such income must go into an NRO account.

What documents do you need to open a bank account in India?

The document requirements vary by account type and your specific status, but the core requirements are consistent across major Indian banks.

For NRIs and OCIs opening NRE or NRO accounts:

  • Valid passport (Indian passport for NRIs; foreign passport for OCIs)
  • OCI card or PIO card (for OCIs and Persons of Indian Origin)
  • Proof of NRI or OCI status
  • Proof of overseas address: a utility bill, bank statement, or official document from your country of residence, typically dated within 90 days
  • Passport-size photographs (two to four, depending on the bank)
  • PAN card or Form 60 (PAN is required for most account operations and is strongly recommended)
  • Visa copy (where applicable)

For foreign nationals opening NRO accounts:

  • Valid passport
  • Valid visa (tourist, employment, or business, depending on circumstances)
  • FRRO registration certificate, where required (foreigners staying more than 14 days on certain visa types must register with the Foreigners Regional Registration Office)
  • Proof of Indian address or overseas address
  • PAN card (required for transactions above INR 50,000)

Practical notes on documentation:

Indian banks are thorough in their KYC (Know Your Customer) requirements. Bring originals and multiple self-attested photocopies of every document. Incomplete submissions are the primary reason account applications are delayed or rejected. Some banks accept applications and documents by post or courier for NRIs opening accounts from abroad; others require either an in-person visit to an Indian branch or an in-person visit to an overseas representative office of the bank.

How to open an Indian bank account from overseas: step by step

Many major Indian banks allow NRIs and OCIs to begin the account opening process from abroad, though the extent to which the full process can be completed remotely varies by bank.

  1. Choose your account type. Decide whether you need an NRE, NRO, or FCNR account based on the nature of your India-related income and whether you need full repatriation. For most NRIs starting out, an NRE account is the first account to open, with an NRO account added if you have India-sourced income.
  2. Choose your bank. Major Indian banks with strong NRI services include State Bank of India (SBI), HDFC Bank, ICICI Bank, and Axis Bank. HDFC and ICICI are frequently cited for their digital onboarding capabilities and NRI-dedicated customer service teams. SBI has the broadest branch network globally through its overseas offices.
  3. Gather your documents. Compile passport, visa or OCI card, overseas address proof, PAN card, and photographs. Have originals ready, and prepare multiple self-attested photocopies.
  4. Begin the application. ICICI and HDFC both offer online application forms for NRI accounts that can be started from outside India. You will typically fill in personal and financial details, upload document scans, and then submit physical originals by courier to the bank’s NRI processing centre.
  5. Complete KYC verification. Some banks accept in-person verification at their overseas representative offices or partner banks. Others require a visit to an Indian branch, which many NRIs complete during a trip to India. NRI accounts typically take 1 to 3 weeks to open once the full documentation is submitted.
  6. Fund the account. For NRE accounts, fund by remitting foreign currency from your overseas bank account. The bank converts the amount to INR at the prevailing rate. For NRO accounts, fund via foreign remittance or by crediting India-sourced income.
  7. Set up UPI and internet banking. Once the account is active, link it to UPI for local payments in India. The RBI now allows NRIs from select countries to use UPI with international SIM cards, which is useful for payments during visits to India.

Can a tourist or visitor open a bank account in India?

Yes, but with significant restrictions.

Foreign tourists during their short visit to India can open a Non-Resident (Ordinary) Rupee (NRO) account at any bank dealing in foreign exchange. Such an account is valid for a maximum period of six months.

Funds remitted from outside India through banking channels, or obtained by the sale of foreign exchange brought by the tourist to India, can be credited to this account. Tourists can freely make local payments through the NRO account, with all payments to residents exceeding INR 50,000 required to be made by cheque, pay order, or demand draft.

Banks can convert the balance in the account into foreign currency for payment to the account holder at the time of departure from India, provided the account has been maintained for no more than six months and has not been credited with any local funds other than interest. If the account runs beyond six months, repatriation requires an application to the RBI’s Foreign Exchange Department.

For most tourists and short-stay visitors, this level of complexity outweighs the benefit of a temporary Indian bank account. Practical alternatives for tourists include carrying foreign currency cash, using an international debit card, or maintaining a multi-currency account that allows local spending in INR without needing a local bank relationship.

Can US citizens, NRIs, and OCIs open bank accounts in India?

US citizens

A US citizen can open a bank account in India, but the process depends on their India-related status and residency. A US citizen who qualifies as an NRI (Indian citizenship, living outside India) opens an NRE or NRO account as an NRI. A US citizen who is an OCI holder opens accounts on OCI terms. A US citizen with no Indian origin who lives in India on a long-term visa can open a resident account.

US citizens face an additional layer: FATCA (Foreign Account Tax Compliance Act) reporting requirements. Indian banks are required to collect FATCA declarations from US citizens and report account details to the US Internal Revenue Service. This doesn’t prevent account opening, but it means US citizens should be prepared for additional compliance paperwork and should consult a US tax advisor familiar with foreign account reporting requirements (FBAR and Form 8938) before opening accounts.

NRIs

NRIs have the most straightforward path: NRE and NRO accounts are specifically designed for them. Most major Indian banks have dedicated NRI banking divisions. The primary compliance obligation is ensuring that the correct account type is used for the correct income type, and that resident accounts are converted to NRO accounts if an Indian resident becomes an NRI.

OCIs

OCIs can open all types of accounts available to NRIs, including NRE, NRO, and, in most cases, FCNR accounts. OCI holders returning to live in India convert their NRI accounts to resident accounts on repatriation, and reconvert when they leave again.

One important OCI note from RBI guidance: an OCI who becomes resident in India must redesignate or convert their NRE, NRO, or FCNR accounts to resident account types as applicable.

What if you cannot open a resident account? Use a multi-currency account

Not everyone who needs to receive, hold, or spend money connected to India can easily open an Indian bank account. Tourists on short visits, foreign nationals without Indian origin, freelancers receiving payments from Indian or international clients, and non-residents who want to avoid the documentation complexity of NRE/NRO accounts all face practical barriers.

For these situations, a multi-currency account provides a working alternative that doesn’t require Indian residency, Indian documentation, or FEMA compliance overhead.

Grey provides USD, EUR, and GBP accounts with local banking details, allowing users to receive international payments without needing an Indian bank account at all. For freelancers based in India receiving USD from US clients, the ability to provide a US ACH routing number and account number to clients means payments arrive as domestic US transfers, without international wire fees or SWIFT deductions. For a full breakdown of how this works, see our guide on safe ways to receive international payments in India.

For non-residents who need foreign currency accounts with local banking details in USD, EUR, or GBP, rather than Indian rupee accounts, you can open a multi-currency account that provides those details without requiring Indian residency. You hold balances in foreign currency, convert when you choose at a rate shown before confirmation, and withdraw to your preferred bank account.

Grey’s deposit fee via ACH, SEPA, or Faster Payments is 0.8%, capped at $10/€10/£10. Currency conversion is charged at 1%, capped at $6. There are no monthly maintenance fees. For a guide to opening US, UK, and euro accounts that work for India-based users, see our article on opening US, UK, and euro accounts in India.

Frequently asked questions

What is the minimum balance required for an NRE or NRO account in India?

Minimum balance requirements vary by bank and account type. At SBI, the minimum average monthly balance for an NRE savings account is typically INR 3,000 for non-metro branches and INR 10,000 for metro and urban branches. HDFC and ICICI Bank generally require higher minimum balances for NRI accounts, ranging from INR 10,000 to INR 25,000, depending on account type and branch location. Always confirm current minimum balance requirements directly with the bank before opening, as these figures change.

What is the difference between an NRE and an NRO account?

An NRE account holds rupees funded by foreign earnings remitted to India, is fully and freely repatriable, and earns tax-free interest in India. An NRO account holds rupees and is primarily for managing income earned within India, such as rent, dividends, or pension. NRO interest is taxable, and TDS applies. Repatriation from an NRO account is permitted up to USD 1 million per financial year with documentation (Forms 15CA and 15CB). Most NRIs hold both an NRE account for foreign savings and an NRO account for Indian income.

Can I open an Indian bank account remotely without visiting India?

Partially. Several major Indian banks, including HDFC and ICICI, allow NRIs and OCIs to begin the application process online from outside India. However, full KYC completion often requires either submitting physical documents by courier to the bank’s NRI processing centre, in-person verification at an overseas bank representative office, or a visit to an Indian branch during a trip to India. A fully digital, non-in-person account opening that is accepted across all Indian banks is not consistently available for non-residents as of 2026.

Can a foreign company open a bank account in India?

Yes, but through a different regulatory framework. Foreign companies operating in India, whether as a branch, liaison office, or subsidiary, can open current accounts with Indian banks subject to RBI approval and FEMA compliance. The documentation requirements are more extensive than for individual accounts and typically involve corporate registration documents, board resolutions, and, in some cases, RBI or FIPB approval, depending on the nature of the business activity.

Can an Indian resident open a foreign bank account?

Yes, under the Liberalised Remittance Scheme (LRS). Indian residents can remit up to USD 250,000 per financial year outside India for permitted purposes, including opening and maintaining foreign bank accounts, investments, education, and travel. Amounts above USD 7 lakh in a financial year attract Tax Collected at Source (TCS) of 20% on the excess, which can be claimed as a credit against tax liability. For a detailed breakdown of how LRS works, see the RBI’s official LRS guidelines at rbi.org.in.

Do I need a PAN card to open a bank account in India as a non-resident?

A PAN card is not mandatory to open an account, but is strongly recommended and practically necessary for most account operations. Transactions above INR 50,000 typically require a PAN. Interest earned on NRO accounts is subject to TDS, and filing for treaty benefits or refunds requires a PAN. NRIs and OCIs can apply for a PAN card by submitting Form 49A along with a passport, overseas address proof, and a photograph. Applications can be submitted online through the Income Tax Department portal at incometax.gov.in or through authorised PAN service centres.

Can I open an NRI account if I hold dual citizenship?

India does not permit dual citizenship. The OCI (Overseas Citizen of India) status is the closest equivalent for those who have taken foreign citizenship. OCI holders can open NRE and NRO accounts on the same terms as NRIs. Persons who have renounced Indian citizenship but hold OCI status retain full NRI banking access. If you are a Person of Indian Origin (PIO) without OCI status, most banks still allow NRO account opening, and some extend NRE account access as well: confirm with your specific bank before applying.

Compare your options and open a multi-currency account with Grey today at grey.co/foreign-accounts.

Portugal NHR tax regime: The expat tax break explained

•

•

2 min read

You are probably here because you are moving to Portugal and might have heard about the country’s tax-relief programme for foreigners that lasts up to 10 years. The Non-Habitual Resident (NHR) programme was introduced in 2009 to attract foreign investors and professionals to Portugal.

However, Portugal's original Non-Habitual Resident (NHR) regime closed to new applicants in 2024. Transitional provisions allow some new arrivals who met specific criteria by certain deadlines to still benefit, though. A replacement regime, the Tax Incentive for Scientific Research and Innovation (NHR 2.0), launched in 2024 and is still accepting applicants who work in qualifying fields.

This article explores Portugal’s NHR tax regime, how it has changed over time, the rules, eligibility, and how to plan your move to Portugal.

What is the Portugal NHR tax regime?

Portugal introduced the Non-Habitual Resident tax regime in 2009. The plan was to attract skilled professionals, retirees, and investors to Portugal by offering a favourable tax structure for a period.

The tax regime offered:

  • A flat 20% tax rate on money made from working locally in Portugal instead of the standard progressive rates that reach up to 48%.
  • Exemptions or reduced withholding tax on many categories of foreign income. This included incomes from pensions, dividends, royalties, and rental income from abroad
  • The benefits for 10 consecutive years with no option to renew

The scheme became very popular, especially among people moving from the UK, the US, Brazil, and France. Interest grew even more after the COVID-19 pandemic as remote work became more common.

So far, here is the timeline of events relevant to the NHR tax regime:

  • 2009: NHR regime introduced
  • 2020 to 2023: Peak uptake, particularly from UK nationals post-Brexit and US retirees
  • October 2023: Portuguese government announces the closure of NHR to new applicants from 2024
  • January 2024: NHR formally closed to new registrations
  • 2024: NHR 2.0 (Tax Incentive for Scientific Research and Innovation) launched as the replacement

Non-habitual resident status in Portugal: who qualifies?

Let’s say you are a US retiree moving to Portugal. The original NHR tax regime meant you could receive Social Security payments, pension income, and investment dividends largely free of Portuguese tax for 10 years. If you are a UK professional working remotely for a British company, you could pay 20% flat tax on your Portuguese-source income rather than the standard progressive rate.

Under the original NHR programme, you could qualify if you**:**

  • Had not been a tax resident in Portugal in the previous five years
  • Became a Portuguese tax resident by spending more than 183 days in Portugal each year or by making Portugal your habitual residence.
  • Applied for NHR status with the Portuguese Tax Authority within the required deadline.

The 10-year period was fixed and non-renewable. After it expired, the individual fell back to the standard Portuguese income tax rates.

Portugal's flat tax for expats in 2026

The original NHR has since closed. If you did not register before it closed, you cannot apply for it anymore. There were transitional rules for two groups who could still register:

  1. People who became tax residents in Portugal in 2024 and met the transitional eligibility requirements. This includes having a qualifying connection to Portugal before the scheme closed (for example, if you had an eligible employment contract, property agreement, or a residence visa application in progress). They also had to apply within the permitted timeframe (31st March, 2025).
  2. People who had already registered under NHR before it closed. They continue to receive the tax benefits until the end of their 10-year period.

For people just moving to Portugal now or in the future, it is unlikely that they can still benefit from the NHR tax regime. The NHR 2.0 is what is in place now.

Learn about Portugal’s receiving limit from US Banks

What replaced the NHR regime?

Portugal replaced the original NHR scheme with the Tax Incentive for Scientific Research and Innovation, commonly known as NHR 2.0.

Let’s run through the differences between the original NHR and NHR 2.0:

Feature Original NHR NHR 2.0
Open to Most professionals and retirees Qualifying researchers, scientists, and highly skilled workers
Tax rate 20% flat on Portuguese-source qualifying income 20% flat on qualifying Portuguese-source income
Duration 10 years 10 years
Foreign income treatment Broad exemptions More limited; depends on income type
Application status Closed (since January 2024) Open
Qualifying activities Broad range Scientific research, technology, innovation, specific high-value-added roles

Who qualifies for NHR 2.0:

  • Researchers working for universities, scientific institutions, or R&D departments
  • Professionals in qualifying technology, data science, and AI roles
  • Academics and postdoctoral researchers
  • Workers in Portugal's "contractual tax benefits" investment programme
  • Certain professionals in innovation-focused industries

Unlike the original NHR, NHR 2.0 is much more restrictive. Most retirees, freelancers, and remote workers will not qualify unless their work falls within one of the approved categories.

How to apply for the new regime

If you believe you qualify for NHR 2.0, here is what the general process looks like. Always verify current requirements at the Portuguese Tax Authority portal before applying.

Step 1: Become a Portuguese tax resident

You generally need to spend more than 183 days in Portugal in a year or have a permanent home there.

Step 2: Get your NIF

The NIF (Número de Identificação Fiscal) is Portugal’s tax identification number. You need it for almost everything, from banking to renting a property, signing contracts, and registering with the tax authority. Non-residents can obtain a NIF at a tax office (Finanças) with a passport and a fiscal representative, before they even move.

Step 3: Register as a tax resident

Once you've moved, update your tax status with the Portuguese Tax Authority.

Step 4: Demonstrate your qualifying activity

You'll need documents showing that your work qualifies for NHR 2.0, such as an employment contract, research agreement, or confirmation from a Portuguese institution.

Step 5: Submit your NHR 2.0 application

Apply through the Portuguese Tax Authority's online portal using your NIF, proof of tax residency, and supporting documents.

Step 6: Await confirmation

The Tax Authority processes the application and confirms your status. Once approved, the 10-year period begins.

Common mistakes to avoid

  • Missing the application deadline after becoming a tax resident
  • Not keeping documents that prove your qualifying role
  • Assuming remote work automatically qualifies
  • Applying without getting professional tax advice

Other tax considerations for expats in Portugal

If you don't qualify for NHR or NHR 2.0, you'll be required to pay Portugal's standard income tax rates. These are progressive, starting at 13% on lower incomes (up to approximately €7,700 per year) and rising to 48% on incomes above €80,000.  High-income earners may also pay an additional solidarity surcharge of 2.5% to 5%.

Here are a few other taxes to keep in mind.

  • Property tax (IMI): Homeowners pay an annual property tax, usually between 0.3% and 0.8% of the property's taxable value. There is also a wealth surcharge (AIMI) on real estate assets above €600,000.
  • Inheritance tax: Portugal does not charge inheritance tax between close family members, such as spouses, parents, and children. Transfers to other beneficiaries are generally subject to 10% stamp duty.
  • US citizens: Moving to Portugal does not stop your US tax obligations. US citizens must still report their worldwide income to the IRS. You may be able to reduce double taxation through the Foreign Tax Credit or tax treaty provisions, but it's best to speak to a cross-border tax adviser.

Managing income from abroad in Portugal

Many expats in Portugal receive income in USD, GBP, or EUR. If that income is sent via an international wire transfer (SWIFT) to a Portuguese bank account, correspondent bank fees and the bank's conversion markup reduce what actually arrives.

For a detailed breakdown of what daily life costs, see our cost of living in Lisbon guide.

Opening a multi-currency account with Grey gives you USD, GBP, and EUR accounts to receive payments from the US, UK, or Europe. Once you provide the corresponding account details, the payment goes through ACH, Faster Payments, or SEPA, depending on the currency. It looks like the sender is making a local transfer.

You can hold the USD or GBP or convert to EUR at a disclosed rate when you need it, and withdraw to your Portuguese bank account. For expats also supporting family back home, you can send money to Portugal with Grey from abroad at transparent rates.

Open a multi-currency account with Grey and receive your international income in Portugal at disclosed fees, convert and withdraw to your Portuguese account whenever you want.

Frequently asked questions

Is the NHR still available in 2026?

The original NHR scheme is closed to new applicants. Some people who qualified under the transitional rules may still receive their benefits. Most new arrivals must apply under NHR 2.0, provided they work in an eligible profession.

Who qualifies for NHR 2.0?

NHR 2.0 is designed for researchers, scientists, academics, and professionals in qualifying high-value technology and innovation roles. Remote workers, retirees, and general freelancers do not qualify under the new scheme unless their work specifically falls within a recognised research or innovation category. Check with the Portuguese Tax Authority or a tax adviser to confirm whether your role qualifies.

How much tax do expats pay in Portugal without NHR?

Without NHR or NHR 2.0, expats are subject to Portugal's standard progressive income tax rates, which range from 14.5% at the bottom to 48% at the top. A solidarity surcharge of 2.5% to 5% also applies to higher earners.

Can I get NHR if I move to Portugal now?

The original NHR is no longer available. If you move to Portugal today, you'll generally pay the standard tax rates unless you qualify for NHR 2.0 or are covered by the transitional rules.

Does Portugal tax US Social Security?

Without NHR, US Social Security benefits may be taxable in Portugal. The exact treatment depends on Portuguese tax rules and the US-Portugal tax treaty, so it's worth getting advice from a tax specialist.

Can I receive USD or GBP income via Grey in Portugal?

Yes. Grey provides USD, GBP, and EUR accounts with real foreign banking details. US clients or pension providers can pay to your US routing number via ACH. UK payers can use your UK sort code via Faster Payments. European payers use your IBAN for SEPA. All payments arrive in full without correspondent bank deductions. You convert to EUR when you need it, at a rate shown before you confirm.

Arrow (up)

Back to top