


How to send money from Egypt to China online

Adeolu Titus Adekunle

TABLE OF CONTENT

SHARE THIS POST

The legal framework, financial restrictions, and tedious paperwork traditional banks require to complete transactions from Egypt to China can be frustrating. Sending money internationally has become significantly easier with the rise of digital financial services. Whether you’re paying for goods, supporting family, or handling business transactions, transferring money from Egypt to China online can be efficient and secure with the right platforms and proper procedures.

This guide outlines how to send money from Egypt to China online, including the best options, steps involved, and important considerations.

Read also: Fastest way to receive USD freelance payments in China

Things to consider before sending money from Egypt to China

Before you initiate a transaction to China from Egypt, here are some factors to look into to avoid roadblocks, delayed transactions, high fees, or even getting flagged by the authorities.

1. Understand the legal framework

It is crucial to understand the financial regulations in both Egypt and China. Egypt imposes certain restrictions on foreign exchange and international transfers, especially for large amounts. Banks usually require proof of transaction purposes, such as invoices or personal remittance declarations. Ensure your transaction complies with both countries’ anti-money laundering (AML) and foreign exchange policies.

2. Choose a reliable transfer method

Several online platforms and methods are available to transfer money from Egypt to China. The right one depends on speed, cost, convenience, and recipient preferences.

a. Bank transfers (via SWIFT)

Many Egyptian banks (like National Bank of Egypt, Banque Misr, or Commercial International Bank) offer international wire transfers using the SWIFT system. To use this method:

  • Visit your bank’s online banking platform or mobile app.
  • Provide the Chinese recipient’s bank name, SWIFT/BIC code, branch address, and account number.
  • State the purpose of the transfer and upload any supporting documents if required.

This method is secure and traceable. However, it comes with high fees and slower processing times. It may take 3–5 business days.

Read also: How to get paid in USD as a freelancer in Egypt

b. Money transfer services

Services like Western Union and MoneyGram are available in Egypt and support sending funds to China. Although not all agents support online transfers, many now offer digital channels:

  • Register online or through their mobile app.
  • Link your Egyptian debit card or bank account.
  • Choose the recipient’s country and enter payment details.
  • Funds can be received in cash or transferred to a bank account in China.

These methods typically have faster delivery, sometimes instant. They are also widely available across cities. Unfortunately, the exchange rate margins and service fees may sometimes be excessive.

c. Online platforms and fintech apps

Some global fintech services work across both Egypt and China, although availability might vary. The most reliable options include:

This growing fintech solution allows users in Egypt to open virtual USD, GBP, and EUR accounts. You can receive international payments in these currencies and convert them to EGP at competitive rates. Users can also fund their multi-currency account by converting EGP from their local banks at a competitive rate. Grey allows you to send USD, GBP, and EUR swiftly to recipients in China who can then convert to Chinese Yuan (CNY).

  • PayPal:

PayPal is available in both China and Egypt. It remains one of the most popular means of international payments. Despite some restrictions on features in Egypt, it gets the job done. You can send money to a recipient’s PayPal account in China, which they can link to their bank.

  • Wise

Wise is popular for its low-cost, transparent fees and competitive exchange rates. However, Wise may not directly support transfers from Egyptian pounds (EGP). You may need to convert funds to USD or EUR first.

3. Considerations and tips

  • Check currency conversion policies: Not all Egyptian banks or services allow direct EGP to CNY transfers. You may need to convert to USD first.
  • Avoid unofficial channels: While some people use informal methods (like agents or cryptocurrency), these can be risky and illegal.
  • Keep documentation: Always retain receipts, screenshots, and transaction confirmations for record-keeping and dispute resolution.
  • Confirm recipient readiness: Ensure the recipient’s bank or platform in China can receive international transfers in the specified format.

Send money from Egypt to China with Grey

Grey is a reliable global payment solution. Following these quick steps, you can set up a Grey account within minutes and send money to China.

1. Create a Grey account

Sign up to send money from Egypt to China with Grey
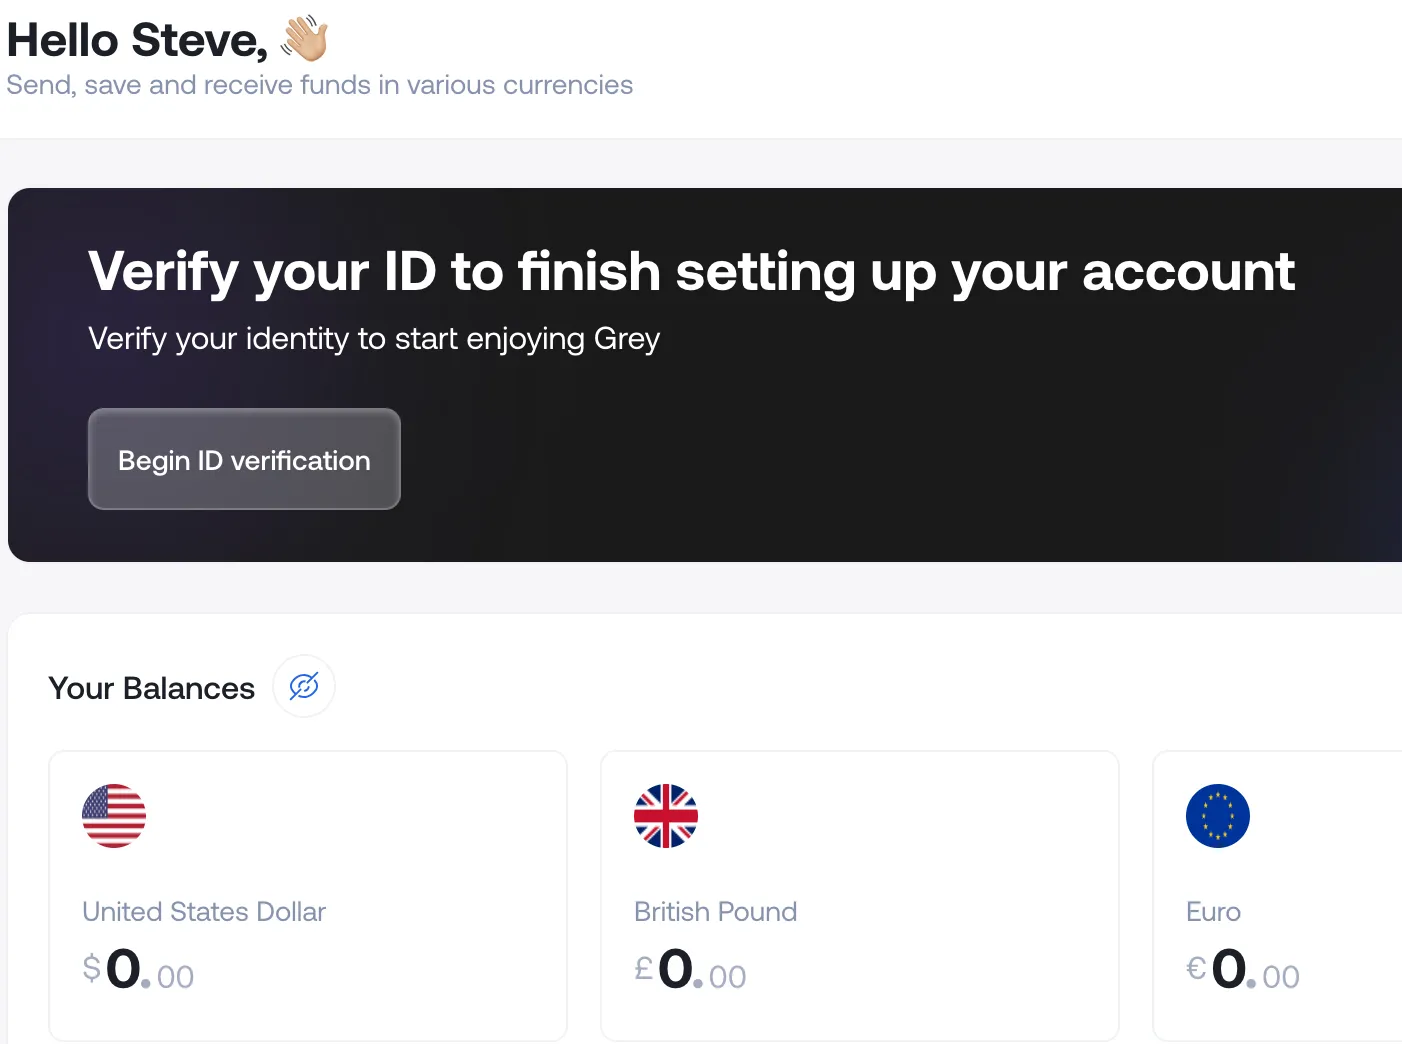
  • Verify your identity with a valid ID (such as a passport or national ID), proof of address (statement of account, utility bill), and a selfie.
verify your account on grey to send money from Egypt to China
  • Once approved, you can get your virtual accounts in USD, GBP, and EUR.

2. Fund your Grey account

  • Transfer Egyptian pounds (EGP) to Grey via supported local payment channels.
  • Convert EGP into USD, GBP, or EUR

3. Initiate transfer

While Grey does not support direct CNY transfers to China, you can send money in USD, GBP, or EUR if the recipient has a foreign currency account. They can then convert to CNY and withdraw it into their local account if needed. If the recipient has a Grey account, it even gets easier. Grey to Grey transactions are swift and free.

Managing international transactions with Grey

Sending money online from Egypt to China is achievable with the right tools and awareness of regulations. While traditional bank transfers remain an option, modern fintech platforms often provide faster and more cost-effective alternatives. Before choosing a service, compare fees, exchange rates, and delivery speeds to find the most suitable method.

With Grey, you have a reliable, versatile, and affordable global payment solution that offers competitive currency conversion rates.

Sign up today to enjoy seamless international transfers from Egypt to China.

‍

Last updated:

June 15, 2026

Open a free Grey account to get startedJoin 1 million digital nomads
IF YOU ENJOYED THIS, CHECK THESE OUT

How to name your LLC: Rules, tips and examples

•

•

2 min read

Naming your LLC can feel simple until you start writing down the names you like and realise you have to consider much more than whether a name sounds good. Your choice needs to fit your business, meet your state’s rules, and be available when you are ready to file.

An LLC name must include a designator such as LLC or Limited Liability Company, be unique in your state, and not imply it is a bank or government body. Check availability on your state business registry before filing. Pick a name that is clear, memorable, and works as a domain and social handle.

Before settling on one of your llc company names, think about how it will look on your website, invoices, social media pages, and future marketing. A clever name might sound great today but become limiting if your business expands into new products or services.

The safest approach is to shortlist a few names, check each one against your state’s requirements, and see whether the matching domain and social handles are available. That way, you can choose a name you are confident using long after your LLC is registered.

LLC naming rules you need to check before filing

The name you have in mind may sound perfect, but you still need to make sure it meets your state’s naming rules before putting it on your LLC application. The exact requirements vary by state, but a few rules apply in most places.

Include an LLC designator

Your business name generally needs to show that it is an LLC. Depending on your state, you may use LLC, L.L.C., or Limited Liability Company as part of the name.

Make sure the name is available

Your name must usually be distinguishable from other registered businesses in the state. Search your state’s business registry before filing to see whether your preferred name, or something very similar, is already taken.

Be careful with restricted words

Some words may require additional paperwork, licences, or approval. Terms associated with banking, insurance, universities, or professional services can have specific restrictions depending on your state.

Avoid names that mislead people

Your LLC name should not suggest that your business is a government agency, bank, or another organisation when it is not. Check your state’s rules before filing so you do not have to change the name later.

Tips for choosing a strong LLC company name

Once your name meets the legal requirements, the next question is whether it will actually work for your business. A name can be available and still be difficult to remember, hard to spell, or too limiting as your business grows.

Make it easy to remember

Keep the name simple enough for someone to hear it once and remember it later. Avoid complicated spellings or combinations that people may struggle to pronounce or search for online.

Check the domain and social handles

Before you get attached to a name, search for the matching website domain and social media handles. Having an easy-to-find name online can help customers discover your business.

Leave room to grow

Think about where you want the business to be in a few years. A name tied too closely to one product, location, or service can become restrictive if you expand.

Avoid being too narrow

A name like “Austin Web Design LLC” may work well if you only offer web design in Austin, but it could feel limiting if you later add branding services or work with clients elsewhere.

The strongest LLC company names give you room to build, change, and grow without needing a new identity every time your business evolves.

Also read: LLC vs sole proprietorship: Which is right for you?

What could your LLC name look like in different industries?

The right naming style often depends on what you do, so these hese LLC name ideas show how you can combine different words to create a name that fits your industry and business direction.

\begin{table}[] \begin{tabular}{lllll} \hline \multicolumn{1}{c}{\textbf{Industry}} & \multicolumn{1}{c}{\textbf{Naming pattern}} & \multicolumn{1}{c}{\textbf{What the pattern communicates}} & \multicolumn{1}{c}{\textbf{Example LLC company names}} & \\ \hline \textbf{Real estate} & {[}Location / Street{]} + Holdings / Properties + LLC & Gives the business a sense of stability and connects the name to a property or location. & \textit{\begin{tabular}[c]{@{}l@{}}Oak Street Holdings LLC\\ Pacific Coast Properties LLC\end{tabular}} & \\ \textbf{Consulting \& agency} & {[}Founder Name / Concept{]} + Partners / Advisors + LLC & Creates a professional feel and can emphasise expertise, trust, and collaboration. & \textit{\begin{tabular}[c]{@{}l@{}}Vanguard Tech Advisors LLC\\ Miller \& Partners Consulting LLC\end{tabular}} & \\ \textbf{Retail \& e-commerce} & {[}Brand Name / Vibe{]} + Boutique / Shop / Goods + LLC & Creates a more approachable, consumer-friendly identity that can work across products and online channels. & \textit{\begin{tabular}[c]{@{}l@{}}Blue Wave Goods LLC\\ The Velvet Thread Boutique LLC\end{tabular}} & \\ \textbf{Construction \& trade} & {[}Family Name / Core Value{]} + Contracting / Group + LLC & Uses language associated with reliability, strength, and practical expertise. & \textit{\begin{tabular}[c]{@{}l@{}}Apex Contracting Group LLC\\ Ironwood Builders LLC\end{tabular}} & \\ \textbf{Creative \& media} & {[}Abstract Concept / Word{]} + Studios / Media + LLC & Gives you a memorable identity while leaving room to work across different creative services. & \textit{\begin{tabular}[c]{@{}l@{}}Pixel Craft Studios LLC\\ Neon Horizon Media LLC\end{tabular}} & \\ \hline \end{tabular} \end{table}

Also read: How to File Taxes for an LLC: A Step-by-Step Guide

How to check whether your LLC name is available before filing

Finding a name you like is only the first step. Before you pay a filing fee, take a few minutes to make sure the name is actually available and will not create problems for your business later.

Start with your state business registry

Search your state’s Secretary of State or business registration website for the exact name you want. Look for businesses with identical or confusingly similar names, since your LLC generally needs to be distinguishable from existing entities.

Search the trademark database

A name being available in your state does not automatically mean you are free to use it as a brand. Search the USPTO trademark database for similar names, including different spellings and businesses offering related goods or services.

Check your domain and social handles

Search for the matching website domain and social media usernames before you file. A business name may be legally available but difficult to build an online presence for if someone else already controls the digital identity.

Once you have completed these checks, you can move on to comparing the best LLC formation services and choose how you want to file.

What to do after choosing your LLC name

Once you have settled on a name and confirmed it is available, the next step is to get your LLC ready to operate. File your Articles of Organisation, or the equivalent formation document, with your state and pay the required filing fee. After your LLC is approved, apply for an Employer Identification Number (EIN) through the IRS. You may need an EIN for tax purposes, hiring employees, and opening business accounts.

With the legal setup out of the way, think about how clients will pay your business, especially when you work with customers outside the US. A Grey USD account lets you receive eligible USD payments and manage your international business income. You can sign up for [Grey](https://app.grey.co/auth/register?) or download the app to create your account and start receiving international payments.

Frequently asked questions

Does an LLC name have to include LLC?

Yes. Most states require your formal LLC name to include a designator such as “LLC,” “L.L.C.,” or “Limited Liability Company.” The exact naming rules vary by state, so check your state’s requirements before filing. The designator must form part of the registered legal business name.

Can two LLCs have the same name?

Generally, no. Your LLC name must usually be distinguishable from other registered business entities in your state. Even small differences may not be enough if the names are considered confusingly similar. Check your state’s business registry before filing to make sure your preferred name is available.

Can I change my LLC name later?

Yes. You can generally change your LLC’s legal name after formation by filing an amendment with your state and paying the required processing fee. Before changing it, check your state’s requirements and make sure the new name is available. You may also need to update your business records.

What is a DBA or trade name?

A DBA, or “Doing Business As” name, allows your LLC to operate under a name different from its registered legal name. This can be useful when you want a more customer-friendly brand without changing the LLC’s official name. DBA registration requirements vary by state and locality.

How do I protect my name nationally?

Registering an LLC generally protects your business name only within the state where you form the company. If you want broader brand protection, you can consider applying for a federal trademark through the USPTO. Trademark rights depend on the application, registration, and how the mark is used.

11 best LLC formation services: Cheapest ways to file

•

•

2 min read

A business idea can be exciting until the paperwork starts. Choosing a business structure, checking your state’s requirements, paying the filing fee, and making sure everything is submitted correctly can quickly make LLC formation feel more complicated than expected.

The good news is that forming an LLC does not always require paying a company to do it for you. In many cases, you can file directly with your state and pay the required state filing fee. However, handling everything yourself means taking care of the paperwork, registered agent requirements, and other state-specific steps.

For people who prefer convenience, LLC formation services can handle much of this process for an additional fee. Some even advertise free formation, although you may still need to pay the state filing cost and may encounter additional charges for optional services.

With so many providers available, comparing the best LLC formation services means looking beyond the headline price. The registered agent cost, turnaround time, included features, renewal fees, and overall filing process can all affect what you actually pay. This guide compares your options so you can find a formation service that fits your budget and needs.

Also read: How much does it cost to start an LLC?

The cheapest way to form an LLC without paying for extras

Starting an LLC does not have to mean paying a formation company to handle everything for you. The cheapest route is usually filing directly with your state, where your main cost is the required state filing fee. The trade-off is that you are responsible for getting the paperwork right and meeting every state requirement.

When DIY makes sense

Filing yourself can be a good fit when you have a straightforward business and enough time to handle the process. You will typically need to:

  • Choose and check your LLC name.
  • Prepare and file the required formation documents.
  • Appoint a registered agent where required.
  • Pay the state filing fee.
  • Complete any additional state requirements.

When a formation service makes sense

Paying for a service may be worthwhile when you want someone else to handle the filing or help you avoid administrative mistakes. Some providers offer low-cost or free formation packages, although you still pay the state fee and may be charged for extras such as registered agent services or compliance support.

The right choice comes down to whether saving money or saving time matters more for your situation.

The comparison below looks at base pricing, registered agent costs, processing times, and the features that distinguish each LLC formation service.

Also read: Open a USD business account without a US address

11 best LLC formation services compared

LLC formation service Starting base price Registered agent cost Turnaround / filing time Key extras and distinctive traits
Northwest Registered Agent $39 + state fee 1 year included ($125/year renewal) Same-day / 1–6 days Privacy by Default, which uses its office address on public documents; free corporate email and website.
ZenBusiness $0 + state fee Add-on ($199/year) 1–10 days; rush available Beginner-friendly platform, Velo AI assistant, and compliance protection in higher tiers.
Bizee (formerly Incfile) $0 + state fee 1 year included ($119/year renewal) Standard state time; expedited options Free tax consultation and a $0 base plan, with additional services available as paid extras.
LegalZoom $0 + state fee Add-on ($249/year) 5–14 days; expedited options Comprehensive filing workflow, legal subscription plans, and access to attorneys.
Inc Authority $0 + state fee 1 year included ($249/year renewal) 24–48 hours Free EIN and express filing included in the base tier; additional services are offered as paid upgrades.
Swyft Filings $0 + state fee Add-on ($149/year) 1–5 days, plan dependent Phone support and an unbundled service structure, with additional features available at extra cost.
Tailor Brands $0 + state fee Add-on Up to 14 days Built for creators, with logo creation, brand kits, domain registration, and website-building tools.
CorpNet $99 + state fee Add-on ($149/year) 24 hours to 1 week Multi-state entity management, compliance alerts, and support for more complex business structures.
MyCompanyWorks $79 + state fee Add-on ($119/year) Same-day processing Startup wizard checklist, corporate minutes, and free trademark consultations.
FileNow $49 + state fee 1 year included 24-hour processing Fast internal processing, a 15-minute onboarding process, and fewer secondary features.
Harbor Compliance $99 + state fee Add-on (99–125/year) 1–3 days Compliance software designed for growing companies and businesses operating across multiple states.

Also read: How to File Taxes for an LLC: A Step-by-Step Guide

Where can you form an LLC for the least money?

The cost of forming an LLC can change quite a bit depending on where you file. The formation service may advertise a $0 price, but you still have to pay the state filing fee, and some states charge annual fees that can make a cheap setup more expensive over time.

For the lowest upfront cost, look for a provider with a $0 base fee, such as Bizee or ZenBusiness, then compare the government fee and ongoing costs in your state.

Here are four states with some of the lowest government filing costs:

  • Montana: Bizee or ZenBusiness ($0) + $35 state filing fee; $20 annual upkeep.
  • Kentucky: Bizee or ZenBusiness ($0) + $40 state filing fee; $15 annual upkeep.
  • New Mexico: Bizee or ZenBusiness ($0) + $50 state filing fee; $0 annual upkeep.
  • Missouri: Bizee or ZenBusiness ($0) + $50 online filing fee; $0 annual upkeep.

New Mexico and Missouri can be particularly interesting when you look beyond the initial filing cost because there is no annual report or recurring state fee listed here.

Why California can cost much more than it first appears

California is a good example of why the lowest filing fee does not necessarily mean the least expensive LLC to maintain.

The initial state filing fee is $70, and you must also file a Statement of Information within 90 days, which costs $20. The bigger expense is the $800 annual franchise tax. That means the ongoing cost can quickly outweigh what you saved by choosing a $0 formation service.

Before choosing a state, look at the full cost of keeping the LLC active, not just what it costs to file on day one.

What to check before you pay for an LLC formation service

A formation service can look incredibly cheap when you first land on its pricing page. The number that catches your eye may only cover basic filing, while important services are added at checkout or automatically renewed the following year. Before entering your card details, take a few minutes to check what you are actually paying for.

  • Check renewal prices: A registered agent may be free for the first year but costs $100 or more at renewal. Check the recurring price, not just the introductory offer.
  • Look for upsells: EIN applications, operating agreements, compliance services, business licences, and other extras may be presented during checkout. Decide which ones you actually need.
  • Check what the base plan includes: A $0 formation package may only cover the provider’s service fee, while your state filing fee still applies.
  • Review cancellation terms: Find out whether optional services renew automatically and how to cancel them before the next billing date.

The cheapest price at checkout is not always the cheapest cost over the life of your LLC.

Once your LLC is registered, set up how you will receive and spend money

Getting your LLC approved is an important step, but there is still the practical side of running the business. Once the paperwork is done, you need a reliable way to receive payments, manage business income, and access your money when clients start paying you.

For freelancers and business owners working with US clients, a Grey USD account can give you a way to receive USD income without asking clients to deal with unfamiliar international payment processes. Funds can be managed from your Grey account, giving you a clearer way to separate business income from your personal finances.

The Grey virtual card can also help when you need to spend your business funds online or pay for services and subscriptions. Keeping your income and business spending organised from the beginning can make your finances easier to manage as the company grows.

You can sign up for Grey or download the app to get started and set up your account for international payments.

Frequently asked questions

What is the cheapest way to start an LLC?

The cheapest way is usually filing the Articles of Organization yourself through your state's Secretary of State portal and paying only the mandatory state government fee. You avoid the service fee charged by formation companies, although you remain responsible for completing the paperwork and meeting all state requirements.

Are formation services worth it?

They can be useful if you want to save time, keep your home address off public business records where possible, or get help managing compliance requirements. The value depends on what the service includes and what you would otherwise handle yourself. Compare the upfront price with recurring fees and optional add-ons.

Can I form an LLC myself?

Absolutely. You can generally visit your state's official business registration website, complete the required formation documents, and pay the applicable state filing fee. The exact process varies by state, so check the requirements before submitting your application and make sure you understand any follow-up obligations.

What is a registered agent?

A registered agent is a person or company designated to receive legal documents, official notices, and certain government correspondence for your LLC. The agent generally needs a physical address in the state where your LLC is registered and must be available to receive documents during required business hours.

How long does LLC approval take?

The processing time depends on the state and how you file. Online applications can sometimes be processed within a few business days, while paper filings may take longer. Some states offer expedited processing for an additional fee. Check your state's current processing times before submitting your application.

How much does it cost to maintain an LLC?

The ongoing cost depends on your state. Some states charge annual or biennial report fees, franchise taxes, or other recurring charges, while others have little or no annual upkeep. Check your state’s requirements so you know what you will pay after the initial filing.

Can I change my LLC name after forming it?

Yes. Most states allow you to change your LLC’s legal name by filing an amendment with the appropriate state agency and paying a fee. Before making the change, check your state’s naming rules and confirm that your preferred new name is available.

How to File Taxes for an LLC: A Step-by-Step Guide

•

•

2 min read

Tax season can raise a simple but important question for LLC owners: where do you actually begin? Filing taxes is not the same for every LLC, because the way your business is taxed determines which forms you complete, what income you report and when everything is due.

A single-member LLC will usually report its business income on the owner’s personal tax return, while a multi-member LLC generally files a separate partnership return and provides K-1 forms to its members. There is also the option to have an LLC taxed as an S-corporation or C-corporation, which changes the filing process.

This guide walks through how to file taxes for an LLC, from identifying your tax structure to understanding the forms, records and deadlines that apply. The aim is to make tax season easier to understand before you sit down to file. Tax laws vary, so confirm what applies to you for the tax year and speak to a qualified tax professional if you’re unsure.

This guide is for general information only and isn’t tax advice.

Also read: Open a USD business account without a US address

By default, an LLC is taxed as a pass-through: a single-member LLC files on Schedule C with the owner's personal return, and a multi-member LLC files Form 1065 plus K-1s. An LLC can also elect S-corp or C-corp taxation. Deadlines and forms depend on the structure you choose.

How is an LLC taxed by default?

An LLC does not automatically pay federal income tax as a separate business. By default, the IRS uses a pass-through tax treatment, meaning the business income and losses generally pass through to the owners and are reported on their personal tax returns. The exact process depends on whether the LLC has one owner or several.

A single-member LLC is usually treated as a disregarded entity for federal income tax purposes. The owner normally reports the LLC’s income and expenses on their personal tax return, often using Schedule C. The business itself generally does not file a separate federal income tax return.

A multi-member LLC is normally treated as a partnership unless it chooses a different tax classification. The LLC files an information return, Form 1065, while each member receives a Schedule K-1 showing their share of the business’s income, deductions and other tax items. Members then report these amounts on their individual returns.

An LLC can also elect to be taxed as an S corporation or C corporation, which can change how the business and its owners are taxed.

How to file taxes as a single-member LLC

For a single-member LLC, understanding the right forms, tax payments and filing dates can make tax season much easier to manage.

1. Report your LLC income on Schedule C

A single-member LLC is usually treated as a disregarded entity for federal income tax purposes. This means the business does not normally file a separate federal income tax return. Instead, the owner reports the LLC’s income, expenses and profit or loss on Schedule C, which is filed with Form 1040.

2. Account for self-employment tax

If the LLC has net earnings from self-employment, you may also need to pay self-employment tax, which covers Social Security and Medicare taxes. Schedule SE is generally used to calculate this tax, and the amount is reported on your personal tax return.

3. Make quarterly estimated tax payments

Tax is not usually withheld from business income, so setting money aside throughout the year is important. If you expect to owe $1,000 or more when you file, you may need to make estimated tax payments during the year using Form 1040-ES.

4. Know your filing deadlines

Your annual federal return is generally due on April 15. Estimated tax payments are normally due in April, June, September and January, although weekends, holidays and special IRS rules can change the exact dates.

Read also: LLC vs sole proprietorship: Which is right for you?

How to file taxes as a multi-member LLC

Imagine two friends running an LLC together. The business earns $120,000 during the year, but that does not mean the LLC simply pays tax on the full amount and the owners move on. The business first reports its financial activity, then each member reports their share on their own tax return.

1. Start with Form 1065

A multi-member LLC is generally treated as a partnership for federal tax purposes unless it elects to be taxed differently. The LLC usually files Form 1065, U.S. Return of Partnership Income. This return reports the business’s income, deductions, gains, losses and other relevant tax information. The LLC generally does not pay federal income tax at the entity level.

2. Give each member a Schedule K-1

Once the partnership return is prepared, each member receives a Schedule K-1. It shows that member’s share of the LLC’s income, deductions, credits and other tax items. The amount reported on the K-1 may differ from the cash the member actually received from the business.

3. Report your share personally

Each member uses the information from their K-1 when completing their individual tax return. If the LLC has several owners, keeping accurate records and agreeing on how profits and losses are allocated can make the filing process much easier.

4. Keep the deadlines in mind

For calendar-year LLCs taxed as partnerships, Form 1065 is generally due March 15. Members generally have until April 15 to file their individual federal tax returns.

When should an LLC choose S-corp or C-corp taxation?

An LLC can keep its default tax treatment or elect to be taxed as a corporation. The right choice depends on the business’s profits, how owners take money from the company and whether the business plans to reinvest or grow.

When S-corp taxation may help

An LLC can elect S-corporation taxation by filing Form 2553 with the IRS. For some profitable businesses, this can change how employment and business income are treated. However, S-corp taxation also brings extra payroll, record-keeping and tax filing responsibilities, so the potential savings need to justify the added work.

When C-corp taxation may make sense

An LLC can generally elect C-corporation treatment by filing Form 8832. This may suit businesses that plan to retain profits in the company, bring in investors or build a structure designed for larger-scale growth. The trade-off is that C-corporations are generally subject to corporate income tax, and distributions to owners can create another layer of tax.

Weigh the trade-offs first

Changing your LLC’s tax classification can affect how profits, salaries, distributions and taxes are handled. Before making an election, consider the business’s expected profits, future plans and administrative costs. A tax professional can help determine which structure fits your situation.

Also read: Virtual US accounts explained: who they work for

Keeping records when your LLC earns money from abroad

Once an LLC starts earning from international clients, keeping the money and records organised becomes just as important as filing the right tax forms. Record each payment clearly, including the amount received, date, client, currency and any fees charged. Keep invoices, contracts, bank statements and receipts so you can explain where the business income came from and how expenses were calculated.

For LLC owners who regularly receive money from overseas clients, a service such as Grey can be a practical option. Grey provides supported foreign-currency account details for receiving international payments, allowing eligible users to receive and manage currencies such as USD. Keeping overseas income in a dedicated account can make your records easier to track before transferring money to your main business account or converting it when needed.

If you also want tighter bookkeeping (and fewer missing receipts at tax time), it helps to separate spend from day one. For instance, you can track deductible expenses on a virtual card and keep business transactions in one place.

Frequently asked questions

How do I file taxes as an LLC?

It depends on how your LLC is taxed.  A single-member LLC usually reports business income and expenses on the owner’s personal tax return, while a multi-member LLC generally files Form 1065 and gives each member a Schedule K-1. An LLC taxed as a corporation follows different filing requirements.

Does a single-member LLC file taxes separately?

Usually, no. A single-member LLC is generally treated as a disregarded entity for federal income tax purposes. The owner reports the LLC’s income, expenses and profit or loss on their personal tax return, typically using Schedule C. The LLC may still have separate state, local or other tax filing requirements.

What is the LLC tax deadline?

The deadline depends on how your LLC is taxed. For a calendar-year LLC taxed as a partnership, Form 1065 is generally due March 15. Individual tax returns are generally due April 15. An LLC taxed as a corporation may have different deadlines, so check the rules that apply to your tax classification.

Do LLCs pay quarterly taxes?

They can. LLC owners who expect to owe $1,000 or more in federal tax when they file may need to make estimated tax payments during the year. The payments are generally made in April, June, September and January. The exact amount depends on your income, deductions and other tax obligations.

Does an LLC have to pay self-employment tax?

In many cases, yes. Owners who actively operate an LLC may owe self-employment tax on their share of business earnings, depending on the LLC’s tax classification and circumstances. Self-employment tax generally covers Social Security and Medicare taxes, separate from federal income tax.

Can an LLC choose how it is taxed?

Yes. An LLC can generally keep its default tax classification or elect to be taxed as an S corporation or C corporation. Each option has different tax and administrative consequences, so the best choice depends on factors such as profits, owner compensation, business plans and record-keeping requirements.

How to set up Meta Pixel for your Nigerian business (2026)

•

•

2 min read

The Meta Pixel is the single most important thing to install on your website before spending money on Facebook or Instagram ads. Without it, Meta cannot track what visitors do after clicking your ad. You cannot optimise for purchases. You cannot build retargeting audiences. You cannot measure whether your ads are making money or wasting it.

Most Nigerian businesses skip the Pixel when starting Facebook ads. They run Traffic or Engagement campaigns, see some clicks and likes, but have no idea whether those clicks turned into sales. Then they move to Conversion campaigns and wonder why Meta cannot deliver results. The answer is always the same: the Pixel was never installed, so Meta has no data to work with.

This guide covers what the Meta Pixel does, how to install it on every major website platform Nigerian businesses use (Shopify, WordPress, WooCommerce, custom sites), which events to set up for your business type, how to verify it is working, and what the Conversions API adds for advanced tracking.

What the Meta Pixel does (and why it changes everything)

The Meta Pixel is a small piece of JavaScript code you add to your website. When someone visits your site, the Pixel fires and sends data back to Meta about what the visitor did: which pages they viewed, which products they looked at, whether they added something to their cart, and whether they completed a purchase or form submission.

This data powers three capabilities that are impossible without it:

1. Conversion tracking. The Pixel tells Meta exactly which ad clicks led to purchases, signups, or other valuable actions. Without this, you see clicks in Ads Manager but have no idea which clicks made you money. With it, you see cost per purchase, cost per lead, and ROAS (return on ad spend) for every campaign, ad set, and ad.

2. Conversion optimisation. When you run a Sales or Leads campaign, Meta's algorithm uses Pixel data to find people most likely to convert. The more conversion data the Pixel collects, the better Meta gets at finding buyers. Without the Pixel, Meta has nothing to optimise against. It shows your ads to people likely to click (not buy), which is why Traffic campaigns get clicks but not sales.

3. Retargeting audiences. The Pixel lets you build Custom Audiences of people who visited your website, viewed specific products, added items to their cart but did not purchase, or completed a specific action. These audiences are the highest-converting audiences you can target because they already know your brand. Retargeting typically costs 30-50% less per click and converts at 2-5x the rate of cold prospecting.

Every day you run ads without the Pixel is a day of wasted data. Install it before spending your first naira on anything beyond basic Awareness campaigns.

Before you start: what you need

A Facebook Business Page and Meta Business Suite account. If you do not have these, see the prerequisites section in How to Run Facebook Ads in Nigeria.

A website you own. You can only install the Pixel on websites you own or have explicit permission to modify. Do not install your Pixel on someone else's site. This violates Meta's terms.

Admin access to your website. You need the ability to add code to your site's header or install plugins. On Shopify, this means store owner access. On WordPress, admin access. On custom sites, access to the HTML files or CMS.

A payment method for when you start running conversion campaigns. The Pixel itself is free to install and collects data passively even without running ads. But its full value is unlocked when you run conversion campaigns, which require a funded ad account. Nigerian businesses can pay via bank transfer (naira accounts) or a Grey virtual dollar card (USD accounts). Full payment setup: How to Pay for Facebook Ads in Nigeria.

Step 1: Create your Pixel in Events Manager

1. Go to Meta Events Manager.

2. Click Connect Data Sources.

3. Select Web.

4. Choose Meta Pixel.

5. Give your Pixel a name (your business name is fine).

6. Enter your website URL.

7. Click Continue.

Meta creates your Pixel and gives you a Pixel ID (a unique number). You now need to add the Pixel code to your website. How you do this depends on your website platform.

Step 2: Install the Pixel on your website

Shopify (easiest setup)

Shopify has a native integration that handles Pixel installation automatically, including e-commerce events (ViewContent, AddToCart, Purchase).

1. In your Shopify admin, go to Settings > Apps and sales channels.

2. Click Facebook & Instagram.

3. If not installed, add the Facebook & Instagram sales channel from the Shopify App Store.

4. Connect your Meta Business Suite account.

5. Select your Pixel from the dropdown.

6. Shopify automatically adds the Pixel to every page and sets up standard e-commerce events.

Shopify also supports the Conversions API through this integration, which sends server-side data to Meta alongside the browser Pixel. This gives you more accurate tracking, especially when browser-based tracking is blocked by ad blockers or iOS privacy settings.

If you run a Shopify store and use a Grey virtual card to pay for Facebook Ads, Shopify, your domain, and other SaaS tools, one card covers all your e-commerce expenses from a single USD balance.

WordPress (with or without WooCommerce)

Two installation methods:

Method 1: Plugin (recommended). Install the Meta Pixel for WordPress plugin (official, by Meta). Activate it, connect your Meta account, and select your Pixel. The plugin adds the base code to every page and provides a UI for setting up events. If you also have WooCommerce, the plugin detects it and adds e-commerce events automatically.

Method 2: Manual code. Go to Events Manager > your Pixel > Settings > Install Code Manually. Copy the base Pixel code. In WordPress, go to Appearance > Theme Editor > header.php, and paste the code in the <head> section before the closing </head> tag. Save. This installs the base code but you need to add event code manually for specific actions (purchase, add to cart).

For WooCommerce stores, Method 1 (the plugin) is strongly preferred because it handles event tracking for the full checkout funnel automatically.

Custom websites (HTML, React, Next.js, etc.)

1. In Events Manager, go to your Pixel > Settings > Install Code Manually.

2. Copy the base Pixel code.

3. Paste it in the <head> section of every page on your website.

4. Add event code for specific actions. For example, on the order confirmation page, add the Purchase event code with the transaction value and currency.

If your site uses a JavaScript framework (React, Next.js, Vue), install the Pixel base code in your root layout or app component so it loads on every route. Use Meta's JavaScript SDK to fire events programmatically when users complete actions.

Using Google Tag Manager

If you already use Google Tag Manager (GTM) for other tracking codes, you can deploy the Meta Pixel through GTM:

1. In GTM, create a new Custom HTML tag.

2. Paste the Meta Pixel base code.

3. Set the trigger to All Pages.

4. Save and publish.

5. For events, create additional tags with the specific event code and set triggers based on page URL (for example, the thank-you page URL triggers the Purchase event).

GTM is the preferred method for businesses with complex websites or multiple tracking codes because it keeps all your tags in one place without touching website code directly.

Step 3: Set up the right events for your business

The base Pixel code automatically tracks PageView. Everything else requires you to set up specific events. Which events you need depends on what your business does:

Event What It Tracks Who Needs It How It Helps Your Ads
PageView Every page load on your site Everyone (automatic) Basic website traffic data. Builds retargeting audiences.
ViewContent Someone viewed a product or service page E-commerce, SaaS, service businesses Lets you retarget people who looked at specific products.
AddToCart Item added to shopping cart E-commerce Identifies high-intent shoppers. Retarget cart abandoners.
InitiateCheckout Checkout process started E-commerce Tracks drop-off between cart and purchase.
Purchase Order completed, payment received E-commerce The most important event. Enables ROAS tracking and purchase optimisation.
Lead Form submitted (email, phone, booking) Service businesses, lead gen Enables cost per lead tracking and lead optimisation.
CompleteRegistration Account created or signup completed SaaS, apps, memberships Tracks signup conversions for subscription businesses.
Contact Someone contacted you (phone, email, chat) Local services, professional services Tracks lead quality from ad clicks.
Search Visitor used site search Large e-commerce with many products Understand what visitors look for. Optimise product pages.
AddPaymentInfo Payment details entered E-commerce, subscription services Identifies users very close to purchasing.

Start with two events: PageView (automatic) plus the one event that matches your primary business goal. For e-commerce: Purchase. For lead generation: Lead. For SaaS: CompleteRegistration. Add more events as your campaigns mature.

Each event can include parameters (additional data). The most important parameter for e-commerce is value (the transaction amount) and currency (NGN or USD). Including value data enables ROAS reporting and allows Meta to optimise for highest-value purchases, not just the most purchases.

Step 4: Verify the Pixel is working

An incorrectly installed Pixel is worse than no Pixel because you think you are tracking but you are not.

Meta Pixel Helper (browser extension)

Install the Meta Pixel Helper extension for Chrome. Visit your website. The extension icon shows a green number indicating how many Pixel events fired on that page. Click the icon to see which events fired and whether they passed parameters correctly. A green checkmark means the event is working. A yellow or red warning means something needs fixing.

Events Manager test events

In Events Manager, go to your Pixel > Test Events. Enter your website URL and click Open Website. Navigate through your site (view a product, add to cart, complete a test purchase if possible). Events Manager shows the events firing in real time. This confirms the data is reaching Meta.

Common verification issues

Issue What It Means How to Fix
No Pixel detected Base code not installed or not loading Check that the code is in the <head> section. Clear cache. Check for JavaScript errors.
PageView fires but no other events Base code works but event code is missing or broken Add event code to the correct pages. Use the Plugin method if manual code is failing.
Duplicate events firing Pixel code installed twice (manual + plugin) Remove one installation method. Do not use both plugin and manual code.
Event fires but no value parameter Purchase event works but does not include transaction amount Add value and currency parameters to the event code.
Events stop firing after site update Theme or plugin update overwrote the Pixel code Reinstall or use GTM (which is not affected by theme updates).

Step 5 (advanced): Set up the Conversions API

The Conversions API (CAPI) sends event data directly from your server to Meta, bypassing the browser entirely. This is increasingly important because browser-based tracking (the Pixel) is being degraded by ad blockers, iOS privacy settings (App Tracking Transparency), and cookie restrictions.

With CAPI, you get two data streams: the Pixel (browser-side) and the API (server-side). Meta deduplicates them using event IDs, so you do not count the same event twice. The result is more complete data and better optimisation.

For Shopify: The Facebook & Instagram sales channel supports CAPI automatically. When you connect your Pixel through the sales channel, Shopify sends both browser and server events.

For WordPress/WooCommerce: The Meta Pixel for WordPress plugin supports CAPI. In the plugin settings, enable the Conversions API and follow the prompts to generate an access token.

For custom sites: CAPI requires server-side development. You send HTTP POST requests to Meta's Conversions API endpoint with event data. This is a developer task. Meta's documentation covers the technical implementation.

CAPI is not required for getting started, but it significantly improves tracking accuracy for businesses spending N300,000+ per month on ads. If your Pixel data and Ads Manager data consistently mismatch (Pixel shows 50 purchases but Ads Manager shows 30), CAPI is the fix.

After installation: what the Pixel enables for your ad campaigns

With the Pixel live and collecting data, you unlock the advertising capabilities that actually drive revenue:

Run conversion campaigns

Create campaigns with the Sales or Leads objective. Meta's algorithm uses your Pixel data to find people most likely to purchase or submit a form. This is where the real ROI from Facebook Ads comes from, and it is only possible with the Pixel.

Conversion campaigns require a larger budget than Traffic campaigns because Meta needs 50 conversion events per week to exit the learning phase. At N2,000 per conversion, that is N100,000 per week (N14,300 per day). Budget accordingly. For full budget guidance, see Facebook Ads Cost in Nigeria.

Build retargeting audiences

In Ads Manager, create Custom Audiences based on Pixel data:

Audience Who It Includes Best For
All website visitors (last 30 days) Everyone who visited any page General retargeting to bring visitors back
Product viewers who did not purchase People who viewed products but did not buy Cart abandonment recovery
Past purchasers People who completed a purchase Upselling, cross-selling, repeat purchase campaigns
High-value visitors People who spent above a certain amount VIP targeting, premium product promotion

Retargeting audiences cost 30-50% less per click than cold prospecting and convert at 2-5x the rate. Once your Pixel has collected 1,000+ visitors, retargeting should be part of every campaign structure.

Create Lookalike Audiences

Upload your Purchase or Lead event data as a source for Lookalike Audiences. Meta finds Nigerians who share characteristics with your actual customers. This is the most effective prospecting strategy: instead of guessing at interests, you let Meta's algorithm find people similar to the ones who already buy from you.

Paying for conversion campaigns from Nigeria

The Pixel unlocks conversion campaigns. Conversion campaigns need a real budget (N10,000-N25,000 per day). That budget needs a reliable payment method.

For naira billing, bank transfer is the simplest option. For USD billing (required if you also run Google Ads or TikTok Ads), a Grey virtual dollar card handles all your ad platform payments from one USD balance. Convert naira to USD in the Grey app (1% fee, capped at the naira equivalent of $6), create a virtual card ($5 one-time), and add it to Facebook Ads Manager.

The same Grey card also covers the tools your e-commerce business runs on: Shopify subscription, domain renewal, email marketing (Mailchimp, Klaviyo), design tools (Canva Pro), and analytics (Google Analytics Premium). One card, one balance, all your digital business expenses.

For a full payment setup with both naira and USD payment methods, see How to Pay for Facebook Ads in Nigeria.

Privacy and compliance

Do not share prohibited information. Meta’s Business Tools Terms prohibit sharing health data, financial account data, children's data, and other sensitive information through the Pixel. If your website collects sensitive data (medical forms, financial applications), ensure the Pixel does not fire on pages containing this information, or strip sensitive parameters before sending events.

Cookie consent. Depending on your audience and applicable regulations, you may need to implement cookie consent before the Pixel fires. For businesses targeting only Nigerian audiences, Nigerian data protection law (NDPR) applies. Consult your legal adviser on whether explicit consent is required for your specific use case.

Regular audits. Review your Pixel setup quarterly. Check that events fire correctly, parameters are accurate, and no prohibited data is being shared. Website updates, theme changes, and plugin updates can break Pixel installations without warning.

Frequently asked questions

Is the Meta Pixel free?

Yes. The Pixel is free to create and install. It collects data passively even without running ads. The cost comes when you run ad campaigns that use the Pixel data.

Do I need a website to use the Meta Pixel?

Yes. The Pixel is code that goes on your website. If you do not have a website, you cannot use the Pixel. However, you can still run Facebook Ads without a website using Lead Form and Messaging objectives.

Can I install the Pixel on multiple websites?

One Pixel can be installed on multiple websites, but Meta recommends using one Pixel per business. If you run multiple separate businesses, create a separate Pixel for each one in Events Manager.

How long does it take for the Pixel to start collecting data?

Immediately. As soon as the code is on your website and someone visits, the Pixel fires. You can see events in Events Manager within minutes of installation.

Will the Pixel slow down my website?

The Pixel code is lightweight and loads asynchronously, meaning it does not block your page from loading. The performance impact is negligible for most websites.

Why is my Pixel showing fewer conversions than my actual sales?

Browser-based tracking is not 100% accurate. Ad blockers, iOS privacy settings, and cookie restrictions prevent the Pixel from firing for some users. The Conversions API (CAPI) helps close this gap by sending data from your server directly to Meta.

Do I need the Pixel for Click-to-WhatsApp campaigns?

Not for the messaging part (WhatsApp conversations are tracked directly by Meta). But if you want to track what happens after the WhatsApp conversation (website visit, purchase), the Pixel is needed on your website.

I installed the Pixel but Events Manager shows no data. What is wrong?

Common causes: the code is in the wrong location (must be in the <head> section), your website has caching that serves an old version without the Pixel, or a JavaScript error is preventing the Pixel from loading. Use the Meta Pixel Helper extension to diagnose.

Related reading

  How to Run Facebook Ads in Nigeria (2026) is the full step-by-step campaign creation guide, covering objectives, targeting, budgets, and optimisation.

  Facebook Ads Cost in Nigeria (2026) covers cost benchmarks, budget tiers for conversion campaigns, and ROAS calculations.

  How to Pay for Facebook Ads in Nigeria (2026) covers naira and USD payment methods for funding your ad account.

  How to Pay for Google Ads in Nigeria (2026) covers Google's equivalent conversion tracking setup (Google Ads tag).

What is an Employer of Record (EOR)?

•

•

2 min read

A business can hire someone in another country without having an office there, but that does not mean it can employ them without following local rules. Someone still has to handle the contract, payroll, taxes, statutory benefits and employment requirements that come with putting a person on the company’s payroll.

An Employer of Record (EOR) is the company that takes on that legal employment role. It officially employs the worker in their country while the client business directs their everyday work, from their responsibilities to their working hours and performance.

The arrangement has become useful as companies build international teams without establishing a legal entity in every country where they hire. This article breaks down how EORs work, why businesses use them, what they handle, what they cost and where the model may not be the right fit. It also explains how EOR hiring compares with using contractors or setting up a local entity.

What does an Employer of Record do?

An Employer of Record is the legal employer of a worker, even though another company is responsible for the person's actual job. Think of a software company hiring a developer who lives in another country. The developer works for the software company, but the EOR officially employs them in that country.

This means the EOR takes responsibility for the employment obligations that the hiring company would normally have to manage itself. Depending on the country and arrangement, this can include:

  • Preparing and signing the employment contract
  • Running payroll and withholding required taxes
  • Providing statutory benefits
  • Managing employment records
  • Following local employment and labour regulations

The hiring company still controls the important parts of the job. It decides what the employee works on, manages performance and remains involved in the working relationship.

The core idea is therefore simple: the EOR provides the legal employment structure, while the client company provides the work. This allows international hiring without requiring the client to become the worker's direct legal employer.

Also read: Receiving foreign income as a solo founder

What does an EOR do?

The easiest way to understand an EOR is to look at everything that has to happen after an international hire accepts a job. The employee needs a valid contract, regular pay, the right tax deductions and whatever benefits local law requires.

Payroll: The EOR calculates the employee’s salary, deductions and other required payments, then makes sure they are paid correctly and on time.

  • Tax: It handles applicable payroll taxes and statutory deductions, helping the business meet its obligations in the employee’s country.
  • Benefits: Where required, the EOR can arrange statutory benefits such as social security, pension contributions, leave and other employee entitlements.
  • Contracts: The EOR prepares an employment agreement that reflects the relevant country’s employment rules, rather than simply using a contract designed for another market.
  • Local compliance: Employment laws can cover everything from working hours and leave to termination procedures and required records. The EOR helps ensure the employment arrangement follows these local requirements.

The business still manages the employee’s everyday work. The EOR handles the legal and administrative side that sits behind the employment relationship.

Also read: Can non-residents open a US bank account online in 2026?

EOR or your own entity: what changes for your business?

An EOR and your own foreign company can both help you hire internationally, but the experience is very different. One gives you an existing employment structure; the other means building and maintaining your own.

EOR: faster, simpler setup

An EOR already has the local employment structure in place. That means a business can hire an overseas employee without first incorporating a company in that country.

  • Speed: Faster because the local employment infrastructure already exists.
  • Cost: You pay the EOR for its service rather than absorbing the full cost of establishing and running an entity.
  • Risk: The EOR handles much of the local employment administration and compliance.
  • Control: Less control over the legal employment structure because the EOR is the formal employer.

Your own entity: more control, more responsibility

Creating a foreign entity gives the business its own legal presence in the country. It can make sense when international operations are expected to become a permanent part of the business.

  • Speed: Slower because incorporation, registration and local setup come first.
  • Cost: Higher upfront and ongoing costs for accounting, payroll, tax and administration.
  • Risk: More responsibility sits directly with the business.
  • Control: Greater control over employees, operations and the local business structure.

For a single hire or an early international expansion, an EOR can remove a lot of unnecessary setup. A company planning a substantial, long-term operation may eventually find its own entity more practical.

How much does an EOR cost?

The price of using an Employer of Record can vary widely, so the monthly fee is only one part of the calculation. Most providers use one of two pricing models: a fixed fee for each employee or a percentage of their salary.

A flat monthly fee

Some EOR providers charge a set amount for each employee they employ on your behalf. A typical range is around $200 to $1,000 per employee each month. This can make budgeting easier because the EOR fee stays relatively predictable, regardless of the employee’s salary.

A percentage of salary

Other providers calculate their fee based on the employee’s gross salary. Rates commonly fall between 3% and 10%. For example, an employee earning $5,000 a month could generate an EOR service fee of $150 to $500, depending on the provider's rate.

What affects the final price?

The headline fee does not always tell the whole story. Location, employee benefits, payroll requirements and the complexity of the employment arrangement can all affect what a business ultimately pays.

Before choosing an EOR, check whether the quoted price includes payroll, benefits administration, compliance support and other required services. A lower monthly fee is not necessarily cheaper once additional charges are included.

When does an EOR make sense for your business?

An EOR is not automatically the best answer every time a business wants to hire abroad. The right option depends on how long the person will work with the company, where they are based and how much of a local presence the business wants to build.

An EOR can be a good fit when:

  • You want to hire an employee in a country where your business does not have a legal entity.
  • You need someone to start quickly without waiting for your company to be incorporated locally.
  • You are entering a new market and want to test it before committing to a permanent local operation.
  • You want the employee to receive local payroll, benefits and employment protections while the EOR handles the formal employment requirements.

A contractor may make more sense when:

The person is genuinely self-employed, works independently and is responsible for their own taxes and business obligations. Contractors can offer more flexibility, but incorrectly classifying an employee as a contractor can create legal and tax problems.

A PEO may be worth considering when:

The business already has a legal entity in the country but wants help managing HR, payroll and employee administration. Unlike an EOR, a PEO arrangement does not normally become the legal employer.

How do you pay an international team with an EOR?

Hiring through an EOR solves the employment side of working across borders, but the business still needs a reliable way to fund payroll. The EOR usually calculates salaries, taxes and other deductions in the employee’s local currency, then pays the employee according to local requirements.

That means the business first sends the money needed for payroll to the EOR. If the company operates in the US but its employees are spread across Africa, Europe or Asia, this can involve moving money across currencies and banking systems before salaries reach employees.

Grey can help with the payment side by providing supported currency accounts for sending international funds. A business can use these accounts to organise money before sending it where it is needed, rather than relying entirely on traditional international transfers

Frequently asked questions

What does EOR stand for?

EOR stands for Employer of Record. It is a company that legally employs a worker for another business in a particular country. The EOR handles employment responsibilities such as payroll, taxes, benefits and local compliance, while the client business manages the employee’s actual work and responsibilities.

What is the difference between an EOR and a PEO?

The main difference is who legally employs the worker. With an EOR, the EOR becomes the legal employer while your business manages the employee’s day-to-day work. A PEO usually works alongside your existing company, meaning your business remains the legal employer. PEOs, therefore, generally require a local entity.

How much does an EOR cost?

EOR pricing varies by provider and country. Many charge a fixed monthly amount per employee, while others take a percentage of the employee’s gross salary. A typical range is around $200 to $1,000 per employee monthly, or roughly 3% to 10% of salary, before additional costs.

Is an EOR the same as a staffing agency?

No. A staffing agency typically helps find and place workers, while an EOR provides the legal employment structure after someone has been hired. The distinction matters because an EOR does not usually recruit the employee or decide what work they perform; it manages formal employment obligations.

When should I use an EOR?

An EOR can make sense when a business wants to hire an employee abroad but does not have a legal entity in that country. It is particularly useful for testing a new market, making a first international hire or building a small overseas team without setting up a company.

How do I pay international contractors?

Contractors are usually paid directly rather than through an EOR, but international transfers can involve currency conversion, bank fees and delays. Grey can help eligible businesses manage supported currencies and send money to supported destinations, making it easier to pay overseas contractors from a central account.

Google Ads billing, invoices and payments for Nigerian businesses (2026)

•

•

2 min read

If you are already running Google Ads from Nigeria, you have solved the payment problem. Your virtual dollar card or domiciliary account card works, your campaigns are running, and money is leaving the account. Now the questions change: Where do I find my invoices? Why does the charge on my card not match my daily budget? How do I record USD ad spend in my naira-denominated books? How do I reconcile billing across four client accounts?

This guide is for Nigerian businesses, agencies, and freelancers who are past the setup phase and need to manage Google Ads billing at scale.

If you are still setting up your first Google Ads payment method, start with How to Pay for Google Ads in Nigeria and come back here once your campaigns are running.

How Google Ads billing works for Nigerian accounts

Every Google Ads account created from Nigeria is billed in USD. There is no naira billing option. This has three consequences for how you manage billing: all invoices and receipts are in dollars, all threshold charges hit your card in dollars, and any reconciliation with naira-denominated accounting requires a conversion step.

The three billing models

Google Ads offers three billing models. The one your account uses depends on when you set it up and your eligibility:

Billing Model How It Works Who Gets It Nigerian Context
Automatic payments Google charges your card after ads run, either at your billing threshold or at the end of the month. Default for most advertisers. This is what most Nigerian advertisers use. Your Grey or dom account card is charged automatically.
Manual payments You pre-fund your account. Costs are deducted from the balance as ads run. Campaigns pause when the balance hits zero. Available in some countries. Not always available for Nigerian accounts. If available to you, this gives more control over spending. Check your account settings to see if manual is an option.
Monthly invoicing Google issues a monthly invoice. You pay on credit terms (net 30 or net 60). Businesses spending $5,000+/month with a clean payment history. Requires a formal application through Google's sales team. Rare but available for Nigerian agencies at scale. Requires a minimum ~$5,000/month spend, clean billing history, and application through a Google sales representative. The benefit: net 30 or net 60 payment terms instead of prepayment.

‍

Most Nigerian advertisers are on automatic payments. The rest of this guide assumes that model unless stated otherwise.

Billing threshold: why your charges do not match your daily budget

This is the single most confusing aspect of Google Ads billing for Nigerian businesses, and the one most likely to cause a mismatch between what you expect to pay and what actually hits your card.

Google does not charge your card daily. It charges when your accumulated ad spend reaches a billing threshold. New accounts start at $50. As your payment history builds, Google raises it:

Threshold Typical Trigger
$50 Account creation (default)
$200 After several successful $50 charges
$350 Continued clean payment history
$500 Established accounts with no billing issues

‍

On top of threshold charges, Google also charges any remaining balance at the end of each calendar month, even if it has not reached the threshold. So you may see two types of charges: mid-month threshold charges and an end-of-month sweep.

A $20/day advertiser with a $200 threshold sees a $200 charge roughly every 10 days, not a $20 charge every day. If your accountant is looking for daily charges that match your daily budget, they will not find them. The charges match your threshold, not your daily spend.

Daily budget overshoot: why Google sometimes charges more than your daily budget

Google can spend up to 2x your daily budget on any single day to compensate for low-traffic days. If you set a $20/day budget, Google may spend $40 on a high-opportunity day and then spend less on subsequent days to balance it out. Over a calendar month, your total spend will not exceed your daily budget multiplied by 30.4 (the average number of days in a month). So a $20/day budget caps at $608 per month.

This is not a billing error. It is how Google optimises delivery. But it means your Billing Activity may show individual threshold charges that seem higher than expected. Check the monthly total, not the individual daily or threshold charges, when reconciling.

Google Ads billing documents: what exists and where to find each one

Google Ads generates several types of billing documents. Nigerian accounts on automatic payments have access to most of them, but not all.

Document What It Contains Where to Find It Nigerian Accounts
Invoice Official billing record for a period. Includes charges, taxes, and totals. Billing > Documents Available if your account generates invoices (not all automatic payment accounts do). Check Documents page.
Statement Summary of billing activity over a period. Not a tax document. Billing > Documents Usually available. Useful for accountant handoff.
Payment receipt Proof that a specific payment was processed. Billing > Summary > expand month > Payments section Available for every card charge. Click the payment link to view/print.
Billing activity Detailed transaction log: charges, payments, credits, refunds, adjustments. Billing > Billing Activity Available. Shows last 3 months by default. Exportable as CSV or PDF.
Tax document VAT or withholding tax records where applicable. Billing > Documents Available. Google issues 7.5% VAT invoices for all Nigerian accounts. Download from Tax and statutory documents tab.

‍

How to download invoices

  1. Sign in to Google Ads.
  2. Click the tools icon in the top navigation.
  3. Under Billing, select Documents.
  4. Use the filters to select the document type (invoice, statement, etc.) and date range.
  5. Click on an individual document to view it, or select multiple and click Download selected for bulk export.
  6. Documents download as PDF.

If you do not see an invoice for a specific month, check whether your account generates invoices at all. Accounts on automatic payments may only produce payment receipts and billing activity, not formal invoices. In that case, the Billing Activity export serves as your primary accounting record.

How to download payment receipts

  1. Go to Billing > Summary.
  2. Expand the card for the month you need.
  3. Find the Payments section.
  4. Click the link next to the specific payment to view the receipt.
  5. Print or save as PDF from your browser.

Each receipt corresponds to one threshold charge or one end-of-month sweep. If your account was charged three times in a month (two threshold charges plus one month-end sweep), you will have three receipts.

How to export billing activity for your accountant

  1. Go to Billing > Billing Activity.
  2. Set the date range (default is last 3 months, but you can go back further).
  3. Click the download icon.
  4. Choose CSV for spreadsheet import or PDF for direct filing.

The CSV export is what your accountant or finance team will use for reconciliation. It includes every line item: ad charges, payments, credits, refunds, adjustments, and taxes. Export monthly and store alongside your Grey transaction history for cross-referencing.

Reconciling Google Ads spend with your business accounting

This is where most Nigerian businesses struggle: the billing is in USD, and the books are in naira. The reconciliation has three layers: matching Google's charges to your card transactions, converting USD charges to naira for your records, and allocating costs to the correct expense category.

Layer 1: Match Google charges to your card transactions

Every threshold charge Google makes appears as a transaction in your Grey app (or your bank statement if using a domiciliary account). Export your Google Ads Billing Activity for the month and your Grey transaction history for the same period. Match each Google charge to a Grey transaction by date and amount.

They should match exactly in USD. If they do not, look for:

Authorization holds that is settled at a different amount (rare but possible).

Credits or adjustments applied by Google between the charge and your export date.

Charges from non-Google merchants if you use the same Grey card for other platforms (Facebook, TikTok).

Layer 2: Convert USD charges to naira for your books

Nigerian businesses filing accounts in naira need to convert USD ad spend to naira. The question is: which exchange rate do you use?

There are two defensible approaches:

Option A: Use the Grey conversion rate on the day you funded. When you converted naira to USD in the Grey app, you received a specific rate. That rate represents your actual cost basis. If you deposited N141,500 and received $100, your cost per dollar was N1,415. Record your Google Ads charges at N1,415 per dollar for that funding batch.

Option B: Use the CBN rate on the date of each Google charge. Some accountants prefer to use the official CBN rate on the transaction date. This may differ from the rate you actually paid through Grey, but it aligns with the method prescribed for foreign currency transactions under Nigerian tax rules.

Whichever method you choose, apply it consistently throughout the financial year. Switching between methods creates reconciliation problems. Consult your accountant for the approach that fits your specific tax situation.

Record the Grey 1% conversion fee as a separate line item under financial charges or bank fees, not as part of your advertising expense. The $4+$1 card creation fee (if applicable) is also a financial charge, not an ad cost.

Layer 3: Allocate to the correct expense category

Google Ads charges should be recorded under advertising and marketing expenses in your chart of accounts. Do not combine them with other card transactions. If you use the same Grey card for ad spend and non-ad purchases (subscriptions, SaaS tools, domain renewals), separate them in your bookkeeping.

For agencies managing client accounts: each client's ad spend should be tracked as a separate cost center. If you use per-account billing in Google Ads, each charge already maps to one client. If you use consolidated billing, cross-reference the Google Ads account-level spend reports with the consolidated charges to allocate correctly.

Setting a backup payment method

Google allows you to add a backup card alongside your primary card. If your primary Grey card fails (insufficient balance, card expired, Grey server downtime), Google charges the backup instead of pausing your campaigns.

To add a backup: go to Payment Methods, add a second card (a domiciliary account card, a second Grey card, or any other USD card), and select "Set as backup." Only debit or credit cards can serve as backup methods.

Managing billing across multiple Google Ads accounts

Agencies and businesses running multiple Google Ads accounts (whether for different brands, markets, or clients) need to decide how billing is structured. The decision affects invoicing, reconciliation, and how easily you can track spend per account.

Per-account billing (recommended for most agencies)

Each Google Ads account has its own payment method. You add your Grey card to each account individually. Charges appear separately per account in your Grey transaction history. When Google charges Client A's account $200 and Client B's account $150, those are two distinct transactions in your Grey app.

Its advantages? Clean reconciliation, isolated billing (one account's issues do not affect others), a clear audit trail per client. One Grey card can be added to multiple Google Ads accounts. The card number is the same across all of them.

Consolidated billing through a Manager account (MCC)

Google's Manager account (MCC) can pay for all linked client accounts from one payment method. One Grey card, one set of charges. Google issues a consolidated invoice or billing summary covering all accounts.

The downside: reconciliation is harder. A single $800 charge from Google might cover four client accounts. You need to cross-reference Google Ads account-level reports to allocate the $800 across clients. For agencies with 10+ clients, this becomes time-consuming.

For most Nigerian agencies, per-account billing is the cleaner setup. Use consolidated billing only if you have a specific operational reason (for example, a single corporate card policy that requires all charges on one payment method).

Billing documents in Manager accounts

If the Manager account is the paying account, invoices and billing documents are generated at the Manager level, not the individual client account level. Users who only have access to a client account will not see billing documents. Grant billing access at the Manager level to anyone who needs to view invoices or export billing data.

Tax considerations for Nigerian businesses running Google Ads

This section provides general guidance. Consult a qualified Nigerian tax adviser for your specific situation.

VAT on Google Ads in Nigeria

Google charges 7.5% VAT on all Google Ads costs for accounts with a Nigerian billing address. This has been in effect since April 1, 2022, under the Finance Act 2021, which requires non-resident digital service providers to collect and remit VAT in Nigeria. The 7.5% is added to your ad spend, meaning a $100 campaign actually costs $107.50 before your card is charged.

Google issues VAT invoices to Nigerian accounts, available for download under Billing > Documents > Tax and statutory documents. These invoices show the 7.5% VAT separately from your ad spend. Your accountant will need these for VAT reporting and any input tax credit claims.

Withholding tax

Nigerian businesses making payments to non-resident companies may have withholding tax obligations. Google Ads payments are made to a Google entity outside Nigeria (Google Ireland or Google Asia Pacific, depending on your account). Since Google already collects and remits 7.5% VAT, the withholding tax treatment may differ from other international payments. Consult your tax adviser on whether additional withholding applies.

This is an area where professional advice is essential. The amounts involved (particularly for agencies spending hundreds of thousands of naira monthly on ads) can create significant tax exposure if handled incorrectly.

Deductibility of Google Ads spend

Google Ads costs are generally deductible as a business expense for companies' tax purposes under Nigerian tax law, provided they are incurred wholly, exclusively, and necessarily for the purpose of the business. Keep your Google Ads billing exports, Grey transaction history, and reconciliation records as supporting documentation.

Month-end billing workflow for Nigerian businesses

A structured month-end process prevents billing surprises and keeps your accountant productive. Here is a practical workflow:

Step Action Where
1
Export Google Ads Billing Activity for the month as CSV Google Ads > Billing > Billing Activity > Download
2
Download any available invoices or statements Google Ads > Billing > Documents
3
Export Grey transaction history for the same period Grey app > Transaction History
4 Match each Google Ads charge to a Grey transaction by date and USD amount Spreadsheet
5 Convert USD charges to naira using your chosen rate method (Grey rate or CBN rate) Spreadsheet
6 Record Grey conversion fee (1%) as a separate financial charge Accounting software
7 Allocate ad spend to correct expense category (per client if agency) Accounting software
8 Store all exports centrally (Google CSV + Grey export + reconciliation) Cloud storage / accounting software

‍

Run this workflow in the first three business days of each month. If you manage multiple accounts, repeat steps 1 and 2 for each account (or export from the Manager account if using consolidated billing).

Managing ad spend with a Grey multi-currency account

If your business runs advertising across multiple platforms (Google, Facebook, TikTok) and manages spend in USD, a Grey multi-currency account can centralize your advertising finances.

How it fits the workflow described above:

Single USD balance for all ad platforms. Fund once, pay Google Ads, Facebook Ads, TikTok Ads, and any Visa-accepting platform from one account. One transaction history covers all your ad spend.

Conversion fee visibility. Grey's 1% conversion fee (capped at the naira equivalent of $6) is shown before you confirm every conversion. No hidden spreads. Your accountant can record the exact fee for each funding event.

Transaction history export. Grey's transaction history shows every charge, organized by date and merchant. Export it alongside your Google Ads Billing Activity for a clean month-end reconciliation.

Separate ad spend from operations. If your business uses Grey for both ad payments and regular expenses (receiving client payments, paying suppliers), the transaction history distinguishes them by merchant name. Google charges appear as GOOGLE*ADS or similar. This simplifies allocation in your accounting software.

For agencies managing multiple clients, Grey's transaction history shows individual charges per Google Ads account (if using per-account billing), making per-client cost allocation straightforward.

Troubleshooting billing issues

Invoice is missing for a specific month

Not all accounts on automatic payments generate formal invoices. Check whether your account produces invoices by going to Billing > Documents. If the Documents page is empty, your account only generates payment receipts and billing activity. Use the Billing Activity CSV export as your primary accounting record. The data is the same; the format is different.

Charge amount does not match any single campaign's spend

This is expected. Threshold charges cover your total account spend across all campaigns, not individual campaigns. If you run three campaigns and your total spend reaches $200 (your threshold), Google charges $200 in a single transaction. To see per-campaign costs, use Google Ads reporting (not billing). Campaign-level costs appear in the Campaigns tab, not in Billing Activity.

Charged at month end for a small amount

Google sweeps any remaining balance at the end of the month. If you spent $130 during the month and your threshold is $200, Google charges $130 on the first of the next month (or the last day of the current month). This is normal behaviour, not an error.

Double charge or unexpected second charge in the same week

If your campaigns are spending faster than usual (a new campaign launch, a budget increase), you may hit your threshold more than once in a short period. Check Billing Activity to confirm each charge corresponds to a threshold event. If you see a genuine duplicate (two charges for the exact same amount at the same time), contact Google Ads support.

Billing Activity shows a credit or adjustment you did not expect

Google applies credits for various reasons: promotional credits, overcharge corrections, invalid click refunds, and service credits. These reduce your next billing charge. They appear as negative amounts in Billing Activity. Record them as credits against advertising expense in your books, not as income.

How promotional credits interact with VAT

Google charges 7.5% VAT on total ad spend, including the portion covered by promotional credits. If you receive a N10,000 promotional credit and spend N20,000 total (N10,000 from your card + N10,000 from the credit), Google charges 7.5% VAT on the full N20,000 worth of ad spend. The VAT on the credit-covered portion appears as a line item in your billing, even though your card was only charged for half the spend.

Your accountant needs to know this because the VAT amount on the invoice will be higher than what seems proportional to your card charge for that period. The credit reduces your ad cost but not the VAT obligation. Record the promotional credit as a reduction in advertising expense, and the full VAT amount as reported on the invoice.

Cannot see billing documents in a client account

If you are using a Manager account (MCC) as the paying account, billing documents are generated at the Manager level. Users with access only to the client account will not see them. Grant billing permissions at the Manager level, or export billing data from the Manager account and share it.

Refund timeline when closing an account or overpaying

If you close your Google Ads account with a remaining balance, or if Google overcharges due to a billing error, Google refunds to the card on file. For active account overpayments, refunds typically process within 1 to 4 weeks. For account closure refunds, the timeline is longer: 4 to 12 weeks is normal. Google processes the refund after all final charges, adjustments, and credits are settled.

Plan for this delay in your cash flow. If you are closing a Google Ads account with a significant balance, do not count on those funds being available in your Grey account for at least 4 weeks. For agencies closing client accounts, communicate the timeline to the client upfront.

Frequently asked questions

Can I change my Google Ads billing currency from USD to naira?

No. Google Ads does not support naira billing for Nigerian accounts. Your billing currency is set when the account is created and cannot be changed afterwards.

Why is my Google Ads charge different from my daily budget?

Google charges at billing thresholds, not daily. A $20/day advertiser with a $200 threshold sees one $200 charge every 10 days, not daily $20 charges. Google also charges any remaining balance at the end of the month.

Can I get Google Ads invoices emailed to me?

Monthly invoicing customers may receive invoices by email. Advertisers on automatic payments need to download billing documents from the Billing section in Google Ads. Google does not email receipts or billing summaries automatically for most accounts.

How do I record Google Ads spend in my naira accounts?

Convert each USD charge to naira using either the Grey conversion rate on the day you funded, or the CBN rate on the date of each Google charge. Apply one method consistently throughout the year. Record the Grey 1% conversion fee separately as a financial charge.

Is Google Ads spend tax-deductible for Nigerian businesses?

Generally yes, as a business advertising expense, provided the spend is incurred for business purposes and properly documented. Keep your Google Ads billing exports, Grey transaction records, and reconciliation files. Consult your tax adviser for specifics.

Does Google charge VAT on Google Ads for Nigerian businesses?

Yes. Google charges 7.5% VAT on all Google Ads costs for Nigerian accounts, effective since April 2022. This appears on your billing as a separate line item. Google also issues VAT invoices available under Billing > Documents > Tax and statutory documents.

Can I download all my Google Ads invoices at once?

Yes. Go to Billing > Documents, select a date range, check all documents, and click Download selected. They download as PDFs.

What should I give my accountant each month?

Four files: the Google Ads Billing Activity export (CSV), any invoices or statements from the Documents page (PDF), the VAT invoice from Tax and statutory documents (PDF), and your Grey transaction history for the same period. The VAT invoice is critical for input tax credit claims.

Related reading

How to Pay for Google Ads in Nigeria (2026) covers setting up your first payment method, including virtual dollar cards and domiciliary accounts.

How to Pay for Facebook Ads in Nigeria (2026) covers both naira and USD payment paths for Meta Ads.

Best Virtual Dollar Cards in Nigeria (2026) compares virtual card options for international business payments.

Alternatives to Domiciliary Accounts in Nigeria compares Grey to traditional bank-issued dollar accounts for businesses.

Arrow (up)

Back to top

