
<script type="application/ld+json" data-schema-version="grey-blog-v4"> [{"@context":"https://schema.org","@type":"BlogPosting","@id":"https://grey.co/blog/safer-alternatives-to-payoneer-and-paypal-for-large-payouts#article","headline":"Safer alternatives to Payoneer and PayPal for large payouts","description":"Are you stuck with PayPal or Payoneer for large payouts? Here is a list of safer alternatives to receive large payments.","inLanguage":"en","url":"https://grey.co/blog/safer-alternatives-to-payoneer-and-paypal-for-large-payouts","mainEntityOfPage":{"@id":"https://grey.co/blog/safer-alternatives-to-payoneer-and-paypal-for-large-payouts#webpage"},"datePublished":"2026-02-23T18:01:59.052Z","dateModified":"2026-06-15T14:24:07.601Z","author":{"@type":"Person","@id":"https://grey.co/authors/tunde-aladeloba#person","name":"Tunde Aladeloba","url":"https://grey.co/authors/tunde-aladeloba","jobTitle":"Content Writer","sameAs":["https://ng.linkedin.com/in/aladeloba-babatunde-b1114b100"]},"publisher":{"@type":"Organization","@id":"https://grey.co/#organization","name":"Grey","url":"https://grey.co","logo":{"@type":"ImageObject","url":"https://cdn.prod.website-files.com/6360022338a81bd6fdbb1145/6564ae1077a67e39d3c491a6_Grey%20Logo%20Lockup%20Black.svg"}},"image":{"@type":"ImageObject","@id":"https://grey.co/blog/safer-alternatives-to-payoneer-and-paypal-for-large-payouts#primaryimage","url":"https://cdn.prod.website-files.com/636a85d290ee58e70c17e1c0/6a300b0734e5f2cbd3051855_6a300b06a550a9d71e65559e_safer-alternatives-to-payoneer-and-paypal-for-large-payouts__header-image.webp","contentUrl":"https://cdn.prod.website-files.com/636a85d290ee58e70c17e1c0/6a300b0734e5f2cbd3051855_6a300b06a550a9d71e65559e_safer-alternatives-to-payoneer-and-paypal-for-large-payouts__header-image.webp","width":1200,"height":675}},{"@context":"https://schema.org","@type":"WebPage","@id":"https://grey.co/blog/safer-alternatives-to-payoneer-and-paypal-for-large-payouts#webpage","url":"https://grey.co/blog/safer-alternatives-to-payoneer-and-paypal-for-large-payouts","name":"Safer alternatives to Payoneer and PayPal for large payouts","description":"Are you stuck with PayPal or Payoneer for large payouts? Here is a list of safer alternatives to receive large payments.","inLanguage":"en","primaryImageOfPage":{"@id":"https://grey.co/blog/safer-alternatives-to-payoneer-and-paypal-for-large-payouts#primaryimage"},"breadcrumb":{"@id":"https://grey.co/blog/safer-alternatives-to-payoneer-and-paypal-for-large-payouts#breadcrumb"}},{"@context":"https://schema.org","@type":"BreadcrumbList","@id":"https://grey.co/blog/safer-alternatives-to-payoneer-and-paypal-for-large-payouts#breadcrumb","itemListElement":[{"@type":"ListItem","position":1,"name":"Home","item":"https://grey.co/"},{"@type":"ListItem","position":2,"name":"Blog","item":"https://grey.co/blog"},{"@type":"ListItem","position":3,"name":"Safer alternatives to Payoneer and PayPal for large payouts","item":"https://grey.co/blog/safer-alternatives-to-payoneer-and-paypal-for-large-payouts"}]}] </script>

Safer alternatives to Payoneer and PayPal for large payouts

Tunde Aladeloba

TABLE OF CONTENT

SHARE THIS POST

In my early days as a writer, PayPal and Payoneer were the go-to payout platforms for global workers and businesses. Clients would usually ask for one or the other before any contract was signed. They were simple, familiar, and widely accepted. But the cross-border payments space has evolved, and so have the stakes, especially when payouts become larger, like the kind that comes with landing a major deal or stepping into a VP or Director role at a global organisation.

With Payoneer’s recent price increases and growing frustration around PayPal, many global professionals and businesses are rethinking their options. When the payouts are substantial, the margin for error shrinks. This blog explores safer alternatives designed to handle large international payments

Also read: Paypal and Payoneer alternatives for freelancers in Egypt

Why having safer options matters for large payouts

As payouts grow, your usual payment platform may stop feeling reliable. What worked for smaller transfers can become expensive, slow, or restrictive when larger sums are involved.

The fees hit differently

When you’re receiving a few hundred dollars, fees feel manageable. But once payouts run into the tens of thousands, those same percentage cuts become painful. You start seeing how much disappears in processing and withdrawal charges. At scale, protecting every percentage point becomes a serious financial decision.

Reviews and compliance

Large transactions often trigger compliance checks. Suddenly, your funds are under review, and you’re asked for extra documents. That delay might last days or weeks. When you’re expecting a major payout, waiting without clarity can disrupt business plans, investments, or personal financial commitments.

Withdrawal and conversion limits

Some platforms limit how much you can withdraw daily or monthly. Others force currency conversion at rates that don’t favour you. With large payouts, these limits slow you down and cost more. What should be a straightforward transfer becomes a drawn-out, expensive process.

Risk of dependence

Relying on a single payment provider is risky when serious money is involved. If there’s a system issue, policy change, or account restriction, access to your funds can disappear overnight. Having alternatives gives you flexibility, bargaining power, and more control over your income

Also read: Receiving international freelance payments: Wise vs Grey vs Payoneer

Safer alternatives to PayPal and Payoneer for big payments

There are plenty of alternatives to PayPal and Payoneer that handle large payouts smoothly, letting you receive money without worrying about slow transfers, or unexpected delays.

Grey

Grey makes receiving large payouts simple and fast. It offers low fees, competitive conversion rates, and instant access to funds. You can even use a virtual card to spend globally, manage subscriptions, or cover business tools. No paperwork, no long waits, everything happens digitally. It’s designed for people who want quick, secure, and smooth access to international payments

Skrill

Skrill is a trusted option for high-value transactions. It supports multiple currencies, allows fast transfers, and lets you hold funds without losing value to hidden fees. You can pay vendors, withdraw to local accounts, or use your account for online purchases. It’s simple, secure, and practical for freelancers, businesses, or anyone handling large payouts.

Revolut

Revolut allows you to hold, convert, and spend multiple currencies easily. Large payments are handled efficiently, giving instant access to your funds. You can track transactions, use a card worldwide, and protect your income from poor exchange rates and unnecessary charges. It’s a smooth way to manage international money.

Hyperwallet

Hyperwallet is built for professionals and businesses needing flexible payout options. It supports global payments, multiple currencies, and direct transfers to local banks or digital wallets. With transparent fees and reliable processing, Hyperwallet ensures your large payments arrive safely and on time, without delays, errors, or unexpected deductions, making international transactions stress-free.

Stripe Connect

Stripe Connect is ideal for marketplaces, platforms, and freelancers handling big payouts. It lets you schedule transfers, manage currency conversions, and automate withdrawals securely. Fees are low and transparent, while payments are fast. For those who need control over how and when money moves, Stripe Connect makes managing high-value international transactions simple and reliable.

Tipalti

Tipalti is perfect for businesses processing large global payments. It automates payouts, handles tax compliance, and supports over 120 currencies. Payments are fast, secure, and accurate, reducing delays and mistakes. For companies or freelancers managing multiple clients, Tipalti makes receiving and sending large sums easy, giving full visibility and control over international payments without unnecessary stress.

Wire transfers

Wire transfers remain a reliable option for large payouts. They allow direct bank-to-bank transfers, are widely accepted, and provide predictable security. While fees vary depending on banks, the process is straightforward, and payments are traceable. For businesses and remote professionals, wire transfers are a solid, dependable way to move large sums internationally without surprises.

Bill.com

Bill.com is designed for businesses managing regular large payments. It simplifies invoicing, automates cross-border transfers, and supports multiple currencies. Funds are sent securely to local banks or digital wallets, reducing manual errors and delays. For companies handling multiple international clients, Bill.com provides transparency, reliability, and efficiency, ensuring that large payouts are processed smoothly without unnecessary hassle.

LDMAG1

Receive large payouts quickly with Grey

As a global worker or business owner receiving international payments, you can’t depend on a single platform, especially when payouts start to increase and you don’t want to lose money or get stuck because of limits. Grey helps by processing large payouts quickly, offering lower fees, competitive exchange rates, and even a virtual card for global shopping. To get started, simply sign up on the website or download the app.

‍

Last updated:

October 18, 2026

Open a free Grey account to get startedJoin 1 million digital nomads
IF YOU ENJOYED THIS, CHECK THESE OUT

How to send money from Europe to India

•

•

2 min read

Here's a question: if you send €500 from Germany to India today, how much will your family actually receive? You'd think there would be one simple answer, but check a few money transfer apps and you'll probably get three different amounts.

And if you're regularly sending money from Europe to India, those differences matter. Every euro spent on transfer fees or conversion charges is money your family could be receiving instead.

So, if you're wondering how to send money from Europe to India, this guide will help you compare transfer methods, understand the fees, find the cheapest way to send money and make sure more rupees reach your recipient.

Quick answer: The easiest way to send money from Europe to India is usually through a transfer app that supports Indian bank deposits or UPI payouts. Create an account, verify your identity, enter the amount, review the exchange rate and fees, then confirm. Transfers may arrive within minutes or take several working days, depending on the provider.

What is the best way to send money from Europe to India?

For most people, a money transfer app offering Indian bank deposits or UPI payouts is a convenient option. You can usually see how many Indian rupees (INR) the recipient will receive before confirming.

Traditional bank wires are another option, particularly for larger payments, but may involve additional charges and longer processing times.

Transfer method How it works What to consider
Money transfer app Pays into an Indian bank account Usually shows fees and INR amount upfront
UPI payout Sends to an eligible UPI ID Fast and convenient where supported
International bank wire Transfers between bank accounts May involve intermediary fees and longer processing

‍

Grey, for example, supports INR payouts to Indian bank accounts and UPI IDs. You can manage supported foreign currencies in your account and review the exchange rate, fees and final amount before sending. Available options depend on your location and account eligibility.

You can also compare the best apps to send money internationally or check how to send money from the UK to India if you're based in Britain.

Also read: What is the best app to send money to India from the US?

How to send money from Europe to India step by step

You can send money from Europe to India in six steps using a provider that supports Indian bank transfers or UPI payouts.

1. Choose a transfer provider

Check which services operate in your country and support payments to India. Fees and funding methods can differ between Germany, France, Ireland and other European countries.

If you're based in Germany, for example, check the available options to send money from Germany to India.

2. Create an account and verify your identity

Sign up and complete the required identity checks. You'll usually need personal details and a valid identity document. Larger transfers may require additional verification.

3. Enter the amount

Choose your sending currency, usually EUR, and enter how much you want to transfer. Check the estimated INR amount alongside the exchange rate and fees.

4. Add the recipient's details

For an Indian bank transfer, you'll generally need the recipient's name, account number and IFSC code. If UPI is supported, you may be able to use an eligible UPI ID instead.

Grey supports both payout methods for eligible INR transfers. Your recipient doesn't need a Grey account, but their bank details or UPI ID must be correct.

5. Review and confirm

Check the exchange rate, fees, recipient amount and estimated delivery time.

With Grey, you can review these details in the app before authorising the transfer through the required security verification.

6. Track your payment

Keep the transfer confirmation and follow its status in the app. Some transfers arrive within minutes, while others take longer because of bank processing or verification checks.

If you regularly earn in euros, you can also check whether you're eligible to open a euro account with Grey and receive supported EUR payments through SEPA.

What it costs: fees and EUR to INR rates

The cost of sending money to India comes down to three things: the transfer fee, the exchange rate and any additional charges.

A service advertising a €0 transfer fee isn't necessarily cheaper than one charging €4. The exchange rate can change how much your recipient actually receives.

Understanding the exchange rate margin

Some providers offer a rate below the reference EUR to INR exchange rate. The difference is called the exchange rate margin, and it affects the amount delivered even when the transfer itself is advertised as free.

Example: sending €500 to India

Imagine the reference rate is €1 = ₹100. This is an illustrative example, not a live exchange rate.

Provider A Provider B
Amount sent €500 €500
Transfer fee €0 €4
Exchange rate ₹98/€1 ₹100/€1
Amount converted €500 €496
Recipient receives ₹49,000 ₹49,600

‍

Despite charging €4, Provider B delivers ₹600 more.

That's why the cheapest way to send money from Europe to India is to compare the final INR amount rather than the advertised fee alone.

What fees does Grey charge for transfers to India?

Grey's published USD-to-INR pricing includes a 1% conversion fee without a percentage-fee cap. Its withdrawal-fee guidance also lists a $1.50 fee for eligible INR bank and UPI payouts.

For example, converting $500 from USD to INR would cost $5 in conversion fees. Including the listed $1.50 payout charge, the combined fees would be $6.50, excluding funding costs and any exchange rate difference.

If you receive euros into Grey through SEPA or SEPA Instant, the published deposit fee is 0.8%, with a €2 minimum and €10 maximum.

These charges apply to different transactions. The USD-to-INR fee shouldn't be treated as the price of a direct EUR-to-INR transfer, so check the available route and final quote in your account.

Grey's published US-to-India information also lists limits of ₹450,000 per bank transfer and ₹100,000 per UPI transfer. Limits for European corridors may differ.

If you're based in the Netherlands, you can check how to send money from the Netherlands to India and compare the available quote.

Sending money home? Send money from Europe to India with Grey and check the available exchange rate, fees and payout options before confirming.

Can you send money from Europe to India without charges?

You may find providers offering fee-free transfers, but that doesn't always mean there are no costs.

Some offer introductory promotions, while others include their charges in the exchange rate. A provider offering ₹99 per euro will deliver less than one offering ₹100, even if neither charges a transfer fee.

If you're looking for how to send money from Europe to India without charges, compare the total amount paid with the rupees delivered.

With Grey, for example, check the applicable conversion and payout fees. If you first need to fund your account, include any deposit charges too.

Receiving money in India: NRE, NRO and UPI

Money sent from Europe can arrive in an eligible Indian bank account or, where supported, through a UPI payout.

For non-resident Indians (NRIs), the type of receiving account can also matter.

NRE accounts

A Non-Resident External (NRE) account allows eligible NRIs to hold funds received from abroad in Indian rupees.

Permitted overseas remittances can generally be deposited into an NRE account, and the funds are repatriable under applicable rules. Interest is generally exempt from Indian income tax while the account holder meets the relevant eligibility conditions.

NRO accounts

A Non-Resident Ordinary (NRO) account is commonly used to manage income arising in India, including rent, dividends and other eligible payments. It can also receive permitted overseas remittances.

Interest earned on NRO accounts is generally taxable in India. Repatriation is subject to applicable rules, documentation and tax compliance. Certain eligible remittances fall under a USD 1 million annual limit per Indian financial year.

The Reserve Bank of India provides further guidance on NRE and NRO accounts.

What about UPI?

UPI allows payments to eligible Indian bank accounts using a linked UPI ID. Some international transfer services, including Grey, support UPI payouts for eligible INR transfers.

This means you may be able to send money without entering the recipient's full bank details. However, the receiving account must be eligible, and provider-specific limits apply.

Grey's published US-to-India corridor information lists a ₹100,000 UPI transfer limit, but you should check the limit applicable to your own sending country and account.

Is money received from abroad taxable in India?

Money received from overseas isn't automatically taxable. The treatment depends on the purpose of the payment, the relationship between sender and recipient, and the recipient's tax circumstances.

Qualifying gifts from specified relatives are generally exempt, while income from work, business or investments may be taxable. Other gifts may also be taxable depending on the amount and circumstances.

For larger transfers or complex situations, consider speaking with a qualified tax professional.

Frequently asked questions about sending money from Europe to India

What is the cheapest way to send money from Europe to India?

The cheapest option is the provider that delivers the highest INR amount for the same total cost. Compare transfer fees, exchange rates and additional charges. A zero-fee transfer may still cost more through the exchange rate.

How long does it take to send money from Europe to India?

Transfers can arrive within minutes or take several working days, depending on the provider, payout method and bank processing. Grey supports eligible INR transfers that may arrive within minutes, although verification and banking delays can affect delivery.

Can I send money to a UPI ID from Europe?

Yes, some international transfer services support UPI payouts to eligible Indian bank accounts. Grey also supports UPI payouts for eligible INR transfers. Check availability for your sending country before confirming.

Should I use an NRE or NRO account?

An NRE account is generally suited to eligible NRIs holding overseas earnings in India. An NRO account is commonly used for income arising in India. Both can receive permitted overseas remittances, but their tax and repatriation rules differ.

Is there a limit on sending money to India?

Limits depend on the provider, sending country, payout method and verification requirements. Grey's published US-to-India limits are ₹450,000 for bank transfers and ₹100,000 for UPI payouts. European corridor limits may differ, so check your account before sending.

Is money received in India from abroad taxed?

Not necessarily. Qualifying gifts from specified relatives are generally exempt from Indian income tax, while payments for services, business activities or investments may be taxable. The recipient's circumstances determine the treatment.
How to use Google Pay in Nigeria

•

•

2 min read

Google Pay launched in Nigeria on 28 October 2026, through the Google Wallet app on Android. Google’s current list covers eligible cards from five banks: FirstBank, GTBank, Providus Bank, UBA, and Zenith Bank, mostly Mastercard. Verve, AfriGO, and cards from banks like OPay, Moniepoint, Kuda, and PalmPay are not on it, and contactless terminals remain limited.

Whether tapping works depends on three things: your card, your phone, and the terminal. This guide takes them in that order, then covers what to do if your card is not supported.

Does Google Pay work in Nigeria?

Yes. Google launched Google Wallet, including Google Pay, in Nigeria on 28 October 2026 for Android and Wear OS users. Google says it lets you pay by tapping in stores, in apps, and online, using a card stored on your phone.

Both names cause confusion, so here is the difference. Google Wallet is the app that holds all your payment cards and can also store loyalty cards, event tickets, and boarding passes. Google Pay is the payment function inside it, the part that passes your card to a terminal or a checkout page. You install one app, add a card, and pay with Google Pay.

Unfortunately, Google Pay won’t work for everyone. Three things have to line up:

  • Your card: It has to be on Google’s list, and your bank decides whether a given card works.
  • Your phone: It has to run Android and have a screen lock. Tapping in stores also needs NFC.
  • The place you are paying. An online shop has to offer Google Pay, and a physical shop needs a contactless-enabled terminal.

The next section covers the first of these: the banks and cards.

Nigerian banks and cards that work with Google Pay

The table below follows Google’s Nigeria payment methods page, as at the time of publishing.

Bank Supported cards
First Bank of Nigeria Mastercard debit
Guaranty Trust Bank (GTBank) Mastercard debit and prepaid
Providus Bank Mastercard credit, debit, and prepaid
United Bank for Africa (UBA) Mastercard credit, debit, and prepaid; Visa prepaid
Zenith Bank Mastercard credit, debit, and prepaid

An account at a listed bank is not enough. Google has stressed that your bank decides whether its cards work with Google Wallet. The card network (Mastercard or Visa) and the card type (debit, credit, or prepaid) both count. A bank that issues Mastercard and Verve cards may support one but not the other, so find your bank’s row, then check the network and card type you hold. Both are usually shown on the card itself or in your banking app.

What is not supported:

  • Verve cards. Google currently only supports Mastercard and Visa.
  • AfriGO cards.
  • Cards from OPay, Moniepoint, Kuda, and PalmPay. None of these providers appears on the list.
  • Visa debit cards from the listed banks. Visa appears only as a prepaid card at UBA.

If your card is not covered, the section below on unsupported cards outlines your options.

How to set up Google Pay in Nigeria

You need an Android phone, a screen lock, and a card from the table above. For tapping in stores, the phone also needs NFC. Google Wallet generally requires a recent version of Android, so update your phone first if it is running an older version.

  1. Install Google Wallet. Download it from the Google Play Store and open it
  2. ‍Set a screen lock. Wallet requires a PIN, pattern, password, or fingerprint before it can store a payment card.‍
  3. Add the card. Tap Add to Wallet, then Payment card, then New credit or debit card.‍
  4. Enter the card details. Scan the card with the camera, or type the number, expiry date, and CVV.‍
  5. Accept the terms and verify. Your bank may send an SMS code or ask you to confirm in its app. Complete this step to activate the card.‍
  6. Set a default. Open Wallet settings and choose the card you want Google Pay to use first.‍
  7. Check NFC. In your phone's settings, search for NFC and switch it on if you plan to tap in stores.

If the verification message does not arrive, or the card is declined, call the number on the back of the card. Google's page says to contact your bank when a card cannot be set up for mobile payments.

Virtual cards go in the same way. Grey's guide on how to add a virtual card to Apple Pay or Google Pay covers it in more detail.

How to set up Google Pay with your Grey card

If your bank card is not on Google's list, a Grey virtual dollar card is another card you can try in Google Wallet. Grey's guide says its virtual cards can be added to Google Wallet on Android, and that Google Pay accepts virtual debit cards on the Mastercard and Visa networks as long as the issuer supports it. Google decides which countries and cards Wallet supports, so availability can vary by region.

What you need: an active, funded Grey virtual card and an Android phone with a screen lock. A frozen or expired card, or one with a $0 balance, can fail verification.

  1. In the Grey app, go to Cards, tap your virtual card, and copy the card number, expiry date, and CVV.
  2. Open Google Wallet, tap Add to Wallet, then Payment card.
  3. Tap New credit or debit card and enter the details.
  4. Tap Save. Google checks the card with the issuer.
  5. Accept the terms and complete the verification step. This may be an SMS code, an email link, or a confirmation in the Grey app.
  6. Open Wallet settings and set the card as your default payment method.

Adding a card to Google Pay is free. Any fees come from the card issuer.

What it is good for

A Grey virtual card holds US dollars, so it suits payments priced in dollars:

  • International online checkouts that show Google Pay at the payment step.
  • Subscriptions billed abroad in dollars, such as software and streaming.
  • Spending when your Nigerian bank card is not on Google's list.

It is a dollar card, so it does not replace a naira bank card for everyday spending in Nigerian shops. For that, a card on Google's list is the simpler fit.

You can get a Grey virtual card from the app, and fund your card from a USD balance so it is ready when you need to pay.

Fees and rates: a Grey virtual card costs $5 to create, once, with no monthly fee. Payments on non-US websites can carry a cross-border fee of 2% plus $0.50. If you fund the card from a non-USD balance, currency conversion applies, and Grey's exchange rates vary with a margin over the mid-market rate. See grey.co/pricing for current fees.

Where you can actually use Google Pay in Nigeria

Online checkout is the realistic use for most people right now. Tapping in stores is possible, but only at terminals that support it, and those are still uncommon.

Online. Paystack has offered Google Pay at checkout for Nigerian merchants since September 2026, and Interswitch's payment gateway supports it too. Each merchant has to switch it on, so you will not see it at every shop. A business turns it on in its Paystack dashboard, and Paystack's help page lists the requirements. Paystack supports Visa and Mastercard for Google Pay, and the option appears only when your device, browser, card, and Wallet setup all support it. If a checkout shows no Google Pay button, the cause is usually one of those four, or the merchant has not enabled it.

In apps. Some apps offer Google Pay at the payment step. The same rule applies: the app has to support it, and your card has to be on Google's list.

In stores. Tapping needs two things: a phone with NFC and a terminal with contactless enabled. Many point-of-sale terminals in use today lack the hardware, and contactless is still a very small share of payments in Nigeria. Even at a terminal that accepts taps, your bank's fraud systems have to recognise the payment, or it may be declined.

How to tell whether a terminal will work:

  • Look for the contactless symbol, four curved lines, on the terminal or its screen.
  • Ask the cashier before the bill is settled: "Does this take tap to pay?"
  • Unlock your phone, switch NFC on, and hold the back of the phone close to the reader for a few seconds.
  • If nothing happens after two or three tries, pay another way.

A practical rule is to use Google Pay online first and treat tapping in stores as a bonus where the terminal supports it. Keep a physical card or cash with you either way.

If your card is not supported

Your card may not be on Google's list. What you do next depends on what you wanted to pay for.

If you want to use the tap-to-pay feature with your card, you may need to wait for your bank to be added or switch to a supported card type. Google’s list can change, and your bank decides which card types are enabled. If you are trying to pay while shopping online, enter your card details as usual. Google Pay is a quick checkout option. If your transaction is in dollars, a virtual dollar card is a better fit, as it is designed for international dollar payments.

Waiting for your bank. The list was shorter at launch than it is now, so more banks and card types may follow. There is no published timetable, so do not plan around it.

Switching to a supported card type. If you bank with one of the five listed banks but hold a Verve or Visa card, ask whether the bank can issue a Mastercard debit or prepaid card. Then check that exact type against Google's list. This keeps you paying from your naira account.

Using a virtual dollar card. For international online payments, Google Pay is rarely the blocker, because you can type a card's details at any checkout that accepts it. A virtual dollar card gives you a dollar card number for those payments. To compare your choices, read about free virtual dollar cards and how to get a virtual dollar card in Nigeria. A dollar card does not replace a naira bank card at home. If you also need to move money between Nigeria and another country, you can send and receive money in Nigeria with Grey.

Fees apply to Grey virtual cards, including a one-time $5 creation fee, and currency conversion can add cost. See grey.co/pricing for current fees.

Frequently asked questions

Does Google Pay work in Nigeria?

Yes. Google launched Google Wallet, including Google Pay, in Nigeria on 28 October 2026 for Android and Wear OS. It works only with cards on Google's list, and only at online shops and terminals that support it.

Which banks support Google Pay in Nigeria?

Google's list currently shows First Bank of Nigeria, GTBank, Providus Bank, UBA, and Zenith Bank. Support depends on the specific card, mostly Mastercard debit, credit, or prepaid. The table in this guide shows the exact types for each bank, and the list can change.

Why was my card rejected?

The most likely cause is that the card is not on Google's list, or your bank has not enabled that card type. Verve and AfriGO cards are not supported. Other causes are a missing screen lock, an unfinished verification step, or a bank fraud check that blocked the payment. Call the number on the back of your card and ask the bank.

Can I tap to pay in Nigerian stores?

Only at terminals with contactless enabled, and many terminals in Nigeria lack the hardware. Your phone also needs NFC. Look for the contactless symbol, and keep another way to pay.

Does my Kuda, OPay, or Moniepoint card work with Google Pay?

Not at the moment. Cards from Kuda, OPay, Moniepoint, and PalmPay are not on Google's list. Check the list again later, because it can change. For dollar payments online, a virtual dollar card is another option.

Is Google Wallet the same as Google Pay?

Not exactly. Google Wallet is the app that stores your cards, tickets, and passes. Google Pay is the payment function inside it. You install Google Wallet, add a card, and pay with Google Pay.

Paying for things abroad? Open a Grey account and get a virtual card for online payments.

11 best virtual mailbox services for digital nomads

•

•

2 min read

A virtual PO box, or virtual mailbox, gives you a real street address where a provider receives your post, scans it and forwards or shreds it on request. Digital nomads use one to keep a stable address for banks, tax letters and deliveries, even when they move between countries.

Without a permanent home, managing important mail can become complicated. You might miss a bank statement, struggle to receive a replacement card or need an address to register a business. A virtual mailbox helps you handle these tasks without relying on friends or family to collect your post.

However, providers differ in their locations, monthly fees, mail-scanning limits, forwarding options and international shipping costs. Some offer additional services, such as check deposits and package consolidation.

This guide covers 11 virtual mailbox services worth considering, helping you compare their features, pricing and availability to find an option that fits your travel routine and mailing needs.

What is a virtual PO box?

A virtual PO box is a mail-handling service that gives you a physical mailing address without requiring you to rent or visit a mailbox in person. As a digital nomad, you can use it to receive letters, bank statements and packages while travelling or living abroad.

Unlike a traditional PO box, a virtual mailbox typically provides a real street address. When you sign up, your provider assigns you an address at its mail-handling facility. You can use this address for eligible correspondence, and the provider receives your mail on your behalf.

Your address may include a private mailbox (PMB) number, such as 123 Main Street, PMB 456. This identifies your individual mailbox within the provider’s facility. The exact format varies by provider, and you should follow its instructions when entering your address on forms.

A USPS PO box, by contrast, is rented directly from the United States Postal Service and usually uses a PO box number rather than a street address. A virtual mailbox may accept deliveries from multiple carriers, depending on its policies, and lets you view scanned mail online, request forwarding or arrange secure shredding.

The 11 best virtual mailbox services

The 11 best virtual mailbox services offer different address locations, mail scanning features, forwarding options and pricing plans. Whether you travel frequently, live abroad or run a remote business, compare each provider’s features to find a mailbox service that fits your needs.

Rank Provider Starting price Address locations Scans included Forwarding cost Best for
1 iPostal1 $9.99/mo 4,250+ locations globally Up to 30 exterior scans; content scans cost $2.25 per envelope for up to 10 pages Carrier rates plus handling fee, varying by location Overall network and local presence
2 Anytime Mailbox 4.98–9.99/mo, depending on address 2,500+ locations globally 30 incoming items and 5 open-and-scan pages monthly on the standard tier Carrier rates plus $5 per shipping bundle Budget and flexibility
3 Traveling Mailbox $15/mo 25+ US locations 35 page scans and 40 incoming envelopes monthly Carrier rates plus $2 per shipment; consolidation is free Digital nomads and RVers
4 PostScan Mail $10/mo 1,000+ locations 30 exterior scans; content scans cost $2 per envelope for up to 10 pages Carrier rates plus $2 for the first item and $0.50 per additional item Mobile app and multiple profiles
5 Physical Address $7.98/mo 6 regional hubs 30 incoming items monthly; unlimited exterior image views Carrier rates plus material costs Extended mail storage
6 US Global Mail 9.95–19.95/mo Locations across 23+ US states Unlimited exterior envelope scans; content scans depend on your plan Discounted carrier rates, advertised savings of up to 80% Expats and check deposits
7 Earth Class Mail 19–39/mo 80–90 US locations Envelope scans included; content scans charged according to volume Carrier rates plus handling charges Businesses and automated workflows
8 Stable Varies Selected premium office locations Custom high-volume limits for business accounts Secure, tracked priority shipping options Tech startups and API integrations
9 SavvyNomad Varies Residential-style addresses Digital envelope scanning and processing included, according to the supplied plan details Custom domestic and international forwarding Expats and financial correspondence
10 Northwest Registered Agent Varies All 50 US states Up to 5 document scans free annually on standard registered-agent plans Forwarding for state and business documents LLC formation and business privacy
11 Alliance Virtual Offices 37–49/mo 1,200+ locations worldwide Mail reception and notification tracking Scheduled forwarding using your chosen carrier Hybrid businesses needing meeting space

‍

How to choose a virtual mailbox

Choosing a virtual mailbox starts with understanding how much mail you receive and how you want to manage it. Compare each provider’s scanning allowance, including the number of incoming envelopes covered and the cost of opening and scanning their contents. If you receive important documents regularly, a plan with generous scanning limits may offer better value than a cheaper subscription with extra fees.

Next, consider forwarding costs. Providers may charge handling fees in addition to postage, and international deliveries can become expensive. Look for options such as mail consolidation, which combines multiple items into one shipment, and check whether storage limits apply before forwarding.

Your address type also matters. A commercial address may suit general correspondence and business mail, but some banks or government agencies require a residential address. Confirm that the address meets the requirements of the organisations where you intend to use it.

Finally, check the provider’s process for USPS Form 1583. This form authorises a commercial mail receiving agency to handle your mail. You generally need to provide identification and complete the required notarisation or identity verification process before your mailbox becomes active.

Also read: Virtual US accounts explained: Who they work for

Can you use a virtual mailbox for banking and business?

Yes, you can use a virtual mailbox for some banking and business purposes, but acceptance depends on the bank, service provider and intended use. Many virtual mailboxes provide a business mailing address for receiving bank statements, tax notices and official correspondence. However, a mailing address is not necessarily accepted as proof of your physical residential address. Before applying, review the bank’s address requirements and its rules for opening a business account.

Banks may flag a virtual mailbox as a commercial mail receiving agency (CMRA), which means it may not satisfy their physical-address verification requirements. This does not automatically prevent you from opening an account, but you must provide accurate details and any additional documents requested.

For business registration, a virtual mailbox may serve as your mailing address, depending on state rules. An LLC may also need a registered agent with a physical address in its state of registration to receive legal notices. Before applying, review this guide on how to open a business bank account and confirm the bank’s requirements.

Managing money while you travel

Managing money while travelling can get complicated when your income, savings and expenses involve different currencies. You might earn dollars from a US client, pay for accommodation in another country and still need money for expenses back home. Keeping track of exchange rates, transfer fees and spending limits can quickly become frustrating.

Grey helps simplify cross-border money management by giving you a way to receive international payments and manage multiple currencies. Instead of constantly converting money whenever you get paid, you can hold supported currencies and exchange them when it suits your needs.

When you need to pay for flights, accommodation or online subscriptions, Grey’s virtual card for spending abroad gives you another way to make international payments. And if you’re travelling while working remotely, you can get paid from the US while abroad by sharing your Grey USD account details with clients. That way, earning and spending across borders becomes easier to manage

Frequently asked questions about virtual mailbox services for digital nomads

1. What is a virtual PO box?

A virtual PO box, also called a virtual mailbox, gives you a mailing address where a provider receives your letters and packages. You can view scanned images of incoming mail online and choose to have items forwarded, stored or shredded. It is useful for travellers, remote workers and businesses that need reliable mail access.

2. Is a virtual mailbox legal?

Yes, virtual mailboxes are legal in the United States when used in accordance with applicable laws and postal regulations. Providers receiving USPS mail on behalf of customers operate as Commercial Mail Receiving Agencies (CMRAs) and must follow USPS requirements. You must provide accurate identification, complete required forms and avoid using the address for unlawful activities.

3. Can you use a virtual mailbox as a permanent address?

You can use a virtual mailbox as a long-term mailing address, even when you travel frequently. However, it may not qualify as your legal residence or physical address for every purpose. Government agencies, banks, insurers and licensing authorities may require a residential address, so check their specific rules before using one.

4. Do banks accept virtual mailbox addresses?

Some banks accept virtual mailbox addresses for mailing statements and correspondence, but others may reject them for account verification. A virtual mailbox is generally a commercial mailing address, not proof of where you live. Banks may require a separate residential or physical business address to meet identity-verification and compliance requirements.

5. What is USPS Form 1583?

USPS Form 1583 is an application that authorises a Commercial Mail Receiving Agency to receive mail on your behalf. You must provide identifying information and acceptable identification documents. Your signature must be witnessed by the provider or an authorised employee, or acknowledged before a qualified notary. Requirements should be confirmed with your mailbox provider.

6. How much does a virtual mailbox cost?

A virtual mailbox typically costs around $5 to $40 per month, depending on the provider, address location and plan features. Basic plans may include limited mail scanning, while higher-priced options offer more scans, storage or business services. Budget for additional charges such as postage, forwarding, document scanning, package handling and international shipping.

7 best peer-to-peer payment apps for sending money

•

•

2 min read

The best peer-to-peer payment apps let you send money to friends and family in seconds using a phone number, email address or username. Venmo, Zelle, Cash App and PayPal lead in the US, while Grey covers payments to people abroad. Compare fees, transfer limits, speed and whether the app works across borders.

Choosing a peer-to-peer payments app should be simple, but the right option depends on who you are paying and where they live. An app that works well for sending money to a friend in the US may not help when you need to pay someone abroad. Fees, transfer limits, and how quickly the money arrives can also vary.

Some apps are designed for local payments, while others offer ways to send money internationally. Before choosing one, consider whether you need free bank transfers, instant payments, or a way to send money across borders without paying more than necessary.

This guide compares seven peer-to-peer payment apps, including their key features, costs, and limitations, so you can choose the right option for your needs.

What is a peer-to-peer payment app?

A peer-to-peer payment app is an app that lets you send money directly to another person using a linked bank account or debit card. Instead of withdrawing cash or exchanging bank details, you can often pay someone using their phone number, email address, or username. Apps like Venmo, Cash App, and PayPal make everyday payments easier, from paying friends back to sharing household bills.

The main difference between a peer-to-peer payment app and a regular bank transfer is how you send the money. With a payment app, you can often select a contact and send funds in a few taps. A bank transfer usually requires the recipient’s bank details, such as their account number and bank name. However, both methods can move money between bank accounts, depending on the service.

Not every app supports the same payment methods or locations. Some focus on payments within the US, while others offer international transfers. Before choosing an app, check its fees, transfer limits, processing times, and whether it supports the country where your recipient lives.

The 7 best peer-to-peer payment apps

From instant transfers to international payments, these seven peer-to-peer payment apps offer different features for sending money to friends, family, and other people.

  1. Grey
  • Best For: Freelancers, remote workers, and expats needing international multi-currency accounts.
  • Fees: Free to receive domestic USD/EUR/GBP bank transfers; a 1% fee applies to auto-convert funds into local African currencies (like NGN or KES). Outgoing international wire fees vary by destination network.
  • Limits: Transaction and daily limits fluctuate dynamically based on user identity verification tier and the specific source currency channel (often starting around $2,000 to $5,000 daily).
  • Speed: Local wallet swaps are instant. International outgoing transfers generally take 1 to 3 business days depending on the receiving country's banking rail.
  1. Venmo
  • Best For: Casual, social expense splitting among friends.
  • Fees: Free for standard bank/debit transfers. A 3% fee applies if funded via credit card, and a 1.75% fee (minimum $0.25, maximum $25) applies for instant debit card cash-outs.
  • Limits: A rolling weekly limit of $4,999.99 for person-to-person payments after completing identity verification.
  • Speed: Standard bank transfers take 1 to 3 business days, while instant transfers to a linked debit card take under 30 minutes.
  1. Zelle
  • Best For: Rapid, secure bank-to-bank domestic transfers.
  • Fees: 100% Free. Neither Zelle nor its partner retail banks charge fees for standard or instant P2P movement.
  • Limits: Limits are determined directly by your participating bank, but typically hover around $500 to $2,500 daily for consumer checking accounts.
  • Speed: Instant. Funds pass directly between integrated bank accounts within minutes.
  1. Cash App
  • Best For: Combined peer transfers, high-yield savings, and micro-investing.
  • Fees: Free for standard P2P transfers. A 3% fee applies for credit card funding, and a 0.5% to 1.75% fee applies for instant cash-outs.
  • Limits: Up to $7,500 per week for sending and an unlimited receiving capacity once basic account verification is completed.
  • Speed: Standard wallet withdrawals take 1 to 3 business days, while instant debit card transfers execute in minutes.
  1. PayPal
  • Best For: High-value transactions, online shopping, and commercial buyer/seller fraud protection.
  • Fees: Free for domestic US "Friends & Family" transfers funded by a bank balance or debit card. Credit cards incur a 2.9% + fixed fee. Commercial "Goods & Services" transactions cost the seller 2.99% + $0.49.
  • Limits: Verified accounts can send up to $60,000 per transaction, with no cumulative daily or weekly caps.
  • Speed: Standard balance withdrawals take 1 to 3 business days, while instant debit card withdrawals take under 30 minutes for a 1.75% fee.
  1. Apple Cash
  • Best For: iPhone users seeking seamless integration inside iOS Messages.
  • Fees: Free for standard balance clearance. A 1.5% fee (minimum $0.25, maximum $15) applies if you opt for an instant debit card cash-out.
  • Limits: Users can send up to $10,000 per transaction and a maximum cumulative cap of $10,000 within any rolling 7-day period.
  • Speed: Standard transfers land in your bank in 1 to 3 business days. Instant transactions update your external debit card balance within minutes.
  1. Google Wallet
  • Best For: Android users wanting cross-platform flexibility for tap-to-pay and peer transfers via Google Pay.
  • Fees: Free for standard bank account deposits. Instant cash-outs to a linked debit card require a 1.5% premium fee (minimum $0.31).
  • Limits: A standard cap of $5,000 per rolling 7-day period (or up to $10,000 for verified commercial profiles).
  • Speed: Standard ACH withdrawals complete in 1 to 3 business days, while instant debit card pushes process in minutes.

P2P payment apps comparison table

Each payment app has different fees, sending limits, and international payment options. Compare the costs of instant transfers and card payments, how much you can send, and whether you can use the app to pay people in other countries.

App Instant transfer fee Card funding fee Weekly sending limit International support
Grey 1% fee plus an exchange rate margin. Varies by currency and card type $3,000 Yes; supports global accounts and multiple currencies
Venmo 1.75% (minimum $0.25, maximum $25) Free for debit; 3% for credit cards $4,999.99 for verified accounts No; US only
Zelle Free; transfers are generally fast Not applicable; uses linked bank accounts Set by bank, often 2,500–5,000 No; US only
Cash App 0.5%–1.75% Free for debit; 3% for credit cards $7,500 for verified accounts Limited; US and UK
PayPal 1.75% (maximum $25) Free for US debit-funded P2P; credit card fees apply No weekly limit stated; up to $60,000 per transaction Yes; available in many countries, with conversion fees
Apple Cash 1.5% (minimum $0.25, maximum $15) No separate fee for eligible debit funding $10,000 No; US only
Google Wallet 1.5% (minimum $0.31) Free for debit cards $5,000 over a rolling seven-day period Limited; P2P sending depends on region

‍

Are peer-to-peer payment apps safe?

Peer-to-peer (P2P) payment apps are generally safe for sending money, but they are not free from risks. Scammers may trick you into sending money to the wrong person, and recovering it can be difficult once you approve the payment. Unlike some credit card purchases, transfers may not come with automatic purchase protection. Before sending money, double-check the recipient’s details and make sure you trust them.

Common scams include fake payment notifications, phishing messages, and claims that someone sent you money by mistake. Be careful when buying items from strangers, especially if they ask you to use a payment option that offers no buyer protection. You should also check Zelle transfer limits and your app’s rules before making large payments, as limits and protections vary by provider.

Another thing to consider is deposit insurance. Money held in a payment app is not automatically FDIC-insured in every case. Coverage depends on how the funds are held and the provider’s arrangements. The Consumer Financial Protection Bureau offers guidance on payment app risks and protecting your money.

How to pay someone in another country

Zelle and Venmo are useful for sending money within the US, but they are not designed for sending payments directly to recipients in most other countries. If you need to pay family, friends, or service providers abroad, you need a service that supports international transfers.

Grey lets you send USD to 170+ countries, giving you a way to pay recipients abroad without relying on a US-only payment app. You can choose the destination, enter the recipient’s payment details, and check the exchange rate and applicable fees before confirming the transfer.

For example, if you need to support family or pay someone in Mexico, you can send money from the US to Mexico directly to their Mexican bank account in pesos. Your recipient does not need a Grey account to receive the money. Transfer times and fees depend on the destination and funding method, so check the details before sending.

Frequently asking questions

1. What is the most popular peer-to-peer payment app?

Venmo and Cash App are popular choices for everyday payments in the US, while PayPal serves users in many countries. Zelle is widely used for sending money directly through participating banks. The best option depends on where you live, who you pay, and which apps they already use.

2. Which P2P app has no fees?

Zelle generally charges no fees for sending or receiving money, although your bank may apply charges. Venmo and Cash App offer free standard transfers to linked bank accounts, but instant withdrawals and credit card payments may cost extra. Check each app’s current fee schedule before sending money.

3. Can you use Venmo or Zelle internationally?

Venmo and Zelle are primarily designed for domestic US payments and generally cannot send money directly to international bank accounts. If you need to pay someone abroad, choose a service that supports your destination country, such as Grey, Wise, or Remitly.

4. What is the safest peer-to-peer payment app?

The safest option depends on how you send money and who receives it. PayPal offers purchase protection for eligible transactions, but not every personal payment is covered. Whichever app you choose, verify the recipient, protect your login details, and avoid sending money to strangers you cannot trust.

5. How much can you send on a P2P app?

Sending limits vary by app, account verification, bank, and payment method. Zelle limits are set by participating banks, while PayPal limits depend on account status and transaction details. Check your account’s current limits before making a large payment to avoid delays or declined transfers.

6. How do you send money to family abroad?

To send money to family abroad, choose an international payment service that supports their country and preferred payout method. Grey, Wise, and Remitly offer different international transfer options. Compare exchange rates, fees, delivery times, and available payment methods before choosing how to send the money.

Whether you’re supporting family, paying a supplier, or sending money to a friend overseas, Grey helps you send money abroad in minutes, so your money gets where it needs to go.

What is the currency of France? Euro symbol and code

•

•

2 min read

The currency in France is the euro, represented by the symbol € and the ISO currency code EUR. If you are travelling to Paris, shopping in Lyon or paying for accommodation in Nice, you will use euros for everyday transactions. France replaced the French franc with euro banknotes and coins in 2002, making the euro its official currency.

The euro is used across mainland France and its outermost regions, including Guadeloupe, Martinique, Réunion, French Guiana and Mayotte. However, not all French territories use the euro. French Polynesia, New Caledonia and Wallis and Futuna use the CFP franc (XPF), a separate currency pegged to the euro at a fixed rate.

When budgeting for a trip, remember that prices are generally displayed in euros, whether you are paying for meals, transport or shopping. If your money is in another currency, check the exchange rate and any conversion fees before making payments. Using a suitable travel card or payment service can also help you manage spending abroad.

What currency does France use?

France uses the euro (€), with the ISO currency code EUR. If you are planning a trip to Paris, exploring the French Riviera or shopping in Marseille, you will pay for most goods and services in euros.

France previously used the French franc as its national currency. The country adopted the euro for electronic and financial transactions in 1999, before euro banknotes and coins entered circulation on 1 January 2002. The franc was then gradually withdrawn, completing France’s transition to the shared European currency.

When checking prices during your visit, look for the € symbol, which usually appears before or after the amount depending on the format. For example, €25 represents twenty-five euros. If you are converting money from naira, pounds or US dollars, the amount you receive will depend on the current exchange rate and any fees charged by your bank or payment provider.

Before travelling, compare conversion costs and payment options so you can manage your spending in France more confidently.

Do the French still use the franc anywhere?

France no longer uses the French franc as its official currency. The euro (€), code EUR, replaced it, with euro banknotes and coins introduced in 2002. However, France still uses a different franc in some of its Pacific territories: the CFP franc (XPF).

If you travel to French Polynesia, New Caledonia or Wallis and Futuna, you will encounter the CFP franc rather than the euro for everyday payments. Although these territories are French, they have a separate currency arrangement suited to their regional economies.

The CFP franc is linked to the euro at a fixed exchange rate of €1 = 119.3317 XPF. This means its value against the euro does not fluctuate with ordinary market exchange-rate movements. However, when converting your money from another currency, such as US dollars or Nigerian naira, the amount you receive can still change with exchange rates and provider fees.

If you are visiting these Pacific territories, check whether your bank card supports local payments and compare conversion charges before travelling. The CFP franc remains distinct from the former French franc, despite sharing the name.

Paying in France: notes, coins, cash and cards

When paying in France, you can use euro banknotes, coins and payment cards. Euro banknotes come in €5, €10, €20, €50, €100 and €200 denominations, while coins range from 1 cent to €2. Prices are displayed in euros, so check the total before paying.

Debit and credit cards are widely accepted in shops, hotels, restaurants and supermarkets. Contactless payments are common, allowing you to tap your card or compatible phone at checkout. However, some transactions may require a PIN, and individual merchants can set minimum card payment amounts where permitted.

Cash remains useful when visiting local markets, buying from smaller vendors, using certain public facilities or making purchases at businesses that do not accept cards. Keeping a little cash available can help you avoid payment difficulties.

If you need a convenient way to pay while travelling, Grey’s virtual card can help you make online and supported card payments in euros. Before your trip, check the card’s currency conversion rates, applicable fees and acceptance conditions so you can plan your spending with confidence.

Also read: Cheapest cities in France for international students

How to get euros for a trip to France

You can get euros for your trip to France through bank ATMs, currency exchange bureaux or your bank before departure. Withdrawing euros from an ATM in France can be convenient, but check your bank’s foreign transaction fees and the ATM operator’s charges. Use ATMs attached to established banks where possible.

Exchange bureaux at airports and tourist areas are easy to find, but they may offer less favourable rates. Compare the final amount you will receive after fees rather than relying only on advertised exchange rates.

When paying by card or withdrawing cash, you may be asked whether you want to pay in euros or your home currency. Choose euros to decline dynamic currency conversion. This usually lets your card provider handle the conversion, which may offer a better rate, although your provider’s fees still apply.

For cross-border payments, Grey offers a way to send money from the US to France. Compare the available exchange rate, transfer fees and delivery times before sending funds, so you can budget for your trip and manage your euros more effectively.

How to send money to France

Whether you are paying rent, covering tuition or supporting family, choosing the right transfer service can help you manage international payments to France. Grey supports cross-border money transfers, allowing you to send money from the UK to France and manage international payments through its platform.

Before sending money, compare exchange rates, transfer fees and delivery times to understand how much your recipient will receive. Bank transfers can include intermediary charges, while card payments may attract foreign transaction fees depending on your provider.

Grey’s multi-currency account helps you hold and manage supported currencies in one place, making it easier to organise international finances. Its virtual card also lets you make eligible online payments and pay for supported purchases in euros. Depending on your card terms and transaction, this may help you avoid certain foreign transaction fees.

Frequently asked questions about the currency of France

1. Does France use the euro or the franc?

France uses the euro as its official currency. The French franc was replaced by euro banknotes and coins in 2002. However, some French Pacific territories still use the CFP franc, a separate currency linked to the euro at a fixed exchange rate.

2. What is the euro symbol and code?

The euro symbol is €, and its three-letter ISO currency code is EUR. You will see the symbol on price tags, receipts and menus across France. For example, €50 means fifty euros. When exchanging money, use EUR to identify the currency correctly.

3. Can you use US dollars in France?

US dollars are not generally accepted for everyday purchases in France. You will usually need euros to pay for meals, transport, shopping and accommodation. Exchange your dollars before travelling or withdraw euros from an ATM. Check conversion rates and fees to manage costs.

4. Is card or cash better in France?

Cards are widely accepted across France, including in hotels, restaurants and shops. Contactless payments are common, making cards convenient for everyday spending. However, cash remains useful at local markets and smaller businesses. Carrying a little of both gives you greater flexibility during your trip.

5. What currency is used in French Polynesia?

French Polynesia uses the CFP franc, abbreviated XPF, rather than the euro for everyday transactions. The currency is pegged to the euro at a fixed rate of €1 = 119.3317 XPF. Check your card’s international payment fees before travelling to the islands.

6. How do you send money to France?

You can send money to France through a bank or an international transfer service. Compare exchange rates, transfer fees and delivery times before choosing. Grey supports cross-border payments, including transfers from the US to France. Confirm service availability and recipient details before sending.

How to get an Airtel eSIM

•

•

2 min read

Switching to an Airtel eSIM lets you use your mobile number without inserting a physical SIM card into your phone. Instead, your device stores the SIM profile digitally, making it easier to activate your line on a compatible smartphone and manage your mobile connection.

If you want to convert your existing Airtel SIM to an eSIM, you'll typically need to send a text message, confirm your request and scann a QR code sent to your email address. The exact steps and eligibility requirements may vary depending on your country and Airtel’s current eSIM service.

Before you begin, check that your phone supports eSIM technology and that your Airtel line qualifies for conversion. You should also have access to the email address linked to your request and a reliable internet connection to download your eSIM profile. This guide explains the steps to follow and what to know before switching.

What do you need before converting an Airtel SIM to eSIM?

Before converting your Airtel SIM to an eSIM, make sure you have a compatible smartphone, an active Airtel number and access to a registered email address. These are essential for completing the conversion and receiving the eSIM activation details.

1. An eSIM-compatible smartphone

Your phone must support eSIM technology. Common eSIM-capable devices include the iPhone XS, XS Max and newer models, selected Samsung Galaxy S20 and newer models, Google Pixel 4 and newer models, and certain newer Motorola devices. However, compatibility varies by model, region and carrier, so confirm that your specific handset supports eSIM.

2. A registered email address

You need a working email address to receive the eSIM QR code and activation instructions from Airtel. Check that you can access your inbox before starting the process.

3. An active Airtel number

Keep your existing Airtel SIM active so you can send the conversion request and confirm it when prompted. You may also need your phone to receive verification messages during activation.

Check Airtel’s local requirements before beginning, as procedures differ by country.

How to convert an Airtel SIM to eSIM by SMS

Convert your Airtel SIM to an eSIM by texting Airtel, confirming your request, waiting for activation and scanning the emailed QR code.

Airtel eSIM QR code ready to scan on a phone. Place at the top of the article.
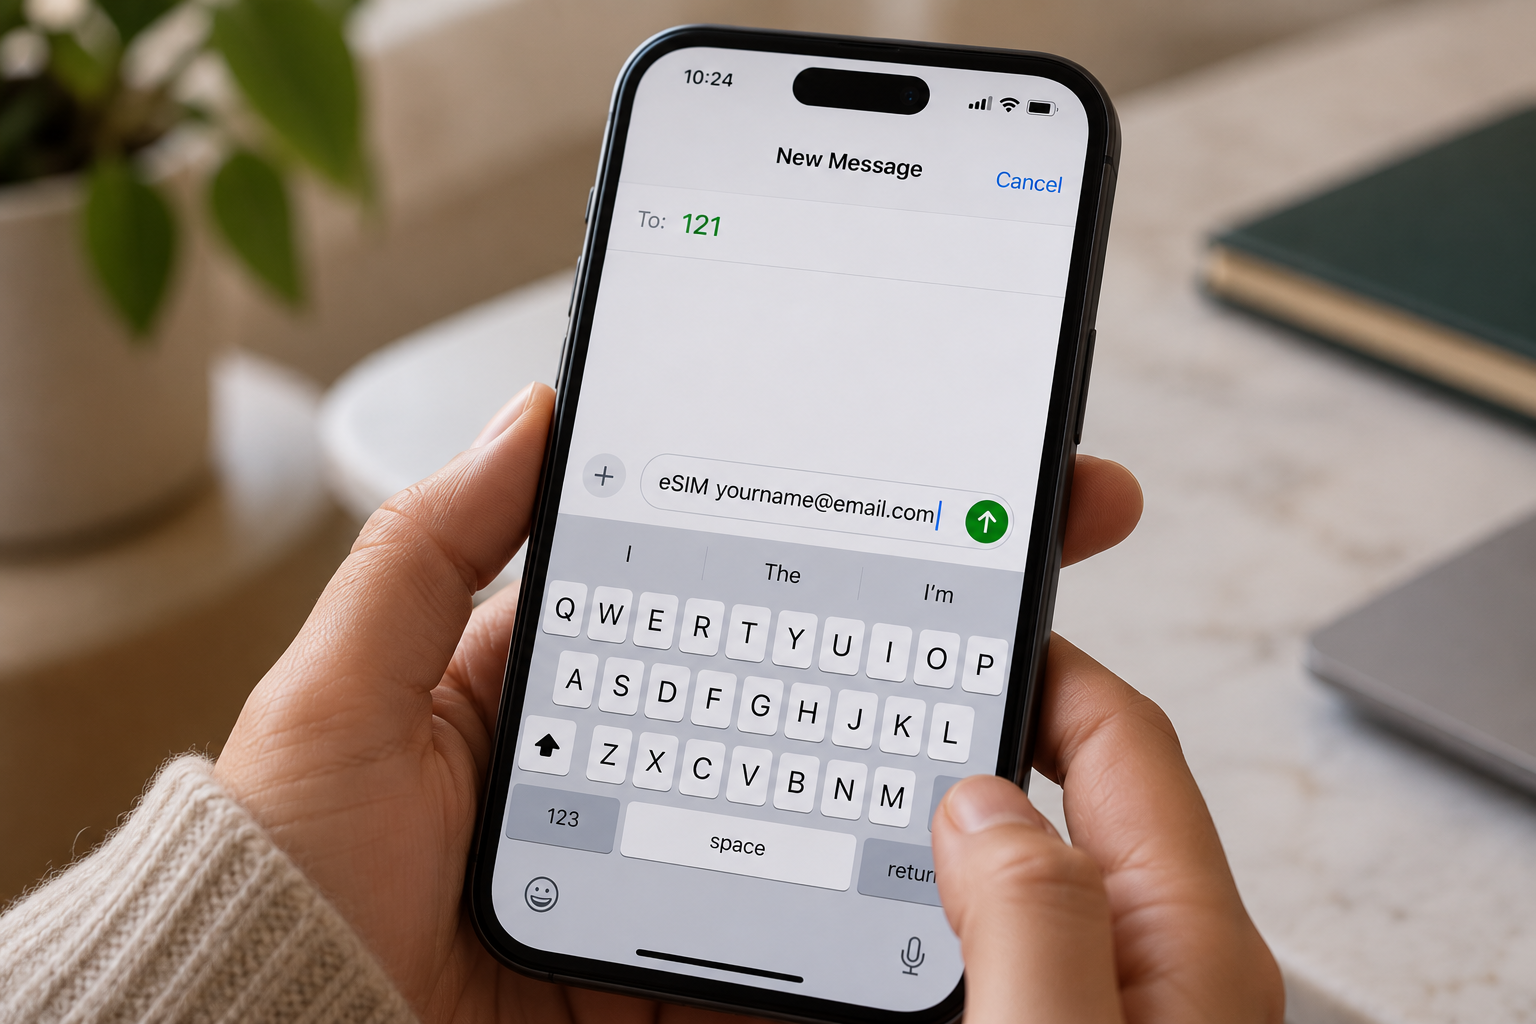
  1. Send an SMS to 121: Open your messaging app and send eSIM followed by your registered email address to 121. Check the spelling of your email before sending the message.
  2. Confirm your request: Airtel should send a confirmation message. Reply with 1 as instructed to authorise the SIM-to-eSIM conversion. Follow any additional prompts provided by Airtel.
  3. Wait for processing: Allow approximately 60 minutes for Airtel to process your request, although activation times may vary. Keep your existing SIM and phone available during this period in case you receive further instructions.
  4. Check your email for the QR code: Airtel will send an eSIM QR code to your registered email address when the process reaches the relevant stage. Check your spam or junk folder if it does not appear in your inbox.
  5. Scan and activate your eSIM: Connect your compatible phone to Wi-Fi, open its mobile network settings and select the option to add an eSIM. Scan the QR code and follow the on-screen instructions to complete activation.

How to convert an Airtel SIM to eSIM in the Airtel Thanks app

You can convert your physical Airtel SIM to an eSIM through the Airtel Thanks app without visiting a store, provided your number and device are eligible. The steps below apply to Airtel India; menu options may vary by app version.

  1. Open the Airtel Thanks app: Install or update the app, then log in using the Airtel number you want to convert. Keep your physical SIM active to receive verification messages.
  2. Find the eSIM option: On the home screen, scroll to Shortcuts, tap More, then select Upgrade to eSIM. If you cannot find it, check the app’s search or help section.
  3. Choose your device: Select "This device" to install the eSIM on your current phone, or choose Another device if that option is available.
  4. Enter your EID. Provide the device’s 32-digit EID when prompted. You can usually find it in your phone’s settings under "About".
  5. Complete verification. Follow the on-screen instructions, including any OTP or confirmation call from Airtel.
  6. Activate the eSIM. Wait for Airtel’s confirmation, then follow the installation prompts on your phone. Processing may take around two hours

How to scan the Airtel eSIM QR code on iPhone and Android

To activate your Airtel eSIM, scan the QR code provided by Airtel using your phone’s mobile network settings. Keep your phone connected to Wi-Fi during setup, as the eSIM profile needs an internet connection to download.

On iPhone

  1. Open Settings and select Cellular or Mobile Service.
  2. Tap Add eSIM, then choose Use QR Code.
  3. Scan your Airtel eSIM QR code using your camera.
  4. Tap Continue and follow the on-screen instructions to install the mobile plan.
  5. Once activated, check that your Airtel line shows a signal and can make calls.

If you’re moving to a new iPhone, follow this guide to transfer an eSIM from one iPhone to another.

On Android

  1. Open Settings and select Connections on Samsung, or Network & Internet on Google Pixel.
  2. Tap SIM manager or Mobile Network.
  3. Select Add eSIM or Add mobile plan.
  4. Choose the QR code option and scan the code from Airtel.
  5. Follow the prompts to download and activate your eSIM.

What happens to your physical SIM?

After the eSIM activates, your physical Airtel SIM for that number is deactivated. You can remove it from your phone. If activation fails, contact Airtel before deleting any installed eSIM profile

Why is my Airtel eSIM not activating?

Your Airtel eSIM may fail to activate because of a problem with your identity verification, phone compatibility, registered email address or activation timing. Identifying the specific issue helps you determine the right fix without unnecessarily repeating the conversion process.

  1. KYC mismatch: Airtel may be unable to verify your identity because your registration details do not match its records. Contact Airtel to confirm your subscriber information and complete any required verification.
  2. Unsupported handset: Your smartphone may not support eSIM technology, or its regional variant may lack eSIM functionality. Check your exact model’s specifications before attempting activation again.
  3. Wrong email address: If you entered an incorrect email address, you may not receive the Airtel eSIM QR code. Verify your registered email and check your spam folder. Contact Airtel if the QR code is missing.
  4. Activation delay: Airtel’s activation process can take up to two hours. Keep your phone connected to the internet and follow the installation instructions. If activation still fails after the waiting period, contact Airtel support or visit an authorised store. Avoid deleting an installed eSIM profile before receiving assistance.

If you need mobile connectivity while travelling, Grey lets you top up airtime and buy eSIMs. You can also manage cross-border expenses by using Grey to send money from the US to India or send money from the UK to India, helping you handle payments while staying connected abroad

Frequently asked questions

1. How long does an Airtel eSIM take to activate?

An Airtel eSIM usually activates within two hours after you download and enable the eSIM profile on your compatible phone. During processing, your physical SIM may continue working. Keep your device connected to Wi-Fi and follow Airtel’s instructions to complete activation. Timings may vary by country and request.

2. Does converting to an Airtel eSIM change my number?

No, converting your existing Airtel physical SIM to an eSIM generally keeps your current mobile number. The process replaces the physical SIM with a digital profile linked to the same line. You can continue using your number for calls, messages and mobile data once activation is complete.

3. Can I convert an Airtel prepaid SIM to eSIM?

Yes, eligible Airtel prepaid customers can convert their physical SIM to an eSIM in supported markets. However, the process differs by country. Airtel India provides an app-based conversion process, while Airtel Nigeria directs customers to a service centre for assistance. Confirm your line’s eligibility before starting.

4. What happens to my physical Airtel SIM after conversion?

Once your Airtel eSIM activates successfully, the physical SIM linked to that number becomes inactive. You can remove it from your phone because the eSIM now provides your mobile connection. Keep the physical SIM in place until activation is confirmed to avoid losing service during the transition.

5. Can I switch an Airtel eSIM back to a physical SIM?

Yes, you can generally switch your Airtel eSIM back to a physical SIM by requesting a SIM replacement. In India and Nigeria, Airtel directs customers to a service centre or showroom for assistance. Bring the required identification and complete any verification steps before using the replacement SIM.

6. Is there a fee to convert an Airtel SIM to eSIM?

The cost depends on your country and Airtel’s current policy. Airtel Nigeria currently states that eSIM activation has no charge, while other SIM replacement services or markets may have different fees. Before converting, check with your local Airtel provider whether activation, replacement or related services incur additional costs.

Arrow (up)

Back to top