STAY UP TO DATE

The Grey Blog

Dive into our latest product updates, user interviews, finance tips, and strategic insights from the Grey team.
Man in purple shirt sitting and smiling while looking at his smartphone against a dark curtain background.Section decorative curve

ALL ARTICLES

USD savings accounts for NRIs: How to save in dollars from India

USD savings accounts for NRIs: How to save in dollars from India

USD savings accounts for NRIs explained. FCNR deposits, NRE accounts, and multi-currency alternatives compared by rates, access, and flexibility. Read now.

•

•

2 min read

As an NRI, you earn in dollars, but your financial roots are in India. The question isn't whether to save in USD. It's where to park those dollars, so they're accessible, earning returns, and not eroding from conversion fees every time you move money.

NRIs can save in USD through FCNR deposits at Indian banks (3 to 5% interest, 1 to 5-year terms). NRE accounts hold rupees but are tax-free and fully repatriable. Multi-currency fintech accounts hold USD with real local account details. The best choice depends on whether you prioritise returns, liquidity, or tax efficiency.

This guide compares every option for NRIs who want to build a dollar cushion, whether you're saving for a future return to India, hedging against rupee depreciation, or simply keeping your income in the currency you earned it. For the broader perspective, see how to save in foreign currency.

Understanding NRI account types

Before diving into USD savings specifically, you need to understand the three account types available to NRIs in India. Each serves a different purpose, and mixing them up leads to tax problems and repatriation headaches.

NRE (Non-Resident External) Account. Rupee-denominated. You deposit foreign currency, and it's converted to INR at the bank's rate on the day of deposit. Interest earned on an NRE account is generally exempt from income tax in India while you meet the applicable non-resident eligibility conditions. Both the principal and interest are fully repatriable, subject to banking and regulatory requirements. NRE accounts come in savings and fixed deposit variants. The fixed deposit rates typically run 6 to 7% for 1-year terms, which sounds attractive until you realise the deposit is in rupees, not dollars. If the rupee depreciates 5% against the dollar during your deposit term, your effective return drops to 1 to 2% in dollar terms.

NRO (Non-Resident Ordinary) Account. Also rupee-denominated. Designed for income earned in India: rental income, dividends from Indian stocks, pension payments, or sale proceeds from Indian property. Interest earned on an NRO account is taxable in India and generally subject to tax deducted at source (TDS), with the applicable rate depending on tax rules and treaty benefits. NRIs can generally repatriate up to USD 1 million per Indian financial year from eligible NRO balances and other qualifying assets, subject to applicable taxes, documentation and bank requirements. Current income, including eligible interest and rent, may be remitted separately under RBI rules. NRO accounts are not ideal for USD savings because of the tax hit and repatriation cap.

FCNR (Foreign Currency Non-Resident) Account. This is the one most NRIs looking for USD savings should focus on. FCNR deposits hold your money in foreign currency (USD, GBP, EUR, JPY, CAD, AUD). No currency conversion on deposit or withdrawal. Interest rates typically 3 to 5% for USD deposits. Tax-free in India. Fully repatriable. The FCNR is the closest thing to a traditional dollar savings account available through the Indian banking system. For how much you can send from India, see LRS guide.

FCNR deposits: The traditional NRI dollar savings

FCNR deposits are term deposits, not savings accounts. FCNR(B) deposits have a minimum tenure of one year and a maximum of five years under RBI rules. They are term deposits rather than regular savings accounts, and premature withdrawal may reduce or eliminate the interest earned, depending on the bank's terms. Think of them as CDs (certificates of deposit) denominated in foreign currency.

Current USD rates (approximate, mid-2026):

SBI: 3.0 to 4.5% (varies by tenure; longer terms generally offer higher rates)

HDFC Bank: 3.15% to 3.80% (typically the most competitive among private banks)

ICICI Bank: 3.25% to 4% (similar range to SBI, sometimes with promotional rates)

Axis Bank: 3.0 to 4.25% (slightly lower ceiling than HDFC)

Kotak Mahindra Bank: 3.0 to 4.5% (competitive with public sector banks)

These rates change frequently, sometimes monthly. Check with your bank before committing. Longer tenures typically offer higher rates. A 5-year USD FCNR at HDFC might yield 4.75%, while a 1-year deposit at the same bank yields 3.25%. The rate is locked at the time of deposit and doesn't change during the term.

Pros: no currency risk (your principal stays in USD), tax-free in India under current law, fully repatriable without limit, and backed by Indian bank deposit insurance (DICGC covers up to INR 5 lakh per depositor per bank, though the dollar equivalent fluctuates with the exchange rate).

Cons: locked for 1 to 5 years with no additions allowed mid-term, early withdrawal penalties (typically 1% reduction in the applicable interest rate, meaning you might earn 2% instead of 3%), minimum deposit requirements ($1,000 to $10,000 depending on the bank), and you need an NRE or NRO account at the same bank to open an FCNR. The branch visit requirement is the biggest friction point. While some banks allow remote FCNR opening via video KYC, many still require either an in-person visit or a notarised application from abroad.

The tax question most NRIs miss: FCNR interest is tax-free in India, but it may be taxable in your country of residence. US-resident NRIs must report FCNR interest on their US tax returns. UK-resident NRIs must report it to HMRC. The India tax benefit doesn't eliminate the foreign tax obligation. Consult a cross-border tax advisor before assuming the interest is truly tax-free.

Multi-currency accounts: The flexible alternative

If the rigidity of FCNR deposits doesn't suit you, maybe you want access to your dollars without a lock-in period, or you want to hold smaller amounts and add to them regularly, a multi-currency fintech account offers more flexibility at the cost of interest.

Key differences from FCNR:

No lock-in period. Add or withdraw anytime. Your dollars are liquid, not frozen for 1 to 5 years.

No minimum deposit. Start with any amount. FCNR requires $1,000 to $10,000 upfront. A Grey account has no minimum balance requirement.

No branch visit. Open online, manage from your phone. The entire process takes minutes, not the days or weeks that FCNR paperwork takes.

Real USD account details. A Grey account provides you with a US routing number and an account number. Your US employer or client can pay you directly via ACH. An FCNR requires a SWIFT transfer to fund it, which costs $15-$50 per deposit.

No interest (in most cases). The trade-off for flexibility is that most multi-currency accounts don't pay interest on balances. You hold dollars, but they don't grow. On a $10,000 balance, an FCNR at 4% earns you $400 per year. A Grey account earns $0. The question is whether the flexibility and lower costs offset the lost interest.

If you earn in USD regularly and want to hold dollars flexibly, a multi-currency account (Grey, Wise). You receive payments, hold USD, and convert to INR when the rate is favourable. No lock-in. Use this for your active income and short-term savings.

Common mistakes NRIs make with USD savings

Leaving dollars in a US checking account earning 0%. If you're not going to invest the money, at least move it to an FCNR where it earns 3 to 5%. Idle dollars in a Chase or Bank of America checking account lose purchasing power to inflation every year.

Converting to rupees immediately upon receiving payment. If you don't need the rupees right now, why convert? Every conversion costs 0.5 to 1.5%. Hold the dollars and convert when you actually need INR, or when the rate is favourable. A Grey account lets you time your conversions without FCNR lock-in.

Ignoring the rupee depreciation trend. Over the past 10 years, the Indian rupee has depreciated roughly 3 to 5% per year against the US dollar. That means your NRE fixed deposit earning 7% in rupees effectively earns 2 to 4% in dollar terms after currency depreciation. An FCNR earning 4% in actual dollars may outperform the NRE on a dollar-adjusted basis.

Not claiming DTAA benefits. India has Double Taxation Avoidance Agreements with many countries. If you're paying tax on FCNR interest in your country of residence, you may be able to claim a credit for taxes paid (or exempted) in India. Most NRIs don't bother with the paperwork and end up overpaying.

Saving in USD with Grey

Grey lets you hold USD in a Grey USD account with real US routing and account details. You receive payments from US clients or employers via ACH (no SWIFT fees), hold the dollars for as long as you want, and convert to INR through Grey when the rate works for you. No FCNR lock-in, no branch visit, no minimum balance.

Earn in dollars? Hold them in a Grey account and convert to INR on your terms.

Frequently asked questions about USD savings accounts for NRIs

Are FCNR deposits taxable in India?

No. Interest earned on FCNR deposits is tax-free in India for NRIs under Section 10(15)(iv)(fa) of the Income Tax Act. However, it may be taxable in your country of residence (the US taxes worldwide income; the UK taxes on a remittance basis or on an arising basis, depending on your status). Check with a cross-border tax advisor in both jurisdictions before assuming the interest is tax-free overall.

Can I open an FCNR account from abroad?

Yes. Most major Indian banks (SBI, HDFC, ICICI, Axis) allow NRIs to open FCNR accounts remotely through their online banking platforms or NRI service centres. You'll need your NRE or NRO account with the same bank, a valid passport, proof of overseas address, and sometimes a video KYC call. Processing takes 3 to 10 business days, depending on the bank.

What happens to my FCNR deposit when I return to India?

If you return to India and your NRI status changes to resident, your FCNR deposit can be held until maturity at the original rate. At maturity, the proceeds must be converted to INR and credited to a resident savings or fixed deposit account. The interest earned during NRI status remains tax-free in India. You cannot renew the FCNR after returning.

Does the $250,000 LRS limit apply to NRIs?

The Liberalised Remittance Scheme allows Indian residents (not NRIs) to remit up to $250,000 per financial year abroad. NRIs are not subject to LRS for repatriation of NRE and FCNR funds, which are fully repatriable without limit. LRS applies to resident Indians sending money abroad, not to NRIs bringing money home. See the full LRS guide for details.

Should I save in USD or invest in US stocks?

Different goals. USD savings (FCNR, Grey) protect your principal and provide liquidity. US stock investments offer growth potential but carry market risk. For emergency funds and short-term savings, keep dollars in FCNR or a Grey account. For long-term wealth building, consider both. The two aren't either/or.

Hold USD as an NRI. Open a Grey account and receive US payments with real account details.

Disclaimer: This article is for informational purposes only. All costs and details are estimates based on mid-2026 data. Verify current information before making decisions. Grey isn't a bank. We're a licensed financial services provider offering multi-currency accounts.

How to start an LLC in Texas: Step-by-step guide

How to start an LLC in Texas: Step-by-step guide

How to start an LLC in Texas. $300 filing fee, step-by-step filing process, franchise tax rules, and what to do after formation. Read the full guide.

•

•

2 min read

Texas has no personal state income tax. That alone makes it one of the most popular states for LLC formation. But Texas does have a franchise tax, and ignoring it is the single most common mistake new LLC owners make. We'll cover that alongside every other step.

The full Texas LLC formation process takes about an hour of your time and $300 in state fees. You can do it entirely online through the Texas Secretary of State's SOSDirect system. No lawyer required for a straightforward single-member or two-member LLC, though complex ownership structures or real estate holdings benefit from legal guidance.

To form an LLC in Texas, choose a registered agent and file a Certificate of Formation with the Secretary of State ($300). Then get an EIN from the IRS, open a business bank account, and apply for any required permits. You can file online through SOSPortal, although processing times vary.

This guide walks through each step in the order you actually do them, with the costs and timelines you'll encounter. For choosing a name, see LLC naming guide.

Step 1: Choose your LLC name

Your Texas LLC name must include "LLC" or "Limited Liability Company" and be distinguishable from any existing entity registered in Texas. Search the Texas Secretary of State's SOSPortal database to check availability. The search is free and returns results instantly.

Texas is relatively lenient on name similarity. "Bright Studio LLC" and "Bright Studios LLC" would likely both be accepted as distinguishable. But being legally distinguishable doesn't mean your customers won't confuse the two. Search broadly and consider trademark implications before committing.

If your name is available but you're not ready to file immediately, Texas allows name reservations for 120 days at $40. This prevents someone else from registering it while you prepare your formation documents.

You can also file a DBA (Assumed Name Certificate) if you want to operate under a different name than your legal LLC name. The DBA filing costs $25 per county where you do business in Texas. This lets "Smith Holdings LLC" operate publicly as "Bright Studio" without changing the legal entity name.

Step 2: Choose a registered agent

Every Texas LLC must have a registered agent with a physical street address in Texas. No PO boxes. The agent receives legal documents (lawsuits, government notices, tax correspondence) on behalf of the LLC. This is a legal requirement, not optional.

Option 1: Be your own agent. Free, but your home address becomes public record on the Texas SOS website. Anyone can look up your LLC and find your personal address. You also must be available at that address during normal business hours to accept documents in person. If you're travelling or working remotely, you can miss a critical legal notice.

Option 2: Use a registered agent service. $50 to $199/year. The service provides a Texas address, forwards documents to you, and ensures nothing gets missed while you're unavailable. Northwest Registered Agent ($125/year) and ZenBusiness ($199/year after the first free year) are popular options. For service comparisons, see best LLC formation services.

Option 3: Use a friend or family member in Texas. Free, but they must be available at the registered address during business hours and they'll see every legal document your LLC receives, including lawsuits. Most people prefer the privacy of a paid service.

Step 3: File the Certificate of Formation

This is the actual formation step. You file the Certificate of Formation (Form 205) with the Texas Secretary of State.

Online filing (recommended): Visit the Texas Secretary of State's SOSPortal and create an account. Complete the Certificate of Formation (Form 205) with your LLC name, registered agent information, management structure, organiser details, and effective date. The filing fee is $300, payable by ACH or credit card, although credit card payments carry an additional convenience fee. Processing times vary, and expedited filing options are available for an additional charge.

Mail filing: Download Form 205, complete it, and mail it with the $300 filing fee to the Texas Secretary of State. Processing times vary, so check the state's current turnaround times before submitting.

The $300 fee is non-refundable. If your filing is rejected (usually because the name is too similar to an existing entity or required information is missing), you can correct and resubmit without paying again, but the original fee isn't returned if you abandon the filing.

Member-managed vs manager-managed: most single-member and small multi-member LLCs choose member-managed, meaning all owners participate in running the business. Manager-managed is for LLCs with passive investors who own a share but don't participate in daily operations. If you're not sure, choose member-managed. You can change this later by filing an amendment ($150).

Step 4: Create an Operating Agreement

Texas doesn't legally require an operating agreement, but you should have one anyway. Banks require it to open a business account. It also protects your personal liability shield: without an operating agreement, a court could argue the LLC isn't a separate entity from you personally (called "piercing the corporate veil"), exposing your personal assets to business debts.

Your operating agreement should cover: ownership percentages, profit and loss distribution, voting rights, member responsibilities, process for adding or removing members, what happens if a member dies or becomes incapacitated, and the process for dissolving the LLC.

For single-member LLCs, the operating agreement is simpler but still essential. It establishes the LLC as a separate entity and documents how the business operates. A basic single-member operating agreement is 3 to 5 pages. Most LLC formation services include a template. Free templates are available from the Texas Secretary of State website and SCORE (SBA's mentoring arm).

Step 5: Get an EIN (Employer Identification Number)

The EIN is free and takes 10 minutes. Apply online at irs.gov/ein. You'll need your LLC's legal name, Texas address, and the responsible party's SSN or ITIN. The EIN is issued immediately upon completion of the online application.

Every LLC needs an EIN, even single-member LLCs. Banks require it to open business accounts. The IRS uses it for tax filings. Vendors and clients use it on W-9 forms. Don't pay an LLC formation service $70 to $99 for this. It's free and faster to do yourself.

One EIN per LLC. If you dissolve and reform, the new LLC needs a new EIN. If you change your LLC's name or address, you keep the same EIN. If you change from single-member to multi-member entity, you keep the same EIN.

Step 6: Open a business bank account

Separate your personal and business finances immediately. Mixing them is the fastest way to lose your personal liability protection. Courts use "commingling of funds" as evidence that the LLC isn't a real separate entity.

What you need to open a business bank account: Certificate of Formation (the approved filing from the Texas SOS), EIN confirmation letter, operating agreement, government-issued ID, and a business address.

Traditional banks: Chase, Bank of America, Wells Fargo all offer business checking in Texas. Expect monthly fees of $10 to $30 (often waivable with minimum balances of $1,500 to $5,000). In-person branch visit required.

Online options: Grey Business lets you open a multi-currency business account in your LLC name with US routing and account details, no branch visit required. You get USD, GBP, and EUR accounts. If your Texas LLC works with international clients or vendors, the multi-currency capability eliminates the need for separate foreign currency accounts or expensive wire transfers for each currency. The Grey conversion fee is 1% capped at $6, compared to bank wire fees of $25 to $50 per international transfer.

Step 7: Texas franchise tax

This is the step most guides bury at the bottom. Don't skip it. Texas LLCs are generally subject to franchise tax rules, but that doesn't mean every LLC owes tax or must file a franchise tax report. Businesses with annualised total revenue at or below the state's no-tax-due threshold generally owe no franchise tax and don't need to file a franchise tax report. However, they must still submit an annual Public Information Report (PIR) or Ownership Information Report (OIR), unless an exception applies.

For 2026 and 2027, the no-tax-due threshold is $2.65 million in annualised total revenue. LLCs at or below this threshold generally owe $0 in franchise tax and no longer need to file a No Tax Due Report. They must still submit the applicable annual information report.

Missing required franchise tax filings or annual information reports can put your LLC's good standing at risk and may lead to forfeiture of its right to transact business in Texas. Even when no franchise tax is owed, it's important to submit the required PIR or OIR on time.

Filing deadlines: the initial franchise tax report is due May 15 of the year after formation. If you form your LLC in September 2026, your first report is due May 15, 2027. Annual reports are due May 15 every year after that. File electronically through the Texas Comptroller's Webfile system.

Tax rates (for LLCs above $2.65 million): 0.375% for retail and wholesale businesses, 0.75% for all other businesses, applied to the LLC's "taxable margin" (roughly, the lesser of total revenue minus cost of goods sold, total revenue minus compensation, 70% of total revenue, or total revenue minus $1 million).

After formation: What comes next

Business licences and permits. Texas doesn't have a general business licence, but specific industries require state or local permits. Food service needs a health department permit. Construction needs a contractor's licence. Check with your city and county clerk for local requirements.

Sales tax permit. If you sell taxable goods or services in Texas, apply for a sales tax permit through the Texas Comptroller. The permit is free. Texas sales tax is 6.25% state rate plus up to 2% local rate (total up to 8.25%). Don't collect sales tax without a permit, and don't sell taxable items without collecting it.

Business insurance. Not legally required for single-member LLCs in Texas (unless you have employees, in which case workers' compensation is recommended but not mandatory in Texas). General liability insurance ($30 to $100/month) protects against third-party claims. Professional liability (errors and omissions) is worth considering if you provide professional services.

Separate credit. Apply for a business credit card in your LLC name to start building business credit. Use it for business expenses and pay in full each month. Business credit is separate from personal credit and can help you secure financing later.

Ready to start your Texas LLC? Open a Grey Business account and get US banking details in your LLC name from day one.

Frequently asked questions about how to start an LLC in Texas

How much does it cost to start an LLC in Texas?

$300 state filing fee for the Certificate of Formation. Optional costs: registered agent service ($50 to $199/year), name reservation ($40), DBA filing ($25 per county), and EIN (free from IRS). Total out-of-pocket for a basic LLC: $300 to $500 in the first year. For cost breakdowns across states, see LLC cost guide.

How long does it take to form a Texas LLC?

Processing times for Texas LLC formation vary depending on the filing method and current workload. Online applications can be submitted through SOSPortal, and expedited same-day or next-day processing is available for an additional fee. Once your LLC is approved, you can apply for an EIN and open a business bank account. The overall timeline depends on how quickly your filing is approved and your bank account is set up.

Does a Texas LLC pay state income tax?

Texas has no personal state income tax, but LLCs are generally subject to the state's franchise tax rules. For 2026 and 2027, LLCs with annualised total revenue of $2.65 million or less generally owe no franchise tax and don't need to file a franchise tax report. However, they must still submit an annual Public Information Report or Ownership Information Report, unless exempt. LLCs above the threshold generally pay 0.375% (retail/wholesale) or 0.75% (other businesses) on their taxable margin, although an alternative EZ computation method is available for eligible businesses. For filing details, see LLC tax guide.

Do I need a lawyer to form an LLC in Texas?

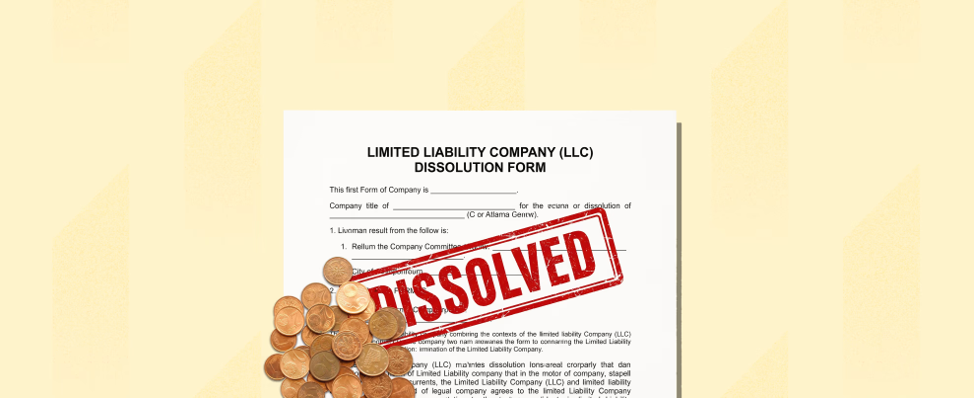
Not for a straightforward single-member or small multi-member LLC. The SOSDirect online filing system is user-friendly and walks you through each section. A lawyer ($500 to $2,000) is worth the cost if your LLC involves complex ownership structures, significant assets, real estate holdings, or multiple members with different contribution levels. For dissolution guidance, see dissolve an LLC.

Can a non-US resident start an LLC in Texas?

Yes. Texas does not require LLC owners to be US citizens or residents. You'll need a registered agent with a Texas address, an EIN from the IRS (apply by mail using Form SS-4 if you don't have a US SSN), and a business bank account that accepts non-resident LLCs. Grey Business serves international founders without requiring a US branch visit.

Start your Texas LLC and open Grey Business for US banking details in your LLC name.

Disclaimer: This article is for informational purposes only. All costs and details are estimates based on mid-2026 data. Verify current information before making decisions. Grey isn't a bank. We're a licensed financial services provider offering multi-currency accounts.

How to dissolve an LLC: Steps and costs

How to dissolve an LLC: Steps and costs

How to dissolve an LLC step by step. State filings, final tax returns, and asset distribution explained. Close your LLC properly. Read now.

•

•

2 min read

A surprising number of business owners stop operating their LLC but never formally close it. The LLC stays registered, the state keeps expecting filings, and fees or penalties accumulate quietly in the background. In California, that can mean an $800 annual LLC tax for a business you thought you'd already shut down. In Delaware, LLCs generally owe a $300 annual tax until they properly cancel their registration. These obligations don't stop when you stop working.

Don't dissolve if you might restart the business within a year. It's easier and cheaper to keep the LLC dormant (file the required reports, pay any minimum fees) than to dissolve and re-form later. Reforming means new filing fees, a new EIN application, new bank accounts, and updated contracts with every vendor and client.

To dissolve an LLC, you vote to dissolve (if multi-member), settle debts, and distribute remaining assets. Then file Articles of Dissolution with your state, file final tax returns, cancel your EIN, and close all business accounts. The process takes 2 to 8 weeks depending on the state.

This guide covers every step, including the tax obligations most dissolution guides skip. For the formation side, see LLC costs.

Step 1: Vote to dissolve

The following steps outline the general process for dissolving an LLC in the US. However, requirements vary by state, including voting rules, tax obligations, filing documents, and processing times. Always check your state's specific requirements before proceeding.

If your LLC has more than one member, the members must formally vote to dissolve. Check your operating agreement for the voting threshold. Common options are unanimous consent, majority vote, or supermajority (two-thirds). If you don't have an operating agreement, your state's default LLC act applies, which typically requires the majority consent of all members.

For single-member LLCs, you make the decision yourself. Either way, document it in writing. Draft a written resolution that states the LLC name, the date of the vote, the result (unanimously approved, majority approved, etc.), and the signatures of all voting members. Keep this resolution with your LLC records permanently.

This documentation protects you if anyone later disputes whether the dissolution was authorised. It also protects you if creditors challenge the dissolution as fraudulent (attempting to avoid debts). A properly documented vote shows the dissolution was deliberate and orderly, not evasive.

If your operating agreement doesn't address dissolution, draft a simple dissolution resolution. One page is enough. Date it, state the decision, and have every member sign it. This becomes the legal record of consent.

Step 2: Wind up business affairs

Before you file anything with the state, resolve everything the LLC owes and is owed. This is the most time-consuming step and the one most people rush through, leading to problems months or years later.

Pay all debts and obligations. Outstanding invoices, business loans, credit card balances, vendor contracts, lease obligations, and any pending legal claims. If the LLC can't pay all debts from its assets, consult a business attorney before proceeding. Dissolving an LLC while debts are outstanding can expose members to personal liability in some situations, particularly if creditors can argue the dissolution was intended to evade payment.

Collect what's owed to you. Chase outstanding receivables aggressively. Send final invoices immediately. Once the LLC is dissolved, collecting becomes dramatically harder. You may lose standing to sue in the LLC's name. Some states allow a "winding up" period after dissolution during which you can still collect, but this varies. Don't rely on it.

Cancel contracts and subscriptions. Leases, software subscriptions, insurance policies, recurring services, domain registrations, hosting accounts, phone plans, and any other recurring commitments. Notify each provider in writing that the LLC is closing and request written confirmation of cancellation. Keep these confirmations. A verbal cancellation that isn't documented can lead to continued billing.

Notify your customers and clients. If you have ongoing client relationships, give them reasonable notice. Provide referrals to alternative providers if appropriate. This isn't legally required in most states, but it's professional and protects your personal reputation for future ventures.

Distribute remaining assets. After debts are paid and receivables collected, distribute the remaining cash and assets to members according to the operating agreement. If there's no agreement, follow your state's default rules, which typically allocate proportionally based on ownership percentage. Document every distribution with amounts, dates, and member signatures.

Step 3: File final tax returns

Your LLC must file a final tax return for the year it dissolves. Check the "final return" box on the applicable form. The specific form depends on how your LLC is taxed:

Single-member LLC (disregarded entity): Report the business's final income and expenses on Schedule C of your personal Form 1040, if applicable. Schedule C does not have a separate "final return" checkbox.

Multi-member LLC (partnership): File Form 1065, check the "final return" box, and issue final Schedules K-1 to each member. Each member reports their share of the LLC's income and other applicable tax items on their personal return.

LLC taxed as an S corporation: File Form 1120-S and mark it as the final return. If the LLC adopts a plan of corporate dissolution or liquidation, Form 966 is generally required within 30 days of adopting that plan.

LLC taxed as a C corporation: File Form 1120 and mark it as the final return. Form 966 is generally required within 30 days of adopting a plan of corporate dissolution or liquidation.

Don't forget state tax obligations. If your state has a franchise tax, income tax, or sales tax, file final returns with the state as well. In Texas, file a final franchise tax report with the Comptroller. In California, LLCs generally owe the $800 annual tax for their final taxable year, even if they stop operating partway through it. The tax is not normally prorated, although certain exceptions apply. In New York, the filing fee is $0, but you must file a final partnership return. For guidance, see how to file LLC taxes.

Sales tax: if your LLC collected sales tax, file a final sales tax return and remit any remaining tax. Notify your state's revenue department that the sales tax permit should be cancelled.

Payroll taxes: if you had employees, file final Forms 941 (quarterly) and W-2s (annual). Pay any remaining payroll tax deposits. File Form 940 (federal unemployment tax) marked "final."

Step 4: File Articles of Dissolution

File the required dissolution or cancellation documents with your state's Secretary of State or equivalent filing authority. The exact form, filing process, and requirements vary by state. Some states also require tax clearance or additional documentation before the LLC can be formally terminated.

Filing fees vary by state. Some states allow LLCs to dissolve at no charge, while others charge a filing fee. For example, California does not charge a fee for LLC termination filings, while Texas charges $40 for a Certificate of Termination. Check your state's current filing fees before submitting your dissolution documents.

The form is typically short: LLC name, date of formation, reason for dissolution (voluntary), effective date of dissolution, and confirmation that debts have been paid or provisions made for payment. Some states require a tax clearance certificate from the revenue department before accepting the dissolution filing. Ohio, for example, requires a tax clearance letter.

If your LLC operates in multiple states, you must also file for withdrawal (or termination of foreign qualification) in each state where you registered as a foreign LLC. Each state charges its own fee for this. Missing a foreign state registration means that the state keeps expecting filings and fees.

Processing time: 1 to 4 weeks for most states. Expedited processing is available in many states for an additional fee ($50 to $200). Once approved, the state issues a certificate of dissolution or cancellation. Keep this permanently with your LLC records.

Step 5: Cancel your EIN and close accounts

Close your IRS business account. An EIN cannot be permanently cancelled, but you can ask the IRS to close the business tax account associated with it. Send a letter containing the LLC's legal name, EIN, business address, and reason for closure to the Internal Revenue Service, Cincinnati, OH 45999. Include a copy of your EIN assignment notice if available. The IRS will close the account once all required tax returns have been filed and outstanding taxes paid.

Close all business accounts. Bank accounts, credit cards, payment processors (Stripe, PayPal, Square), and any merchant accounts. Transfer any remaining balances to members before closing. Request written confirmation from each institution that the account is closed. A "closed" bank account that still has a $2.50 monthly maintenance fee will eventually go to collections.

Cancel your registered agent service if you were using a professional agent. Cancel any business licences or permits with your city, county, and state. Cancel your DBA (doing business as) registration if you filed one. Update your website to indicate the business is no longer operating, or take it down entirely. Update social media profiles similarly.

Notify creditors formally. Many states require or recommend sending a written notice to known creditors that the LLC is dissolving. This starts a statutory claims period (typically 90 to 120 days) after which creditors who don't file claims lose their right to collect. This is your legal protection against surprise claims years later.

Common dissolution mistakes

1. Not filing Articles of Dissolution. This is the most common and most expensive mistake. The LLC continues to exist in the state's records, annual fees keep accumulating, franchise taxes keep accruing, and your registered agent keeps billing you. Five years of California's $800 annual LLC tax can mean $4,000 in unpaid taxes, plus applicable penalties and interest. The tax can apply even if the LLC earned no income, unless an exemption or exception applies.

2. Not filing final tax returns. The IRS expects a final return. Not filing triggers a substitute return (SFR), which estimates your tax liability, usually too high, and starts penalties and interest from the original due date. State revenue departments are equally aggressive. Don't assume that dissolving the LLC means the tax obligations disappear.

3. Distributing assets before paying debts. Members who receive distributions while debts are outstanding can be held personally liable for those debts, up to the amount they received. This is called a "fraudulent transfer" or "fraudulent conveyance" in legal terms. Pay every creditor first. Distribute to members last.

4. Forgetting state-specific requirements. Some states require additional steps before an LLC can be formally dissolved, including obtaining tax clearance or notifying creditors. These requirements vary, so check the rules in the state where your LLC was formed. Some states have mandatory waiting periods. Check your specific state's requirements before filing.

5. Not cancelling foreign state registrations. If your LLC is registered to do business in three states, you need to file for dissolution in your home state and withdrawal in the other two. Miss one and that state keeps expecting annual reports and fees.

Closing your LLC? Make sure all financial accounts are settled and final returns are filed before you dissolve.

Frequently asked questions about how to dissolve an LLC

How much does it cost to dissolve an LLC?

The cost of dissolving an LLC depends on the state and whether you need professional assistance. Some states charge no filing fee, while others charge $40, $100, or more. For example, California has no filing fee for LLC termination, while Texas charges $40. If you hire an attorney, dissolution service, or accountant, you'll also need to budget for their fees. Outstanding taxes, annual fees, and other obligations can increase the total cost.

How long does LLC dissolution take?

The state filing itself takes 1 to 4 weeks for processing, longer in busy states like California and New York. But the full wind-up process (paying debts, collecting receivables, distributing assets, filing final taxes, notifying creditors) can take 2 to 6 months. Start the wind-up well before you file with the state. The statutory creditor claims period adds 90 to 120 days after filing.

Can I dissolve an LLC with debt?

You can, but you must handle the debt first. The LLC's assets should be used to pay creditors before any distributions to members. If the LLC's assets aren't sufficient to cover all debts, consult a business attorney. Dissolving with unpaid debts can expose members to personal liability in some cases, particularly if creditors argue the dissolution was intended to avoid payment.

What happens to the LLC name after dissolution?

In most states, the name becomes available for others to use after dissolution. The timeline varies: some states release names immediately, others hold them for 1 to 3 years. If you want to protect the name for future use, consider registering it as a federal trademark before dissolving (costs $250 to $350). For starting a new LLC later, see start a Texas LLC or name an LLC.

Do I still need to file taxes after dissolving my LLC?

You must file a final tax return for the year of dissolution. After that, no. But if you didn't file returns for prior years, those obligations survive dissolution. The IRS can pursue unfiled returns against the LLC's former members. Clean up any back filings before or during dissolution.

Starting fresh? Open a Grey Business account for your next venture.

Disclaimer: This article is for informational purposes only. All costs and details are estimates based on mid-2026 data. Verify current information before making decisions. Grey isn't a bank. We're a licensed financial services provider offering multi-currency accounts.

How to save money in USD in Nigeria: Best ways and apps

How to save money in USD in Nigeria: Best ways and apps

How to save money in USD in Nigeria. Domiciliary accounts vs fintech apps compared by fees, access, and risk. Protect your savings from naira depreciation.

•

•

2 min read

If you saved NGN 1,000,000 in a Nigerian bank account five years ago, that money has lost more than half its purchasing power in dollar terms. The naira has depreciated from roughly NGN 410/USD to over NGN 1,500/USD since 2021. Saving in naira means watching your wealth shrink. Saving in dollars means preserving it.

Nigerians can save in USD through domiciliary accounts at commercial banks, fintech apps like Grey, PiggyVest, and Bamboo, or by holding dollar-denominated stablecoins. Each method has different costs, access requirements, and risk profiles. The best option depends on how much you're saving, how quickly you need access, and how comfortable you are with digital platforms.

This guide compares every method available in Nigeria for saving in dollars, with the real costs, risks, and trade-offs for each. For a broader look at saving in foreign currencies from anywhere, see how to save in foreign currency.

Why save in USD from Nigeria?

The case for saving in dollars is straightforward: the naira has lost value against the dollar consistently for over a decade. This isn't a temporary dip. It's a structural trend driven by Nigeria's dependence on oil exports, foreign exchange shortages, and monetary policy decisions.

Saving in naira means your money buys less every year, even when the number in your account stays the same or grows. A Nigerian who saved NGN 5 million in 2020 had roughly $13,000 at the time. That same NGN 5 million is now worth under $3,500. The account balance didn't change. The purchasing power collapsed.

Saving in USD preserves your purchasing power relative to the global economy. Your dollar savings buy the same amount of imported goods, school fees, medical treatment, and international services regardless of what happens to the naira.

That said, saving in USD isn't without risk. If the naira strengthens (it has happened in short bursts, usually after CBN interventions), your dollar savings lose value in naira terms temporarily. Converting naira to dollars also carries a cost: the exchange rate spread, which runs 1 to 5% depending on the method. The decision to save in dollars should be a long-term one, not a short-term speculation on the naira.

Don't convert your rent money or next month's food budget to dollars. Keep 3 to 6 months of living expenses in naira for immediate needs. Save in dollars with what you can afford to hold for at least 6 to 12 months.

Method 1: Domiciliary accounts

A domiciliary account ("dom account") is a foreign currency account at a Nigerian commercial bank. You hold USD, GBP, or EUR in the account and can deposit or withdraw in those currencies. GTBank, Access Bank, Zenith Bank, First Bank, and UBA all offer them. For a step-by-step guide, see how to open a domiciliary account.

Requirements: BVN, NIN, a valid ID (international passport or national ID card), a utility bill not older than 3 months, two reference letters (some banks still require these; others have dropped the requirement), and a minimum opening deposit (typically $100 to $500, depending on the bank). The process requires a branch visit, and the documentation verification can take 3 to 7 business days.

Pros: Regulated by CBN, funds are NDIC-insured (up to NGN 500,000 equivalent per depositor per bank), physical branch access for withdrawals, and you can receive international wire transfers directly into the account via SWIFT.

Cons: The biggest issue is sourcing dollars. Nigerian banks don't sell USD to individuals at the official rate. You need to deposit dollars you already have, whether from exports, remittances, freelance income, or the parallel market. Interest is typically 0% on most domiciliary accounts. Withdrawals can be restricted during FX shortages, with some banks limiting cash withdrawals to $5,000 per month. Monthly maintenance fees of $1 to $5 are common, and some banks charge for incoming wire transfers.

Who should use this: Anyone with large dollar savings ($10,000+) who wants maximum regulatory protection and doesn't need frequent access. The NDIC insurance and CBN regulation make this the safest option on paper.

Method 2: Fintech apps

Several Nigerian fintech apps let you save in dollars or dollar-equivalent instruments from your phone. They're faster to set up than dom accounts, don't require a branch visit, and typically have lower minimum deposits. The trade-off is different (and sometimes less clear) regulatory protection.

PiggyVest: One of Nigeria's most popular savings apps. Offers USD savings with up to 7% annual interest through their dollar savings feature. You buy dollars within the app at the prevailing rate.

Pros: User-friendly interface, competitive interest rates, automated savings features.

Cons: $20 fee to transfer USD out to a domiciliary account, USD isn't always available for purchase (demand often exceeds supply), and the platform is not a bank, so deposit insurance works differently. Best for people who want to save small amounts regularly and don't mind limited withdrawal windows.

Bamboo: Primarily an investment app for US stocks and ETFs, but its fixed-income dollar product lets you save idle USD at up to 8% interest for 90-day lock-in periods.

Pros: Dollar-denominated, SEC-regulated (for the stocks side), accessible from Nigeria.

Cons: the 90-day lock-in means no access during that period, and the platform is more investment-oriented than a pure savings product. Best for people who want to park $500+ for 3 months and earn yield while they wait.

Rise: Another investment platform with dollar savings features. Offers fixed-income and real estate dollar funds alongside stock investments.

Pros: Diversified dollar savings options, regulated, and accessible.

Cons: Returns vary by fund, minimum investments apply, and liquidation times depend on the fund type. Real estate funds can take days to liquidate. Best for people who want dollar exposure beyond simple savings.

Cowrywise: Offers naira and dollar mutual fund investments. Dollar savings come through dollar-denominated fixed-income funds managed by licensed fund managers.

Pros: Automated savings, SEC-regulated fund managers, and accessible.

Cons: Dollar availability can be limited during high-demand periods, returns aren't guaranteed (they're based on fund performance, not a fixed interest rate), and withdrawals may take 24 to 72 hours.

Who should use fintech apps: anyone saving $50 to $5,000 monthly who wants easy access, doesn't want a branch visit, and is comfortable with digital platforms. Compare the interest rates, lock-in periods, and withdrawal policies before committing.

Method 3: Stablecoins (USDT, USDC)

Stablecoins are cryptocurrencies pegged 1:1 to the US dollar. Buying USDT (Tether) or USDC (Circle) is effectively buying digital dollars. You purchase them on exchanges like Binance, Bybit, or Luno using naira via P2P trading.

Pros: Instant access at any hour, no bank involved, 24/7 liquidity (you can convert back to naira at 2am on a Sunday), and the ability to earn yield through DeFi protocols (though this adds substantial risk). Converting back to naira via P2P is straightforward and settles within minutes.

Cons: Not regulated by CBN, which means no deposit insurance. The exchange rate spread on P2P purchases runs 1 to 3% above the mid-market rate, eating into your savings immediately. Platform insolvency is a real risk (FTX collapsed owing billions to depositors). You need basic crypto knowledge to manage wallets, avoid scams, and understand the difference between custodial and non-custodial storage. P2P trading also carries counterparty risk: the counterparty could fail to deliver.

Who should use stablecoins: People comfortable with crypto who want maximum flexibility and don't mind managing their own security. Keep holdings on reputable exchanges (Binance, Bybit) or in a hardware wallet for larger amounts. This isn't a savings account. It's holding a digital asset pegged to the dollar.

Method 4: Grey USD account

Grey lets Nigerian residents open a USD account that holds real dollars with US routing and account details. You can receive USD from international clients, freelance platforms, or transfers, hold the dollars, and convert to naira when you choose.

What makes it different: Grey isn't a savings app that lets you buy dollars at a markup. It's an account that receives and holds USD directly. If you earn in dollars (freelancing, remote work, exports), the money lands in your Grey account as USD. You decide when to convert to naira, based on the rate you see in the app. No forced conversion, no lock-in period, no minimum balance.

You can also spend directly from your USD balance using a Grey virtual card for online purchases, subscriptions, and international payments. This means you don't need to convert to naira just to pay for a Netflix subscription or buy something from an international merchant.

To organise money for a specific goal (a trip, tuition, an emergency fund), set it aside in a Grey Pouch so it's visually separate from your spending balance.

Pros: Real USD account details (ACH routing number and account number), no minimum deposit, no lock-in period, instant setup, virtual card for spending.

Cons: No interest earned on balances; 1% conversion fee (capped at $6) when you swap to naira.

Who should use Grey: Anyone earning in dollars who wants to hold those dollars and convert on their own terms. Especially freelancers, remote workers, and small business owners receiving payments from US clients.

Cost comparison: Converting NGN 500,000 to USD

Here's what it costs to convert NGN 500,000 (roughly $330 at parallel market rates) into dollars through each method:

Domiciliary account: You bring cash dollars to the bank. The cost is whatever you paid to source those dollars, typically the parallel market rate, which includes a 1 to 3% premium over the official rate. No conversion fee from the bank, but you're paying the spread on acquisition.

PiggyVest: You buy dollars within the app at their rate, which includes a spread. The effective cost is typically 1 to 3% above the parallel market rate. On $330, that's $3 to $10 in spread.

Stablecoins (P2P): Binance P2P rates for USDT include a 1 to 3% spread over the mid-market rate. On $330, that's $3 to $10 in spread, plus any trading fees (typically 0%).

Grey: If you're receiving dollars from clients, the cost is zero on receiving. When you convert from naira to dollars within Grey, the 1% swap fee (capped at $6) applies. On $330, that's $3.30.

The real cost isn't the platform fee. It's the exchange rate you get when sourcing dollars. Compare the effective rate (how many naira per dollar) across methods before converting a large amount.

Which method should you use?

If you earn in dollars (freelancing, remote work, exports): Grey. Your income arrives in USD and stays in USD until you choose to convert. No intermediary, no markup on receiving.

If you want to convert naira to dollars for long-term savings: PiggyVest or a domiciliary account. PiggyVest is easier to set up and pays interest; dom accounts offer more regulatory protection. If the amount is large ($10,000+), the dom account's NDIC insurance matters.

If you want dollar-denominated investments: Bamboo or Rise. These go beyond simple savings into fixed-income and equity products that earn returns.

If you're comfortable with crypto: Stablecoins (USDT/USDC) offer the most flexibility and 24/7 access, but with no deposit insurance and additional platform risk. Keep no more than you can afford to lose on any single exchange.

If you want both savings and spending: Grey. Hold dollars, spend with a virtual card, convert to naira when you need to. One account covers receiving, saving, and spending.

Frequently asked questions about saving in USD in Nigeria

Is it legal to save in dollars in Nigeria?

Yes. Nigerian residents can legally hold and operate domiciliary accounts in USD, GBP, or EUR at commercial banks. The CBN permits individuals to hold foreign currency for legitimate purposes, including savings, investment, and business transactions. Fintech apps operate under different regulatory frameworks depending on the specific licence. Stablecoins exist in a regulatory grey area but are not prohibited for individual holding.

How much interest can I earn on dollar savings in Nigeria?

Domiciliary accounts at banks: typically 0% (banks don't pay interest on foreign currency deposits). PiggyVest: up to 7% annually. Bamboo: up to 8% on 90-day fixed-income lock-in. Stablecoin DeFi yields vary widely (2 to 15%) but carry proportionally higher risk. Grey doesn't pay interest on USD balances but lets you hold and convert on your terms with no lock-in.

What is the safest way to save in dollars in Nigeria?

A domiciliary account at a CBN-regulated bank offers the most regulatory protection, with NDIC insurance covering up to NGN 500,000 equivalent per depositor per bank. Fintech apps offer convenience but may not carry the same level of deposit insurance. Stablecoins offer no deposit protection. For amounts under $5,000, a regulated fintech app is a reasonable balance of convenience and safety. For larger amounts, consider splitting across a dom account and a fintech platform.

Can I open a domiciliary account without a salary account at the same bank?

Yes. You don't need a salary account at the same bank to open a dom account. You need your BVN, NIN, valid ID, proof of address, and the minimum opening deposit ($100 to $500, depending on the bank). Some banks ask for reference letters. The process requires a branch visit at most banks, though some now offer partial online applications.

Ready to save in dollars? Open a Grey USD account and hold real dollars with US account details.

Disclaimer: This article is for informational purposes only. All costs and details are estimates based on mid-2026 data. Verify current information before making decisions. Grey isn't a bank. We're a licensed financial services provider offering multi-currency accounts.

How to save in foreign currency: A practical guide

How to save in foreign currency: A practical guide

How to save in foreign currency. Domiciliary accounts, multi-currency fintechs, and stablecoins compared by cost, access, and risk. Read now.

•

•

2 min read

Saving in a foreign currency is a hedge, not a guaranteed win. If the currency you save in depreciates against yours, you lose money. If it appreciates, you gain. Most people save in foreign currency because they don't trust their local currency to retain its value, not because they've run the numbers on exchange-rate forecasts.

That's a reasonable instinct. Over the past decade, the Nigerian naira has lost roughly 70% of its value against the US dollar. The Egyptian pound lost about 60% of its value. The Pakistani rupee lost about 40%. If you earned in those currencies and saved locally, your purchasing power eroded every year. Saving in USD, EUR, or GBP protects against that erosion.

To save in foreign currency, open a domiciliary account at a local bank or a multi-currency fintech account with a provider like Grey or Wise. Dom accounts have limited access and high minimums. Fintech accounts offer flexible digital holding with lower conversion costs. Stablecoins (USDC, USDT) offer a third path for crypto-comfortable savers who want dollar exposure without a bank account.

This guide covers every option, the costs involved, and who each one is actually for.

Why save in foreign currency?

Three reasons make the case for most people.

1. Currency depreciation protection. If your country's currency has a history of losing value against the dollar or euro, holding savings in a stronger currency preserves your purchasing power. This isn't speculation. It's insurance. The naira's depreciation from approximately 360/USD in 2020 to over 1,500/USD in 2026 turned NGN savings into a losing position regardless of interest rates earned. An NRE account earning 7% in naira still loses purchasing power compared to someone holding dollars at 0% interest.

2. Planning for international expenses. If you'll pay for education abroad, travel, medical treatment, or property in another country, saving in that country's currency eliminates exchange-rate uncertainty. You know exactly how much you have in the currency you'll spend. Converting from a depreciating currency at the last minute means you need more of it every month you wait.

3. Diversification. Financial advisors recommend diversifying across asset classes. Currency diversification applies the same logic: don't hold all your savings in a single currency, especially one with high inflation or political instability. Even a small allocation (10 to 20% of savings) in a stable foreign currency reduces portfolio volatility.

Who should NOT save in foreign currency: if your local currency is stable (USD, EUR, GBP, CHF, SGD), the benefits are minimal, and the conversion costs eat into returns. Swiss residents don't need to save in dollars. Americans don't need to save in euros unless they have specific euro-denominated expenses. If you live in a strong-currency country, invest rather than hedge currency risk.

Option 1: Domiciliary accounts

A domiciliary account (dom account) is a foreign-currency account held at a local bank. In Nigeria, most major banks (GTBank, Access Bank, Zenith Bank, UBA, First Bank) offer USD, GBP, and EUR domiciliary accounts. Similar products exist in Ghana (forex accounts), Kenya (FCY accounts), and other African and Asian markets.

How it works: you deposit foreign currency into the account, and it stays in that currency. No conversion on deposit. No conversion until you choose to withdraw in local currency. The bank holds your dollars as dollars. Interest rates are typically 0 to 1% on domiciliary accounts, sometimes zero.

Pros: Your foreign currency is held at a regulated local bank. NDIC insurance (up to NGN 500,000 equivalent in Nigeria). Familiar banking interface. You can receive SWIFT transfers directly into the account from abroad.

Cons: The access friction is real. Opening requires a branch visit with ID, utility bills, and sometimes a minimum deposit of $100 to $1,000. Withdrawals often require another branch visit. Some banks restrict online transfers from domiciliary accounts. The SWIFT fees on incoming transfers (ranging from $10 to $25 at many Nigerian banks) reduce the value of smaller deposits. And the bank's exchange rate when you convert to local currency includes a 1-3% spread over the mid-market rate, which is higher than fintech alternatives.

Best for: people who want to keep foreign currency at a traditional bank they already use, and who make infrequent, larger deposits ($500+) where the fixed SWIFT fee is proportionally small.

Option 2: Multi-currency fintech accounts

Fintechs like Grey, Wise, and Revolut let you hold multiple currencies in a single digital account. No branch visit. No minimum balance in most cases. Currency conversion happens instantly in the app at rates close to the mid-market rate.

Grey: Hold USD, EUR, and GBP with real account details. Receive payments via ACH (USD), SEPA (EUR), or FPS (GBP). Convert between currencies at a 1% fee, capped at $6. Withdraw to a local bank in 50+ countries. Virtual card for online spending directly from your foreign currency balance. No minimum balance. No monthly fee.

The Grey advantage for savers in Africa and South Asia: you get real US account details (routing and account numbers) that let you receive ACH transfers from US employers and clients with no receiving fees. A dom account can only receive SWIFT transfers, which cost $15 to $50 per incoming payment.

Wise: Multi-currency account with 40+ currencies. Conversion fees vary by currency pair (typically 0.5 to 1.5%). No receiving fee on major currencies. Real account details in USD, GBP, EUR, and several others. Competitive on per-transfer cost for smaller amounts.

Revolut: Similar to Wise. 30+ currencies. Free exchanges up to a monthly limit (standard plan), then 0.5 to 1%. Full banking features in the UK and EU. Limited availability in Africa and South Asia. If you're in Nigeria, Kenya, or India, Revolut likely isn't an option for you right now.

Best for: People who save foreign currency regularly (monthly income in USD, for example), who want instant access and low conversion costs, and who value the ability to spend directly from the foreign currency balance using a virtual card. If you'd otherwise lose 2 to 3% on every bank conversion, the fintech route saves $20 to $30 per $1,000 converted over a dom account.

Option 3: Stablecoins (USDC, USDT)

Stablecoins are cryptocurrencies pegged to a fiat currency, usually the US dollar. USDC (issued by Circle) and USDT (issued by Tether) are the two largest. Holding USDC is functionally similar to holding digital dollars, without needing a bank account.

How it works: buy USDC or USDT on a crypto exchange (Binance, Bybit, Luno, Quidax) using local currency. Hold the stablecoins in the exchange wallet or a personal crypto wallet (MetaMask, Trust Wallet, Phantom). When you want to convert back to local currency, sell on the exchange at the current rate.

Pros: accessible from almost any country. No bank required. No minimum balance. Transfers between wallets are fast and cheap on certain networks (Solana USDC transfers cost less than $0.01 and settle in seconds). You can hold dollar-equivalent value without a US bank account, which matters in countries where USD bank accounts are restricted or expensive.

Cons: you're holding crypto, even if it's a stablecoin. Exchange risk exists (the exchange could freeze your account, get hacked, or face regulatory action). USDT's reserve backing has been questioned repeatedly, though it has maintained its peg. USDC is considered more transparent but has occasionally frozen addresses at law enforcement request. Selling USDC back to local currency on peer-to-peer platforms can involve a 1 to 3% premium or discount depending on demand. No deposit insurance of any kind.

Grey's USDC integration: Grey supports receiving, holding, sending, and spending USDC. You can receive USDC via Solana or BNB Smart Chain, hold it in your Grey account alongside your fiat balances, and spend it directly with your Grey virtual card (the card draws from USD first, then USDC, then other balances). This bridges the gap between stablecoin holding and everyday spending without a manual conversion step. See Grey virtual cards for details.

Best for: crypto-comfortable savers in countries where foreign currency bank accounts are restricted, expensive, or unreliable. Not for people uncomfortable with crypto custody and exchange risks.

How to Time Your Currency Conversions

The honest answer: you probably shouldn't try to time currency conversions. Academic research consistently shows that even professional currency traders struggle to beat a simple dollar-cost-averaging strategy (converting the same amount at regular intervals regardless of the rate).

Dollar-cost averaging: convert a fixed amount every week or month. Some conversions will be at good rates, some at bad rates, and over time, they average out. This eliminates the paralysis of waiting for "the right rate" and the regret of converting at a bad one.

Rate alerts: set a target rate and convert when it hits. Grey and Wise both offer rate alert notifications. If you're not in a rush, setting a rate alert for 2 to 3% above the current rate and converting when it triggers gives you a consistent discount without the stress of monitoring daily.

Don't hold indefinitely. If you're saving in foreign currency for a specific purpose (tuition, property, travel), convert when you have enough, regardless of the rate. The goal is certainty of the amount in the target currency, not maximising the exchange rate. A bad conversion rate is better than being short of funds when the tuition bill arrives.

The costs of saving in foreign currency

Every method has costs. Account for them before assuming foreign currency savings are pure profit.

Conversion costs: 0.5 to 3% per conversion, depending on the method. Grey charges 1% capped at $6. Wise charges 0.5 to 1.5% depending on the pair. Dom accounts charge 1 to 3% via the bank's exchange rate spread. Stablecoin exchanges charge 0.1 to 0.5% in trading fees plus the spread.

Transfer fees: SWIFT transfers cost $15 to $50. ACH transfers to a Grey account are free. SEPA transfers to a Wise account are free. Stablecoin transfers vary by network (nearly free on Solana, $1 to $5 on Ethereum).

Holding costs: Dom accounts may charge monthly maintenance fees ($5 to $20). Fintech accounts are typically free. Stablecoins have no holding cost, but exchange wallets may have withdrawal fees.

Opportunity cost: dollars held in a zero-interest account lose purchasing power to US inflation (~3 to 4% annually). If you're holding $10,000 in a Grey account earning 0%, you're losing $300 to $400 per year in real purchasing power. An FCNR deposit at 4% offsets this. A US high-yield savings account at 4 to 5% does too, but that requires a US bank account.

Total your costs before committing. If you convert $500 per month at 1% cost ($5), that's $60 per year in conversion fees. If the currency you're saving in appreciates 5% against your local currency, you've gained $300 minus $60 in fees, netting $240. If it doesn't appreciate, you've spent $60 for no benefit. Know your break-even.

Want to start saving in foreign currency? Open a Grey account and hold USD, EUR, or GBP with real account details and no monthly fee.

Frequently asked questions about saving in foreign currency

What is the safest currency to save in?

The US dollar is the most common choice because it's the world's reserve currency, widely accepted, and relatively stable. The euro and British pound are alternatives. The Swiss franc (CHF) is traditionally the safest haven but conversion costs are higher for most people. No currency is risk-free. Dollar inflation means USD savings lose 3 to 4% in purchasing power annually unless earning interest.

Can I save in foreign currency without a bank account?

Yes. Stablecoins (USDC, USDT) let you hold dollar-equivalent value without a bank account. Buy on a crypto exchange using local currency, hold in a wallet. You can also use fintech accounts (Grey, Wise) that aren't traditional banks but offer regulated, insured foreign currency holding. For Grey specifically, sign up at grey.co/foreign-accounts.

How much should I save in foreign currency?

A common rule of thumb is 10 to 20% of total savings for currency diversification. If you have specific foreign currency expenses planned (education abroad, property, medical travel), save the full estimated cost in that currency. Don't convert your entire savings to foreign currency. Keep enough in local currency for 3 to 6 months of expenses.

Is saving in dollars better than investing?

Different purposes. Dollar savings protect purchasing power and provide liquidity. Investing (stocks, bonds, real estate) aims for growth and carries higher risk. Use dollar savings for emergency funds, short-term goals, and currency hedging. Use investments for long-term wealth building. They're complementary, not competing strategies.

Does Grey pay interest on foreign currency balances?

Grey does not currently pay interest on USD, EUR, or GBP balances held in the account. The value proposition is holding foreign currency with real account details, low conversion costs (1% capped at $6), and the ability to spend directly from the balance using a virtual card, not interest income. For interest-earning options, consider FCNR deposits (for NRIs) or US high-yield savings accounts (if you have US banking access).

Start saving in foreign currency. Open a Grey account and hold USD, EUR, or GBP.

Disclaimer: This article is for informational purposes only. All costs and details are estimates based on mid-2026 data. Verify current information before making decisions. Grey isn't a bank. We're a licensed financial services provider offering multi-currency accounts.

How to plan a road trip in the US (plus the best scenic routes)

How to plan a road trip in the US (plus the best scenic routes)

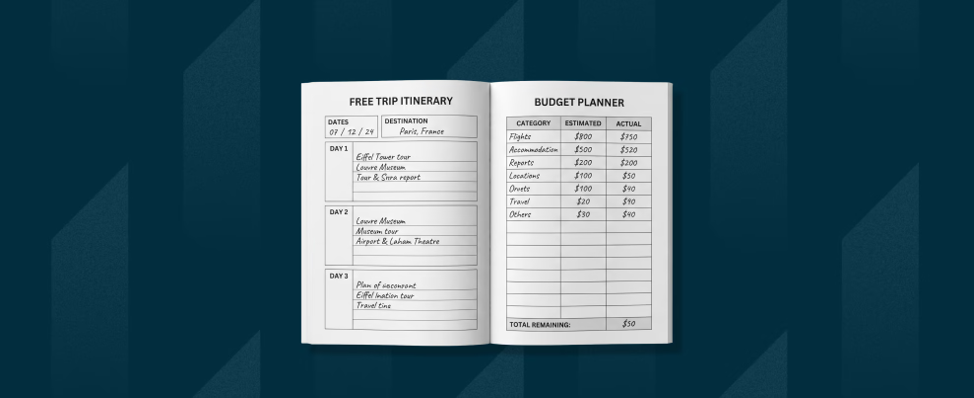
Learn how to plan a road trip step by step, with the best scenic US routes, a budget planner, and the easy way to pay for fuel and tolls.

•

•

2 min read

You've got two weeks off, a car, and roughly $2,000. That's enough for an incredible US road trip if you plan it right, and barely enough for a frustrating one if you don't. Most people start by picking a route. That's actually step two. Step one is deciding how many hours you're willing to drive each day, because that single number determines where you can go, how many stops you can make, and whether you'll enjoy the trip or just survive it.

To plan a road trip, pick your route and stops, set a daily driving limit, budget for fuel, food, and stays, book key accommodation early, and prepare your car. Build in buffer time for detours. Use a card with no foreign transaction fees if you're visiting from abroad.

We've planned this guide around the decisions in the order you actually need to make them, not the order most articles put them in. You'll also find the four best scenic road trips in the US with real distances, costs, and timing, so you can compare routes before committing.

How to plan a road trip: step by step

Planning a road trip comes down to six decisions, made in this order. Skip one and the rest get harder.

1. Choose your route. Start with a destination or a theme. Do you want coastline (Pacific Coast Highway), desert (Utah's Mighty Five parks), history (Route 66), or mountains (Blue Ridge Parkway)? Once you've picked the theme, map the route and identify overnight stops roughly every 3 to 5 hours of driving. Google Maps and Roadtrippers are the two best tools for this.

2. Set a daily driving limit. The number one mistake on road trips is overestimating how far you want to drive in a day. 4 to 5 hours of actual driving is sustainable. Six is fine occasionally. Eight is miserable and dangerous. Plan your stops around a 4-hour average, and you'll enjoy the drive instead of enduring it.

3. Book accommodation for your first and last nights, plus any national parks. Everything in between can stay flexible. But the first night sets the tone (don't arrive exhausted because you drove too far), and national park lodges and campsites book months in advance. If you're visiting in summer, book Yosemite, Zion, or Yellowstone accommodation 3 to 6 months ahead.

4. Budget the trip before you leave. Fuel, food, accommodation, tolls, park entrance fees, and one unexpected cost. We'll break this down below with a worked example.

5. Prepare the car. Tyres, oil, coolant, wipers, and a safety kit. A breakdown 100 miles from the nearest town is the kind of adventure nobody wants. If you're renting, inspect the car before you leave the lot and document any existing damage.

6. Download offline maps. Cell coverage is patchy in rural America, especially through the desert Southwest, mountain passes, and stretches of Montana and Wyoming. Download your entire route on Google Maps or Maps.me before you leave. If you're visiting from abroad and need data on the road, a travel eSIM is cheaper and more reliable than roaming on your home plan.

Best scenic road trips in the US

If you're looking for road trip ideas, these are the four routes that consistently rank as the best road trips in the USA. Here's a quick comparison:

Route Distance Days Est. fuel cost Best season
Pacific Coast Highway ~650 mi 5 to 7 $80 to $120 Apr to Oct
Route 66 ~2,400 mi 10 to 14 $250 to $400 May to Sep
Blue Ridge Parkway ~469 mi 3 to 5 $60 to $90 Sep to Nov
Utah Mighty Five ~900 mi 7 to 10 $120 to $180 Mar to May, Sep to Nov

‍

Pacific Coast Highway is probably the most photographed road trip in the country. San Francisco to Los Angeles (or the reverse), hugging the coast through Big Sur, Monterey, Santa Barbara, and Malibu. It's short enough for a long weekend if you push it, but 5 to 7 days lets you stop at every viewpoint without rushing.

Route 66 is the classic. 2,400 miles from Chicago to Santa Monica, crossing eight states and three time zones. It's a trip through small-town America, roadside diners, and neon signs. Budget at least 10 days. Some stretches of the original route have been replaced by interstate, but most of the iconic stops are still there.

Blue Ridge Parkway is the most underrated route on this list. 469 miles through the Appalachian Mountains from Virginia to North Carolina, with no commercial traffic (trucks are banned). In autumn, the foliage is extraordinary. It's also one of the cheapest road trips because there are no tolls and fuel distances are short.

Utah's Mighty Five hits all five of Utah's national parks in a single loop: Arches, Canyonlands, Capitol Reef, Bryce Canyon, and Zion. The landscape is unlike anything else in the US. Spring and autumn are the sweet spots; summer is brutally hot and parks are overcrowded. An America the Beautiful pass ($80 per vehicle per year), from the National Park Service, covers entrance fees for all five parks.

All fuel costs are estimates based on a vehicle averaging 25 to 30 mpg at mid-2026 US fuel prices. Your actual cost will vary by vehicle, driving style, and fuel price at the time of travel.

How to budget for a road trip

The number that catches most people off guard isn't fuel. It's food. A two-week road trip where you eat at restaurants for every meal can easily cost $1,500 to $2,000 per person. Pack a cooler, buy groceries, and save restaurants for the stops that deserve them.

Here's a worked budget for a 7-day Pacific Coast Highway trip for two people:

Expense Estimated cost (2 people, 7 days)
Fuel (650 mi, 25 mpg, ~$4/gal) $100 to $120
Accommodation (motels + Airbnb mix) $700 to $1,200
Food (groceries + 3 restaurant meals) $400 to $600
Tolls (Golden Gate Bridge + minor) $10 to $20
Park and attraction fees $30 to $80
Unexpected (flat tyre, parking, etc.) $100 to $200
TOTAL $1,340 to $2,220

‍

The range is wide because accommodation drives most of the variance. Camping ($20 to $40 per night) versus a beachfront motel in Big Sur ($250+ per night) changes the total dramatically. If you're saving up for the trip, save for your road trip in a Pouch so the money is set aside and visible, separate from your everyday spending.

All costs are estimates based on mid-2026 prices. Fuel, accommodation, and food costs vary seasonally and by region.

Road trip packing and car prep

Two lists: one for the car, one for you.

Car prep (do this at least a week before you leave): check tyre pressure and tread depth (including the spare), check oil level and coolant, test all lights (headlights, brake lights, indicators, fog lights), replace wiper blades if they streak, and make sure your breakdown cover is active and covers your route.

Safety kit: jump cables or a portable jump starter, a basic tool kit, a torch with fresh batteries, a first aid kit, a reflective warning triangle or flares, and a printed copy of your route (in case your phone dies and there's no signal).

Packing for you: pack light. Road trip luggage lives in the boot, not in overhead bins, so you have more space than flying, but overpacking means less room for souvenirs and groceries. Bring layers (mountain and coastal temperatures swing 15 to 20 degrees between morning and afternoon), comfortable driving shoes, sunscreen, a reusable water bottle, and a cooler if you're planning to buy groceries.

One thing most people forget: a phone mount for the dashboard. Using your phone as a GPS while it sits in your lap is unsafe and illegal in many states. A $15 mount solves this completely.

How to pay on a US road trip

If you live in the US, your regular debit or credit card handles everything. Fuel, tolls, accommodation, food. The only thing to watch is whether your card charges foreign transaction fees if you cross into Canada or Mexico during the trip.

If you're visiting the US from abroad, paying for a road trip gets more complicated. Your home bank card works at most fuel stations and restaurants, but foreign transaction fees of 1.5 to 3% add up fast over a two-week trip. On $3,000 in spending, that's $45 to $90 in fees you didn't need to pay.

A card with no foreign transaction fees is the simplest fix. Grey's virtual Mastercard works at US fuel stations, restaurants, and toll booths. You load USD before you leave and spend from your dollar balance, so there's no conversion markup on every transaction. Pay for fuel and tolls on a virtual card.

For data and navigation, a travel eSIM is cheaper than international roaming. You buy it before you leave, activate it when you land, and get US data for maps, music, and booking accommodation on the road. Buy a travel eSIM for the US. And if you need to move money before you travel, Grey handles that too.

Cash tip: carry $100 to $200 in small bills. Some rural fuel stations, farm stands, and small-town diners are cash-only.

Frequently asked questions about planning a road trip IN the US

How do I plan a road trip for the first time?

Start with a route (pick a destination or a scenic drive). Map your overnight stops every 3 to 5 hours of driving. Book your first night, last night, and any national park accommodation in advance. Budget for fuel, food, stays, and one unexpected cost. Prep the car (tyres, oil, lights). Download offline maps. Everything else can be flexible.

What is the best US road trip for beginners?

The Pacific Coast Highway from San Francisco to Los Angeles. It's short (650 miles, 5 to 7 days), the route is well-marked, accommodation is plentiful, and the scenery is spectacular from start to finish. Reliable cell coverage for most of the route makes navigation easy.

How much does a road trip across the US cost?

A coast-to-coast trip (roughly 2,800 miles, 10 to 14 days) typically costs $2,500 to $5,000 per person. Budget roughly: $300 to $500 for fuel, $1,000 to $2,500 for accommodation, $500 to $1,000 for food, and $200 to $500 for tolls, attractions, and unexpected costs. Camping and cooking drop the total significantly.

How far should I drive per day on a road trip?

4 to 5 hours of actual driving (200 to 300 miles on highways) is the sweet spot. You can push to 6 to 8 hours on long transfer days, but doing that daily will burn you out by day three. Plan around a 4-hour average and add a rest day every three or four driving days.

Do I need an America the Beautiful pass?

If you're visiting two or more national parks, yes. The pass costs $80 per vehicle per year and covers all 400+ National Park Service sites. A single park entry is typically $30 to $35, so the pass pays for itself after three parks. For the Utah Mighty Five loop, it saves roughly $95 in entrance fees.

Can I do a US road trip without a car?

You'll need a car. Public transport doesn't cover most scenic routes. If you don't own a car, rent one early for the best rates. Airport pickup is usually cheaper than city-centre. Under-25 drivers can expect a surcharge of $20 to $30 per day. International visitors need a valid driving licence from their home country.

Hitting the road? Save for your trip in a Grey Pouch and pay for fuel and tolls on a virtual card, wherever the highway takes you.

Disclaimer: This article is for informational purposes only. Fuel prices, accommodation rates, park fees, and toll charges change seasonally. All cost estimates are based on mid-2026 data. Verify current prices before you travel. Grey isn't a bank. We're a licensed financial services provider offering multi-currency accounts.

How much does an all-inclusive Caribbean trip cost?

How much does an all-inclusive Caribbean trip cost?

How much does an all-inclusive Caribbean trip cost? Prices by island, resort tier, and season. Budget your trip accurately before you book. Compare now.

•

•

2 min read

The average all-inclusive Caribbean trip for two people runs $3,000 to $8,000 for a week, and that's before flights, tips, off-resort excursions, and the spa treatments that aren't actually included. "All-inclusive" covers a lot, but it doesn't cover everything.

An all-inclusive Caribbean trip typically costs $150 to $400 per person per night at the resort, plus $300 to $800 per person for flights from the US. The total cost for a 7-night trip for two ranges from $3,000 to $8,000, depending on the island, resort tier, and time of year. Punta Cana and Cancun are the most affordable. Turks and Caicos and St. Barts are the most expensive.

Skip all-inclusive entirely if you love exploring local restaurants, markets, and street food. The resort model keeps you on-site, and that's the point. If discovering a country through its food is half your trip, go hotel-only and eat locally. You'll spend less and see more.

This guide breaks down costs by island, shows you what's actually included (and what isn't), and helps you set a realistic budget.

What does "all-inclusive" actually include?

Before comparing prices, understand what the package covers. A standard all-inclusive includes: accommodation, all meals (buffet plus 2 to 4 a la carte restaurants with reservations), drinks (alcoholic and non-alcoholic, usually house brands), pool and beach access, basic water sports (kayaking, snorkelling gear, paddleboarding), and entertainment (live music, evening shows, kids' clubs at family resorts).

What's usually NOT included: flights, airport transfers (some resorts include these, most charge $30 to $80 per car each way), spa treatments ($100 to $300 per treatment), premium excursions (catamaran tours $80 to $150, zip-lining $60 to $120, scuba diving $100 to $200), premium alcohol brands (top-shelf spirits and imported wine), room service at some resorts, Wi-Fi at older properties, tips for staff (varies by resort and country), and travel insurance.

The "not included" list is where the real cost hides. A couple spending $300 on a spa day, $200 on a catamaran tour, and $100 on premium drinks adds $600 to a trip they thought was already paid for. Budget an extra 15 to 25% above the resort rate for these extras. If you're strict about staying on-site and sticking to included drinks, you can avoid most of this. But most people don't.

One thing most comparison sites don't tell you: the quality gap between a $150/night resort and a $250/night resort is enormous. The extra $100/night buys you edible a la carte restaurants instead of repetitive buffet food, drinkable house wine instead of headache-inducing cheap spirits, and a beach that isn't shared with 500 other guests. The mid-range tier is where all-inclusive actually delivers on its promise.

All-inclusive costs by island

Punta Cana (Dominican Republic). The most popular and affordable all-inclusive destination in the Caribbean. Budget resorts: $120 to $180/night per person per night. Mid-range: $180-$280/night. Luxury: $280 to $500+/night. Flights from the US East Coast: $250 to $450 return. The DR has more all-inclusive resorts than any other Caribbean island, which keeps prices competitive.

The Bavaro Beach strip has the highest concentration of resorts, which means easy comparison shopping but also the most crowded beaches. Hard Rock and Hyatt Ziva are solid mid-range options. Secrets and Excellence are the best adults-only properties.

Cancun/Riviera Maya (Mexico). Close second to Punta Cana on value. Budget: $120 to $200/night. Mid-range: $200-$350/night. Luxury: $350 to $600+/night. Flights from the US: $200 to $400 round-trip. The Riviera Maya (Playa del Carmen, Tulum) is slightly pricier than Cancun's hotel zone but quieter and with better snorkelling at cenotes and nearby reefs.

Cancun has more nightlife options, which matters if you want to explore beyond the property. The domestic flight connections from Cancun are also cheaper if you want to add Mexico City or Oaxaca to your trip.

Jamaica. Montego Bay and Negril are the main all-inclusive hubs. Budget: $150 to $220/night. Mid-range: $220 to $350/night. Luxury (Sandals, Secrets): $350 to $600+/night. Flights: $300 to $500 return. Jamaica's all-inclusives tend to include more in the base package than the cheapest DR options: better drink selections, more included restaurants, and more activities.

Sandals properties are couples-only and include premium spirits and top-shelf wine that would cost extra at most other chains. The trade-off is that Jamaica's resorts are more spread out, and getting between them (or to town) requires taxis or organised transport.

Aruba. Fewer true all-inclusives than DR or Jamaica, and generally pricier. Mid-range: $250 to $400/night. Luxury: $400 to $700+/night. Flights: $300 to $550 return. Aruba's appeal is the guaranteed weather.

It sits outside the hurricane belt, so you can book August to October without weather anxiety and get low-season pricing without the storm risk. The European-influenced dining scene and the island's compact size (you can drive end to end in 45 minutes) make it easy to explore off-resort too.

Turks and Caicos. Premium destination. Very few budget options exist. Mid-range: $350 to $550/night. Luxury: $600 to $1,200+/night. Flights: $350 to $600 return. Grace Bay Beach consistently ranks among the world's best beaches, and the price reflects it.

This is where you go for a special occasion or once-in-a-lifetime trip, not a budget beach break. The water clarity and turquoise colour are genuinely in a different league from most Caribbean islands.

St. Lucia. Romantic favourite. Budget options are rare. Mid-range: $300 to $500/night. Luxury (Sandals, Jade Mountain): $500 to $1,500+/night. Flights: $350 to $650 return. The Pitons (twin volcanic peaks) make every sunset photo look professional.

St. Lucia is the Caribbean's top honeymoon destination for a reason: dramatic scenery, boutique resorts, and a lush, mountainous interior that feels more like Hawaii than a flat coral island.

All prices are estimates based on mid-2026 data for 7-night stays. Prices fluctuate significantly by season, with December to April (high season) commanding 30 to 50% premiums over May to November (low season, which overlaps with hurricane season). If you're planning a trip for two, you can find more inspiration in our guide to 15 romantic destinations for couples.

When to book for the best price

Timing matters more than haggling. Three rules:

1. Book 2 to 4 months in advance for the best combination of availability and price. Last-minute deals exist but they're unpredictable, and you lose the ability to choose your room type or preferred resort. The sweet spot is 8 to 16 weeks before departure. Earlier bookings (6+ months) lock in availability but rarely offer the lowest price.

2. Travel in shoulder season (late April to May, or November). Prices drop 20 to 40% from peak, the weather is still good (warm, occasional rain, fewer tourists), and resorts are less crowded. Avoid hurricane peak (August to October) unless you're comfortable with the risk and want the absolute lowest prices. If you do book during hurricane season, travel insurance that covers weather-related cancellations is non-negotiable. A cancelled trip without insurance means you lose the full resort cost.

3. Compare the package, not just the nightly rate. A resort at $250/night that includes airport transfers, premium drinks, and a la carte dining may cost less overall than a $180/night resort where transfers are $80 round trip, good drinks are extra, and you end up eating off-resort twice because the buffet disappoints. The per-night rate is the starting point, not the final answer.

Sample budget: 7-night Punta Cana trip for two

Here's what a realistic mid-range all-inclusive week looks like for two people:

Flights (US East Coast): $600 to $900 total (two return tickets booked 2 to 3 months ahead).

Resort (mid-range, 7 nights): $2,500 to $3,900 total (based on $180 to $280/night per person). This gets you a Hyatt Ziva, Hard Rock, or Secrets-tier property with multiple restaurants, pool bars, and beach service.

Airport transfers: $60 to $100 total (shared shuttle is cheapest, private car is $80 to $100).

Excursions (2 activities): $150 to $300 total (catamaran tour with snorkelling plus a zip-line or ATV adventure).

Tips and extras: $100 to $200 total (staff tips throughout the week, one spa treatment, premium drinks upgrade).

Travel insurance: $80 to $150 total (covers cancellation, medical, and evacuation).

TOTAL: $3,490 to $5,550 for two people, 7 nights.

If you're saving up before the trip, set aside money in a Grey Pouch so the funds are earmarked and visible. You can track your savings growing toward the target and know exactly where you stand before booking.

How to pay at Caribbean resorts

Most Caribbean resorts accept Visa and Mastercard for extras, excursions, and tips. If you're paying in USD (most Caribbean destinations price in USD for tourists), your home bank card may charge 1.5 to 3% in foreign transaction fees on every tap. On a $500 extras bill across the week, that's $7.50 to $15 in hidden fees you wouldn't notice until the statement arrives.

A Grey virtual card lets you spend from your dollar balance with no conversion markup. You can also hold USD before you travel, so every payment at the resort comes from your pre-loaded balance rather than triggering a live conversion. For data and maps at the resort, grab a travel eSIM and skip the international roaming charges that add up when you're googling snorkelling spots and restaurant reviews.

Bring $50 to $100 in small USD bills for tipping housekeeping, bartenders, and tour guides. Cash tips are preferred over adding them to the room bill, and many staff members don't see room-bill tips until weeks later.

Frequently asked questions

How much does an all-inclusive Caribbean trip cost for two?

$3,000 to $8,000 for a 7-night trip, including flights, depending on the island and resort tier. Punta Cana (DR) and Cancun (Mexico) are the most affordable at $3,000 to $5,500. Turks and Caicos starts at $6,000+. These figures include flights, resort, transfers, excursions, tips, and insurance. The resort rate alone is only part of the total.

Is Punta Cana or Cancun cheaper?

They're close, but Punta Cana edges ahead slightly on resort prices due to higher competition among properties. Cancun has cheaper flights from the US West Coast and Midwest. For the US East Coast, Punta Cana is usually the better overall deal because flights are shorter (3 to 4 hours vs 4 to 5) and cheaper.

Are all-inclusive resorts worth it?

For beach holidays where you plan to spend most of your time at the resort, yes. The value is strongest at mid-range resorts ($200 to $350/night) where meals, drinks, and activities are genuinely included and genuinely good. Skip all-inclusive if you love exploring local restaurants and markets. The resort model is designed to keep you on-site.

When is hurricane season in the Caribbean?

June to November, with August to October being the highest-risk months. Resorts offer their lowest prices during this period (20 to 40% below peak). Travel insurance that covers weather-related cancellations is essential if you book during hurricane season. Aruba, Bonaire, and Curacao sit outside the hurricane belt and are safer bets.

Do I need a passport for the Caribbean?

US citizens need a valid passport for all Caribbean destinations except US territories (US Virgin Islands, Puerto Rico). Your passport must be valid for at least 6 months beyond your travel dates for most islands. Apply or renew at least 3 months before your trip; processing times can stretch to 8 to 10 weeks.

Should I tip at an all-inclusive resort?

Not required, but it's customary and appreciated. $1 to $5 per interaction for bartenders, housekeeping, and restaurant servers. $5 to $20 for tour guides and excursion leaders. Some resorts add a service charge automatically to your bill. Check before doubling up. Bring small USD bills since cash is strongly preferred.

Planning a Caribbean getaway? Save for the trip in a Grey Pouch and pay for extras on a virtual card with no conversion fees.

Disclaimer: This article is for informational purposes only. All costs and details are estimates based on mid-2026 data. Verify current information before making decisions. Grey isn't a bank. We're a licensed financial services provider offering multi-currency accounts.

How much does a trip to Japan from the US cost? A full budget breakdown

How much does a trip to Japan from the US cost? A full budget breakdown

See how much a trip to Japan costs from the US, Europe, Africa, South America and North America, with flight, hotel and daily budgets. Compare.

•

•

2 min read

You pull up flights to Tokyo. $1,200 round trip from New York. You check hotels. $150 a night in Shinjuku. You start doing the maths and the number climbs past $3,000 before you've added food or a single bullet train ticket. Then you land and discover that a bowl of tonkotsu ramen costs $7, a metro ride across Tokyo is $2, and a Shinto shrine charges $3 to enter. The flights and hotels are expensive. Everything else is cheaper than a week in most European or American cities.

A one-week trip to Japan costs roughly $1,500 to $4,000 per person, depending on where you fly from and your travel style. Budget travellers can manage around $1,500 to $2,200, mid-range around $2,500 to $4,000, and luxury $6,000 or more. Flights are the biggest variable by region.

This guide breaks down costs from five origin regions so you can budget accurately regardless of where you're flying from. For help building your itinerary, use the free trip itinerary template.

How much does a trip to Japan cost? Budget range overview

How much is a trip to Japan? The answer depends on three things: where you fly from, how you sleep, and how fast you move between cities. Here's the range for a solo traveller spending 7 nights:

Travel Style 7-Night Total (Solo) Daily Spend (Excl. Flight)
Budget (hostels, konbini meals, local trains) $1,500 to $2,200 $80 to $120
Mid-range (business hotels, restaurants, JR Pass) $2,500 to $4,000 $150 to $250
Luxury (ryokans, kaiseki, taxis) $5,000 to $8,000+ $400 to $700+

‍

The highest single cost is always the flight. After that, accommodation and intercity transport (especially bullet trains) determine which tier you're in. Food, attractions, and local transport are comparatively cheap. A budget traveller eating at convenience stores, taking local trains, and sleeping in hostels can see most of what Japan offers for under $100 a day.

How much does a trip to Japan cost from the USA?

Round-trip flights from major US cities to Tokyo (Narita or Haneda) typically cost $800 to $1,400 in economy. Direct flights from the West Coast (LA, San Francisco, Seattle) are cheaper and shorter (10 to 11 hours). East Coast departures (New York, Chicago) are more expensive and add connection time or a longer direct route (13 to 14 hours).

Low season (January to early March, excluding holidays) drops fares to the $700 to $900 range. Cherry blossom season (late March to mid-April) and Golden Week (late April to early May) push fares past $1,200. Summer (July to August) and autumn foliage (October to November) sit in the middle.

Expense Budget Mid-Range
Round-trip flight $700 to $1,000 $1,000 to $1,400
Accommodation (7 nights) $280 to $490 $560 to $1,050
Food (7 days) $175 to $280 $280 to $490
Transport (7 days) $100 to $180 $250 to $400
Activities (7 days) $50 to $100 $100 to $250
Total per person $1,500 to $2,200 $2,500 to $4,000

‍

How much does a trip to Japan cost from North America (Canada and Mexico)?

From Canada, round-trip flights from Vancouver are the cheapest, ranging from $800 to $1,200 (direct flights available). Toronto adds $200 to $400 to those ranges because most routes connect through Vancouver, Seattle, or a Pacific hub. From Mexico City, flights typically route through the US or via a transpacific airline and cost $1,000 to $1,700.

Once in Japan, daily costs are identical to those for US travellers. The only difference is the flight. Budget total for 7 nights from Canada: $1,600 to $2,400. From Mexico: $1,800 to $2,800.

How much does a trip to Japan cost from Europe?

Flights from London, Paris, and Frankfurt to Tokyo run $700 to $1,300 (roughly EUR 650 to EUR 1,200). Airlines like Finnair (via Helsinki), Turkish Airlines (via Istanbul), and ANA (direct from London or Paris) compete on this route, keeping prices reasonable despite the distance. Low-season fares dip below $700.

The yen's weakness against the euro and pound in recent years has made Japan's daily costs cheaper for European travellers than they look in dollar terms. A meal that costs 1,500 yen ($10) feels like a bargain against London or Paris restaurant prices. Budget total for 7 nights from Europe: $1,500 to $2,200. Mid-range: $2,300 to $3,800.

How much does a trip to japan cost from Africa?

There are no direct flights from any African city to Japan. The most common routes connect through Dubai (Emirates), Doha (Qatar Airways), or Istanbul (Turkish Airlines). From Lagos, Nairobi, or Johannesburg, round-trip fares range from $900 to $1,800, depending on the season and layover time. Two-stop itineraries are cheaper but add 20+ hours of travel.

Once in Japan, costs are the same as for any other origin. The flight premium is the main budget difference. Budget total for 7 nights from Africa: $1,700 to $2,600. Mid-range: $2,700 to $4,200. Currency conversion is a factor: if you're earning in naira, rand, or shillings, holding USD or yen before travel avoids unfavourable airport exchange rates.

How much does a trip to Japan cost from South America?

Flights from Sao Paulo or Buenos Aires to Tokyo are among the longest and most expensive: $1,300 to $2,200 round trip. Most routes connect through the US (Dallas, Houston, LA) or the Middle East. Timing matters: January and February fares are lowest. No direct flights exist from South America to Japan as of 2026.

Budget total for 7 nights from South America: $2,000 to $3,000. Mid-range: $3,000 to $4,500. The flight is the single largest expense. Once on the ground, Japan's daily costs are manageable, but the airfare takes a bigger bite of the total budget than from any other region.

Trip to Japan cost breakdown: Flights, hotels, food and activities

Here's every line item for a 7-day Japan trip, regardless of origin:

Expense Budget Range Notes
Round-trip flight (US origin) $700 to $1,400 West Coast cheaper; book 2 to 3 months ahead
Accommodation per night $40 to $200 Hostels $40 to $70, business hotels $80 to $150, ryokans $150 to $400+
JR Pass (7-day) $335 Covers bullet trains; only worth it if you take 3+ long-distance trips
Local transport per day $5 to $15 Metro, buses; buy a Suica or Pasmo IC card
Food per day $25 to $70 Konbini breakfast $3 to $5, ramen $7 to $12, sit-down dinner $15 to $40
Activities per day $10 to $35 Temples $3 to $5, museums $7 to $15, theme parks $55 to $75
eSIM data (7 days) $4 to $10 Prepaid data plan; essential for maps and translation
Travel insurance (7 days) $15 to $50 Basic medical + trip cancellation coverage

‍

On the JR Pass: at $335 for 7 days, the Japan Rail Pass is only worth buying if you plan at least 2 to 3 long-distance bullet train trips (Tokyo to Kyoto is $100 each way). If you're staying in one city, local trains and metro passes are much cheaper. If you're buying JR tickets individually, hold Japanese yen in advance and pay at station kiosks to avoid airport exchange markups.

How to Budget and Pay for Your Trip to Japan

Japan is still heavily cash-dependent in smaller shops, izakayas, and rural areas. Major chains and department stores accept cards, but you'll need cash for temple admission, street food, local buses, and smaller restaurants. Here's how to handle the money side:

Carry some yen in cash. Withdraw from 7-Eleven ATMs (available nationwide, 24/7) or exchange before departure. Airport exchange desks give the worst rates.

Use a card with no foreign transaction fee. Japan's card acceptance has improved, but foreign transaction fees of 1.5 to 3% eat into your budget on every tap. Grey's virtual card charges a 1% conversion fee capped at $6. That's cheaper than most bank cards on any purchase over $600. The Grey card works everywhere Visa is accepted, including convenience stores, department stores, and train stations.

Get a travel eSIM before you fly. Japan has free Wi-Fi in stations and convenience stores, but it's patchy and slow. A prepaid eSIM plan gives you data for Google Maps, Google Translate, and train schedules without hunting for hotspots. Buy a travel eSIM for Japan through Grey's Lifestyle tab before departure.

Move money before you travel. Sending money ahead to a Japanese bank account for tuition, a rent deposit, or a ryokan booking? Move money before you travel through Grey. The fee is 1% capped at $6. Far cheaper than a bank wire.

Frequently asked questions about the cost of a trip to Japan from the US

How much does a trip to Japan cost for 7 days?

A 7-day trip to Japan costs $1,500 to $4,000 per person from the US, depending on travel style. Budget travellers staying in hostels and eating at convenience stores spend $1,500 to $2,200. Mid-range travellers using business hotels, JR Pass, and restaurants spend $2,500 to $4,000. Flights are the biggest variable: West Coast departures are $200 to $400 cheaper than East Coast.

Is Japan expensive for tourists?

Japan's reputation for being expensive is outdated. Daily spending (food, transport, activities) is lower than in London, Paris, or New York. A bowl of ramen costs $7 to $12. A metro ride is $2 to $4. Temple admission is $3 to $5. The expensive parts are flights (especially from Africa and South America) and bullet trains ($100+ per trip). The weak yen has also made Japan cheaper for visitors holding dollars, euros, or pounds.

How much spending money do I need per day in Japan?

Budget travellers need $80 to $120 per day for accommodation, food, transport, and activities. Mid-range travellers need $150 to $250 per day. This excludes flights. Carry some cash (yen) for smaller shops and rural areas. Use a card with no foreign transaction fee for larger purchases to avoid 1.5 to 3% markups on every tap.

Is the JR Pass worth it?

Only if you take 3 or more long-distance bullet train trips in 7 days. At $335, the JR Pass breaks even if you ride from Tokyo to Kyoto round-trip ($200) plus one more Shinkansen trip. If you're staying in one city or only making one intercity trip, buying individual tickets is cheaper. The JR Pass also covers some local JR lines, which adds value if you're moving between cities daily.

What is the cheapest month to visit Japan?

January and February are the cheapest months. Flights drop to $700 to $900 from the US, and hotels offer low-season rates. The weather is cold but dry. Avoid the last week of December (New Year) and the first week of January (holiday crowds). Late May (after Golden Week) and September are also good values with better weather.

How much would a trip to Japan cost from Africa?

A 7-day trip to Japan from Lagos, Nairobi, or Johannesburg costs $1,700 to $4,200, depending on travel style. Flights are the biggest expense: $900 to $1,800 round trip via Dubai, Doha, or Istanbul. Daily costs in Japan are the same regardless of origin. Consider holding USD or yen before departure to avoid poor exchange rates at African airports.

Travelling to Japan? Open a Grey account, spend in yen on a virtual card, and buy a travel eSIM before you fly.

‍

Disclaimer: All prices are estimates based on publicly available data and may change. Flight prices vary by season, airline, and booking date. Hotel prices vary by location and demand. Grey isn't a bank. We're a licensed financial services provider offering multi-currency accounts and virtual cards.

Free trip itinerary template with a built-in budget planner

Free trip itinerary template with a built-in budget planner

Plan your trip with this free itinerary template. Copy it to organise flights, hotels, activities, daily plans, and travel costs in one place.

•

•

2 min read

Planning a trip without an itinerary is like cooking without a recipe. You might end up with something great, or you might end up at the airport without a hotel booking, $500 over budget, and an argument about whose fault it is. A good itinerary doesn't constrain you. It frees you to enjoy the trip because the logistics are already handled.

Skip the detailed itinerary if you're taking a 3-day beach holiday with no flights to catch and no bookings to keep. Not every trip needs a spreadsheet. A note with your hotel address and flight times is enough for a short, simple getaway. But anything longer than 4 days, with multiple destinations, or involving international travel, benefits from a proper plan.

A trip itinerary template organises your flights, accommodation, activities, and daily budget in one document. The best templates include a day-by-day schedule, a cost tracker, a packing checklist, and a section for booking confirmations. You fill it in once before the trip and reference it every morning.

We've built a template below that works for any destination, any length of trip, and any budget.

What a good trip itinerary includes

Most free templates online are either too simple (just a list of dates) or too complex (30 fields per day that nobody fills in). A useful template balances structure with flexibility. Here's what it should contain:

1. Trip overview. Destination, travel dates, number of travellers, total budget, and emergency contacts (embassy phone number, travel insurance policy number and claims line, local emergency number). This goes on page one, so it's accessible instantly, even without internet. If your phone dies in a foreign country, this page is the one you need printed.

2. Day-by-day schedule. Each day gets a date, location (if you're moving between cities), morning activity, afternoon activity, evening plans, accommodation name and address, and check-in/check-out times. Leave gaps. Over-scheduling kills the spontaneity that makes trips memorable. Two planned activities per day is the sweet spot. Three is pushing it. Four means you'll see everything and enjoy nothing.

3. Budget tracker. Daily budget (set a target per day), actual spend (update each evening), running total, and category breakdown (accommodation, food, transport, activities, miscellaneous). The gap between your daily budget and actual spend tells you whether you're on track or need to adjust before it's too late. Most overspending happens because people don't track until it's too late.

4. Booking confirmations. A section with confirmation numbers, booking references, and links for flights, hotels, car rentals, and pre-booked activities. Having these in one place saves you from searching your email at the airport check-in counter while the queue builds behind you. It also means anyone travelling with you can find the information without asking you.

5. Packing checklist. A simple checkbox list. Clothes, toiletries, documents, electronics, chargers, medications. Check each item as you pack it. Uncheck when you repack for the return journey so you don't leave anything in the hotel.

6. Transport details. For multi-city trips, note how you're getting between locations: flight number and terminal, train time and station, car rental pickup/dropoff address. This prevents the panic of arriving at a train station and not knowing which platform, or discovering your car rental is at a different terminal.

Also read: What to pack for a Europe trip (plus how to handle your money)

How to fill in your itinerary: Step by step

Step 1: Start with the fixed elements. Flights, accommodation, and any pre-booked activities go in first. These are the non-negotiable time slots that everything else fits around. Note departure times, check-in times, and anything with a timed entry (museums, tours, restaurants with reservations).

Step 2: Add your must-do activities. The 3 to 5 things you'd be disappointed to miss. Place them on specific days, accounting for travel time and opening hours. Don't schedule more than 2 major activities per day. You'll be more tired than you think, especially with jet lag on the first and second days.

Step 3: Fill in meals. You don't need to book every restaurant, but noting "lunch near the museum" or "dinner in the old town" gives each day a loose structure without over-planning. Research one must-try restaurant per city in advance and make a reservation if it's popular. Leave the rest to spontaneity and local recommendations.

Step 4: Leave a blank space. At least one "free afternoon" for every three planned days. This is where the best travel moments happen: a cafe you stumble into, a market you didn't know about, a local's recommendation that changes your whole day. Resist the urge to fill every gap. The blank space isn't wasted time. It's the time that makes the trip feel like yours rather than a checklist.

Step 5: Set your daily budget. Divide your total trip budget by the number of days. This gives you a target per day. Some days will be over (a museum plus a nice dinner), others under (a beach day plus street food). As long as the running average stays near your target, you're fine. Track it every evening. Two minutes on your phone, not twenty minutes with a spreadsheet.

Step 6: Share with everyone. Send the finished itinerary to every person on the trip. Use a Google Doc (free, editable, works offline if downloaded) or print one copy as backup. If your phone dies or you get separated, everyone needs access to the day's plan, the hotel address, and the emergency contacts.

If you are looking for romantic trips getaways, check our list of 15 romantic trips for couples: Ideas and budgets.

Trip itinerary template

Here's a sample structure for a 7-day trip. Copy this format for any destination:

‍

TRIP OVERVIEW

Destination: [City/Country].

Dates: [Departure date] to [Return date].

Travellers: [Number and names].

Total budget: $[amount] / Daily target: $[amount/days].

Emergency: Embassy [number], Insurance [policy number + phone], Local emergency [number].

‍

BOOKING CONFIRMATIONS

Flight out: [Airline, flight #, confirmation #, departure time, terminal].

Flight return: [Same details]. Hotels: [Name, confirmation #, check-in/out, address] for each property.

Activities: [Name, confirmation #, date/time] for each pre-booked experience.

Car rental: [Company, confirmation #, pickup/dropoff location and time].

‍

PACKING CHECKLIST

Passport (valid 6+ months)
Travel insurance documents
Phone charger
Universal power adaptor
Medications (in original packaging)
Comfortable walking shoes
Layers for weather changes
Toiletries
Reusable water bottle
Day bag/backpack
Copies of booking confirmations (printed)
Cash in local currency for arrival day
Add destination-specific items (swimwear, hiking boots, formal wear for restaurants) as needed.

‍

DAY 1: [Date] [City]

Accommodation: [Hotel/Airbnb name, address, check-in time, confirmation #].

Morning: [Activity or arrival details].

Afternoon: [Activity].

Evening: [Dinner plans or free time].

Budget target: $[amount] | Actual: $[fill in evening].

[Repeat this structure for each day of your trip.]

‍

How to budget your trip

The budget section is the most underused part of any itinerary. Most people fill in the fun stuff (activities, restaurants) and ignore the numbers until they check their bank balance on day five and panic. Don't be that person.

Here's a simple framework. Set a daily budget based on the destination's cost level. Budget destinations (Southeast Asia, Eastern Europe, Central America, Morocco): $50 to $100/day per person. Mid-range (Western Europe, Japan, major US cities, Australia): $120 to $250/day. Premium (Scandinavia, Switzerland, Maldives, Iceland): $250 to $500+/day. These include accommodation, food, transport, and activities.

Track actual spend every evening. It takes 2 minutes. Open your banking app, add up the day's transactions, and write the number next to the day's budget target. If you're over budget by day three, you have four days to adjust: eat local instead of restaurants, skip one paid activity, or switch to free attractions. If you don't track, you won't know until you're home and the credit card bill arrives.

Before you leave, save for the trip in a Grey Pouch so the money is set aside and visible. On the trip, spend on a Grey card with no foreign transaction fees, and your spending is automatically logged in the app. For data and maps, grab a travel eSIM and skip roaming charges that can add $10 to $15 per day.

Common itinerary mistakes

Over-scheduling. Three museums, two tours, and a cooking class in one day isn't ambitious. It's exhausting. You'll rush through each one, remember none of them properly, and spend the evening too tired to enjoy dinner. Two activities per day is the maximum for enjoying a trip, not just completing it. One morning activity and one afternoon experience, with meals and walking in between, is a full and satisfying day.

No buffer between activities. Travel time between locations is real. Google Maps says 30 minutes, but finding the entrance, queuing, getting lost, and dealing with unexpected closures adds 15 to 30 minutes. Build in 30- to 60-minute buffers between each scheduled activity. These buffers become coffee stops, photo opportunities, and the unplanned discoveries that make trips memorable.

Ignoring time zones and jet lag. If you land at 7 am after an overnight flight, don't schedule a museum visit for 9 am. You'll be a zombie. Plan day one as a recovery day: check in, walk the neighbourhood, eat well, sleep early. Your trip starts properly on day two. Most itineraries assume you'll hit the ground running. You won't.

Not sharing the itinerary. Everyone on the trip should have access. Share it as a Google Doc, a shared note, or print a copy. If your phone dies, someone else can navigate. If you get separated, everyone knows the day's plan and where to meet. A shared itinerary also prevents the "what are we doing today?" conversation that starts every morning of a poorly planned trip.

Booking everything in advance. Book flights, first and last night accommodation, and any activity that sells out (popular museum time slots, well-known restaurants, national park entries). Leave mid-trip accommodation flexible if you can. You might want to stay an extra night somewhere you love or leave early from a place that disappoints.

Plan your trip, set your budget, and pay for it all with Grey. Save in a Pouch, spend on a virtual card, stay connected with an eSIM.

Frequently asked questions about trip itineraries

What is the best app for trip itineraries?

Google Docs or Google Sheets for simplicity: free, shared in real-time, and editable from any device. TripIt for automatic itinerary building from forwarded confirmation emails. Notion for customisable templates with linked databases. Wanderlog for map-based visual itineraries. For most travellers, a simple shared Google Doc with the template structure above works better than a specialised app.

How detailed should my itinerary be?

Detailed enough to avoid logistical stress, flexible enough to allow spontaneity. Fix the non-negotiables (flights, hotels, timed-entry activities). Plan 1 to 2 activities per day. Leave at least one free afternoon for every 3 planned days. The best trips have structure in the morning and freedom in the afternoon.

Should I book everything in advance?

Book flights, first and last night accommodation, and activities that sell out (popular museums, tours, national park entries). Leave mid-trip accommodation flexible if you can. You might want to stay an extra night somewhere you love or leave a place that disappoints you. Over-booking removes the flexibility that makes travel enjoyable.

How do I share my itinerary with travel companions?

Google Docs with edit access so everyone can add restaurant finds and updated costs. Print one physical copy as backup. Take a screenshot of each day's plan so it's accessible without internet. The shared document becomes the single source of truth. No more group chats asking "what time is check-in?"

‍

Disclaimer: This article is for informational purposes only. All costs and details are estimates based on mid-2026 data. Verify current information before making decisions. Grey isn't a bank. We're a licensed financial services provider offering multi-currency accounts.

How to activate an eSIM: A step-by-step guide

How to activate an eSIM: A step-by-step guide

Learn how to activate an eSIM on iPhone or Android in a few steps, from scanning the QR code to setting your default line. Get connected today.

•

•

2 min read

Getting a new phone or switching to a different mobile plan usually means dealing with a physical SIM card. With an eSIM, there is no small plastic card to insert or remove, but you still need to activate the digital SIM before you can use your mobile plan.

The activation process is usually straightforward, although the steps can look slightly different depending on your phone and carrier. Instead of inserting a physical SIM, you add the eSIM through your phone settings using a QR code or the activation details provided by your carrier.

To activate an eSIM, open your phone settings, go to Mobile Data or Connections, and choose Add eSIM. Scan the QR code from your carrier or enter the details by hand, then follow the prompts to install the plan. Finally, set the eSIM as your line for data, calls or both.

Once the plan is installed, checking your mobile data and call settings can help make sure the eSIM is active and ready to use.

What you need before you start

Before you start the eSIM activation process, it helps to have everything you need within reach. Nothing is more frustrating than getting halfway through setup and realising you are missing the activation details or your phone does not support eSIMs.

First, make sure your phone is compatible with eSIM technology. If you are unsure, check which phones support eSIM before you begin, as compatibility can vary by device, model and region. You will also need an eSIM plan from a carrier that supports eSIM activation.

Your carrier should provide either a QR code or activation details that you can enter manually. Keep these details available before opening your phone settings, as you may need them during installation.

With a compatible phone, a carrier eSIM plan and your QR code or activation details ready, you can move on to the activation process and install the eSIM on your device.

Also read: eSIM vs physical SIM: What is the difference?

How to activate an eSIM on iPhone: a step-by-step guide to installing your mobile plan

Activating an eSIM on your iPhone lets you connect to a mobile network without inserting a physical SIM card. Before you begin, make sure you have your carrier’s activation details or QR code ready and your iPhone connected to Wi-Fi.

1. Connect to Wi-Fi

Connect your iPhone to a stable Wi-Fi network before you begin. A reliable internet connection helps your device communicate with your carrier and complete the eSIM setup without interruptions. If you are activating a new iPhone, complete the device setup before adding your mobile plan.

2. Open Cellular Settings

Open Settings on your iPhone and tap Cellular or Mobile Service, depending on your region. Select Add eSIM, then choose the available activation option. Your iPhone may offer several methods, including transferring from another iPhone or using a QR code supplied by your carrier directly.

3. Scan the QR Code

Select the option to use a QR code if your carrier has one. Point your iPhone camera at the code and follow the prompts on screen. Depending on your carrier, you may need to confirm activation or enter details before the plan downloads as expected.

4. Label Your Plan

Once the eSIM has been added, give the cellular plan a clear label, such as Personal or Work, so you can identify it easily. If you have multiple lines, choose which number should handle calls, messages and mobile data, then finish the setup process completely.

How to activate an eSIM on Android

Learn how to activate an eSIM on your Android phone, from scanning your carrier’s QR code to downloading the mobile plan and completing setup.

Samsung Galaxy

  1. Open Settings and tap Connections.
  2. Select SIM manager, then choose Add eSIM.
  3. Tap the Scan QR code from the service provider and scan your carrier’s QR code.
  4. Follow the on-screen instructions to download the eSIM and complete activation.

Google Pixel

  1. Open Settings and select Network & Internet.
  2. Tap the + (Add) icon beside SIMs.
  3. Select Download a SIM instead?, then tap Next.
  4. Scan your carrier’s QR code and follow the prompts to download and activate your eSIM.

Motorola

  1. Open Settings, then select Network & Internet.
  2. Tap Mobile network, choose Advanced, and select Carrier.
  3. Tap Add carrier, then select Start to open the scanner.
  4. Scan your QR code and tap Done to complete eSIM activation.

Xiaomi / Redmi

  1. Open Settings and select SIM cards & mobile networks.
  2. Turn on Use eSIM, then tap Manage eSIM.
  3. Select Add mobile plan and scan your provider’s QR code.
  4. Tap Download and follow the prompts to install and activate your eSIM.

OnePlus

  1. Open Settings and tap Mobile network.
  2. Select eSIM and turn on the eSIM feature.
  3. Tap Add eSIM, then select Next to continue.
  4. Scan your carrier’s QR code and follow the on-screen instructions to complete the setup.

Activating an eSIM without a QR code or using two eSIMs

You may not always need a QR code to activate an eSIM. Depending on your carrier and Android phone, you may be able to enter the activation details manually or download the eSIM through your carrier’s app. Manual activation typically requires information such as an activation code or SM-DP+ address provided by your carrier. If your carrier supports app-based activation, download its official app, sign in, and follow the instructions to add your mobile plan. The exact steps can vary by carrier and Android device.

Some Android phones also support two eSIMs, allowing you to keep two mobile plans on one device. This can be useful if you want to separate personal and work numbers, use different carriers when travelling, or keep a local plan alongside your main number. Your phone must support multiple active eSIMs, and the exact options vary by model. Check your device’s SIM settings to see whether you can add and manage more than one eSIM.

You may also like: How to pay online and in stores worldwide with your phone

Get a Grey eSIM and stay connected across 100+ countries

With a Grey eSIM, you can stay connected while travelling across more than 100 countries without worrying about traditional roaming charges. You can purchase a data plan through the Grey app, select your destination, choose the plan that suits your trip, and complete the payment.

Once you have purchased your plan, install the eSIM on your compatible phone and follow the activation steps for your device. After activation, turn on the eSIM for mobile data and make sure data roaming is enabled for the Grey line where required. Your plan will then connect to a supported local network when you arrive.

The Grey app also makes it easier to hold and spend multiple currencies while you travel. You can manage your available balances, exchange currencies when needed, and use your Grey card for eligible purchases, giving you more flexibility when moving between countries. Download the Grey app to get started

Frequently asked questions about activating an eSIM card

How do I activate an eSIM?

Open your phone’s Settings and find the Cellular, Mobile network, or SIM manager menu. Select Add eSIM or the equivalent option, then follow your carrier’s instructions. You may need to scan a QR code or enter activation details manually.

Do I need a QR code?

A QR code is the most common way to activate an eSIM, as carriers typically provide one with your plan. However, some devices and networks also support manual activation, allowing you to enter details such as an activation code or SM-DP+ address.

Can I activate an eSIM without Wi-Fi?

You generally need an internet connection to download and activate an eSIM profile. Wi-Fi is usually the simplest option, although some devices may allow activation using mobile data. Check your carrier’s instructions before starting, especially when travelling without an active connection.

How long does activation take?

eSIM activation usually takes only a few minutes once you have downloaded the digital profile. However, the exact time depends on your carrier, device, and network. If your eSIM does not connect immediately, restart your phone and check that the correct line is enabled.

Can I move an eSIM to a new phone?

You can move an eSIM to another compatible phone, but the process depends on your carrier and device. Some phones support direct eSIM transfer, while others require you to deactivate the old profile and request a new activation code or QR code.

How do I get a Grey eSIM?

Open the Grey app, go to the Lifestyle section, and select eSIM. Choose your destination country and the data plan that suits your trip, then complete your purchase. Download the eSIM to your compatible device and follow the activation instructions.

What to pack for a Europe trip (plus how to handle your money)

What to pack for a Europe trip (plus how to handle your money)

What to pack for a Europe trip. Practical checklist plus how to handle money across multiple currencies. Travel lighter and smarter. Read now.

•

•

2 min read

The internet has convinced people they need a 47-item packing list, a compression cube system, and a capsule wardrobe colour-coordinated to their destination’s architecture. You need a carry-on bag, 5 days of clothes, and a plan for handling money across 2 to 4 currencies. That's it.

Pack for 5 days regardless of trip length. You'll do laundry. Every European city has laundromats, and most hotels and Airbnbs have washing machines. Packing for 14 days means lugging a checked bag through cobblestone streets, up narrow hotel staircases, and onto trains where overhead racks are sized for Europeans who pack lighter than you.

Skip packing cubes unless you genuinely find them useful. They're a gear-industry solution to a problem caused by overpacking. If you pack 5 days of clothes in a 40L backpack, everything fits without elaborate organisational systems.

This guide covers what to pack, what to leave behind, and how to handle money in euros, pounds, Swiss francs, and other currencies you'll encounter. For day trip planning, once you arrive, see the best day trips from Paris.

What clothes to pack for a Europe trip

3 t-shirts or tops. Neutral colours (black, grey, navy, white) that mix and match. Cotton blends dry faster than pure cotton. Merino wool is worth the investment for travel: it doesn't smell after multiple wears, dries quickly, and regulates temperature. One merino t-shirt and two cotton tops cover most situations.

2 pairs of trousers/bottoms. One pair of comfortable jeans or chinos for evenings and nicer restaurants. One pair of quick-dry hiking/travel trousers for active days. Skip the "zip-off" travel trousers unless you're actually hiking. They look terrible in cities, and most European restaurants enforce a "no shorts that look like you just came from a trek" dress code.

5 pairs of underwear and socks. This is the one category where matching your trip length makes sense. Underwear and socks are small, and not having enough is genuinely unpleasant. Quick-dry travel underwear (ExOfficio, Uniqlo Airism) dries overnight after hand-washing.

1 light jacket or fleece. Even Mediterranean summers get cool in the evening. A packable down jacket (Uniqlo Ultra Light Down or similar) weighs almost nothing and compresses to the size of a water bottle. It saves you from buying a jacket at a European price when the temperature drops unexpectedly.

1 rain layer. A lightweight waterproof shell. Not an umbrella. Umbrellas are awkward on crowded European streets, break in the wind, and get forgotten in cafes. A packable rain jacket (Patagonia Torrentshell, North Face Venture) works in rain, doubles as a windbreaker, and stuffs into your day bag.

1 "nice" outfit. One slightly dressier shirt or blouse and your better trousers. Some European restaurants (especially in Italy and France) expect a minimum level of dress. You don't need formal wear, but a step above hiking gear shows respect for the culture and gets you into places that turn away obvious tourists.

Comfortable walking shoes. This is the single most important packing decision. You'll walk 8 to 15 miles per day in European cities. Cobblestones destroy unsupported shoes. Pack one pair of comfortable, broken-in walking shoes with good arch support. White trainers (Nike, Adidas, New Balance) work for both walking and casual dining. Leave the flip-flops for the beach.

Tech essentials for travelling in Europe

Phone + charger + power bank. Your phone replaces maps, guidebooks, translators, cameras, boarding passes, and booking confirmations. Keep it charged. A 10,000mAh power bank adds one full charge and weighs about 200g. Charge both every night.

Universal power adaptor. Europe uses Type C (two round pins) in most countries, Type G (three rectangular pins) in the UK and Ireland. One universal adaptor covers both plus Switzerland's Type J. Don't pack country-specific adaptors for each destination. One universal unit is smaller and more versatile.

Travel eSIM. A travel eSIM gives you data across Europe without swapping SIM cards or paying roaming charges. You download it before you leave, activate on arrival, and have data for maps, messaging, and translations. This is the single biggest quality-of-life improvement in modern travel. Not having reliable data in a foreign city means you can't navigate, translate, or look up anything.

Noise-cancelling earbuds or headphones. For flights, trains, and noisy hostels. Also useful for audio guides at museums (better than renting the museum's clunky device).

Key travel documents for Europe

Passport. Valid for at least 6 months beyond your travel dates. Check now, not 2 weeks before departure. Passport renewal takes 6 to 10 weeks in the US and 3 to 6 weeks in the UK.

Travel insurance. Non-negotiable. A European hospital visit without insurance can cost $5,000 to $50,000. Annual multi-trip policies ($100 to $200/year) are cheaper than single-trip policies if you travel more than once. Check that your policy covers medical evacuation, trip cancellation, and baggage loss.

Copies of important documents. Passport photo page, travel insurance policy number, credit/debit card emergency numbers, and hotel confirmations. Keep digital copies in your email and physical copies separate from the originals. If your passport is stolen, a photocopy dramatically speeds up the replacement process at your embassy.

Toiletries to pack for Europe

The TSA 3-1-1 rule applies to EU flights too. Liquids in containers of 100ml (3.4oz) or less, in one clear zip-lock bag per person. Pack travel-size versions of essentials only: toothpaste, deodorant, sunscreen, any prescription medications. Buy shampoo, conditioner, and body wash at a European pharmacy or supermarket after arrival. They cost the same or less than travel sizes at home, and you're not carrying them through airport security.

Prescription medications. Keep in original packaging with your name on the label. Carry a copy of the prescription for controlled substances. Pack in carry-on, never checked luggage (if your checked bag is lost, you can't replace prescription medication easily in a foreign country).

Sunscreen. Even in Northern Europe. The sun in June to August is strong enough to burn, and European pharmacies charge premium prices for sunscreen (EUR 15 to 25 for a decent bottle). Pack one travel-size bottle and buy more locally if needed.

What NOT to pack

A checked bag. Carry-on only. European budget airlines (Ryanair, easyJet, Wizz Air) charge $25 to $60 for checked bags each way. European hotel staircases are narrow. Cobblestone streets destroy rolling suitcase wheels. A 40L backpack or carry-on suitcase forces you to pack efficiently and move easily on any surface.

A hair dryer. Every European hotel provides one. Even most Airbnbs have one. Packing your own waste space and weight.

"Just in case" clothes. If you haven't worn it in the last 2 weeks at home, you won't wear it in Europe. Every extra item takes space from the things you'll actually use. The "what if we go somewhere nice?" outfit is the one dressier option listed above, not three additional outfits.

A full-size towel. Hotels provide them. If you're staying in hostels, a microfiber travel towel (PackTowl or similar) dries fast, packs small, and weighs almost nothing.

Excessive electronics. A laptop, tablet, and e-reader are too many screens. Pick one. Most travellers find their phone handles everything a tablet does, and a Kindle weighs far less than a laptop.

How to handle money across Europe

This is where most packing guides stop. They tell you what clothes to bring, but not how to handle the financial side of visiting 3 countries with 2 different currencies in 10 days.

The problem: Western Europe uses the euro (most countries), the British pound (UK), the Swiss franc (Switzerland), the Swedish krona (Sweden), and several others. Every card payment in a non-home currency carries a foreign transaction fee of 1.5 to 3% from your bank. On a $3,000 trip, that's $45 to $90 in hidden fees.

The solution: hold euros and pounds in a Grey account before you leave. Spend on a Grey virtual card from your pre-loaded balance. No conversion markup on each tap. Your spending is tracked in the Grey app automatically, which doubles as your trip budget tracker.

Cash: carry EUR 50 to 100 in cash for arrival (taxi, first meal, tips if needed). ATMs at European airports and train stations accept international cards. Avoid currency exchange booths at airports. Their rates include a 5 to 10% markup. ATM withdrawals are almost always better, even with a per-withdrawal fee.

Contactless payments: Europe is more contactless-friendly than the US. Tap-to-pay works at virtually all retailers, restaurants, transport, and vending machines. Apple Pay and Google Pay are widely accepted. Some small markets and rural businesses are cash-only, but these are the exception in Western Europe.

Tipping: not expected in most of Europe the way it is in the US. Rounding up the bill (EUR 47 → EUR 50) or leaving 5 to 10% at a sit-down restaurant is normal. Don't tip 20%. No one expects it, and some servers find it awkward.

Travelling Europe? Hold euros and pounds in Grey, spend on a virtual card with no conversion fees, and stay connected with a travel eSIM.

Frequently asked questions about what to pack for a Europe trip

What size bag should I take to Europe?

40L backpack or carry-on suitcase (55x40x20cm or smaller for budget airlines). Pack for 5 days and do laundry. A carry-on avoids checked bag fees ($25 to $60 per flight on European budget airlines), fits in overhead bins and narrow hotel staircases, and moves easily on cobblestones. Avoid rolling suitcases for backpacking-style trips.

Do I need a power adaptor for Europe?

Yes. Europe uses Type C plugs (most countries) and Type G (UK, Ireland). One universal adaptor covers all European countries plus Switzerland. Don't buy country-specific adaptors. Budget EUR 10 to 15 for a good universal adaptor from Amazon before you leave. European pharmacies and electronics stores charge double.

How much cash should I bring to Europe?

EUR 50 to 100 for arrival day (taxi, first meal, small purchases). After that, use ATMs for cash withdrawals as needed. Contactless card payments work almost everywhere in Western Europe. Avoid airport currency exchange booths (5 to 10% markup). ATM withdrawals give better rates. Carry a small cash reserve for markets and rural businesses.

Do I need travel insurance for Europe?

Yes. A European hospital visit without insurance costs $5,000 to $50,000, depending on the treatment. Annual multi-trip policies cost $100 to $200/year and cover medical, cancellation, and baggage. Single-trip policies cost $50 to $150. Some credit cards include travel insurance. Check your card benefits before buying a separate policy.

What shoes should I pack for Europe?

One pair of comfortable, broken-in walking shoes with good arch support. You'll walk 8 to 15 miles per day on cobblestones. White trainers (Nike, Adidas, New Balance) work for both walking and casual dining in most European cities. Leave flip-flops for beach destinations only. Leave dress shoes at home unless you have a specific formal event.

‍

Disclaimer: This article is for informational purposes only. All costs and details are estimates based on mid-2026 data. Verify current information before making decisions. Grey isn't a bank. We're a licensed financial services provider offering multi-currency accounts.

15 romantic trips for couples: Ideas and budgets

15 romantic trips for couples: Ideas and budgets

15 romantic trips for couples at every budget. Weekend city breaks, beach escapes, and adventure getaways with real costs. Find your perfect trip. Read now.

•

•

2 min read

The internet is full of "romantic trip" lists that recommend the Maldives and Santorini as if everyone has $10,000 to spend on a week away. Great romantic trips exist at every price point. A $300 weekend in a cabin can be more memorable than a $5,000 resort stay if you pick the right destination and plan around what you both actually enjoy, not what looks good on Instagram.

The best romantic trips for couples range from budget weekends ($300 to $800 for two) to splurge-worthy escapes ($3,000 to $8,000+). Budget picks: Lisbon, Marrakech, and Bali. Mid-range: Amalfi Coast, Kyoto, and Cape Town. Luxury: Maldives, Santorini, and the Swiss Alps. Each destination suits different types of couples and travel styles.

Skip any destination where one of you will be bored. A beach resort is only romantic if both of you like beaches. If one partner wants culture and museums while the other wants poolside cocktails, pick a city with both. Paris, Barcelona, and Cape Town all deliver romance with enough variety to keep both people engaged.

This guide covers 15 destinations organised by budget, with realistic costs for flights, accommodation, food, and activities.

Budget romantic trips ($300 to $800 for two)

1. Lisbon, Portugal. Flights from the US: $400 to $600 return for two. From the UK: $60 to $150. Accommodation: boutique hotel in Alfama or Bairro Alto for $60 to $120/night. Lisbon is hilly, colourful, and built for wandering. Tram 28 through the old town costs EUR 3.30 and is more scenic than most guided tours.

Pasteis de nata at Pasteis de Belem (EUR 1.30 each) and sunset drinks at a rooftop bar in Bairro Alto cost almost nothing. The Miradouro da Graca viewpoint is free, uncrowded, and overlooks the entire city. Budget for 4 nights: $600 to $1,200 total including flights.

2. Marrakech, Morocco. Flights from Europe: $100 to $300 return for two. Accommodation: a traditional riad (courtyard hotel) in the Medina for $50 to $100/night, including breakfast. Marrakech is sensory overload in the best way: the souks, the food stalls at Jemaa el-Fna square, the call to prayer echoing over the rooftops. A couples' hammam and massage at a mid-range spa costs $30 to $60 per person.

The Jardin Majorelle (EUR 15 entry) is the most romantic garden in North Africa. Budget for 4 nights: $400 to $800 total.

3. Bali, Indonesia. Flights from Australia: $300 to $500 return for two. From the US/Europe: $800 to $1,400. Accommodation: a private pool villa in Ubud or Seminyak for $50 to $150/night. Bali is the budget romantic destination that feels like a splurge. A couples' spa treatment costs $30 to $60. A private sunset dinner at a rice terrace restaurant costs $50 to $80 for two, including wine.

The Tegallalang rice terraces, Uluwatu Temple at sunset, and the Campuhan Ridge Walk in Ubud are all free or nearly free. Budget for 7 nights: $1,000 to $2,500, including flights. For coworking options, if you're combining work and romance, see coworking spaces in Bali.

4. Budapest, Hungary. Flights from Europe: $50 to $150 return for two. From the US: $500 to $800. Accommodation: $60 to $120/night for a boutique hotel along the Danube. Budapest's thermal baths (Szechenyi, Gellert) are built for couples: warm mineral water, ornate architecture, and a pace that forces you to slow down. Entry: $20 to $30 per person.

The ruin bars in the Jewish Quarter are unlike anything else in Europe: crumbling courtyards converted into eccentric bars with mismatched furniture and art installations. Budget for 4 nights: $500 to $1,000 total.

5. San Juan, Puerto Rico. No passport needed for US citizens. Flights from the US East Coast: $150 to $350 return for two. Accommodation: $80 to $150/night in Old San Juan.

Walking the colourful streets of Viejo San Juan, exploring El Morro fortress (free with National Parks Pass, $10 without), and eating mofongo at a local restaurant ($15 to $25 per plate) make a romantic long weekend without the hassle of international travel. Budget for 3 nights: $400 to $800 total.

Mid-range romantic trips ($1,000 to $3,000 for Two)

6. Amalfi Coast, Italy. Fly into Naples, train to Sorrento, ferry to Positano or Amalfi. Flights from the US: $600 to $1,000 return for two. Accommodation: $150 to $300/night (book 3+ months ahead in summer). The Amalfi Coast is the most reliably romantic landscape in Europe: pastel villages clinging to sea cliffs, lemon groves, and blue water.

The Path of the Gods hike (Sentiero degli Dei) from Agerola to Positano is free, takes 3 to 4 hours, and has views that justify the entire trip. Budget for 5 nights: $2,000 to $3,500 total.

7. Kyoto, Japan. Flights from the US: $700 to $1,200 return for two. Accommodation: a traditional ryokan (Japanese inn) with tatami rooms and private onsen for $150 to $350/night. Kyoto has 2,000 temples and shrines, and the best are free or nearly free: Fushimi Inari (free, go at 6 am for empty torii gates), Arashiyama Bamboo Grove (free), and Kinkaku-ji Golden Pavilion (JPY 400).

A private tea ceremony costs $30 to $50 per person and is one of the most meditative couple experiences you can book anywhere. Budget for 5 nights: $2,000 to $3,500 total.

8. Cape Town, South Africa. Flights from the US: $700 to $1,100 return for two. From the UK: $500 to $800. Accommodation: $80 to $200/night in the Cape Winelands or Camps Bay. Table Mountain at sunset (cable car ZAR 360 return), wine tasting in Stellenbosch and Franschhoek (ZAR 50 to 150 per tasting), and a penguin colony at Boulders Beach (ZAR 176 entry).

The exchange rate makes Cape Town exceptionally valuable: a tasting menu at a top restaurant costs $40 to $70 per person, roughly a third of the equivalent quality in London or New York. Budget for 7 nights: $2,000 to $3,500 total.

9. Costa Rica. See our full cost breakdown: how much does a trip to Costa Rica cost. Highlights for couples: Arenal volcano hot springs ($20 to $60 per person), Manuel Antonio National Park ($18 entry), and a private sunset catamaran tour ($80 to $120 per person).

Budget for 7 nights: $2,500 to $4,000 total.

10. Greek Islands (Crete or Naxos). Skip Santorini if you're on a mid-range budget. Crete and Naxos deliver the same blue water and white buildings at half the price. Flights from Europe: $100 to $300 return for two.

Accommodation: $80 to $150/night. Renting a car (EUR 30 to 50/day) opens up hidden beaches and mountain villages. Budget for 7 nights: $1,500 to $2,500 total.

Luxury romantic trips ($3,000+)

11. Santorini, Greece. The caldera view from Oia at sunset is one of the most photographed scenes on earth, and it delivers even when you've seen it a thousand times in photos.

Accommodation: $250 to $600+/night for a cave hotel with a private plunge pool overlooking the caldera. Flights from the US: $800 to $1,200 return for two. Budget for 5 nights: $3,500 to $6,000 total.

12. Maldives. Overwater bungalows, private beaches, and water so clear you can see fish from your deck. Flights from the US: $1,000 to $1,800 return for two. Accommodation: $300 to $1,500+/night all-inclusive.

The Maldives is the ultimate splurge romantic trip: expensive, remote, and worth every penny if snorkelling, diving, and doing absolutely nothing is your idea of paradise. Budget for 5 nights: $4,000 to $10,000+ total.

13. Swiss Alps (Zermatt or Grindelwald). Mountain romance: snowy peaks, alpine villages, fondue, and train rides through scenery that looks computer-generated. Accommodation: $200 to $500/night.

The Glacier Express or Bernina Express train rides ($100 to $300 per person) are the highlight. Budget for 5 nights: $3,000 to $6,000 total.

14. Patagonia (Argentina/Chile). For adventurous couples. Torres del Paine National Park, glacier hikes, and empty landscapes. Flights from the US: $800 to $1,500 return for two.

Accommodation: $100 to $300/night (lodges near the park). The W Trek (4 to 5 days) is a bucket-list hike. Budget for 7 nights: $3,000 to $5,500 total.

15. Paris, France. The classic. Flights from the US: $600 to $1,000 return for two. Accommodation: $150 to $350/night in the Marais or Saint-Germain. Seine river cruise ($15 to $20), a picnic under the Eiffel Tower with wine and cheese from a local market ($20 for two), and a patisserie crawl through the 6th arrondissement.

Paris earns its romantic reputation through accumulation: every meal, every walk, every candlelit bistro adds to the atmosphere. For day trips, see best day trips from Paris (grey.co/blog/best-day-trips-from-paris). Budget for 5 nights: $2,500 to $4,500 total.

Paying for romance abroad

Foreign transaction fees add 1.5 to 3% to every card payment outside your home currency zone. On a $3,000 trip, that's $45 to $90 in hidden fees. A Grey virtual card lets you spend from your pre-loaded EUR, GBP, or USD balance with no conversion markup. Hold the destination currency before you travel, and every payment comes from your own funds, not a live conversion.

Save for the trip in a Grey Pouch so the money is set aside and growing toward your target. For mobile data abroad, grab a travel eSIM and skip roaming charges that can run $10 to $15 per day on some carriers.

Planning a romantic getaway? Save in a Grey Pouch, spend on a virtual card, and keep more of your travel budget for the trip itself.

Frequently asked questions about romantic trips for couples

What is the most romantic trip for couples?

Depends on what romance means to you. Beach and relaxation: Maldives or Bali. Culture and food: Paris or Kyoto. Adventure: Patagonia or Costa Rica. Budget romantic: Lisbon, Budapest, or Marrakech. The best romantic trip is one where both partners are excited about the destination, not one that just looks good online.

How much should a romantic trip cost?

Budget: $300 to $800 for a long weekend in a nearby destination (Lisbon, Budapest, San Juan). Mid-range: $1,000 to $3,000 for a week in a destination with moderate costs (Amalfi Coast, Kyoto, Cape Town). Luxury: $3,000 to $10,000+ for a once-in-a-lifetime trip (Maldives, Santorini, Swiss Alps). Set a budget both partners are comfortable with before researching destinations.

When is the best time for a romantic trip?

Shoulder seasons (April to May, September to October) offer the best combination of good weather, lower prices, and fewer crowds at most destinations. Avoid peak holiday weeks (Christmas, New Year, Valentine's Day week) when prices spike 30 to 50%. The exception: if a specific season defines the destination (Swiss Alps in winter, cherry blossoms in Kyoto in April), time it to the season.

Should we book all-inclusive or independent?

All-inclusive for pure relaxation trips where you want to stay at the resort (Maldives, Caribbean). Independent for destination exploration trips where eating local, walking the streets, and discovering hidden spots is the point (Paris, Lisbon, Kyoto). An all-inclusive in a culturally rich destination wastes the destination.

‍

Disclaimer: This article is for informational purposes only. All costs and details are estimates based on mid-2026 data. Verify current information before making decisions. Grey isn't a bank. We're a licensed financial services provider offering multi-currency accounts.

Check your inbox! 😀
We've sent you a confirmation email. Just follow the steps to complete your subscription.
Oops! Something went wrong while submitting the form.