STAY UP TO DATE

The Grey Blog

Dive into our latest product updates, user interviews, finance tips, and strategic insights from the Grey team.
Man in purple shirt sitting and smiling while looking at his smartphone against a dark curtain background.Section decorative curve

ALL ARTICLES

Portugal D7 visa: How to apply for the passive income visa

Portugal D7 visa: How to apply for the passive income visa

Find out if you qualify for the D7 visa Portugal offers passive income earners. Income thresholds, documents and timings explained. Apply with confidence.

•

•

2 min read

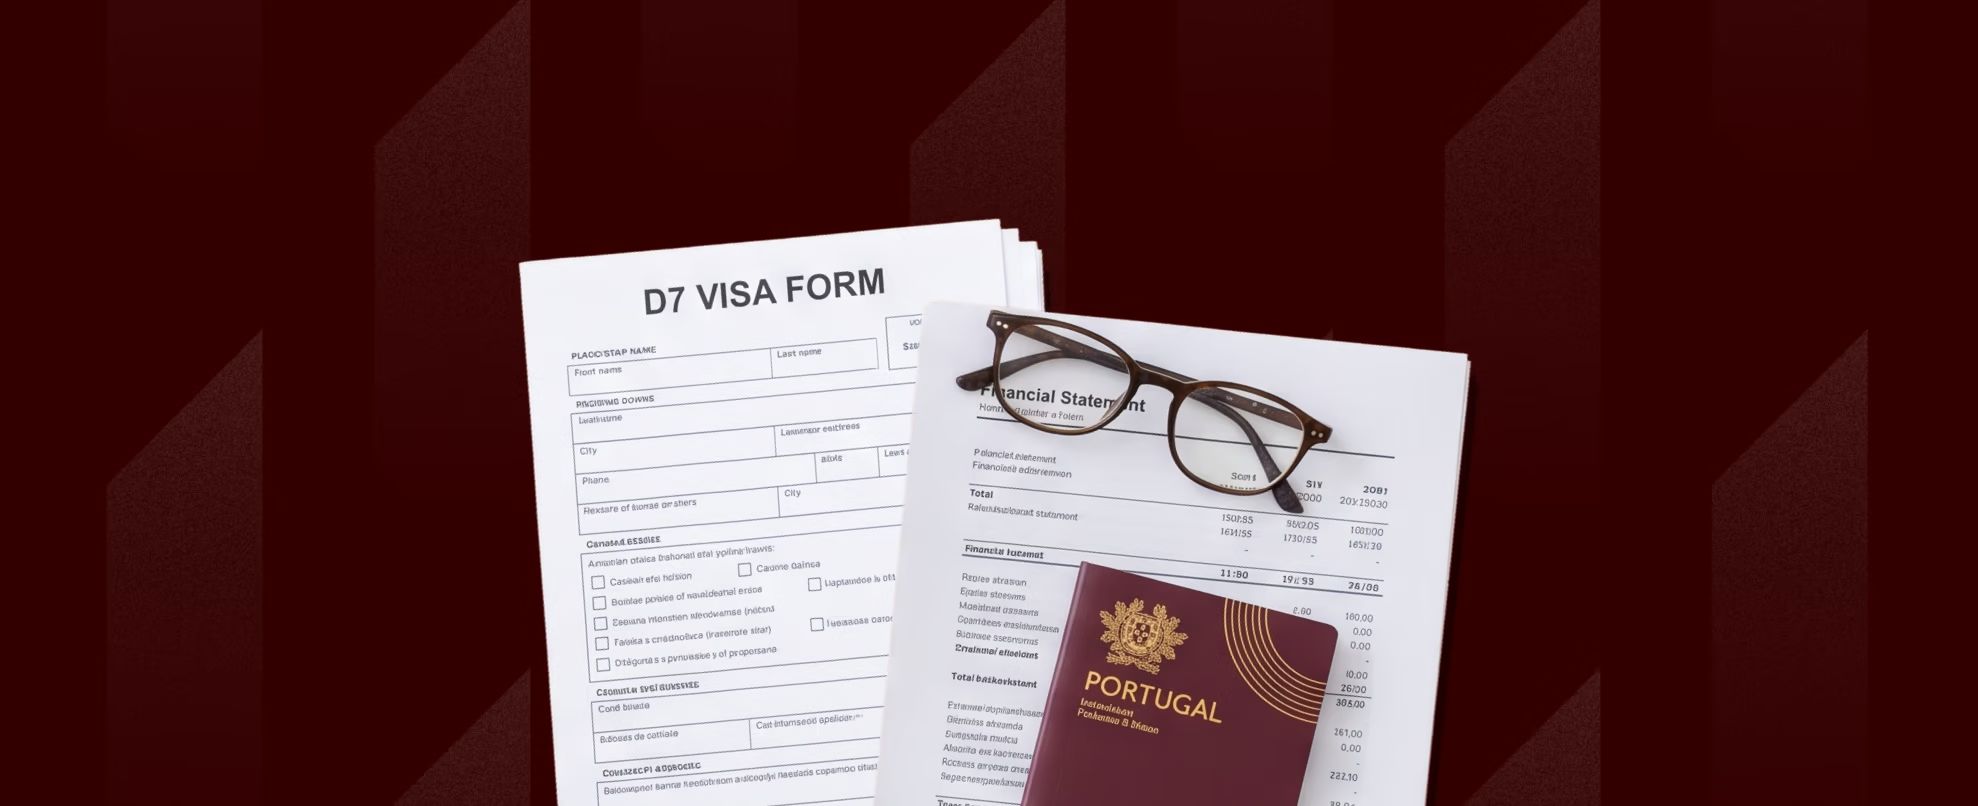
Portugal has become an attractive option for people who want to build a life in Europe without relying on a local job offer. For retirees, property owners and others with regular passive income, the Portugal D7 visa offers a way to apply for residency while continuing to support yourself from income earned outside the country.

The Portugal D7 visa is a residency route for non-EU nationals with a stable passive income, such as pensions, rental income or dividends. You must show income at least equal to the Portuguese minimum wage, plus proof of accommodation.

But having enough income is only one part of the application. You also need to understand the documentation, accommodation requirements, application process and what happens after your visa is approved. If you are considering Portugal as your next home, knowing what the D7 visa requires before you apply can help you avoid delays, prepare the right documents and decide whether this residency route fits your circumstances.

Also read: Portugal transfer limits from US banks: Rules explained

What is the D7 visa?

The Portugal D7 visa is a residency visa for non-EU nationals with stable passive income who want to live in Portugal.

Who Can Apply?

The D7 visa is designed for non-EU nationals who can support themselves through regular passive income. Applicants must demonstrate sufficient financial means and provide accommodation evidence, making it suitable for people planning to relocate rather than simply visit Portugal.

Retirees

Retirees are among the most common D7 applicants because pensions can qualify as passive income. Someone receiving a regular pension from another country may use that income to demonstrate financial stability while moving to Portugal for retirement.

Remote-Income Earners

The D7 can also appeal to people earning a regular income from sources outside Portugal. This may include rental properties, investments or other recurring income streams. However, remote workers whose income comes from active employment or freelancing should check whether another Portuguese visa is more appropriate.

The Passive-Income Requirement

The D7 is based on demonstrating reliable financial resources rather than securing a Portuguese job. Applicants generally need to show recurring income, such as pensions, rental income or dividends, alongside sufficient savings to support their stay and meet the visa requirements.

What are the D7 visa requirements for Portugal?

Understanding the Portugal D7 visa requirements gives you a clearer picture of what to prepare before submitting your application, from proving your finances to securing accommodation and meeting the health and character requirements.

  • Income: Financial stability is central to the D7 application. You need to demonstrate sufficient regular income or financial resources to support your life in Portugal. For 2026, Portugal’s minimum wage is €920 per month, giving a €11,040 annual reference amount for a single applicant.
  • Accommodation: Before applying, arrange a suitable place to live in Portugal. This could be a rental property or a home you own. Your documents should provide evidence of your intended address and show that you have somewhere to live during your stay.
  • Health insurance: Appropriate health insurance is another part of the application. Your policy should cover necessary medical expenses, including urgent treatment and potential repatriation. Once you become a resident, different healthcare requirements may apply depending on your circumstances.
  • Clean record: Your application also needs to demonstrate good character. This usually means providing a criminal record certificate from your country of nationality or the relevant country of residence, with the required authentication. Portuguese authorities will also check your Portuguese criminal record.

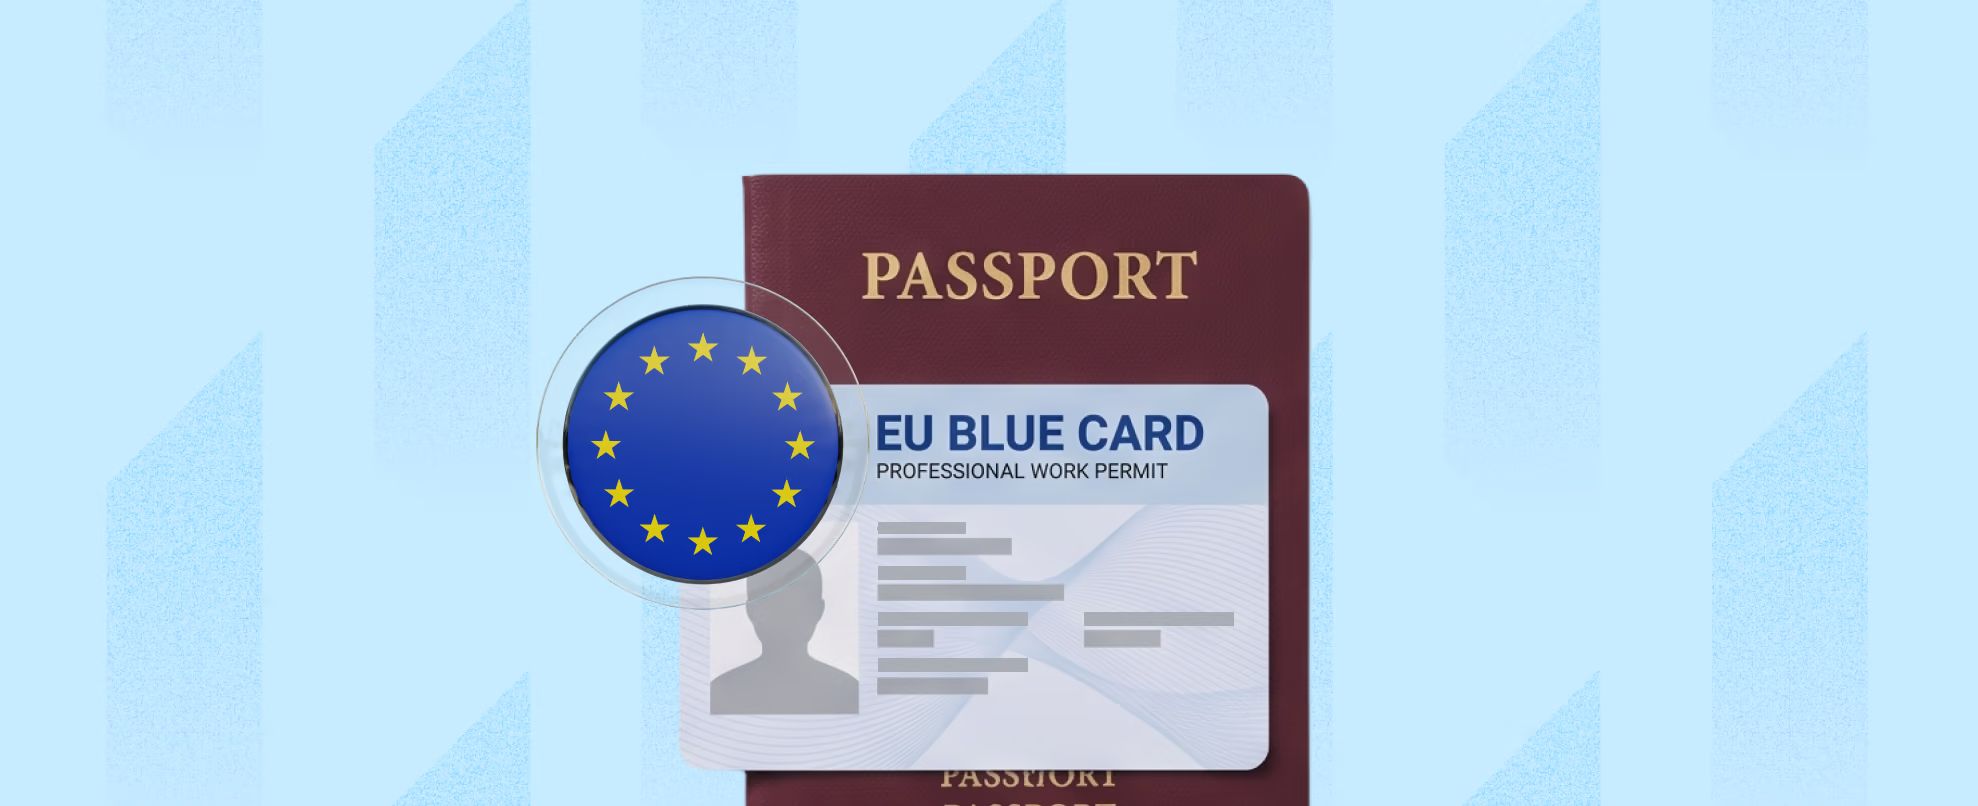
For highly qualified professionals moving to Portugal for work, the EU Blue Card route provides another residency option. The route is designed for skilled workers with an eligible employment offer and comes with specific requirements

Also read: Real budgeting tips for nomads living in Lisbon

How to apply for the Portugal D7 visa

If you are applying for the Portugal D7 visa, following the process in the right order helps you prepare your documents, avoid unnecessary delays and know what to expect at each stage.

1. Gather your documents

Start by preparing proof of income or financial resources, accommodation in Portugal, valid health insurance, a criminal record certificate, your passport and any other supporting documents required. You may also need to have certain documents authenticated or translated before submitting your application.

2. Submit your visa application

Next, submit your D7 visa application through the Portuguese consulate or visa application centre responsible for your country of residence. You will provide your documents, complete the application process and attend an appointment or interview if requested.

3. Travel to Portugal

Once your residence visa is approved, you can travel to Portugal within the validity period shown on your visa. This gives you permission to enter Portugal and complete the next stage of your residency application.

4. Apply for your residence permit

After arriving in Portugal, you will attend your appointment with AIMA and submit the documents required for your residence permit. Once your application is approved, you will receive your Portuguese residence card, allowing you to live in Portugal legally.

Residency, taxes and the path to citizenship

Once you have your D7 residence permit, the focus shifts from getting approved to maintaining your residency and planning for the years ahead. That means understanding renewal dates, how much time you need to spend in Portugal, the route to citizenship and how becoming a tax resident could affect your income.

Renewal timeline

Your D7 journey begins with a two-year residence card, followed by a three-year renewal, provided you continue meeting the residency requirements and maintaining your ties to Portugal. You should also plan around the minimum-stay requirement, especially if you work remotely or are registering as self-employed abroad while living in Portugal.

Minimum stay

A D7 residence permit is intended for people who genuinely live in Portugal, so your travel plans matter. You generally need to spend at least six consecutive months or eight non-consecutive months in Portugal each year. If your work takes you abroad frequently, factor these limits into your plans before choosing this residency route.

Citizenship route

After five years of legal residency, D7 holders may become eligible to apply for Portuguese citizenship, subject to the applicable requirements, including an A2-level Portuguese language test. For someone building a long-term life in Portugal, this can turn the D7 from a temporary relocation decision into a potential pathway towards permanent belonging.

How moving to Portugal can affect your tax residency

Getting a D7 residence permit does not automatically mean every tax obligation is the same; your tax residency depends on your circumstances and time spent in Portugal.

Portugal generally considers factors such as spending more than 183 days in the country or having a home there that indicate an intention to maintain it as your habitual residence. Once you become a tax resident, Portuguese IRS rules can apply to your income, including foreign-source income, subject to applicable exemptions, credits and tax treaties.

Proving income and moving money when preparing for life in Portugal

As you prepare your Portugal D7 Visa application, Grey can help you manage the money side of your move. Its multi-currency account lets you hold and manage different currencies, while giving you access to a euro account for receiving, holding and spending euros once you start settling into Portugal.

You will still need to prove that you have stable funds or a regular income to support yourself. Your bank statements and financial documents should clearly show where your money comes from and that you can cover your living costs. Having a euro account can also make everyday payments in Portugal more straightforward.

Whether you are moving money from the UK to Portugal or the US to Portugal, Grey gives you a way to move funds across currencies without having to juggle multiple accounts. You can convert your money to euros when needed and use your euro balance for expenses such as rent, bills and everyday spending.

Frequently asked questions about Portugal D7 visa

What is the D7 visa?

The D7 visa is a Portuguese residence visa for non-EU citizens who have a stable income or sufficient financial resources. It is commonly associated with passive income, including pensions, investments and rental income, and allows eligible applicants to live in Portugal with their families.

How much income do I need?

The minimum income requirement is linked to Portugal’s minimum wage and currently starts at €920 per month for the main applicant. You need additional funds for dependents. You should also be prepared to demonstrate that your income or savings can support your planned life in Portugal.

Can I work on a D7?

Yes. Although your initial D7 application is based on demonstrating sufficient income or financial resources, holding Portuguese residency allows you to work legally in Portugal. This means you can take up employment, become self-employed or develop a business after your residency has been granted.

How long does it take?

The initial D7 visa process can take around 60 days once your application is submitted, although processing times vary by consulate and individual circumstances. After receiving the visa, you travel to Portugal and complete the required steps to obtain your residence permit.

Does it lead to citizenship?

The D7 can provide a route towards Portuguese citizenship. Under the rules applicable to your application, you may become eligible after meeting the required period of legal residence and other conditions, including Portuguese language requirements. Check the current nationality rules before relying on a specific timeline.

How do I move money to Portugal?

You can transfer money internationally into your Portuguese bank account to support your move and everyday expenses. Grey can also help you move money across currencies, including transfers from the UK or US to Portugal, while its multi-currency account gives you access to a euro balance.

Independent contractor vs employee: How to tell the difference

Independent contractor vs employee: How to tell the difference

Know where contractor vs employee status really differs. Compare control, tax, benefits and the IRS classification tests in one place. Get the breakdown.

•

•

2 min read

A new job offer can feel straightforward until you reach the part of the contract that describes your employment status. The salary may look attractive and the role may seem like the right next step, but being hired as an independent contractor rather than an employee can change what you take home, who handles your taxes and whether you receive benefits such as paid leave or health insurance.

An independent contractor runs their own business and controls how they work, while an employee works under the employer's direction. Employers withhold tax and provide benefits for employees, but not for contractors, who handle their own taxes

The difference is more than a job title, and getting it wrong can leave you with unexpected tax bills or fewer workplace protections than you expected. In this guide, we’ll break down the key differences between an independent contractor and an employee, so you can understand where you stand before signing your next contract.

Independent contractor vs employee: Key differences

This table compares the main differences between contractors and employees, from workplace control and taxes to benefits, job security, tools, and financial risk.

Feature Independent Contractor Employee
Control Dictates own hours, methods, and routine Employer dictates schedule, location, and tasks
Tax Pays own income and self-employment taxes Employer automatically withholds income and payroll taxes
Benefits Responsible for own health insurance and retirement Eligible for company healthcare, 401(k), and PTO
Tools Provides own specialised equipment and software Employer provides necessary tools and equipment
Permanence Defined by project completion or contract end Indefinite, ongoing relationship until termination
Financial Risk Can experience a financial profit or loss Receives a guaranteed wage or salary

‍

What is an independent contractor?

An independent contractor is a self-employed person who provides services to a business or individual under a contract rather than working as a traditional employee. Think of a freelance designer hired to create a company’s new website, a consultant brought in to solve a business problem, or a writer paid to produce a series of articles. They work independently and are generally responsible for deciding how, when, and where the work gets done, as long as they deliver what was agreed in the contract.

In the US, independent contractors are commonly paid as 1099 workers, meaning businesses generally report their payments to the contractor using a Form 1099-NEC when applicable. Unlike employees, contractors typically do not have income tax, Social Security, or Medicare taxes withheld from their payments, so they need to plan for these taxes themselves.

Being an independent contractor also comes with responsibilities beyond completing the work. Contractors usually handle their own tax filings, business expenses, insurance and retirement planning, while keeping records of income and expenses. The trade-off is greater control over how they work and, in many cases, the ability to work with multiple clients.

What is an Employee?

An employee is a person who works for a company or organisation under an employment relationship, where the employer generally controls what work is done, how it is performed and when it is completed. Unlike an independent contractor, an employee works as part of the organisation and is typically entitled to protections and benefits provided under their employment arrangement.

W-2 Pay

In the US, employees are generally paid through payroll and receive a W-2 form from their employer at the end of the tax year. The W-2 reports their wages and the taxes already withheld from their pay.

Tax Withholding

Employers typically withhold federal income tax, Social Security and Medicare taxes from an employee’s wages and send these amounts to the relevant authorities. This means employees do not usually need to set aside the full tax amount themselves.

Employee Benefits

Depending on the employer and role, employees may receive health insurance, retirement plans, paid time off and other benefits. If you encounter the term “what a 1099 employee is,” it is important to understand that a 1099 worker is generally an independent contractor, not an employee.

How the IRS tests classification

The difference between an employee and an independent contractor is not always obvious from a job title or contract. A company might call someone a contractor, but the IRS looks at the actual working relationship to determine how that person should be classified for tax purposes. It generally considers three categories of control.

Behavioral Control

The IRS considers whether the business has the right to direct how, when and where the worker performs their job. Detailed instructions, set working hours, training and supervision can indicate an employee relationship.

Financial Control

The IRS looks at how much control the business has over the worker’s financial and business activities. Factors include who provides tools and equipment, whether expenses are reimbursed, how the worker is paid and whether they can make a profit or experience a loss.

Relationship Factors

The nature of the relationship also matters, including written contracts, employee benefits, how permanent the arrangement is and whether the worker provides services that are a key part of the business. No single factor determines classification; the IRS considers the entire relationship.

How taxes and paperwork differ for Contractors and Employees

Getting paid as a contractor or employee does not just change the amount that lands in your bank account; it also changes the paperwork you receive, who handles your tax withholding and what happens if your worker classification is wrong.

1099 vs. W-2

Employees generally receive a W-2 showing their wages and taxes withheld by their employer, while independent contractors typically receive a 1099-NEC for qualifying payments. Understanding 1099 vs. W-2 can help clarify how each worker is paid, what taxes are withheld, who is responsible for reporting income, and what paperwork to expect.

Self-Employment Tax

Contractors generally have to account for both the employer and employee portions of Social Security and Medicare taxes through self-employment tax, meaning they need to plan for these payments themselves rather than relying on payroll withholding.

Misclassification risk

Calling a worker a contractor does not automatically make them one. If a business treats an employee as an independent contractor, it may face additional taxes, penalties and other consequences, while the worker could miss protections and benefits they should have received.

How to pay contractors in the US and abroad

Paying a contractor can look simple until the person doing the work lives in another country. A US-based company might have a designer in the Philippines, a developer in Nigeria or a marketing consultant in Brazil, and suddenly the payment process involves exchange rates, transfer fees, payment details and waiting times.

This is where Grey can make contractor payments easier. Businesses can use Grey to pay contractors from the US and send payments internationally without having to navigate a complicated process for every contractor. The platform supports transfers across multiple currencies, allowing businesses to hold and convert funds before sending money to contractors in supported countries.

For example, a US company paying a contractor in the Philippines can use Grey to send money from the US to the Philippines, while the contractor receives the funds in the supported local currency. For businesses working with international talent regularly, having one place to manage these payments can make cross-border contracting much simpler.

Frequently asked questions

What is the difference between a contractor and an employee?

An employee works under an employer’s direction and typically receives payroll withholding and benefits, while an independent contractor runs their own business and controls how they complete their work. Contractors generally handle their own taxes, business expenses and insurance, while employees receive greater workplace protections and employer-provided benefits.

How does the IRS decide?

The IRS looks beyond a worker’s job title or contract and examines the actual working relationship. It considers behavioural control, financial control and the relationship between the worker and business. No single factor automatically determines classification, so businesses should consider the full arrangement when deciding whether someone is an employee or contractor.

Do contractors get benefits?

Independent contractors generally do not receive employee benefits such as employer-sponsored health insurance, paid vacation or retirement contributions. Instead, they are responsible for arranging their own insurance, retirement savings and other benefits. However, a contractor’s specific agreement can provide certain perks or payments, depending on what the business and contractor negotiate.

What is misclassification?

Misclassification happens when a business treats a worker as an independent contractor when the person legally qualifies as an employee. This can affect taxes, benefits and workplace protections. For the business, misclassification can lead to unpaid employment taxes, penalties and other costs, while the worker may lose benefits they should have received.

Can someone be both?

Yes, someone can potentially work as an employee for one business while independently contracting for another. For example, a person could have a full-time W-2 job and provide freelance consulting services to separate clients. However, the classification of each working relationship depends on the specific facts and circumstances involved.

How do I pay an overseas contractor?

Paying an overseas contractor typically involves choosing a payment method, confirming the contractor’s banking details and considering currency conversion, transfer fees and tax documentation. Platforms such as Grey can help businesses make international payments, allowing them to send money across borders without relying on traditional bank transfers for every contractor.

EU Blue Card: How to qualify and apply

EU Blue Card: How to qualify and apply

See who qualifies for the EU Blue Card and how to apply. Degree and salary thresholds, plus the German route, explained. Start your application today.

•

•

2 min read

Moving to Europe for work can feel complicated when you are trying to understand which visa, residence permit and eligibility requirements apply to you. The EU Blue Card offers a route for highly qualified non-EU nationals who have the skills and qualifications European employers need.

To qualify for an EU Blue Card, you generally need a recognised university degree or equivalent professional qualification, a qualifying employment contract or job offer, and a salary that meets the required threshold in the EU country where you plan to work. Requirements can vary between countries, so checking the rules for your destination matters before you apply.

The EU Blue Card combines the right to live and work in a participating EU country with a pathway to greater mobility within the EU. Understanding the eligibility criteria, salary requirements and application process can help you decide whether it is the right route for your move.

Also read: Expat living in Germany: Banking, visas and costs

What is the EU Blue Card?

The EU Blue Card is a work and residence permit for highly qualified non-EU nationals who have a qualifying job offer in a participating European Union country. It is designed to attract skilled professionals from outside the EU by giving them the right to live and work in the country where they are employed, provided they meet the required qualifications, salary and employment conditions.

The “highly qualified” requirement generally means you need higher education qualifications, such as a recognised university degree, or qualifying professional skills recognised under the rules of the country where you apply. You also need a binding job offer or employment contract that meets the required salary threshold. Because these thresholds and application requirements vary by country, your eligibility can depend on where you plan to work.

Most EU countries participate in the EU Blue Card scheme, including Germany, France, the Netherlands, Spain and Italy. Denmark and Ireland do not participate, so you need to consider the specific immigration route available in your chosen destination before applying.

Who qualifies for the EU Blue Card?

You may qualify for the EU Blue Card if you are a highly qualified non-EU national with a qualifying job offer in a participating EU country. You generally need higher professional qualifications, a work contract or binding job offer lasting at least six months, and a salary that meets your destination country’s threshold.

A university degree is the most common way to meet the qualification requirement, typically through a recognised higher education programme of at least three years. However, some countries also recognise relevant professional experience as an alternative, particularly for certain occupations such as IT. Your job must also match the qualifications or professional skills you are using to qualify for the card.

There is no single euro salary figure for the whole EU. Under the current rules, each participating country sets its own threshold, generally between 1 and 1.6 times its average gross annual salary. For example, Germany’s 2026 threshold is €50,700, with a lower €45,934.20 threshold for shortage occupations and certain recent graduates.

The Blue Card in Germany

Germany is the largest issuer of EU Blue Cards in Europe, making it an important destination for highly qualified professionals looking to work in the EU. In 2024, Germany issued 56,252 Blue Cards, representing 72% of all cards issued across the EU.

For 2026, the standard salary threshold in Germany is €50,700 gross per year. A lower threshold of €45,934.20 applies to shortage occupations, provided the Federal Employment Agency approves the employment. Recent graduates can also qualify at the lower threshold, while certain IT specialists may qualify without a university degree if they have the required professional experience.

Germany’s shortage occupations include academic STEM professionals, doctors, veterinarians, dentists, pharmacists, nurses and midwives, teachers and educators, as well as certain managers in manufacturing, logistics, ICT and professional services. This means that when searching for German companies that sponsor work visas, your occupation and the salary offered can directly affect your EU Blue Card eligibility.

How to apply for the EU Blue Card step by step

Once you have confirmed that you qualify, the EU Blue Card application usually follows a straightforward sequence, although the exact process depends on the country where you will work.

  1. Secure a qualifying job: Get a signed employment contract or binding job offer that meets the required salary threshold and runs for at least six months.
  2. Prepare your documents: Gather your valid passport, employment contract, CV, degree certificates, proof of qualifications and health insurance. Your destination country may require foreign documents to be translated, legalised or accompanied by a statement of comparability.
  3. Apply for the required visa: If you need an entry visa, submit your application through the relevant embassy or consulate in your country of residence, including your supporting documents and biometrics.
  4. Enter your destination country: Once your visa is approved, travel to the country where you will work and complete any required address registration or other local formalities.
  5. Apply for your Blue Card: Depending on the country and your circumstances, you may apply before travelling or after arrival. The immigration authority reviews your application and, once approved, issues your biometric EU Blue Card residence permit.

Also read: How to open US, UK and Euro bank accounts in Germany

EU Blue Card benefits and path to permanent residence

The EU Blue Card offers more than permission to work, giving you options for family reunification, mobility across participating EU countries and eventually permanent residence.

Family reunification

Your EU Blue Card can make it easier to bring eligible family members to join you in your destination country. Spouses and dependent children may qualify for residence permits, with specific rights depending on national rules. In many cases, family members can also access employment without needing a separate work permit, helping your household settle more easily.

EU mobility

After legally living in an EU country with an EU Blue Card, you can gain greater mobility within participating EU countries. After 12 months of legal residence in your first member state, you may be able to move to another participating country for highly qualified employment, although you must apply for a new Blue Card under that country’s rules.

Path to permanent residence

The EU Blue Card can also contribute towards long-term residence, although the timeline depends on your circumstances and national rules. Under EU rules, Blue Card holders can generally qualify for EU long-term resident status after five years of continuous legal residence, with periods spent in other participating EU countries potentially counting towards the requirement.

Getting paid in euros and sending money home

Once you start working in Germany, your salary will typically be paid into a German or European bank account in euros. If you regularly move money across borders, opening a euro account can give you a place to receive and hold your earnings before deciding when to convert or transfer them, rather than exchanging everything as soon as you are paid.

Grey can help you manage this money through a multi-currency account where you can receive and hold supported currencies, manage international payments and convert funds when needed. This means your euros can remain available while you decide whether to spend them, convert them or send them elsewhere.

When you are ready to move your money, you can use supported payment routes to send money from Germany or send money to India, depending on the currencies and transfer routes available to you. Whether you are supporting your family, paying expenses abroad or moving your own savings, keeping your money in the currency you receive can give you more control over when you transfer.

Frequently asked questions

What is the EU Blue Card?

The EU Blue Card is a work and residence permit for highly qualified non-EU citizens who want to live and work in participating EU countries. It provides a legal route to employment for professionals who meet the required education, salary and job conditions in their chosen destination.

Who is eligible?

You may qualify as a non-EU professional with a recognised higher education qualification and a qualifying employment contract or binding job offer. In certain cases, particularly for IT professionals, relevant professional experience can replace a traditional degree, depending on the country’s rules.

What salary do I need?

Your salary must meet the threshold set by the country where you will work. Under EU rules, the threshold generally falls between 1.0 and 1.6 times the national average gross annual salary, with lower thresholds potentially applying to shortage occupations and other qualifying groups.

Which countries offer it?

The EU Blue Card is available in 25 EU member states. Denmark and Ireland do not participate in the EU Blue Card scheme, so professionals planning to work there need to explore their separate national work and residence routes instead.

Can my family join me?

Yes. Your eligible family members can generally join you through family reunification procedures, and EU Blue Card rules provide favourable conditions for accompanying family members. Spouses may also have access to employment, although the exact application process and requirements depend on the country where you live.

How do I send money?

Once you are working in Europe, you can send money home through your bank or an international payment platform such as Grey. Grey lets you receive and hold supported currencies in a multi-currency account, manage international payments and choose when to convert your money, giving you greater control over exchange rates and transfers.

What is the currency of Thailand? Baht symbol and code

What is the currency of Thailand? Baht symbol and code

The Thai baht is Thailand's currency, with its own symbol, code and notes. Grey gets you a fair rate on every transfer. Send money to Thailand today.

•

•

2 min read

Recently, Thailand has become one of the most sought-after destinations for vacationers. Now, before you hop on that flight, you need to understand the country’s currency, which denominations are in circulation, and how to get a fair rate when you convert or send money, so you save time and money from the moment you land.

This guide covers everything you need to know about Thailand’s currency, the Thai baht: its symbol, currency code, history, denominations, and practical advice for travellers and anyone sending money to Thailand.

What is the currency of Thailand?

The currency of Thailand is the Thai baht, and it’s the only legal tender accepted across Thailand for everyday transactions, from street food and tuk-tuks to hotels and department stores. The baht has been Thailand’s official currency since the late 19th century and is issued and regulated by the Bank of Thailand.

The baht is a relatively stable emerging-market currency that trades on international foreign-exchange markets. It floats within a managed regime overseen by the Bank of Thailand, which intervenes periodically to limit volatility. For most travellers and remittance senders, the baht is freely exchangeable at banks, authorised money changers, hotels, and through online platforms.

Thailand’s economy is among the largest in Southeast Asia, and the baht reflects it. It is widely recognised, commonly held by foreign exchange desks around the world, and straightforward to convert from major currencies, including USD, EUR, GBP, and SGD.

The Thai baht: symbol and code

The Thai baht uses the symbol ฿ and the ISO 4217 currency code THB. On price tags, menus, and payment receipts in Thailand, you will see the ฿ symbol placed before the amount: ฿500, ฿1,200. In international financial contexts and money transfer platforms, the code THB is used to identify the currency.

One baht is divided into 100 satang, which is the subunit of the baht. The word “satang” comes from the Sanskrit “śataṅga,” meaning “one hundredth.” In practical terms, satang coins are used but rarely noticed by visitors, as most purchases are priced in whole baht.

Notes and coins

The Thai baht is issued in both banknotes and coins, covering a range of denominations suited to everyday transactions from small street purchases to larger payments.

Banknotes

Denomination Colour What is featured
฿20 Green King Rama X on the front; national landmarks on the reverse
฿50 Blue King Rama X on the front; national landmarks on the reverse
฿100 Red King Rama X on the front; national landmarks on the reverse
฿500 Purple King Rama X on the front; national landmarks on the reverse
฿1,000 Brown/grey King Rama X on the front; national landmarks on the reverse

‍

All current banknotes feature the reigning monarch, King Vajiralongkorn (Rama X), on the front face. Earlier series featured King Bhumibol Adulyadej (Rama IX), who reigned until 2016. Older Rama IX notes remain legal tender and are still widely in circulation. You will encounter both in everyday transactions.

The ฿20 note is the most commonly used for small transactions. The ฿1,000 note is the largest denomination and is standard for paying at hotels, shops, and restaurants. The ฿500 is also widely accepted.

Street vendors and tuk-tuk drivers often cannot make change for a ฿1,000 note. Keeping a supply of ฿20, ฿50, and ฿100 notes makes small daily purchases easier, so always keep that in mind.

Coins

Denomination Composition Notes
25 satang Aluminium bronze Small; used primarily in supermarkets
50 satang Aluminium bronze Occasionally used in supermarket pricing
฿1 Nickel-clad steel Common in everyday use
฿2 Nickel-clad steel Common in everyday use
฿5 Nickel-clad steel Common in everyday use
฿10 Bimetallic Most commonly used coin; appears in nearly all transactions

‍

The ฿10 coin is the most prevalent in Thailand. It is bimetallic, with a gold-coloured outer ring and a silver-coloured centre, and is used across all types of transactions from vending machines to street markets. The ฿1, ฿2, and ฿5 coins are also common. Satang coins appear primarily in supermarket and pharmacy change.

Using the baht as a traveller

Thailand is primarily a cash economy in many contexts, though card acceptance has expanded significantly in urban areas and tourist zones. Understanding when cash is essential and when cards work best helps you plan your spending and avoid unnecessary fees.

When is cash essential?

Street food and markets: Almost all food stalls, night markets, floating markets, and local vendors across Thailand operate on a cash-only basis. The famous Chatuchak Weekend Market in Bangkok, every night market from Chiang Mai to Phuket, and virtually all local restaurants expect baht in hand.

Tuk-tuks, songthaews (shared trucks), and motorbike taxis: While ride-hailing apps like Grab now offer card payment for cars, traditional transport remains cash-dependent.

Temples and tourist sites: Some accept cards, but many require cash for entry fees, donations, and purchases at site stalls.

Small guesthouses and bungalows: particularly on the islands and in rural areas, smaller accommodations often operate cash only or charge a fee for card payments.

When are cards accepted?

Shopping malls, department stores, and major supermarkets (Central, The Mall, Big C, Lotus’s)  accept Visa and Mastercard. Chain restaurants, international hotels, and larger tourist restaurants also take cards. Grab rides booked in-app, accept card payment.

Getting baht at a fair rate

ATMs in Thailand dispense baht directly from your foreign debit or virtual debit card. The exchange rate is typically close to the interbank rate, but Thai ATMs charge a fixed fee of 220 baht per withdrawal at most banks. This fee is charged by the Thai bank, not your home bank. If your home bank also charges an international ATM fee, withdrawing larger amounts less frequently reduces the total fee paid.

Currency exchange booths in Thailand, particularly authorised money changers rather than hotel desks, typically offer better rates than airport exchanges. SuperRich (orange and green) and Vasu Exchange are well-regarded in Bangkok. Airport exchange booths are convenient but tend to offer worse rates.

Using your card for direct purchases abroad triggers your card network’s exchange rate plus any foreign transaction fee charged by your card issuer. To understand how card exchange rates work before your trip, see our guide on how card exchange rates work. For practical steps to keep those costs down, our guide on avoiding foreign transaction fees covers the main options.

For travellers who earn in multiple currencies or want to hold baht and other currencies in one place, Grey lets you hold multiple currencies in a single account and convert at a transparent rate before you travel.

Practical tips for using baht

Carry small denominations. ฿20, ฿50, and ฿100 notes are used for most daily transactions. Having ฿1,000 notes is fine for hotels and shops, but annoying for markets and street food.

Keep coins. Thai coins accumulate quickly and are useful for small purchases, vending machines, and motorcycle taxi fares.

Don’t exchange money at the airport unless necessary. Rates at airport exchange counters are typically worse than in-city authorised money changers. Exchange a small amount at the airport for immediate needs (transport, first meal) and exchange the bulk once you’re in the city.

Decline dynamic currency conversion at ATMs and card terminals. When a Thai ATM or card payment machine offers to charge you in your home currency rather than baht, decline. This is called dynamic currency conversion, and the rate applied by the machine is almost always significantly worse than your card’s standard rate.

Sending money to Thailand

If you’re sending money to family, paying rent, covering business expenses, or supporting someone in Thailand from abroad, the method you use determines how much they receive.

The Thai baht is freely receivable at all major Thai banks, including Bangkok Bank, Kasikorn Bank (KBank), Siam Commercial Bank (SCB), Krung Thai Bank, and TMBThanachart Bank. International transfers arrive as THB after conversion, or as USD/EUR/GBP for foreign currency accounts held at Thai banks.

The main cost considerations when sending money to Thailand are the exchange rate applied on conversion and any transfer fees or correspondent bank charges. Traditional bank wire transfers to Thailand typically carry an outbound fee of $25 to $50 from the sending bank, plus a conversion spread of 2 to 4% above the mid-market rate at the receiving end. Correspondent bank fees can reduce the amount further in transit.

With Grey, you make transfers to Thailand for a flat fee of $1.80, regardless of the amount. Regular deposits via ACH, SEPA, or Faster Payments carry a 0.8% fee capped at $10. This is significantly cheaper than the combined cost of a bank wire plus a bank conversion spread on larger transfers.

To get started, send money to Thailand with Grey and see the current rate and total fee before committing to the transfer. For US-based senders specifically, our send money from the US to Thailand page covers the process in detail.

Frequently asked questions about the Thai baht

What is the currency of Thailand?

The currency of Thailand is the Thai baht, abbreviated THB and symbolised as ฿. It is the sole legal tender in Thailand and is issued and regulated by the Bank of Thailand. One baht divides into 100 satang. The baht is used for all transactions across the country, from small street food purchases to large hotel bills and business payments.

What is the symbol for the Thai baht?

The Thai baht symbol is ฿. It is placed before the amount in Thai pricing conventions, for example, ฿100 or ฿1,500. In international financial contexts, the three-letter ISO code THB is used to identify the currency in exchange rates, bank transfers, and financial systems.

What is the currency code for the Thai baht?

The currency code for the Thai baht is THB, as assigned under the ISO 4217 international currency standard. This code is used on money transfer platforms, bank statements, foreign exchange rate boards, and financial software to identify transactions denominated in Thai baht.

What is a satang?

A satang is the subunit of the Thai baht. One baht equals 100 satang. Satang appear as coins in denominations of 25 satang and 50 satang, and are occasionally used in supermarket and pharmacy pricing. In most everyday Thai transactions, prices are rounded to the nearest whole baht, so satang coins are not frequently encountered in street markets or restaurants.

Should I use cash or card in Thailand?

Both are useful, but cash remains essential in Thailand. Street food stalls, local markets, motorbike taxis, small guesthouses, and many tourist attractions operate on cash only. Cards are accepted reliably at shopping malls, chain supermarkets, international hotels, and larger restaurants. A practical approach is to carry baht cash for daily spending and markets, and use a card at larger establishments. Avoid dynamic currency conversion at ATMs and card terminals, and withdraw larger amounts to minimise the ฿220 per-transaction ATM fee that Thai banks charge.

How do I send money to Thailand?

To send money to Thailand, you need the recipient’s Thai bank name, account number, and the bank’s SWIFT code. Grey provides international transfers to Thailand for a flat fee of $1.80, with the rate shown before you confirm. Traditional bank wire transfers typically carry a $25 to $50 outbound fee plus a 2 to 4% conversion spread, making fintech transfers significantly cheaper for most amounts.

Send money to Thailand with Grey

eSIM vs Google Fit: Which is better for international travel?

eSIM vs Google Fit: Which is better for international travel?

Google Fi eSIM or a prepaid travel eSIM? Compare cost, data speeds abroad, coverage and keeping your US number to see which suits your trip. Choose yours.

•

•

2 min read

Before comparing these two options, I need to clarify something. Google Fi and a travel eSIM are not different technologies. Google Fi is a US mobile carrier plan that can run on an eSIM. A travel eSIM is a prepaid data plan from a different provider, also delivered as an eSIM.

The choice you have to make is between staying on your existing Google Fi plan while travelling internationally, versus buying a separate prepaid travel eSIM for the trip. That distinction shapes everything about the comparison: cost, coverage, your US phone number, and whether you need to think about your phone plan at all while you’re abroad.

What is the difference between Google Fi and a travel eSIM?

Google Fi is a US mobile carrier that roams internationally on partner networks in over 200 countries, keeping your US number active the entire time. A travel eSIM, on the other hand, is a prepaid, data-only plan purchased specifically for travel that gives you a local or regional data connection without affecting your existing carrier plan.

Google Fi can itself be delivered as an eSIM. If your phone supports eSIM and you activate Fi that way, you’re using an eSIM for your primary carrier plan. A travel eSIM would then be a second eSIM profile loaded alongside that primary eSIM, which is possible on many modern smartphones that support dual eSIM.

So while Google Fi roaming keeps your US number for calls and texts, charges within your existing monthly plan, and requires no setup before you travel. A travel eSIM gives you a separate data connection, usually at a lower per-gigabyte cost for the trip, but doesn’t carry your US number for incoming calls.

How Google Fi works abroad

Google Fi’s Unlimited Premium and Flexible plans include international data in over 200 destinations, with 5G speeds available in 110+ countries on compatible phones, tablets, laptops, and other devices.

Here’s how the plans break down for international use.

Flexible plan ($20/month base + $10/GB)

International data is included in 200+ destinations at the same $10/GB rate as domestic data. Bill Protection caps your total data charges at $60 per month, regardless of usage, so heavy data months cost at most $80 ($20 base + $60 data cap). This makes the Flexible plan surprisingly competitive for moderate users who don’t stream heavily.

Unlimited Standard (from $35/month)

Unlimited Standard supports data, calls and texts within the US, Canada and Mexico. International data beyond Canada and Mexico is not included.

Unlimited Premium ($65/month for one line)

The Unlimited Premium plan caps high-speed international roaming data at 50 GB per billing cycle, after which speeds reduce to 256 Kbps. You can pay a flat rate of $10 per gigabyte to restore unthrottled speeds before the billing cycle resets.

Unlimited Essentials

On Unlimited Essentials, international data coverage is not available. If you’re on this plan and travelling outside North America, you’ll need to either upgrade or buy a travel eSIM for data.

Extended international use

One important limitation applies to all Fi plans: extended international travel can trigger data suspension. Google Fi is designed as a US plan with international roaming, not a plan for people living abroad. Using it as your primary data source for more than 60 days continuously can result in a review of your account. This makes it excellent for trips but unsuitable as a long-term solution for digital nomads or expats.

Cost comparison for a one-week and one-month trip

The cost comparison depends on how much data you use, which plan you’re on, and where you’re travelling.

For travel eSIM pricing, verified current rates show that regional data eSIMs for popular destinations typically cost $5 to $15 for 1 GB (seven days), $15 to $30 for 5 GB (30 days), and $25 to $50 for 10 GB (30 days), depending on the region. Europe and Southeast Asia tend to be cheaper than Africa, the Middle East, and some parts of Latin America.

Scenario Google Fi Flexible Google Fi Unlimited Premium Typical travel eSIM
One-week trip, 2 GB data
$20 base + $20 data = $40 $65 (plan includes data) $8–$20 for 2 GB/7 days
One-week trip, 5 GB data $20 base + $50 data = $70
(or $80 with Bill Protection cap)
$65 (included) $15–$35 for 5 GB/7 days
One-month trip, 10 GB data
$80 (Bill Protection cap) $65 (included) $25–$50 for 10 GB/30 days
One-month trip, 20 GB data
$80 (Bill Protection cap) $65 (included) $35–$70 for 20 GB/30 days
US number kept for calls/texts Yes, included Yes, included No (data only)
Setup required before trip No No Yes (must purchase and install eSIM)

‍

Prices are indicative ranges based on current market pricing. Exact cost depends on provider, destination, and data package chosen.

For a one-week trip using moderate data, a travel eSIM is often cheaper than Google Fi Flexible. For a one-month trip using heavy data, Unlimited Premium at $65 flat becomes competitive.

The comparison also shifts depending on whether you use a Grey virtual card for spending abroad: paying for your travel eSIM in USD from a Grey balance avoids conversion fees on the purchase if you’re buying internationally.

Is Google Fi better than a travel eSIM?

It depends on your trip type. There’s no universal answer, but the decision framework is clear.

When Google Fi is the better choice:

It’s a great option if you want zero setup and is ideal for business travellers and people who change plans at the last minute. This frictionless experience is worth the price premium.

A travel eSIM typically covers one country or region. So, for example, if you’re crossing from France to Morocco to Portugal in two weeks, it is much simpler with Google Fi than with multiple travel eSIMs.

If you need your US number to be active for incoming calls, two-factor authentication, or banking apps that send SMS codes to your US number, then Google Fi is the better option. Travel eSIMs are data-only and won’t receive your US calls or texts.

Google Fi is also a better choice if you’re on Unlimited Premium and using enough data to justify the plan cost. At $65/month for 50 GB of international data, it competes well with travel eSIMs for heavy users.

When a travel eSIM is the better choice:

I’ll recommend a travel eSIM if you’re going to a single destination for a specific trip. A 10-day trip to Japan on a 5 GB travel eSIM costs $15-$25. The same trip on Google Fi Flexible costs $20 + data, and on Unlimited Premium, you’re paying $65 for a monthly plan when you only need it for 10 days.

If you’re on Unlimited Standard or Unlimited Essentials and don’t want to upgrade your whole plan for one trip, a travel eSIM can work. It lets you add international data for the trip without changing your underlying Fi plan.

Budget-conscious heavy data users will also prefer a travel eSIM. A 20 GB regional eSIM for Southeast Asia costs less than $40 from most providers. On Google Fi Flexible, 20 GB abroad costs $200 before Bill Protection kicks in.

Another scenario is when you’re travelling to a country where Fi’s partner network is weak. In some destinations, the local network Fi roam on is slower than what a local travel eSIM would give you, because travel eSIM providers can partner with multiple networks in each country rather than being tied to a single roaming agreement.

For trips that span multiple countries and involve heavy data use, buying a travel eSIM on Grey gives you a straightforward data option without committing to a full monthly plan upgrade.

How to use both: keep your number and add local data

The most practical setup for frequent international travellers is to use Google Fi and a travel eSIM simultaneously.

Most modern smartphones support dual eSIM, which means two eSIM profiles can be active simultaneously. You keep your Google Fi eSIM active for US calls, texts, and two-factor authentication codes. You activate a travel eSIM for data, which gives you faster or cheaper local connectivity without changing your primary number.

In practice, data is routed through the travel eSIM, and Calls and SMS default to your Fi number. When someone calls your US number, it rings on your phone even though your data is running on a separate line. Banking apps that send SMS codes to your US number continue to work normally.

This dual approach costs slightly more than either option alone, but solves the two main problems simultaneously: you don’t lose your number, and you don’t overpay for data in countries where local connectivity is cheap.

To set this up, you install the travel eSIM before departing (most scan a QR code in under two minutes), then in your phone’s settings assign data to the travel eSIM and calls to Fi. For detailed instructions on managing multiple eSIM profiles on an iPhone, see our guide on how to transfer an eSIM between iPhones.

Frequently asked questions about eSIM and Google Fit

Does Google Fi work internationally?

Yes. The Unlimited Premium and Flexible plans include international data in over 200 destinations. Unlimited Standard covers Canada and Mexico only. Unlimited Essentials has no international data. On Flexible, international data costs $10/GB, the same as domestic. On Unlimited Premium, up to 50 GB of high-speed international data is included, with speeds dropping to 256 Kbps after that.

Is Google Fi an eSIM?

Google Fi can be activated as an eSIM on compatible devices, but it doesn’t have to be. You can also use Google Fi with a physical SIM card. Whether Fi runs as an eSIM or a physical SIM doesn’t affect its international functionality. The relevant question for most travellers is whether to use Fi’s built-in international roaming or add a separate travel eSIM for data.

Is a travel eSIM cheaper than Google Fi?

For short trips with moderate to heavy data use, a travel eSIM is usually cheaper than Google Fi’s per-gigabyte rate on the Flexible plan. A 5 GB regional eSIM for Europe or Southeast Asia typically costs $15 to $35, while 5 GB on Google Fi Flexible costs $50 in data plus the $20 base fee. Google Fi Unlimited Premium at $65/month is more competitive for longer trips with heavy data use, as it includes 50 GB of international data.

Can I use Google Fi and a travel eSIM together?

Yes, on phones that support dual eSIM. You keep your Google Fi eSIM active for calls, texts, and your US number. You activate a travel eSIM for data. In your phone settings, you assign which line handles calls and which handles data. This gives you the best of both options: a US number that stays active for incoming calls and authentication codes, plus cheaper local data from the travel eSIM.

Does Google Fi slow data abroad?

The Unlimited Premium plan caps high-speed international roaming data at 50 GB per billing cycle, after which speeds reduce to 256 Kbps. On the Flexible plan, data continues at full speed until the Bill Protection cap is reached. In some countries, the speed you experience depends on which local network Fi is roaming on, which varies by destination and is outside Fi’s direct control. In markets where Fi’s partner network is congested or slower than alternatives, a travel eSIM on a stronger local network can be meaningfully faster.

Which is better for a long trip?

For trips longer than 30 days, Google Fi Unlimited Premium at $65/month offers 50 GB of included international data, which suits most travellers who aren’t constantly streaming video. However, Google Fi’s extended international use policy means it’s not suitable as a permanent international solution: sustained use as a primary international data source for 60+ days can trigger account review. For long-term nomads or expats, a travel eSIM renewed regularly, or a local SIM in each country, is more practical than relying on Fi as a permanent international data source.

Buy a travel eSIM in the Grey app

What is the RTP network? Real-time payments in the US

What is the RTP network? Real-time payments in the US

See how real-time payments work in the US, from the RTP network to instant settlement. Plus how RTP differs from FedNow, ACH and wires. Compare them.

•

•

2 min read

Imagine a US business paying a freelancer on a Friday evening and the freelancer receiving the money within seconds, rather than waiting until the next business day for a traditional bank transfer to clear. That is the kind of experience real-time payments are designed to make possible, and it is where the RTP network comes in.

The RTP network is a US real-time payments system run by The Clearing House that settles payments instantly, 24/7, every day of the year. Funds are available to the recipient within seconds and payments are final. It is used for payroll, bill pay and business-to-business transfers.

For you, the biggest difference is speed. Instead of planning around banking hours, weekends or public holidays, an RTP payment can move whenever the sending and receiving institutions support the network. That makes real-time payments particularly useful when getting paid, settling an urgent bill or moving money between businesses.

What is the RTP Network?

The RTP Network is a US real-time payments network that allows participating banks and financial institutions to send and receive eligible payments within seconds, rather than waiting for traditional banking processing windows. If you are sending money through a participating institution, the payment can move at any time, including nights, weekends and holidays, making it useful when waiting until the next business day is not an option.

The network is operated by The Clearing House, a US payments company owned by a group of major banks. Unlike traditional payment systems that may process transactions in batches, the RTP Network is designed for continuous, real-time processing, so funds can become available to the recipient almost immediately after the payment is sent.

For you, the key features are speed, availability and finality. RTP payments operate 24 hours a day, seven days a week, 365 days a year, and payments sent through the network are generally irrevocable once completed. The network supports use cases including business payments, bill payments, payroll and other account-to-account transfers.

How RTP payments work

An RTP payment can start with a request for payment or a direct credit push, before the network processes and settles the transaction almost immediately.

Request for payment

A request for payment allows the recipient or business to ask you to make a payment electronically. You receive the request through your participating bank or financial institution, review the payment details and authorise it. Once approved, the payment can be sent through the RTP Network without waiting for normal banking hours.

Credit push

A credit push is the more direct option, where you instruct your bank or financial institution to send money to the recipient's account. You provide the required account and payment details, confirm the amount and authorise the transaction. The sending institution then submits the payment through the RTP Network for processing.

Instant settlement

Once the payment is submitted, the RTP Network processes it in real time and settles the transaction between participating financial institutions. The recipient can typically access the funds within seconds, while the payment becomes final after settlement. Because RTP operates continuously, payments can be made on weekends, holidays and outside traditional banking hours.

RTP vs FedNow vs ACH vs wire transfers

This comparison shows how RTP, FedNow, ACH and wire transfers differ across speed, cost, operating hours and payment finality, helping you choose the right rail.

Payment Rail Speed Cost (Network / Retail) Operating Hours Finality (Irrevocability)
RTP Immediate (seconds) Network: $0.045;
Retail: free to low fee
24/7/365 Immediate and final
FedNow Immediate (seconds) Network: $0.045;
Retail: free to low fee
24/7/365 Immediate and final
ACH 1–3 business days Network: <$0.01;
Retail: free to $1.00
Business hours (batches) Reversible
(60-day consumer window)
Wire 1–2 hours Network: Variable;
Retail: 15–50
Varies by institution Generally final

‍

When should you use real-time payments?

You should use real-time payments when you need money to reach someone within seconds, rather than waiting for traditional banking hours or batch processing. They are particularly useful for urgent payments, payroll, bills and business-to-business transfers where immediate access to funds matters.

Payroll

If you run payroll and need employees or contractors to receive their money immediately, real-time payments can shorten the gap between sending funds and availability. This can be particularly useful for urgent payments, off-cycle payroll or businesses paying workers outside traditional banking hours.

Bill payments

Real-time payments can help you settle bills when waiting several business days is not practical. If a payment is due today, sending it through a participating institution can make funds available quickly, helping you avoid delays, missed deadlines or interruptions to important services.

Business-to-business payments

For B2B payments, real-time payments can help you pay suppliers, contractors or business partners without waiting for traditional payment batches. Faster settlement can improve cash flow, speed up fulfillment and give the recipient access to funds almost immediately after the payment is sent.

Also read: How to choose a cross-border payments platform you can trust

How cross-border payments work when domestic instant rails stop at the border

Real-time payment networks such as RTP are built for domestic transfers, which means the speed you experience within the US does not automatically apply when you make a cross-border payment. For example, someone looking to send money from the US to Mexico may still need a different payment route because the transaction involves another country, currency, banking system and regulatory requirements.

That does not mean international transfers have to be difficult. With a multi-currency account, you can receive and hold money in different currencies before deciding when to convert or move it. This gives you more control, particularly when you regularly receive payments from abroad and do not want every transaction converted immediately.

For example, with Grey, you can manage multiple currencies in one account and use supported payment routes for international transfers. Whether you need to send money from the US to Mexico or manage payments across other countries, holding your funds in the currency you receive them in can give you more control over when and how you move your money.

Also read: Best cross-border payment platforms compared 2026

Frequently asked questions about the RTP Network

What is the RTP network?

The RTP network is a US real-time payments system operated by The Clearing House. It allows participating banks and financial institutions to send and receive payments instantly, 24/7, 365 days a year. Unlike traditional payment methods that process in batches, RTP transactions settle individually, with funds available within seconds.

Who runs it?

The RTP network is operated by The Clearing House, a US payments organisation owned by major banks. It provides the infrastructure that participating financial institutions use to send and receive real-time payments. Your bank or payment provider must participate in RTP for you to make or receive an RTP payment.

How fast is it?

RTP payments typically reach the recipient within seconds, rather than taking one or several business days. The network operates continuously, including weekends and public holidays, so you do not have to wait for normal banking hours. Once an RTP payment settles, the funds are generally available to the recipient immediately.

How is RTP different from FedNow?

RTP and FedNow are both US real-time payment networks that enable near-instant transfers 24/7. The main difference is who operates them: The Clearing House runs RTP, while the Federal Reserve operates FedNow. Your choice usually depends on which real-time payment network your bank or financial institution supports.

Is RTP the same as ACH?

No. RTP and ACH are different US payment rails. RTP processes payments individually in real time, allowing recipients to access funds within seconds, while ACH payments are generally processed in batches and can take longer. ACH transactions can also have different rules around reversals and payment processing compared with RTP.

Can I use it internationally?

RTP is primarily designed for domestic payments within the US, so you generally cannot use it as a direct international payment network. Sending money across borders, such as from the US to Mexico, requires a separate international payment route that can handle different currencies, banking systems and regulatory requirements.

USDC on Solana vs Ethereum: Which should you use?

USDC on Solana vs Ethereum: Which should you use?

USDC on Solana settles in seconds for cents, while Ethereum costs more but has deeper support. See which network fits your transfer. Compare both now.

•

•

2 min read

Solana or Ethereum? Both can move the same dollar-backed stablecoin, but the difference becomes clear when speed and transaction fees matter.

Solana can settle a USDC transfer in a few seconds, usually for a fraction of a cent. Ethereum, on the other hand, can take several minutes, with fees that increase when the network is busy. For a straightforward payment, Solana can be the more practical option when keeping costs low matters.

Both versions of USDC are issued by Circle and designed to maintain a 1:1 value with the US dollar. The real choice is therefore not between two different stablecoins, but between two networks. The better option depends on where the money is going, which network the recipient supports, and whether speed, low fees or access to Ethereum’s wider ecosystem matters most.

What is the difference between USDC on Solana and Ethereum?

The main difference between USDC on Solana and Ethereum is the blockchain network used to settle your transaction, even though both versions are issued by Circle, designed to maintain a 1:1 value with the US dollar and redeemable through the same issuer. When you choose between them, you are therefore choosing a different settlement layer, with Solana generally offering faster and cheaper transfers while Ethereum can become more expensive when the network is busy.

The distinction becomes more important when you come across native and bridged USDC. Native USDC is issued directly by Circle on the blockchain where you hold it, so USDC issued natively on Solana is Circle-issued USDC on Solana, while native USDC on Ethereum is issued directly on Ethereum. This means you should not assume that every token labelled “USDC” has the same issuance structure.

Bridged USDC represents USDC that has been moved between blockchains using a bridge, rather than being directly issued by Circle on the destination network. Before sending your USDC, check the network supported by the recipient and whether you are dealing with native or bridged USDC, because sending through an unsupported network can make it difficult or impossible to recover your funds.

How fees and settlement times compare

When you compare Ethereum and Solana for USDC transfers, the biggest differences you'll notice are the network fee and how quickly your transaction settles. Ethereum fees change with supply and demand, so when more people compete for limited block space, the base fee rises and you may pay an additional tip to have your transaction prioritised. Solana generally offers lower and more predictable fees, which can make it more practical for frequent transfers.

On Ethereum Layer 1, you may pay around 0.01–0.20, with settlement taking roughly 12 seconds to several minutes depending on network conditions and the level of finality you require. Solana typically settles transactions within seconds at a fraction of a cent.

Ethereum Layer 2 networks can reduce the cost further by processing transactions away from the main chain and later posting transaction data to Ethereum. This gives you faster execution and lower fees, although the final settlement process works differently from a direct Layer 1 transaction. Network conditions change, so check current fees before sending.

Also read: USDC to USD: How to convert your stablecoin to cash

What happens if you send USDC to the wrong network?

Sending USDC to the wrong network can put your funds at risk, and whether you can recover them depends on where the money was sent and who controls the receiving wallet. If the destination supports the network you used, recovery may be possible, but if it does not, you may need help from the exchange or wallet provider, with no guarantee that the funds can be recovered.

Before sending, check that the network selected on your platform matches the network supported by the recipient. Do not rely on the wallet address alone, because the same address format can sometimes work across different networks. If you use a USD bridge to move USDC between blockchains, confirm the destination network and the type of USDC being received before approving the transaction.

For a large transfer, send a small test amount first, then check the network name, token and destination address before sending the remaining balance. Once a blockchain transaction is confirmed, it generally cannot be reversed.

Also read: How to convert and use USDC in Nigeria

How to choose a network for your transfer

Choosing a network for your USDC transfer comes down to three things: how much you are sending, where the money is going and how quickly you need it to arrive. Start with the destination, because the cheapest or fastest network is not useful if the recipient’s wallet or exchange does not support it. Check the supported networks before you enter the amount or confirm the transaction.

Next, consider the amount you are sending. For a small transfer, a network with very low transaction fees can help you avoid losing a noticeable percentage of your money to fees. For a larger transfer, the fee may matter less, but you should still confirm that the network supports the exact USDC you are sending.

Finally, consider urgency. If you need the money to arrive within seconds or minutes, a faster network may make more sense. If timing is flexible, you can compare fees and choose the cheaper option. Whatever you choose, confirm the network on both sides before sending.

Open a multi-currency account to send and receive USDC

Turning USDC into local currency usually involves one more step after receiving your payment: moving the funds from your crypto wallet or exchange into a bank account where you can spend them. A multi-currency account can fit between these steps, giving you a place to receive and hold funds before converting them into the currency you need.

With Grey, you can open a multi-currency account and use it to manage your international payments in one place. Once you receive USDC, you can move the funds through the available conversion and withdrawal options rather than immediately sending everything to a local bank account. This can give you more control over when you convert and where your money goes.

The process is straightforward: receive your USDC, convert or off-ramp it through a supported route, then withdraw the resulting currency to your local bank account. The exact steps depend on the currencies and payment routes available to you, so check the supported options before starting your transfer.

Frequently asked questions

Is USDC on Solana the same as USDC on Ethereum?

USDC on Solana and USDC on Ethereum are both issued by Circle and designed to maintain a 1:1 value with the US dollar, but they operate on different blockchains. The main differences are transaction speed, network fees and where you can send or receive each version of USDC.

Which network has lower USDC fees?

Solana generally has lower USDC transaction fees than Ethereum, with transfers typically costing a fraction of a cent. Ethereum fees can increase when the network is busy because users compete for limited block space. Before sending, check the current network fee and make sure the recipient supports your chosen network.

Can I send USDC from Solana to an Ethereum wallet?

You cannot send native USDC on Solana directly to an Ethereum-only address and expect it to arrive correctly. To move USDC between networks, you need a supported bridge or exchange that handles the transfer. Always confirm both the sending and receiving networks before approving the transaction.

What happens if I pick the wrong network?

Choosing the wrong network can make your USDC difficult or impossible to recover, depending on the receiving wallet or exchange. Before sending, check the network supported by the recipient and make sure it matches the network selected in your wallet. For larger amounts, consider sending a small test transaction first.

Is USDC on Solana safe?

USDC on Solana can be safe when you use the official, native version of USDC and send it through a supported wallet or exchange. Your biggest risks usually come from choosing the wrong network, using an unsupported token or sending funds to an incorrect address. Always verify the token and destination.

How do I convert USDC to my local currency?

To convert USDC into your local currency, you typically send it to a supported exchange or financial platform, sell or convert the USDC, then withdraw the resulting funds to your bank account. A multi-currency account can also give you a place to receive and manage funds before converting them.

21 best apps to send money internationally

21 best apps to send money internationally

Compare the 21 best apps to send money internationally on fees, exchange rates, speed and country coverage. See which suits your route. Send smarter today.

•

•

2 min read

Sending money internationally can seem fairly simple, well, that's until you reach the payment screen and start comparing fees, exchange rates and delivery times. The app that looks cheapest at first may not be the one that leaves the recipient with the most money.

Your choice can make a noticeable difference, especially when you are sending money regularly to family, paying someone abroad, or moving your own money between countries. Some apps focus on low fees, while others compete on faster delivery, better exchange rates or wider coverage.

The best apps to send money internationally combine low fees, a small exchange rate margin and fast delivery to the country you are sending to. Grey, Wise, Remitly and WorldRemit are strong starting points, but the right option depends on where you are sending money, how much you are transferring and how quickly it needs to arrive.

This guide compares 21 international money transfer apps so you can see what each one offers and choose the option that fits your needs.

How to choose an international money transfer app

Before picking from the best apps for transferring money internationally, check these things:

  • Fees: Look beyond the advertised transfer fee and check the total amount you will pay, including any charges that apply to larger or more frequent transfers.
  • Exchange rate margin: Compare the exchange rate offered with the current market rate, because even a small difference can reduce the amount your recipient receives.
  • Speed: Check how quickly the transfer should arrive, particularly when you are sending money for an urgent bill, family expense, or time-sensitive payment.
  • Payout methods: Check how your recipient can collect the money, whether that means a bank account, mobile wallet, cash pickup, or another available option.
  • Coverage: Make sure the app supports both the country you are sending money from and the destination where your recipient lives.
  • Registration: Check what you need before sending your first transfer, including identity verification, personal information, account details, and any required supporting documents.

The 21 best apps for sending money internationally

These 21 money transfer apps combine lower fees, competitive exchange rates and faster international payments for individuals, freelancers and businesses worldwide

1. Grey

  • Fees: 1% conversion fee capped at $6 for USD/GBP/EUR (uncapped for KES).
  • Rate margin: Competitive real-time market exchange rates with transparent tracking.
  • Speed: Instant for UK/Europe/Kenya; 1–2 business days for US ACH wires.
  • Countries: Supports transfers to 80+ countries including the US, UK, and Eurozone.
  • Best for: Remote workers and freelancers requiring dedicated foreign virtual accounts.

2. Wise

  • Fees: Small variable percentage fee shown upfront.
  • Rate margin: 0% markup using the true mid-market exchange rate.
  • Speed: Real-time processing up to 2 business days.
  • Countries: Operates across 145+ destination countries.
  • Best for: Most affordable bank-to-bank international personal transfers.

3. Remitly

  • Fees: Variable structure tiered by chosen tier (Express vs. Economy).
  • Rate margin: Small retail markup layered on top of mid-market rates.
  • Speed: Instant delivery for Express option; 3 days for Economy.
  • Countries: Sends funds globally to over 150 countries.
  • Best for: Family remittances requiring specific arrival time guarantees.

4. WorldRemit

  • Fees: Flat or percentage fees determined by payout destination.
  • Rate margin: Standard commercial markup added to currency conversions.
  • Speed: Immediate for mobile wallets and physical cash collections.
  • Countries: Extensive coverage across more than 130 countries.
  • Best for: Sending money straight to digital mobile money wallets.

5. LemFi

  • Fees: Zero or ultra-low platform transfer fees.
  • Rate margin: Competitive exchange rates with minimal built-in spread.
  • Speed: Transactions complete within a few minutes.
  • Countries: Diaspora sending from US/UK/Canada to Africa, Asia, and Latin America.
  • Best for: Immigrant communities seeking zero-fee remittance corridors.

6. Eversend

  • Fees: 1.5% to 3.5% currency exchange processing fee.
  • Rate margin: Tight spreads close to official mid-market numbers.
  • Speed: 1-minute mobile money payouts and swift wallet swaps.
  • Countries: Focuses on inter-Africa corridors alongside Western channels.
  • Best for: Managing a robust multi-currency digital wallet in Africa.

7. Revolut

  • Fees: Free standard allowance; weekend currency conversion surcharges apply.
  • Rate margin: Interbank rates with near-zero markups on weekdays.
  • Speed: Instant within network; 1–3 days for traditional banks.
  • Countries: Sends to 160+ countries across 70 currencies.
  • Best for: Tech-forward travelers requiring multi-currency card spending.

8. XE Money Transfer

  • Fees: Free for large transfers; minor fee for small amounts.
  • Rate margin: Tiered markup that drops significantly on massive transactions.
  • Speed: Typically 1 to 4 business days.
  • Countries: Serves over 130 destination countries worldwide.
  • Best for: Tracking live exchange pairs and executing wire transfers.

9. Sendwave

  • Fees: Zero base fee on primary remittance routes.
  • Rate margin: Fixed retail spread built seamlessly into the rate.
  • Speed: Instant delivery directly into recipient mobile wallets.
  • Countries: Sends from North America and Europe to selective target markets.
  • Best for: No-fuss, instant one-way family remittance payments.

10. Western Union

  • Fees: Scale scales with speed, funding source, and destination.
  • Rate margin: Higher combined markup compared to specialised fintechs.
  • Speed: Minutes for agent pickup; days for bank routing.
  • Countries: Unrivaled footprint spanning over 200 countries.
  • Best for: Reaching recipients located in remote, cash-reliant locations.

11. OFX

  • Fees: Fee-free transfers for major commercial volumes.
  • Rate margin: Declining scale margin optimised for larger amounts.
  • Speed: 1 to 4 business days, depending on location.
  • Countries: Covers international payments across more than 170 countries.
  • Best for: High-value corporate transactions or cross-border property acquisitions.
  1. MoneyGram
  • Fees: Highly dynamic rates depending on credit vs. bank funding.
  • Rate margin: Variable retail spread added over global markets.
  • Speed: Cash payouts clear in minutes; wires take 3 days.
  • Countries: Network extends across more than 200 physical countries.
  • Best for: Urgent retail cash collections via global agent stands.

13. Xoom

  • Fees: Flat fees mapped directly to underlying PayPal integrations.
  • Rate margin: Standard commercial percentage markup added to conversions.
  • Speed: Fast execution when utilising debit cards or bank balances.
  • Countries: Sends seamlessly across more than 160 countries.
  • Best for: Existing PayPal account holders prioritising transfer convenience

14. Payoneer

  • Fees: Standard receiving fees scaling up to 3%.
  • Rate margin: Competitive foreign exchange conversion spreads applied.
  • Speed: 1 to 3 business days to hit local bank.
  • Countries: Wide availability across 200+ countries and territories.
  • Best for: Marketplace payouts for e-commerce platforms and global networks.

15. Afriex

  • Fees: Zero platform fees for transactions passing standard guidelines.
  • Rate margin: Low-spread markup integrated into structural transfers.
  • Speed: Settles within minutes to bank rails or wallets.
  • Countries: Connects North America and Europe to key African hubs.
  • Best for: Rapid diaspora money transfers with minimal fee overhead.

16. Geegpay

  • Fees: Around 1% processing charge on incoming wallet setups.
  • Rate margin: Competitive, freelancer-focused retail currency exchange spreads.
  • Speed: Local distributions clear instantly; global wires take 3 days.
  • Countries: Supports Western inbound billing routes for African contractors.
  • Best for: African remote workers billing international clients via foreign bank rails.

17. Chipper Cash

  • Fees: Free peer-to-peer domestic and cross-border app transactions.
  • Rate margin: Variable currency conversion margin added on foreign swaps.
  • Speed: Wallet-to-wallet transactions execute instantly across borders.
  • Countries: Operational across core African nations, the US, and UK.
  • Best for: Quick mobile peer-to-peer payments between supported countries.

18. Atlantic Money

  • Fees: Flat fixed cost of £3 or €3 per transaction.
  • Rate margin: Strict 0% markup utilising true live mid-market rates.
  • Speed: 1 to 3 standard business days to settle.
  • Countries: Focused predominantly on UK and Eurozone banking rails.
  • Best for: High-volume transfers within Europe at flat predictable costs.

19. Airwallex

  • Fees: Clear volume pricing geared toward digital company infrastructure.
  • Rate margin: Commercial interbank spreads tailored for wholesale enterprises.
  • Speed: Real-time processing ranging up to 2 days.
  • Countries: Worldwide operational scale covering over 150 countries.
  • Best for: Tech startups managing multi-currency SaaS billing infrastructure.

20. Send App (by Flutterwave)

  • Fees: Clear flat rates depending on the selected currency pair.
  • Rate margin: Structured retail spread built into regional corridors.
  • Speed: Settles within minutes into standard destination bank accounts.
  • Countries: Channels money from Europe and the US into 30+ destinations.
  • Best for: Quick remittance tracking via a major African gateway engine.

21. Sendcash

  • Fees: Free underlying platform interaction charges.
  • Rate margin: Blended rates calculated through crypto-backed payment rails.
  • Speed: Direct bank settlement within 24 hours.
  • Countries: Inbound global remittances targeted toward the Nigerian market.
  • Best for: Sending funds internationally, utilising underlying digital currency paths seamlessly.

The best apps for each popular money transfer route

The right app depends on where the money is coming from, where it needs to go and whether speed, exchange rates, fees or flexible payment options matter most.

US to Mexico

Top pick: TapTap Send

  • Why it stands out: TapTap Send focuses on international remittances, with fast transfers to supported Mexican bank accounts and cash-pickup locations.

Alternative: Remitly

  • Why consider it: Remitly offers different delivery speeds and cash-pickup options, giving you flexibility when you need to send money from the US to Mexico.

US to Nigeria

Top pick: Grey

  • Why it stands out: Grey gives eligible users a digital way to manage USD and NGN, making it easier to send money from the US to Nigeria while seeing the applicable rate and fees before confirmation.

Alternative: LemFi

  • Why consider it: LemFi focuses on international remittances and offers a straightforward option for sending money from the US to Nigeria.

UK to India

Top pick: Wise

  • Why it stands out: Wise uses the real exchange rate and shows the conversion fee separately, making the cost easier to understand before you complete the transfer.

Alternative: ZoltMoney and Grey

  • Why consider it: ZoltMoney focuses specifically on transfers between the UK and India, so it is worth comparing its live payout against Wise before choosing. Grey also makes it easy to send money from the UK to India, giving you another simple option for the transfer.

Europe to Africa

Top pick: Grey

  • Why it stands out: Grey is useful when you regularly move money between Europe and Africa because eligible users can receive and hold supported currencies, manage international payments and convert funds when needed.

Alternative: Eversend

  • Why consider it: Eversend supports selected Africa-focused corridors and multiple currencies, depending on your destination and payment needs.

How to avoid hidden fees when converting foreign currency

Check the rate before converting.

Do not look at the advertised fee alone. Check the exchange rate you will actually receive. If the market rate is ₦1,350 per dollar but you receive ₦1,327, the difference reduces the amount you receive per conversion. On $500, a ₦23 difference per dollar means you receive ₦11,500 less than the market rate.

Time your conversions.

You do not always have to convert your money as soon as it arrives. If you receive $500 when the rate is ₦1,327 and it later moves to ₦1,350, waiting could give you about ₦11,500 more. Of course, exchange rates can also move in the opposite direction, so timing only makes sense when you can afford to wait.

Understand where you can hold your money.

Holding foreign currency before converting is only possible on platforms that let you maintain a foreign currency balance. With a platform such as Grey, you can receive USD into your account and decide when to convert it. This gives you more control than receiving a foreign currency payment directly into a bank account where the conversion may happen automatically.

Compare the total cost, not just conversion fees.

Different platforms use different fee structures. One may charge a visible conversion fee, while another may build costs into the exchange rate or charge for receiving or withdrawing funds. Look at the receiving fee, conversion fee, exchange rate and withdrawal cost together to see how much you will actually receive.

Also read: Cheapest way to send money from Nigeria in 2026

A $500 example

Here is a simple example of what happens when you compare the full cost of converting and withdrawing $500 using Grey

Grey is built for freelancers and uses a dedicated virtual receiving account model.

  • Receiving fee: $4.00 (0.8% ACH deposit fee), leaving $496.00 in the wallet.
  • Conversion fee: $4.96 (1% flat conversion fee), leaving $491.04 to convert.
  • Exchange rate: ₦1,327.
  • Bank withdrawal fee: ₦35 flat.
  • Amount received: ₦651,575.

The fees are shown as separate costs, so you can see exactly what is deducted before the money reaches your Nigerian bank account.

Is it safe to send money with an app?

Yes, sending money with a reputable app can be safe, but you should check how the platform protects your money and personal information before using it. Start with registration: use the official app or website, create a strong password and complete any identity checks required. Avoid signing up through links sent by unknown people or messages.

Look for security features such as two-factor authentication, transaction notifications, device verification and encryption. It is also worth checking whether the app is regulated or licensed to provide financial services in the countries where it operates. These safeguards can reduce the risk of someone accessing your account or making a transaction without your knowledge.

Scams are often easier to avoid when you slow down before sending money. Check the recipient's details carefully, especially when making a first payment, and never share your password, PIN or one-time verification code. Be cautious of anyone asking you to send money urgently or promising unusually favourable exchange rates. Use the app's official support channels if something looks suspicious.

Frequently asked questions

1. What is the best app to send money internationally?

The best app depends on your destination, transfer speed, fees and how you want the recipient to receive the money. Compare the exchange rate and total cost before choosing. Grey is an option for freelancers who need to receive and manage international payments across currencies.

2. Which money transfer app has the lowest fees?

There is no single app with the lowest fees for every transfer. Costs can change based on the amount, currency and payment method. Compare the total amount the recipient receives, not just the advertised transfer fee, before deciding which app offers better value.

3. What is the fastest way to send money abroad?

The fastest option depends on the currencies, countries and payout method involved. Some apps can deliver money almost instantly, while bank transfers may take longer. Before sending, check the estimated delivery time shown by the app and whether the recipient can receive funds directly into their bank account.

4. Is it safe to send money with an app?

Yes, reputable money transfer apps use security measures such as encryption, two-factor authentication, identity verification and transaction alerts. You should still protect your login details, verify recipient information and only download apps from official sources. Never share your password, PIN or one-time verification code with anyone.

5. How much can I send internationally with an app?

Transfer limits vary between apps and can depend on your country, currency, account verification level and payment method. Some platforms may also set daily or monthly limits. Check the app's sending limits before starting a large transfer, particularly if you need to send money regularly.

6. Do money transfer apps show the exchange rate before I send?

Most reputable apps show the exchange rate and fees before you confirm a transfer. This lets you see how much you will pay and how much the recipient should receive. Grey also shows the applicable exchange rate and fees before you complete your transaction, helping you understand the total cost upfront.

USD savings accounts for NRIs: How to save in dollars from India

USD savings accounts for NRIs: How to save in dollars from India

USD savings accounts for NRIs explained. FCNR deposits, NRE accounts, and multi-currency alternatives compared by rates, access, and flexibility. Read now.

•

•

2 min read

As an NRI, you earn in dollars, but your financial roots are in India. The question isn't whether to save in USD. It's where to park those dollars, so they're accessible, earning returns, and not eroding from conversion fees every time you move money.

NRIs can save in USD through FCNR deposits at Indian banks (3 to 5% interest, 1 to 5-year terms). NRE accounts hold rupees but are tax-free and fully repatriable. Multi-currency fintech accounts hold USD with real local account details. The best choice depends on whether you prioritise returns, liquidity, or tax efficiency.

This guide compares every option for NRIs who want to build a dollar cushion, whether you're saving for a future return to India, hedging against rupee depreciation, or simply keeping your income in the currency you earned it. For the broader perspective, see how to save in foreign currency.

Understanding NRI account types

Before diving into USD savings specifically, you need to understand the three account types available to NRIs in India. Each serves a different purpose, and mixing them up leads to tax problems and repatriation headaches.

NRE (Non-Resident External) Account. Rupee-denominated. You deposit foreign currency, and it's converted to INR at the bank's rate on the day of deposit. Interest earned on an NRE account is generally exempt from income tax in India while you meet the applicable non-resident eligibility conditions. Both the principal and interest are fully repatriable, subject to banking and regulatory requirements. NRE accounts come in savings and fixed deposit variants. The fixed deposit rates typically run 6 to 7% for 1-year terms, which sounds attractive until you realise the deposit is in rupees, not dollars. If the rupee depreciates 5% against the dollar during your deposit term, your effective return drops to 1 to 2% in dollar terms.

NRO (Non-Resident Ordinary) Account. Also rupee-denominated. Designed for income earned in India: rental income, dividends from Indian stocks, pension payments, or sale proceeds from Indian property. Interest earned on an NRO account is taxable in India and generally subject to tax deducted at source (TDS), with the applicable rate depending on tax rules and treaty benefits. NRIs can generally repatriate up to USD 1 million per Indian financial year from eligible NRO balances and other qualifying assets, subject to applicable taxes, documentation and bank requirements. Current income, including eligible interest and rent, may be remitted separately under RBI rules. NRO accounts are not ideal for USD savings because of the tax hit and repatriation cap.

FCNR (Foreign Currency Non-Resident) Account. This is the one most NRIs looking for USD savings should focus on. FCNR deposits hold your money in foreign currency (USD, GBP, EUR, JPY, CAD, AUD). No currency conversion on deposit or withdrawal. Interest rates typically 3 to 5% for USD deposits. Tax-free in India. Fully repatriable. The FCNR is the closest thing to a traditional dollar savings account available through the Indian banking system. For how much you can send from India, see LRS guide.

FCNR deposits: The traditional NRI dollar savings

FCNR deposits are term deposits, not savings accounts. FCNR(B) deposits have a minimum tenure of one year and a maximum of five years under RBI rules. They are term deposits rather than regular savings accounts, and premature withdrawal may reduce or eliminate the interest earned, depending on the bank's terms. Think of them as CDs (certificates of deposit) denominated in foreign currency.

Current USD rates (approximate, mid-2026):

SBI: 3.0 to 4.5% (varies by tenure; longer terms generally offer higher rates)

HDFC Bank: 3.15% to 3.80% (typically the most competitive among private banks)

ICICI Bank: 3.25% to 4% (similar range to SBI, sometimes with promotional rates)

Axis Bank: 3.0 to 4.25% (slightly lower ceiling than HDFC)

Kotak Mahindra Bank: 3.0 to 4.5% (competitive with public sector banks)

These rates change frequently, sometimes monthly. Check with your bank before committing. Longer tenures typically offer higher rates. A 5-year USD FCNR at HDFC might yield 4.75%, while a 1-year deposit at the same bank yields 3.25%. The rate is locked at the time of deposit and doesn't change during the term.

Pros: no currency risk (your principal stays in USD), tax-free in India under current law, fully repatriable without limit, and backed by Indian bank deposit insurance (DICGC covers up to INR 5 lakh per depositor per bank, though the dollar equivalent fluctuates with the exchange rate).

Cons: locked for 1 to 5 years with no additions allowed mid-term, early withdrawal penalties (typically 1% reduction in the applicable interest rate, meaning you might earn 2% instead of 3%), minimum deposit requirements ($1,000 to $10,000 depending on the bank), and you need an NRE or NRO account at the same bank to open an FCNR. The branch visit requirement is the biggest friction point. While some banks allow remote FCNR opening via video KYC, many still require either an in-person visit or a notarised application from abroad.

The tax question most NRIs miss: FCNR interest is tax-free in India, but it may be taxable in your country of residence. US-resident NRIs must report FCNR interest on their US tax returns. UK-resident NRIs must report it to HMRC. The India tax benefit doesn't eliminate the foreign tax obligation. Consult a cross-border tax advisor before assuming the interest is truly tax-free.

Multi-currency accounts: The flexible alternative

If the rigidity of FCNR deposits doesn't suit you, maybe you want access to your dollars without a lock-in period, or you want to hold smaller amounts and add to them regularly, a multi-currency fintech account offers more flexibility at the cost of interest.

Key differences from FCNR:

No lock-in period. Add or withdraw anytime. Your dollars are liquid, not frozen for 1 to 5 years.

No minimum deposit. Start with any amount. FCNR requires $1,000 to $10,000 upfront. A Grey account has no minimum balance requirement.

No branch visit. Open online, manage from your phone. The entire process takes minutes, not the days or weeks that FCNR paperwork takes.

Real USD account details. A Grey account provides you with a US routing number and an account number. Your US employer or client can pay you directly via ACH. An FCNR requires a SWIFT transfer to fund it, which costs $15-$50 per deposit.

No interest (in most cases). The trade-off for flexibility is that most multi-currency accounts don't pay interest on balances. You hold dollars, but they don't grow. On a $10,000 balance, an FCNR at 4% earns you $400 per year. A Grey account earns $0. The question is whether the flexibility and lower costs offset the lost interest.

If you earn in USD regularly and want to hold dollars flexibly, a multi-currency account (Grey, Wise). You receive payments, hold USD, and convert to INR when the rate is favourable. No lock-in. Use this for your active income and short-term savings.

Common mistakes NRIs make with USD savings

Leaving dollars in a US checking account earning 0%. If you're not going to invest the money, at least move it to an FCNR where it earns 3 to 5%. Idle dollars in a Chase or Bank of America checking account lose purchasing power to inflation every year.

Converting to rupees immediately upon receiving payment. If you don't need the rupees right now, why convert? Every conversion costs 0.5 to 1.5%. Hold the dollars and convert when you actually need INR, or when the rate is favourable. A Grey account lets you time your conversions without FCNR lock-in.

Ignoring the rupee depreciation trend. Over the past 10 years, the Indian rupee has depreciated roughly 3 to 5% per year against the US dollar. That means your NRE fixed deposit earning 7% in rupees effectively earns 2 to 4% in dollar terms after currency depreciation. An FCNR earning 4% in actual dollars may outperform the NRE on a dollar-adjusted basis.

Not claiming DTAA benefits. India has Double Taxation Avoidance Agreements with many countries. If you're paying tax on FCNR interest in your country of residence, you may be able to claim a credit for taxes paid (or exempted) in India. Most NRIs don't bother with the paperwork and end up overpaying.

Saving in USD with Grey

Grey lets you hold USD in a Grey USD account with real US routing and account details. You receive payments from US clients or employers via ACH (no SWIFT fees), hold the dollars for as long as you want, and convert to INR through Grey when the rate works for you. No FCNR lock-in, no branch visit, no minimum balance.

Earn in dollars? Hold them in a Grey account and convert to INR on your terms.

Frequently asked questions about USD savings accounts for NRIs

Are FCNR deposits taxable in India?

No. Interest earned on FCNR deposits is tax-free in India for NRIs under Section 10(15)(iv)(fa) of the Income Tax Act. However, it may be taxable in your country of residence (the US taxes worldwide income; the UK taxes on a remittance basis or on an arising basis, depending on your status). Check with a cross-border tax advisor in both jurisdictions before assuming the interest is tax-free overall.

Can I open an FCNR account from abroad?

Yes. Most major Indian banks (SBI, HDFC, ICICI, Axis) allow NRIs to open FCNR accounts remotely through their online banking platforms or NRI service centres. You'll need your NRE or NRO account with the same bank, a valid passport, proof of overseas address, and sometimes a video KYC call. Processing takes 3 to 10 business days, depending on the bank.

What happens to my FCNR deposit when I return to India?

If you return to India and your NRI status changes to resident, your FCNR deposit can be held until maturity at the original rate. At maturity, the proceeds must be converted to INR and credited to a resident savings or fixed deposit account. The interest earned during NRI status remains tax-free in India. You cannot renew the FCNR after returning.

Does the $250,000 LRS limit apply to NRIs?

The Liberalised Remittance Scheme allows Indian residents (not NRIs) to remit up to $250,000 per financial year abroad. NRIs are not subject to LRS for repatriation of NRE and FCNR funds, which are fully repatriable without limit. LRS applies to resident Indians sending money abroad, not to NRIs bringing money home. See the full LRS guide for details.

Should I save in USD or invest in US stocks?

Different goals. USD savings (FCNR, Grey) protect your principal and provide liquidity. US stock investments offer growth potential but carry market risk. For emergency funds and short-term savings, keep dollars in FCNR or a Grey account. For long-term wealth building, consider both. The two aren't either/or.

Hold USD as an NRI. Open a Grey account and receive US payments with real account details.

Disclaimer: This article is for informational purposes only. All costs and details are estimates based on mid-2026 data. Verify current information before making decisions. Grey isn't a bank. We're a licensed financial services provider offering multi-currency accounts.

How to start an LLC in Texas: Step-by-step guide

How to start an LLC in Texas: Step-by-step guide

How to start an LLC in Texas. $300 filing fee, step-by-step filing process, franchise tax rules, and what to do after formation. Read the full guide.

•

•

2 min read

Texas has no personal state income tax. That alone makes it one of the most popular states for LLC formation. But Texas does have a franchise tax, and ignoring it is the single most common mistake new LLC owners make. We'll cover that alongside every other step.

The full Texas LLC formation process takes about an hour of your time and $300 in state fees. You can do it entirely online through the Texas Secretary of State's SOSDirect system. No lawyer required for a straightforward single-member or two-member LLC, though complex ownership structures or real estate holdings benefit from legal guidance.

To form an LLC in Texas, choose a registered agent and file a Certificate of Formation with the Secretary of State ($300). Then get an EIN from the IRS, open a business bank account, and apply for any required permits. You can file online through SOSPortal, although processing times vary.

This guide walks through each step in the order you actually do them, with the costs and timelines you'll encounter. For choosing a name, see LLC naming guide.

Step 1: Choose your LLC name

Your Texas LLC name must include "LLC" or "Limited Liability Company" and be distinguishable from any existing entity registered in Texas. Search the Texas Secretary of State's SOSPortal database to check availability. The search is free and returns results instantly.

Texas is relatively lenient on name similarity. "Bright Studio LLC" and "Bright Studios LLC" would likely both be accepted as distinguishable. But being legally distinguishable doesn't mean your customers won't confuse the two. Search broadly and consider trademark implications before committing.

If your name is available but you're not ready to file immediately, Texas allows name reservations for 120 days at $40. This prevents someone else from registering it while you prepare your formation documents.

You can also file a DBA (Assumed Name Certificate) if you want to operate under a different name than your legal LLC name. The DBA filing costs $25 per county where you do business in Texas. This lets "Smith Holdings LLC" operate publicly as "Bright Studio" without changing the legal entity name.

Step 2: Choose a registered agent

Every Texas LLC must have a registered agent with a physical street address in Texas. No PO boxes. The agent receives legal documents (lawsuits, government notices, tax correspondence) on behalf of the LLC. This is a legal requirement, not optional.

Option 1: Be your own agent. Free, but your home address becomes public record on the Texas SOS website. Anyone can look up your LLC and find your personal address. You also must be available at that address during normal business hours to accept documents in person. If you're travelling or working remotely, you can miss a critical legal notice.

Option 2: Use a registered agent service. $50 to $199/year. The service provides a Texas address, forwards documents to you, and ensures nothing gets missed while you're unavailable. Northwest Registered Agent ($125/year) and ZenBusiness ($199/year after the first free year) are popular options. For service comparisons, see best LLC formation services.

Option 3: Use a friend or family member in Texas. Free, but they must be available at the registered address during business hours and they'll see every legal document your LLC receives, including lawsuits. Most people prefer the privacy of a paid service.

Step 3: File the Certificate of Formation

This is the actual formation step. You file the Certificate of Formation (Form 205) with the Texas Secretary of State.

Online filing (recommended): Visit the Texas Secretary of State's SOSPortal and create an account. Complete the Certificate of Formation (Form 205) with your LLC name, registered agent information, management structure, organiser details, and effective date. The filing fee is $300, payable by ACH or credit card, although credit card payments carry an additional convenience fee. Processing times vary, and expedited filing options are available for an additional charge.

Mail filing: Download Form 205, complete it, and mail it with the $300 filing fee to the Texas Secretary of State. Processing times vary, so check the state's current turnaround times before submitting.

The $300 fee is non-refundable. If your filing is rejected (usually because the name is too similar to an existing entity or required information is missing), you can correct and resubmit without paying again, but the original fee isn't returned if you abandon the filing.

Member-managed vs manager-managed: most single-member and small multi-member LLCs choose member-managed, meaning all owners participate in running the business. Manager-managed is for LLCs with passive investors who own a share but don't participate in daily operations. If you're not sure, choose member-managed. You can change this later by filing an amendment ($150).

Step 4: Create an Operating Agreement

Texas doesn't legally require an operating agreement, but you should have one anyway. Banks require it to open a business account. It also protects your personal liability shield: without an operating agreement, a court could argue the LLC isn't a separate entity from you personally (called "piercing the corporate veil"), exposing your personal assets to business debts.

Your operating agreement should cover: ownership percentages, profit and loss distribution, voting rights, member responsibilities, process for adding or removing members, what happens if a member dies or becomes incapacitated, and the process for dissolving the LLC.

For single-member LLCs, the operating agreement is simpler but still essential. It establishes the LLC as a separate entity and documents how the business operates. A basic single-member operating agreement is 3 to 5 pages. Most LLC formation services include a template. Free templates are available from the Texas Secretary of State website and SCORE (SBA's mentoring arm).

Step 5: Get an EIN (Employer Identification Number)

The EIN is free and takes 10 minutes. Apply online at irs.gov/ein. You'll need your LLC's legal name, Texas address, and the responsible party's SSN or ITIN. The EIN is issued immediately upon completion of the online application.

Every LLC needs an EIN, even single-member LLCs. Banks require it to open business accounts. The IRS uses it for tax filings. Vendors and clients use it on W-9 forms. Don't pay an LLC formation service $70 to $99 for this. It's free and faster to do yourself.

One EIN per LLC. If you dissolve and reform, the new LLC needs a new EIN. If you change your LLC's name or address, you keep the same EIN. If you change from single-member to multi-member entity, you keep the same EIN.

Step 6: Open a business bank account

Separate your personal and business finances immediately. Mixing them is the fastest way to lose your personal liability protection. Courts use "commingling of funds" as evidence that the LLC isn't a real separate entity.

What you need to open a business bank account: Certificate of Formation (the approved filing from the Texas SOS), EIN confirmation letter, operating agreement, government-issued ID, and a business address.

Traditional banks: Chase, Bank of America, Wells Fargo all offer business checking in Texas. Expect monthly fees of $10 to $30 (often waivable with minimum balances of $1,500 to $5,000). In-person branch visit required.

Online options: Grey Business lets you open a multi-currency business account in your LLC name with US routing and account details, no branch visit required. You get USD, GBP, and EUR accounts. If your Texas LLC works with international clients or vendors, the multi-currency capability eliminates the need for separate foreign currency accounts or expensive wire transfers for each currency. The Grey conversion fee is 1% capped at $6, compared to bank wire fees of $25 to $50 per international transfer.

Step 7: Texas franchise tax

This is the step most guides bury at the bottom. Don't skip it. Texas LLCs are generally subject to franchise tax rules, but that doesn't mean every LLC owes tax or must file a franchise tax report. Businesses with annualised total revenue at or below the state's no-tax-due threshold generally owe no franchise tax and don't need to file a franchise tax report. However, they must still submit an annual Public Information Report (PIR) or Ownership Information Report (OIR), unless an exception applies.

For 2026 and 2027, the no-tax-due threshold is $2.65 million in annualised total revenue. LLCs at or below this threshold generally owe $0 in franchise tax and no longer need to file a No Tax Due Report. They must still submit the applicable annual information report.

Missing required franchise tax filings or annual information reports can put your LLC's good standing at risk and may lead to forfeiture of its right to transact business in Texas. Even when no franchise tax is owed, it's important to submit the required PIR or OIR on time.

Filing deadlines: the initial franchise tax report is due May 15 of the year after formation. If you form your LLC in September 2026, your first report is due May 15, 2027. Annual reports are due May 15 every year after that. File electronically through the Texas Comptroller's Webfile system.

Tax rates (for LLCs above $2.65 million): 0.375% for retail and wholesale businesses, 0.75% for all other businesses, applied to the LLC's "taxable margin" (roughly, the lesser of total revenue minus cost of goods sold, total revenue minus compensation, 70% of total revenue, or total revenue minus $1 million).

After formation: What comes next

Business licences and permits. Texas doesn't have a general business licence, but specific industries require state or local permits. Food service needs a health department permit. Construction needs a contractor's licence. Check with your city and county clerk for local requirements.

Sales tax permit. If you sell taxable goods or services in Texas, apply for a sales tax permit through the Texas Comptroller. The permit is free. Texas sales tax is 6.25% state rate plus up to 2% local rate (total up to 8.25%). Don't collect sales tax without a permit, and don't sell taxable items without collecting it.

Business insurance. Not legally required for single-member LLCs in Texas (unless you have employees, in which case workers' compensation is recommended but not mandatory in Texas). General liability insurance ($30 to $100/month) protects against third-party claims. Professional liability (errors and omissions) is worth considering if you provide professional services.

Separate credit. Apply for a business credit card in your LLC name to start building business credit. Use it for business expenses and pay in full each month. Business credit is separate from personal credit and can help you secure financing later.

Ready to start your Texas LLC? Open a Grey Business account and get US banking details in your LLC name from day one.

Frequently asked questions about how to start an LLC in Texas

How much does it cost to start an LLC in Texas?

$300 state filing fee for the Certificate of Formation. Optional costs: registered agent service ($50 to $199/year), name reservation ($40), DBA filing ($25 per county), and EIN (free from IRS). Total out-of-pocket for a basic LLC: $300 to $500 in the first year. For cost breakdowns across states, see LLC cost guide.

How long does it take to form a Texas LLC?

Processing times for Texas LLC formation vary depending on the filing method and current workload. Online applications can be submitted through SOSPortal, and expedited same-day or next-day processing is available for an additional fee. Once your LLC is approved, you can apply for an EIN and open a business bank account. The overall timeline depends on how quickly your filing is approved and your bank account is set up.

Does a Texas LLC pay state income tax?

Texas has no personal state income tax, but LLCs are generally subject to the state's franchise tax rules. For 2026 and 2027, LLCs with annualised total revenue of $2.65 million or less generally owe no franchise tax and don't need to file a franchise tax report. However, they must still submit an annual Public Information Report or Ownership Information Report, unless exempt. LLCs above the threshold generally pay 0.375% (retail/wholesale) or 0.75% (other businesses) on their taxable margin, although an alternative EZ computation method is available for eligible businesses. For filing details, see LLC tax guide.

Do I need a lawyer to form an LLC in Texas?

Not for a straightforward single-member or small multi-member LLC. The SOSDirect online filing system is user-friendly and walks you through each section. A lawyer ($500 to $2,000) is worth the cost if your LLC involves complex ownership structures, significant assets, real estate holdings, or multiple members with different contribution levels. For dissolution guidance, see dissolve an LLC.

Can a non-US resident start an LLC in Texas?

Yes. Texas does not require LLC owners to be US citizens or residents. You'll need a registered agent with a Texas address, an EIN from the IRS (apply by mail using Form SS-4 if you don't have a US SSN), and a business bank account that accepts non-resident LLCs. Grey Business serves international founders without requiring a US branch visit.

Start your Texas LLC and open Grey Business for US banking details in your LLC name.

Disclaimer: This article is for informational purposes only. All costs and details are estimates based on mid-2026 data. Verify current information before making decisions. Grey isn't a bank. We're a licensed financial services provider offering multi-currency accounts.

How to dissolve an LLC: Steps and costs

How to dissolve an LLC: Steps and costs

How to dissolve an LLC step by step. State filings, final tax returns, and asset distribution explained. Close your LLC properly. Read now.

•

•

2 min read

A surprising number of business owners stop operating their LLC but never formally close it. The LLC stays registered, the state keeps expecting filings, and fees or penalties accumulate quietly in the background. In California, that can mean an $800 annual LLC tax for a business you thought you'd already shut down. In Delaware, LLCs generally owe a $300 annual tax until they properly cancel their registration. These obligations don't stop when you stop working.

Don't dissolve if you might restart the business within a year. It's easier and cheaper to keep the LLC dormant (file the required reports, pay any minimum fees) than to dissolve and re-form later. Reforming means new filing fees, a new EIN application, new bank accounts, and updated contracts with every vendor and client.

To dissolve an LLC, you vote to dissolve (if multi-member), settle debts, and distribute remaining assets. Then file Articles of Dissolution with your state, file final tax returns, cancel your EIN, and close all business accounts. The process takes 2 to 8 weeks depending on the state.

This guide covers every step, including the tax obligations most dissolution guides skip. For the formation side, see LLC costs.

Step 1: Vote to dissolve

The following steps outline the general process for dissolving an LLC in the US. However, requirements vary by state, including voting rules, tax obligations, filing documents, and processing times. Always check your state's specific requirements before proceeding.

If your LLC has more than one member, the members must formally vote to dissolve. Check your operating agreement for the voting threshold. Common options are unanimous consent, majority vote, or supermajority (two-thirds). If you don't have an operating agreement, your state's default LLC act applies, which typically requires the majority consent of all members.

For single-member LLCs, you make the decision yourself. Either way, document it in writing. Draft a written resolution that states the LLC name, the date of the vote, the result (unanimously approved, majority approved, etc.), and the signatures of all voting members. Keep this resolution with your LLC records permanently.

This documentation protects you if anyone later disputes whether the dissolution was authorised. It also protects you if creditors challenge the dissolution as fraudulent (attempting to avoid debts). A properly documented vote shows the dissolution was deliberate and orderly, not evasive.

If your operating agreement doesn't address dissolution, draft a simple dissolution resolution. One page is enough. Date it, state the decision, and have every member sign it. This becomes the legal record of consent.

Step 2: Wind up business affairs

Before you file anything with the state, resolve everything the LLC owes and is owed. This is the most time-consuming step and the one most people rush through, leading to problems months or years later.

Pay all debts and obligations. Outstanding invoices, business loans, credit card balances, vendor contracts, lease obligations, and any pending legal claims. If the LLC can't pay all debts from its assets, consult a business attorney before proceeding. Dissolving an LLC while debts are outstanding can expose members to personal liability in some situations, particularly if creditors can argue the dissolution was intended to evade payment.

Collect what's owed to you. Chase outstanding receivables aggressively. Send final invoices immediately. Once the LLC is dissolved, collecting becomes dramatically harder. You may lose standing to sue in the LLC's name. Some states allow a "winding up" period after dissolution during which you can still collect, but this varies. Don't rely on it.

Cancel contracts and subscriptions. Leases, software subscriptions, insurance policies, recurring services, domain registrations, hosting accounts, phone plans, and any other recurring commitments. Notify each provider in writing that the LLC is closing and request written confirmation of cancellation. Keep these confirmations. A verbal cancellation that isn't documented can lead to continued billing.

Notify your customers and clients. If you have ongoing client relationships, give them reasonable notice. Provide referrals to alternative providers if appropriate. This isn't legally required in most states, but it's professional and protects your personal reputation for future ventures.

Distribute remaining assets. After debts are paid and receivables collected, distribute the remaining cash and assets to members according to the operating agreement. If there's no agreement, follow your state's default rules, which typically allocate proportionally based on ownership percentage. Document every distribution with amounts, dates, and member signatures.

Step 3: File final tax returns

Your LLC must file a final tax return for the year it dissolves. Check the "final return" box on the applicable form. The specific form depends on how your LLC is taxed:

Single-member LLC (disregarded entity): Report the business's final income and expenses on Schedule C of your personal Form 1040, if applicable. Schedule C does not have a separate "final return" checkbox.

Multi-member LLC (partnership): File Form 1065, check the "final return" box, and issue final Schedules K-1 to each member. Each member reports their share of the LLC's income and other applicable tax items on their personal return.

LLC taxed as an S corporation: File Form 1120-S and mark it as the final return. If the LLC adopts a plan of corporate dissolution or liquidation, Form 966 is generally required within 30 days of adopting that plan.

LLC taxed as a C corporation: File Form 1120 and mark it as the final return. Form 966 is generally required within 30 days of adopting a plan of corporate dissolution or liquidation.

Don't forget state tax obligations. If your state has a franchise tax, income tax, or sales tax, file final returns with the state as well. In Texas, file a final franchise tax report with the Comptroller. In California, LLCs generally owe the $800 annual tax for their final taxable year, even if they stop operating partway through it. The tax is not normally prorated, although certain exceptions apply. In New York, the filing fee is $0, but you must file a final partnership return. For guidance, see how to file LLC taxes.

Sales tax: if your LLC collected sales tax, file a final sales tax return and remit any remaining tax. Notify your state's revenue department that the sales tax permit should be cancelled.

Payroll taxes: if you had employees, file final Forms 941 (quarterly) and W-2s (annual). Pay any remaining payroll tax deposits. File Form 940 (federal unemployment tax) marked "final."

Step 4: File Articles of Dissolution

File the required dissolution or cancellation documents with your state's Secretary of State or equivalent filing authority. The exact form, filing process, and requirements vary by state. Some states also require tax clearance or additional documentation before the LLC can be formally terminated.

Filing fees vary by state. Some states allow LLCs to dissolve at no charge, while others charge a filing fee. For example, California does not charge a fee for LLC termination filings, while Texas charges $40 for a Certificate of Termination. Check your state's current filing fees before submitting your dissolution documents.

The form is typically short: LLC name, date of formation, reason for dissolution (voluntary), effective date of dissolution, and confirmation that debts have been paid or provisions made for payment. Some states require a tax clearance certificate from the revenue department before accepting the dissolution filing. Ohio, for example, requires a tax clearance letter.

If your LLC operates in multiple states, you must also file for withdrawal (or termination of foreign qualification) in each state where you registered as a foreign LLC. Each state charges its own fee for this. Missing a foreign state registration means that the state keeps expecting filings and fees.

Processing time: 1 to 4 weeks for most states. Expedited processing is available in many states for an additional fee ($50 to $200). Once approved, the state issues a certificate of dissolution or cancellation. Keep this permanently with your LLC records.

Step 5: Cancel your EIN and close accounts

Close your IRS business account. An EIN cannot be permanently cancelled, but you can ask the IRS to close the business tax account associated with it. Send a letter containing the LLC's legal name, EIN, business address, and reason for closure to the Internal Revenue Service, Cincinnati, OH 45999. Include a copy of your EIN assignment notice if available. The IRS will close the account once all required tax returns have been filed and outstanding taxes paid.

Close all business accounts. Bank accounts, credit cards, payment processors (Stripe, PayPal, Square), and any merchant accounts. Transfer any remaining balances to members before closing. Request written confirmation from each institution that the account is closed. A "closed" bank account that still has a $2.50 monthly maintenance fee will eventually go to collections.

Cancel your registered agent service if you were using a professional agent. Cancel any business licences or permits with your city, county, and state. Cancel your DBA (doing business as) registration if you filed one. Update your website to indicate the business is no longer operating, or take it down entirely. Update social media profiles similarly.

Notify creditors formally. Many states require or recommend sending a written notice to known creditors that the LLC is dissolving. This starts a statutory claims period (typically 90 to 120 days) after which creditors who don't file claims lose their right to collect. This is your legal protection against surprise claims years later.

Common dissolution mistakes

1. Not filing Articles of Dissolution. This is the most common and most expensive mistake. The LLC continues to exist in the state's records, annual fees keep accumulating, franchise taxes keep accruing, and your registered agent keeps billing you. Five years of California's $800 annual LLC tax can mean $4,000 in unpaid taxes, plus applicable penalties and interest. The tax can apply even if the LLC earned no income, unless an exemption or exception applies.

2. Not filing final tax returns. The IRS expects a final return. Not filing triggers a substitute return (SFR), which estimates your tax liability, usually too high, and starts penalties and interest from the original due date. State revenue departments are equally aggressive. Don't assume that dissolving the LLC means the tax obligations disappear.

3. Distributing assets before paying debts. Members who receive distributions while debts are outstanding can be held personally liable for those debts, up to the amount they received. This is called a "fraudulent transfer" or "fraudulent conveyance" in legal terms. Pay every creditor first. Distribute to members last.

4. Forgetting state-specific requirements. Some states require additional steps before an LLC can be formally dissolved, including obtaining tax clearance or notifying creditors. These requirements vary, so check the rules in the state where your LLC was formed. Some states have mandatory waiting periods. Check your specific state's requirements before filing.

5. Not cancelling foreign state registrations. If your LLC is registered to do business in three states, you need to file for dissolution in your home state and withdrawal in the other two. Miss one and that state keeps expecting annual reports and fees.

Closing your LLC? Make sure all financial accounts are settled and final returns are filed before you dissolve.

Frequently asked questions about how to dissolve an LLC

How much does it cost to dissolve an LLC?

The cost of dissolving an LLC depends on the state and whether you need professional assistance. Some states charge no filing fee, while others charge $40, $100, or more. For example, California has no filing fee for LLC termination, while Texas charges $40. If you hire an attorney, dissolution service, or accountant, you'll also need to budget for their fees. Outstanding taxes, annual fees, and other obligations can increase the total cost.

How long does LLC dissolution take?

The state filing itself takes 1 to 4 weeks for processing, longer in busy states like California and New York. But the full wind-up process (paying debts, collecting receivables, distributing assets, filing final taxes, notifying creditors) can take 2 to 6 months. Start the wind-up well before you file with the state. The statutory creditor claims period adds 90 to 120 days after filing.

Can I dissolve an LLC with debt?

You can, but you must handle the debt first. The LLC's assets should be used to pay creditors before any distributions to members. If the LLC's assets aren't sufficient to cover all debts, consult a business attorney. Dissolving with unpaid debts can expose members to personal liability in some cases, particularly if creditors argue the dissolution was intended to avoid payment.

What happens to the LLC name after dissolution?

In most states, the name becomes available for others to use after dissolution. The timeline varies: some states release names immediately, others hold them for 1 to 3 years. If you want to protect the name for future use, consider registering it as a federal trademark before dissolving (costs $250 to $350). For starting a new LLC later, see start a Texas LLC or name an LLC.

Do I still need to file taxes after dissolving my LLC?

You must file a final tax return for the year of dissolution. After that, no. But if you didn't file returns for prior years, those obligations survive dissolution. The IRS can pursue unfiled returns against the LLC's former members. Clean up any back filings before or during dissolution.

Starting fresh? Open a Grey Business account for your next venture.

Disclaimer: This article is for informational purposes only. All costs and details are estimates based on mid-2026 data. Verify current information before making decisions. Grey isn't a bank. We're a licensed financial services provider offering multi-currency accounts.

How to save money in USD in Nigeria: Best ways and apps

How to save money in USD in Nigeria: Best ways and apps

How to save money in USD in Nigeria. Domiciliary accounts vs fintech apps compared by fees, access, and risk. Protect your savings from naira depreciation.

•

•

2 min read

If you saved NGN 1,000,000 in a Nigerian bank account five years ago, that money has lost more than half its purchasing power in dollar terms. The naira has depreciated from roughly NGN 410/USD to over NGN 1,500/USD since 2021. Saving in naira means watching your wealth shrink. Saving in dollars means preserving it.

Nigerians can save in USD through domiciliary accounts at commercial banks, fintech apps like Grey, PiggyVest, and Bamboo, or by holding dollar-denominated stablecoins. Each method has different costs, access requirements, and risk profiles. The best option depends on how much you're saving, how quickly you need access, and how comfortable you are with digital platforms.

This guide compares every method available in Nigeria for saving in dollars, with the real costs, risks, and trade-offs for each. For a broader look at saving in foreign currencies from anywhere, see how to save in foreign currency.

Why save in USD from Nigeria?

The case for saving in dollars is straightforward: the naira has lost value against the dollar consistently for over a decade. This isn't a temporary dip. It's a structural trend driven by Nigeria's dependence on oil exports, foreign exchange shortages, and monetary policy decisions.

Saving in naira means your money buys less every year, even when the number in your account stays the same or grows. A Nigerian who saved NGN 5 million in 2020 had roughly $13,000 at the time. That same NGN 5 million is now worth under $3,500. The account balance didn't change. The purchasing power collapsed.

Saving in USD preserves your purchasing power relative to the global economy. Your dollar savings buy the same amount of imported goods, school fees, medical treatment, and international services regardless of what happens to the naira.

That said, saving in USD isn't without risk. If the naira strengthens (it has happened in short bursts, usually after CBN interventions), your dollar savings lose value in naira terms temporarily. Converting naira to dollars also carries a cost: the exchange rate spread, which runs 1 to 5% depending on the method. The decision to save in dollars should be a long-term one, not a short-term speculation on the naira.

Don't convert your rent money or next month's food budget to dollars. Keep 3 to 6 months of living expenses in naira for immediate needs. Save in dollars with what you can afford to hold for at least 6 to 12 months.

Method 1: Domiciliary accounts

A domiciliary account ("dom account") is a foreign currency account at a Nigerian commercial bank. You hold USD, GBP, or EUR in the account and can deposit or withdraw in those currencies. GTBank, Access Bank, Zenith Bank, First Bank, and UBA all offer them. For a step-by-step guide, see how to open a domiciliary account.

Requirements: BVN, NIN, a valid ID (international passport or national ID card), a utility bill not older than 3 months, two reference letters (some banks still require these; others have dropped the requirement), and a minimum opening deposit (typically $100 to $500, depending on the bank). The process requires a branch visit, and the documentation verification can take 3 to 7 business days.

Pros: Regulated by CBN, funds are NDIC-insured (up to NGN 500,000 equivalent per depositor per bank), physical branch access for withdrawals, and you can receive international wire transfers directly into the account via SWIFT.

Cons: The biggest issue is sourcing dollars. Nigerian banks don't sell USD to individuals at the official rate. You need to deposit dollars you already have, whether from exports, remittances, freelance income, or the parallel market. Interest is typically 0% on most domiciliary accounts. Withdrawals can be restricted during FX shortages, with some banks limiting cash withdrawals to $5,000 per month. Monthly maintenance fees of $1 to $5 are common, and some banks charge for incoming wire transfers.

Who should use this: Anyone with large dollar savings ($10,000+) who wants maximum regulatory protection and doesn't need frequent access. The NDIC insurance and CBN regulation make this the safest option on paper.

Method 2: Fintech apps

Several Nigerian fintech apps let you save in dollars or dollar-equivalent instruments from your phone. They're faster to set up than dom accounts, don't require a branch visit, and typically have lower minimum deposits. The trade-off is different (and sometimes less clear) regulatory protection.

PiggyVest: One of Nigeria's most popular savings apps. Offers USD savings with up to 7% annual interest through their dollar savings feature. You buy dollars within the app at the prevailing rate.

Pros: User-friendly interface, competitive interest rates, automated savings features.

Cons: $20 fee to transfer USD out to a domiciliary account, USD isn't always available for purchase (demand often exceeds supply), and the platform is not a bank, so deposit insurance works differently. Best for people who want to save small amounts regularly and don't mind limited withdrawal windows.

Bamboo: Primarily an investment app for US stocks and ETFs, but its fixed-income dollar product lets you save idle USD at up to 8% interest for 90-day lock-in periods.

Pros: Dollar-denominated, SEC-regulated (for the stocks side), accessible from Nigeria.

Cons: the 90-day lock-in means no access during that period, and the platform is more investment-oriented than a pure savings product. Best for people who want to park $500+ for 3 months and earn yield while they wait.

Rise: Another investment platform with dollar savings features. Offers fixed-income and real estate dollar funds alongside stock investments.

Pros: Diversified dollar savings options, regulated, and accessible.

Cons: Returns vary by fund, minimum investments apply, and liquidation times depend on the fund type. Real estate funds can take days to liquidate. Best for people who want dollar exposure beyond simple savings.

Cowrywise: Offers naira and dollar mutual fund investments. Dollar savings come through dollar-denominated fixed-income funds managed by licensed fund managers.

Pros: Automated savings, SEC-regulated fund managers, and accessible.

Cons: Dollar availability can be limited during high-demand periods, returns aren't guaranteed (they're based on fund performance, not a fixed interest rate), and withdrawals may take 24 to 72 hours.

Who should use fintech apps: anyone saving $50 to $5,000 monthly who wants easy access, doesn't want a branch visit, and is comfortable with digital platforms. Compare the interest rates, lock-in periods, and withdrawal policies before committing.

Method 3: Stablecoins (USDT, USDC)

Stablecoins are cryptocurrencies pegged 1:1 to the US dollar. Buying USDT (Tether) or USDC (Circle) is effectively buying digital dollars. You purchase them on exchanges like Binance, Bybit, or Luno using naira via P2P trading.

Pros: Instant access at any hour, no bank involved, 24/7 liquidity (you can convert back to naira at 2am on a Sunday), and the ability to earn yield through DeFi protocols (though this adds substantial risk). Converting back to naira via P2P is straightforward and settles within minutes.

Cons: Not regulated by CBN, which means no deposit insurance. The exchange rate spread on P2P purchases runs 1 to 3% above the mid-market rate, eating into your savings immediately. Platform insolvency is a real risk (FTX collapsed owing billions to depositors). You need basic crypto knowledge to manage wallets, avoid scams, and understand the difference between custodial and non-custodial storage. P2P trading also carries counterparty risk: the counterparty could fail to deliver.

Who should use stablecoins: People comfortable with crypto who want maximum flexibility and don't mind managing their own security. Keep holdings on reputable exchanges (Binance, Bybit) or in a hardware wallet for larger amounts. This isn't a savings account. It's holding a digital asset pegged to the dollar.

Method 4: Grey USD account

Grey lets Nigerian residents open a USD account that holds real dollars with US routing and account details. You can receive USD from international clients, freelance platforms, or transfers, hold the dollars, and convert to naira when you choose.

What makes it different: Grey isn't a savings app that lets you buy dollars at a markup. It's an account that receives and holds USD directly. If you earn in dollars (freelancing, remote work, exports), the money lands in your Grey account as USD. You decide when to convert to naira, based on the rate you see in the app. No forced conversion, no lock-in period, no minimum balance.

You can also spend directly from your USD balance using a Grey virtual card for online purchases, subscriptions, and international payments. This means you don't need to convert to naira just to pay for a Netflix subscription or buy something from an international merchant.

To organise money for a specific goal (a trip, tuition, an emergency fund), set it aside in a Grey Pouch so it's visually separate from your spending balance.

Pros: Real USD account details (ACH routing number and account number), no minimum deposit, no lock-in period, instant setup, virtual card for spending.

Cons: No interest earned on balances; 1% conversion fee (capped at $6) when you swap to naira.

Who should use Grey: Anyone earning in dollars who wants to hold those dollars and convert on their own terms. Especially freelancers, remote workers, and small business owners receiving payments from US clients.

Cost comparison: Converting NGN 500,000 to USD

Here's what it costs to convert NGN 500,000 (roughly $330 at parallel market rates) into dollars through each method:

Domiciliary account: You bring cash dollars to the bank. The cost is whatever you paid to source those dollars, typically the parallel market rate, which includes a 1 to 3% premium over the official rate. No conversion fee from the bank, but you're paying the spread on acquisition.

PiggyVest: You buy dollars within the app at their rate, which includes a spread. The effective cost is typically 1 to 3% above the parallel market rate. On $330, that's $3 to $10 in spread.

Stablecoins (P2P): Binance P2P rates for USDT include a 1 to 3% spread over the mid-market rate. On $330, that's $3 to $10 in spread, plus any trading fees (typically 0%).

Grey: If you're receiving dollars from clients, the cost is zero on receiving. When you convert from naira to dollars within Grey, the 1% swap fee (capped at $6) applies. On $330, that's $3.30.

The real cost isn't the platform fee. It's the exchange rate you get when sourcing dollars. Compare the effective rate (how many naira per dollar) across methods before converting a large amount.

Which method should you use?

If you earn in dollars (freelancing, remote work, exports): Grey. Your income arrives in USD and stays in USD until you choose to convert. No intermediary, no markup on receiving.

If you want to convert naira to dollars for long-term savings: PiggyVest or a domiciliary account. PiggyVest is easier to set up and pays interest; dom accounts offer more regulatory protection. If the amount is large ($10,000+), the dom account's NDIC insurance matters.

If you want dollar-denominated investments: Bamboo or Rise. These go beyond simple savings into fixed-income and equity products that earn returns.

If you're comfortable with crypto: Stablecoins (USDT/USDC) offer the most flexibility and 24/7 access, but with no deposit insurance and additional platform risk. Keep no more than you can afford to lose on any single exchange.

If you want both savings and spending: Grey. Hold dollars, spend with a virtual card, convert to naira when you need to. One account covers receiving, saving, and spending.

Frequently asked questions about saving in USD in Nigeria

Is it legal to save in dollars in Nigeria?

Yes. Nigerian residents can legally hold and operate domiciliary accounts in USD, GBP, or EUR at commercial banks. The CBN permits individuals to hold foreign currency for legitimate purposes, including savings, investment, and business transactions. Fintech apps operate under different regulatory frameworks depending on the specific licence. Stablecoins exist in a regulatory grey area but are not prohibited for individual holding.

How much interest can I earn on dollar savings in Nigeria?

Domiciliary accounts at banks: typically 0% (banks don't pay interest on foreign currency deposits). PiggyVest: up to 7% annually. Bamboo: up to 8% on 90-day fixed-income lock-in. Stablecoin DeFi yields vary widely (2 to 15%) but carry proportionally higher risk. Grey doesn't pay interest on USD balances but lets you hold and convert on your terms with no lock-in.

What is the safest way to save in dollars in Nigeria?

A domiciliary account at a CBN-regulated bank offers the most regulatory protection, with NDIC insurance covering up to NGN 500,000 equivalent per depositor per bank. Fintech apps offer convenience but may not carry the same level of deposit insurance. Stablecoins offer no deposit protection. For amounts under $5,000, a regulated fintech app is a reasonable balance of convenience and safety. For larger amounts, consider splitting across a dom account and a fintech platform.

Can I open a domiciliary account without a salary account at the same bank?

Yes. You don't need a salary account at the same bank to open a dom account. You need your BVN, NIN, valid ID, proof of address, and the minimum opening deposit ($100 to $500, depending on the bank). Some banks ask for reference letters. The process requires a branch visit at most banks, though some now offer partial online applications.

Ready to save in dollars? Open a Grey USD account and hold real dollars with US account details.

Disclaimer: This article is for informational purposes only. All costs and details are estimates based on mid-2026 data. Verify current information before making decisions. Grey isn't a bank. We're a licensed financial services provider offering multi-currency accounts.

Check your inbox! 😀
We've sent you a confirmation email. Just follow the steps to complete your subscription.
Oops! Something went wrong while submitting the form.